Undoubtedly so many Hp models are so reliable that users will not face any trouble throughout. But sometimes it happens that issues occur, and there is a need to fix them. One such issue that people encounter is Hp Laptop preparing automatic repair issue. There is a possibility that you may have encountered this issue, and that’s why you have landed here.
Don’t worry because, in this article, we will discuss the solutions that can help you. Keep on reading till the end to know about all of these in detail.
What Does Automatic Repair Mean? And How to Start?
Automatic repair is a built-in feature helpful in diagnosing and fixing issues that prevent the computer from starting up properly. Whenever there is a problem with the computer during the boot process, including corrupted system files or configuration problems, automatic repair comes into play. This is particularly useful when a system is not booting up properly into the operating system due to software-related issues.
It primarily starts with identifying the root cause behind the startup problem and applying the appropriate solutions to fix it. There is some task involved, including repairing corrupted system files, restoring system settings to their previous working state and diagnosing the hardware-related issues impacting the booting process. The time that is required for Automatic repair is approximately 20 minutes.
Steps to follow for Automatic Repair:
Step 1: Turn on the Laptop and before it boots up, press the F8 key frequently, and you will see various options available on your screen.
Step 2: Now, opt for “Troubleshoot” followed by “Advanced Options”.

Step 3: Next, you need to opt for “Automatic Repair/Startup Repair”. Windows will then start performing Startup repair to resolve any booting issues.
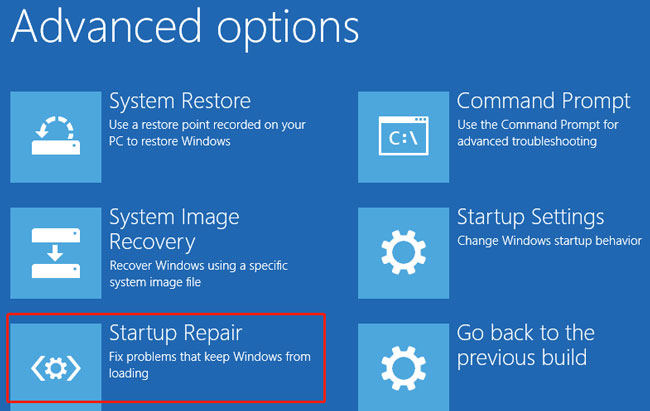
Possible Causes for Hp Laptop Stuck on Preparing Automatic Repair
The primary factor leading to the Hp Laptop stuck on preparing automatic repair loop for many individuals arises from the presence of corrupted system files. In some cases of booting, errors like this are primarily attributed to the absence or malfunction of vital files within the boot sector or registry. Apart from it several additional reasons behind it are:
- Compromised Boot Configuration Data
- Presence of malicious software (malware)
- Instability introduced by a system update
- Incorrect data entries within the Windows Registry
- Dysfunction in antivirus software or Early Launch Anti-Malware functionality
- Hardware breakdown predominantly stems from driver-related issues, although occasional instances can be attributed to physical components
Workable Solution: Solve Hp Laptop preparing automatic repair Issue
Feeling confused about the solutions that you can adapt to resolve Hp Laptop preparing automatic repair then black screen Problem. If it is so, don’t worry because there are some workable solutions that will help you out. These are as follows:
- 1. Reset Hp Laptop with Tweaking
- 2. Boot Hp Laptop in Safe Mode
- 3. Rebuild BCD with the Prompt
- 4. Run the Fixboot and Chkdsk
- 5. Perform a Hard Reboot
- 6. Disable Automatic Repair
- 7. Reset Registry
- 8. Extend System Reserved Partition
1. Reset Hp Laptop with Tweaking
One of the most considerable solutions to fixing Hp Laptops preparing automatic repair is using the Tweaking Windows Repair Tool. The steps that you need to follow for it include:
Step 1 First of all, double-click on the Tweaking executable file to launch the software.
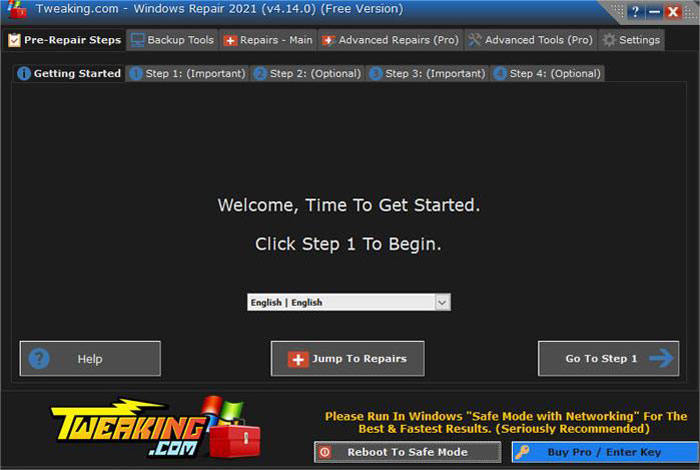
Step 2 Within the software interface, locate and click the Reboot To Safe Mode button.
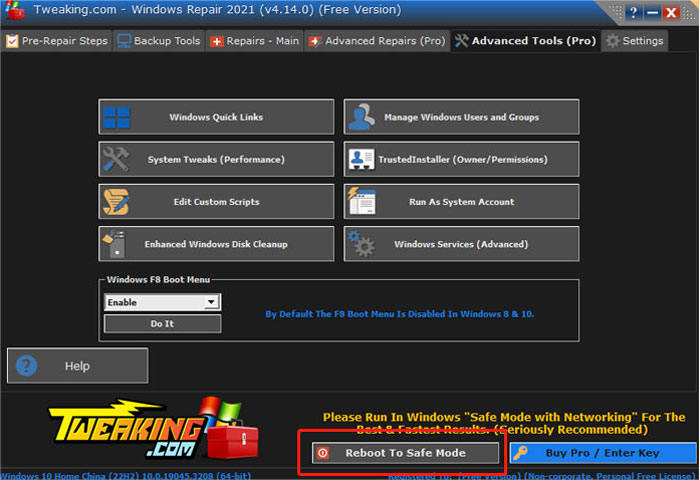
Step 3 As recommended by the software, select Safe Mode with Networking from the provided options.
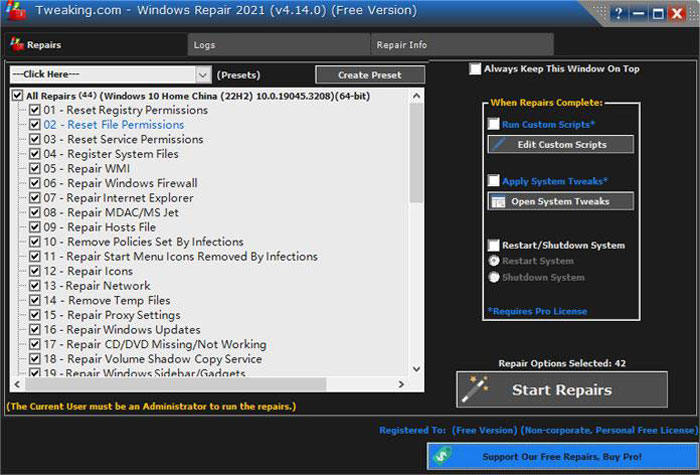
Step 4 Follow the step-by-step instructions displayed on your screen to perform the necessary fixes.
After completing the fixes, restart your PC without pressing any function key during the OS boot process to return to the regular Windows version.
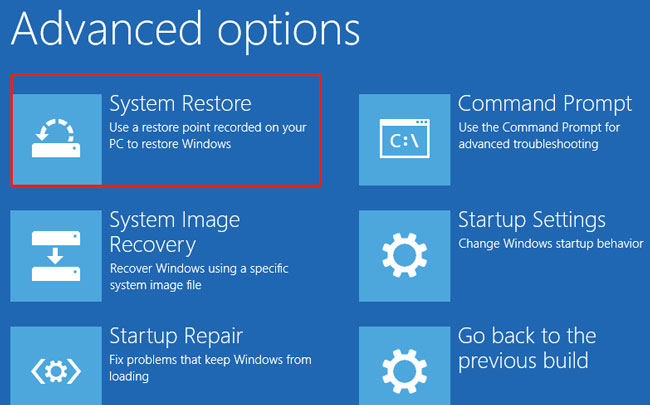
2. Boot Hp Laptop in Safe Mode
Step 1: Restart your Hp Laptop.
Step 2: As the Laptop boots up, repeatedly press the “F8” key until the “Advanced Boot Options” menu appears.
Step 3: Use the arrow keys to select “Startup Settings” followed by “Safe Mode” and press “Enter.”
Step 4: Your Laptop will boot into Safe Mode, wait for the system to Restart.
3. Rebuild BCD with the Prompt
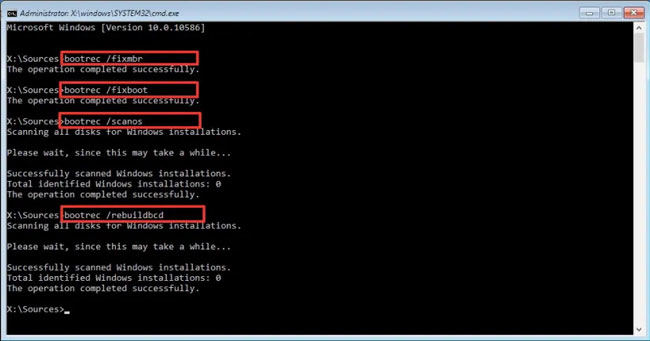
Step 1: Go to Troubleshoot > Advanced options > Command Prompt within the Windows Recovery Environment (winRE).
Step 2: Enter the provided commands individually and hit Enter after typing each one.
- bootrec /fixboot
- bootrec /scanos
- bootrec /rebuildbcd
Step 3: Type exit and press Enter. After it, you can restart your PC.
4. Run the Fixboot and Chkdsk
Step 1: Go to Troubleshoot, then select Advanced options, and finally, choose Command Prompt within the Windows Recovery Environment (win).
Step 2: Enter the given command and hit the Enter key. “chkdsk C: /f /r /x”.
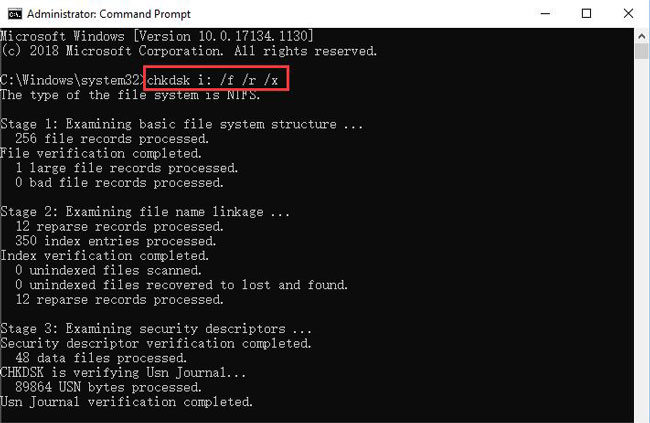
Step 3: Again, type the following command and press Enter: “SFC /scan now”
Step 4: Type exit and press Enter. After it, you can restart your PC and check whether the problem has been resolved or not.
5. Perform a Hard Reboot
Step 1: Turn off your Laptop.
Step 2: Disconnect any external devices.
Step 3: Press and hold the power button for around 15 seconds.
Step 4: Release the button, then power on the Laptop normally.
6. Disable Automatic Repair
Step 1: Press the Win + X keys on your keyboard to open the Power User menu.
Step 2: Select “Command Prompt” to open an elevated Command Prompt.
Step 3: In the Command Prompt window, type the following command and press Enter: bcdedit /set {current} recovery enabled No.
Step 4: This command disables Automatic Repair for the current operating system. You should see a message indicating that the operation was completed successfully. Close the Command Prompt window and restart your computer.
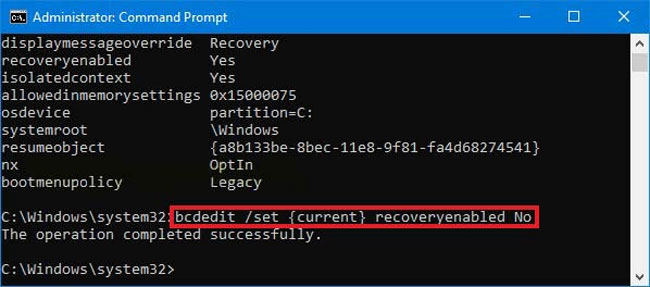
Step 5: After completing these steps, Automatic Repair should be disabled on your system.
7. Reset Registry
Step 1: Initiate Windows Settings by either using the key combination Win + I or accessing it from the start menu.
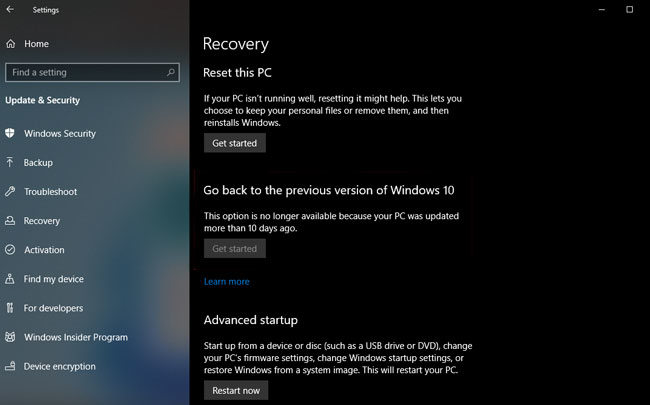
Step 2: Navigate to Update and Security > Recovery.
Step 3: Choose the “Get started” option within the Reset this PC section. This allows you to perform a complete system reset or begin anew, giving you the option to reinstall Windows while keeping your current files intact.
8. Extend System Reserved Partition
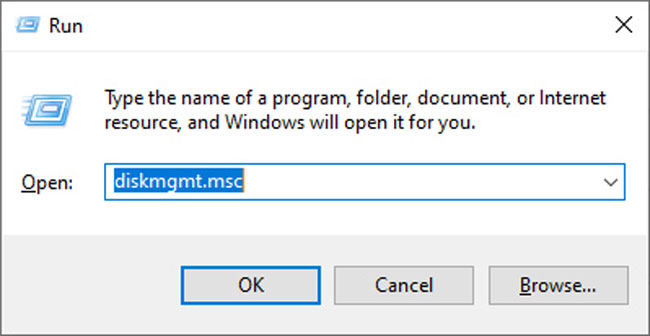
Step 1: Access the Disk Manager, by hitting “Windows+R” and type diskmgmt.msc followed by hitting Enter button.
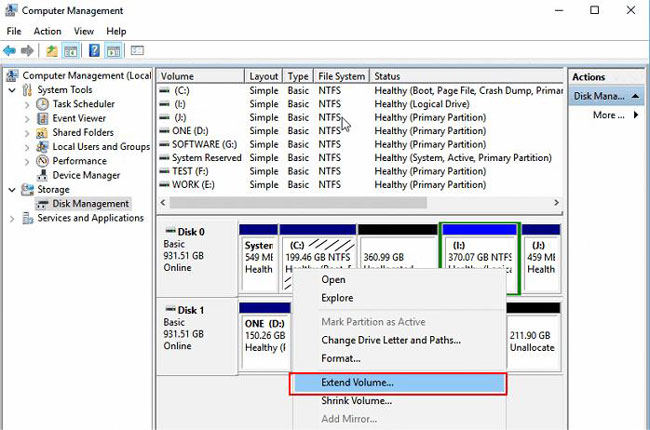
Step 2: Now, place your cursor over the drive with limited available storage, and select the “Extend Volume” option. Now press “OK” to extend the partition.
Note:
In order for this method to work, you must have unallocated space available on your disk.
9. Perform a Startup Repair
Step 1: Access the Settings application by using the shortcut Win+I.
Step 2: Navigate to Update & Security, then choose Recovery.
Step 3: Under Advanced Startup, initiate a restart by clicking on Restart Now.
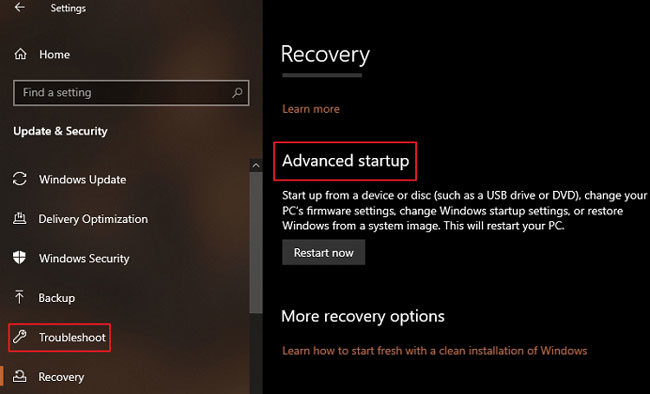
Step 4: Proceed to Troubleshoot > Advanced Options > Automatic Repair/Startup Repair.

Also Read: 11 Ways to Troubleshoot HP Laptop Not Turning on
Final Words
In conclusion, fixing out Hp Laptops and preparing automatic repair issues is easy with the right steps, like use Tweaking Windows Repair Tool. It is important that one is paying attention to all the steps in detail and following the right one. If you are someone who is not able to fix the issue on your own, you can reach out to a professional and seek help from them. They will help you out at every step and fix the same issue easily. Don’t worry because this is one of the common issues that people encounter, and the same can get fixed in a few minutes or so!

