Encountering a black screen on your Android device can be a daunting experience, especially if you need to access debugging tools. Figuring out how to enable USB debugging on Android with black screen might seem complicated, but it’s essential for developers, technicians, or even users who want to recover data or troubleshoot issues. This guide will explore three easy solutions to tackle this problem, making it a straightforward process even in the face of such a challenging scenario.
Frequently Asked Questions
Q1: What is USB debugging?
USB debugging is a feature found in Android devices that allows a computer to communicate directly with the connected Android device. By enabling USB debugging, the computer can execute commands on the device, provide full access to its system and files, and even facilitate the use of data recovery software to restore lost or deleted information. This functionality is crucial for developers who need to test applications and is often used in troubleshooting and device management. It creates a bridge between the device and computer for greater control and accessibility.
Q2: Is it safe to enable USB debugging?
No, enabling USB debugging is not always safe, as it may allow unauthorized access to your data. When USB debugging is turned on, the data can transfer automatically when the phone is connected to any computer, potentially exposing sensitive information to untrusted devices. It’s essential to use this feature with caution and only connect your device to trusted computers.
How to Enable USB Debugging on Android with Black Screen
A black screen issue can become even more complex if the screen is broken, causing frustration for many users. Learning how to enable USB debugging on Android with broken black screen is vital for salvaging data, conducting repairs, or developing on an impaired device. This process allows you to bridge the gap between the device and your computer, enabling you to overcome the limitations imposed by the broken screen and continue your important work.
- Option 1: Enable USB Debugging Using Mouse and OTG Cable
- Option 2: Enable USB Debugging Using ADB Commands
- Option 3: Enable USB Debugging Using MTP USB Driver
Option 1: Enable USB Debugging Using Mouse and OTG Cable
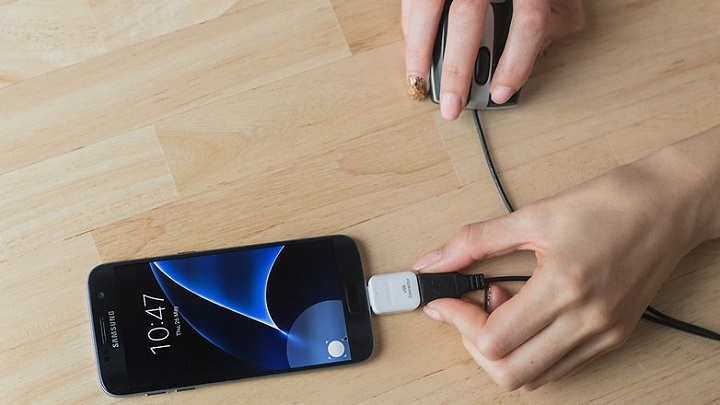
Enabling USB debugging using a mouse and OTG (On-The-Go) cable is a practical solution when dealing with a broken black screen on an Android device. By connecting a USB mouse to your Android device using an OTG cable, you can navigate through the settings to enable USB debugging. This method assumes that the touchscreen is unresponsive, but the display is still faintly visible or that you are familiar enough with the device to navigate blindly.
Steps:
- Connect a USB mouse to the Android device using an OTG cable.
- Unlock the device if possible, using the mouse to simulate touch gestures.
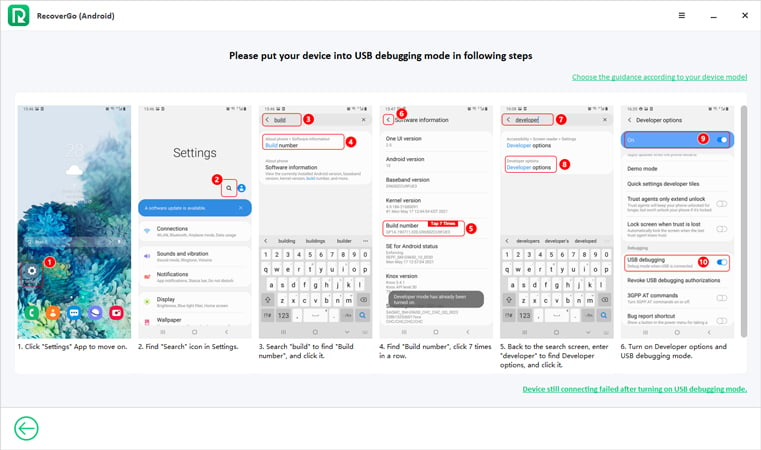
- Navigate to Settings > About Phone > Build Number and tap it seven times to enable Developer Options.
- Go back to the main Settings menu and select Developer Options.
- Find and enable the USB Debugging option within the Developer Options menu.
Option 2: Enable USB Debugging Using ADB Commands
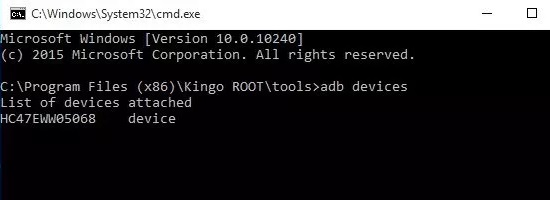
ADB (Android Debug Bridge) commands provide another way to enable USB debugging, especially when dealing with a broken black screen. ADB is a command-line tool that allows communication with an Android device via a computer. If USB Debugging was previously enabled or you have access to recovery mode with ADB, you can use specific ADB commands to enable USB debugging, even without direct interaction with the device’s screen.
Steps:
- Install the Android SDK Platform-Tools on the computer.
- Connect the Android device to your computer using a USB cable.
- Open a command prompt or terminal window on the computer.
- Execute the command `adb devices` to ensure the device is recognized.
- If the device is detected, use the command `adb shell settings put global adb_enabled 1` to enable USB Debugging.
Option 3: Enable USB Debugging Using MTP USB Driver
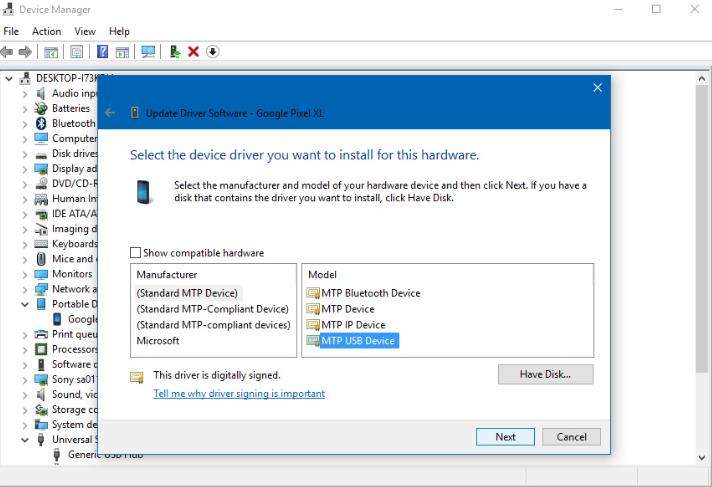
Enabling USB Debugging using an MTP (Media Transfer Protocol) USB Driver is another solution for those facing a broken black screen on an Android device. MTP allows you to access the files on the Android device from your computer. By using specific software and the device’s MTP mode, you can manipulate files to enable USB debugging indirectly, without having to navigate the device’s settings directly.
Steps:
- Connect the Android device to your computer using a USB cable and make sure it’s in MTP mode.
- Download and install the appropriate MTP USB Driver for your device on your computer.
- Use the necessary software (like the one mentioned in the reference link) to access the device’s system files.
- Locate and modify specific system files as directed by the software or guide to enable USB Debugging.
- Disconnect and restart the device to apply the changes, and USB Debugging should now be enabled.
How to Recover Data on Android with Black Screen
In situations where an Android device is suffering from a black screen, data recovery can seem like an insurmountable challenge. However, with tools like RecoverGo for Android and knowledge on how to enable USB debugging on black screen Android, retrieving deleted data without a backup becomes feasible. RecoverGo is specifically designed to work in scenarios like this, offering a user-friendly interface and powerful features to pull back lost or deleted information, even when the screen is unresponsive.
✨ Deep Scan: Conducts a comprehensive scan of the device to find and retrieve even the most elusive files.
✨ Preview Option: Allows users to preview files before recovery, ensuring they recover exactly what they need.
✨ Multiple File Types Support: Supports the recovery of various file types including photos, videos, messages, and more.
✨ Compatibility: Works with a wide range of Android devices and versions, providing flexibility in recovery.
Step-by-Step Guide
Step 1 Enable USB Debugging on the black screen Android device using one of the methods mentioned earlier.
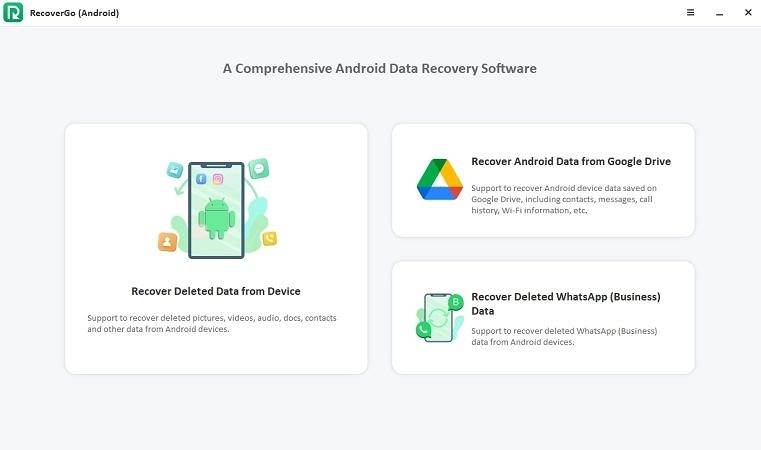
Step 2 Download and install RecoverGo (Android) on your computer. Select “Recover Deleted Data from Device” from the main interface.
Step 3 Connect the Android device to your computer via a USB cable.
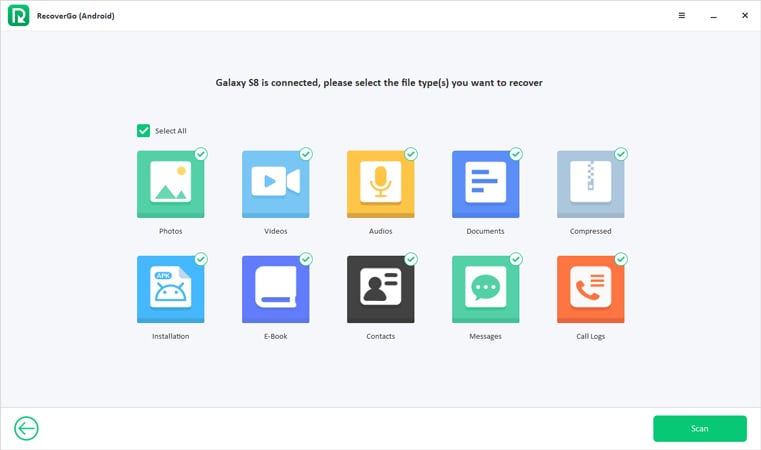
Step 4 Select the types of files you want to recover. Click on “Start” to begin scanning the device.
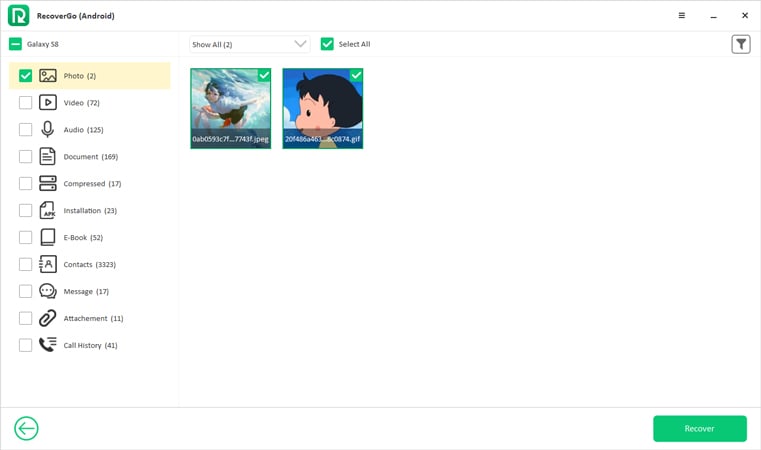
Step 5 Preview and select the files you wish to recover.
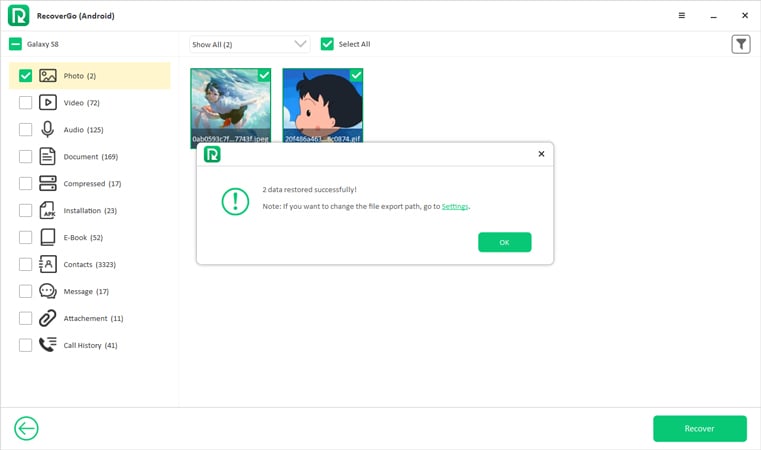
Step 6 Click “Recover” to retrieve the selected files and choose a destination folder on your computer. Wait for the recovery process to complete, and your data will be restored to the chosen location.
Conclusion
Navigating the complexities of how to enable USB debugging on Android with black screen can be challenging, especially when the need for data recovery is pressing. This article has provided three different options to enable USB debugging, each tailored for different circumstances and levels of technical expertise. Once USB debugging is enabled, tools like RecoverGo for Android become indispensable in recovering lost or deleted data, even without a backup. With features like deep scanning, previewing, and compatibility with various file types and devices, RecoverGo (Android) is a highly recommended solution. Whether you’re a developer, technician, or everyday user facing a black screen, these methods provide a pathway to retrieve valuable data and maintain control over your Android device.


