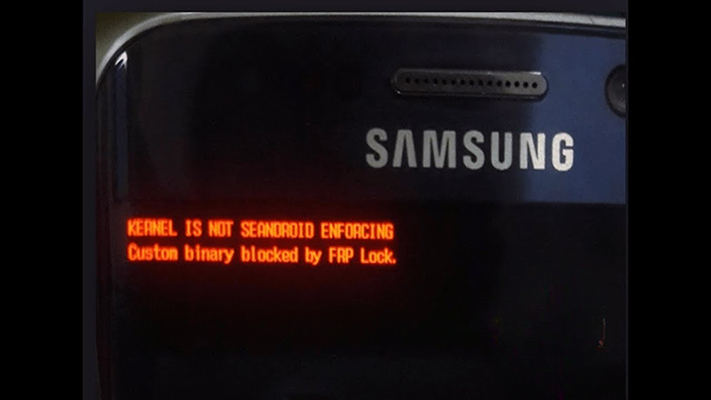
Sometimes you will often encounter the message “kernel is not Seandroid Enforcing” on your Android device during boot-up. This alert indicates that the device’s kernel is not in an enforcing SEAndroid mode, which could pose security risks. This scenario typically occurs after modifications such as rooting or installing a custom ROM. Understanding why this message appears and knowing how to address it are crucial for maintaining the security and functionality of your device. Here are two easy ways to resolve this issue and restore your device to its proper security stance.
Part 1. What means Kernel is not SEAndroid enforcing?
The message “Kernel is not SEAndroid enforcing” or “Recovery is not SEAndroid enforcing” indicates that your Android device’s kernel or recovery environment is not enforcing SEAndroid security policies. This often happens after modifying the device’s firmware, such as rooting or flashing custom ROMs. Essentially, the device is not adhering to the strict security protocols set by SEAndroid, potentially leaving it vulnerable to unauthorized access or malware.
Part 2. How to Fix Kernel is Not SEAndroid Enforcing Issue without Data Loss
To fix the “Kernel is not Seandroid enforcing” issue without losing data, initially attempt a factory reset to restore the device’s firmware to its default state. However, this method erases all data. To recover the deleted data after the reset, use a tool like RecoverGo, which can efficiently retrieve lost files from Android devices, ensuring you regain access to your important information without compromise.
1: Fix Kernel is Not SEAndroid Enforcing via Factory Reset
A factory reset can be an effective solution to address this issue. This process restores the device to its original system state by erasing all data, settings, and apps that were added after purchase. It’s particularly useful if the issue arose due to a problematic app or an unstable custom ROM. A factory reset often resolves the security and stability issues by returning the device to its default firmware configuration. However, it’s essential to back up important data before proceeding, as this process will delete all personal information stored on the device.
Here are 5 easy steps to fix this issue.
Step 1: Back Up Your Data
Before proceeding, ensure all important data is backed up to an external storage or cloud service.
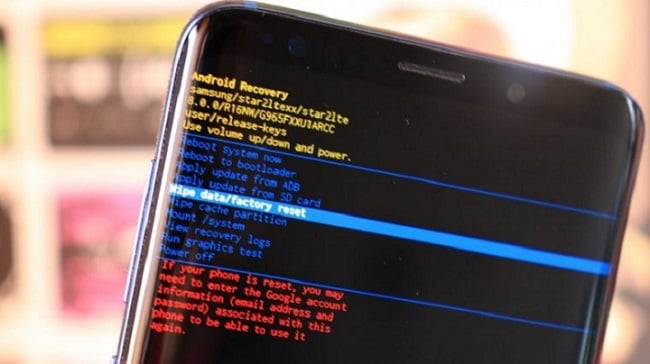
Step 2: Access Recovery Mode
Turn off your device. Then, press and hold the specific combination of buttons (usually Power + Volume Up or Power + Volume Down) to boot into recovery mode.
Step 3: Navigate to Wipe Data/Factory Reset
Use the volume buttons to navigate and the power button to select.
Step 4: Confirm the Reset
Select the ‘Wipe Data/Factory Reset’ option and confirm your choice.
Step 5: Reboot Your Device
Once the reset is complete, select ‘Reboot System Now’ to restart your device.
Step 6: Reboot Your Device
Once the reset is complete, select ‘Reboot System Now’ to restart your device.
2: Recover Erased Data via RecoverGo Android Data Recovery
Do you want to get back your precious data after a factory reset or accidental deletion? RecoverGo (Android) is a powerful data recovery tool designed to help you retrieve lost or deleted data from your Android device with ease. Whether you’ve lost photos, contacts, messages, or documents, RecoverGo offers a user-friendly interface and efficient recovery methods to ensure you can regain access to your important files. It supports a wide range of Android devices and is equipped with advanced features to handle various data loss scenarios effectively.
✨ Versatile Data Recovery: Capable of retrieving over 11 different file types, including photos, contacts, and videos, making it a comprehensive recovery tool.
✨ Preview Before Recovery: Before finalizing the recovery process, RecoverGo allows you to preview the photos, ensuring that you are recovering the right data.
✨ High Compatibility: Supports more than 6000 Android phone models, covering a wide range of brands and versions.
✨ Selective Data Recovery: Allow users to selectively recover the data they need, saving time and storage space.
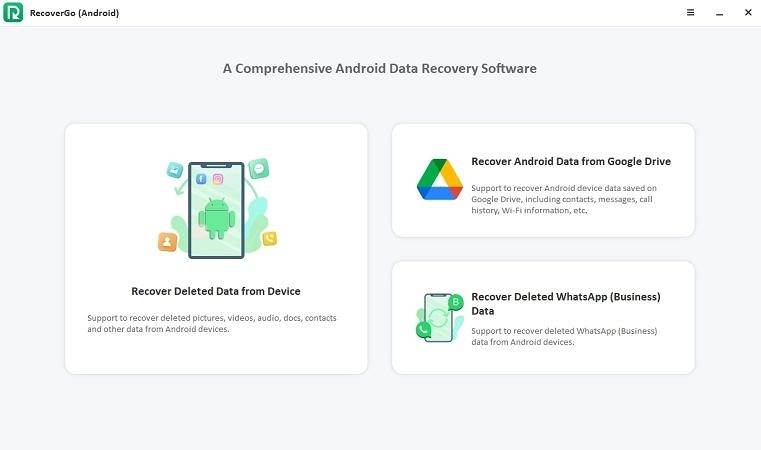
Step 1 Download and install RecoverGo (Android) on your computer. Open the software and select the “Recover Deleted Data from Device” option on the main menu.
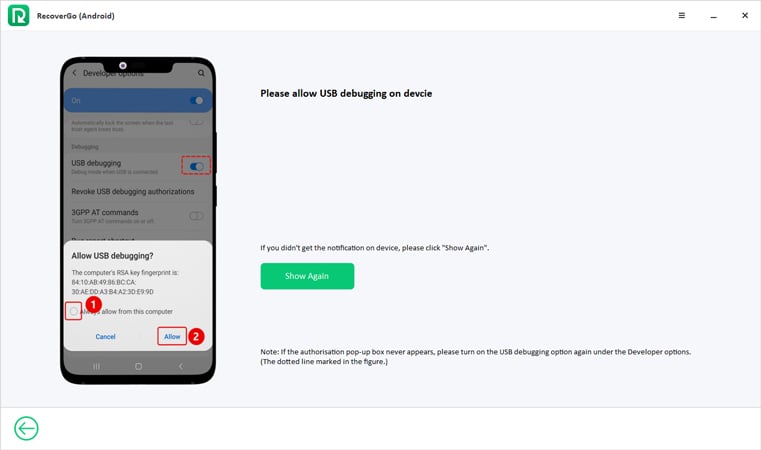
Step 2 Connect your Android device to the PC using a USB cable. Follow the on-screen instructions to enable USB debugging on your Android device to allow communication with the recovery software.
Step 3 Once your device is connected, choose the types of files you wish to recover. Click ‘Scan’ to begin scanning your device for recoverable data.
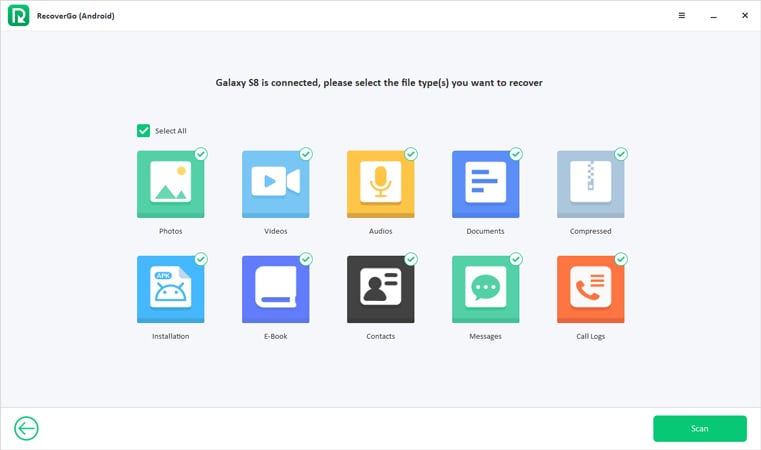
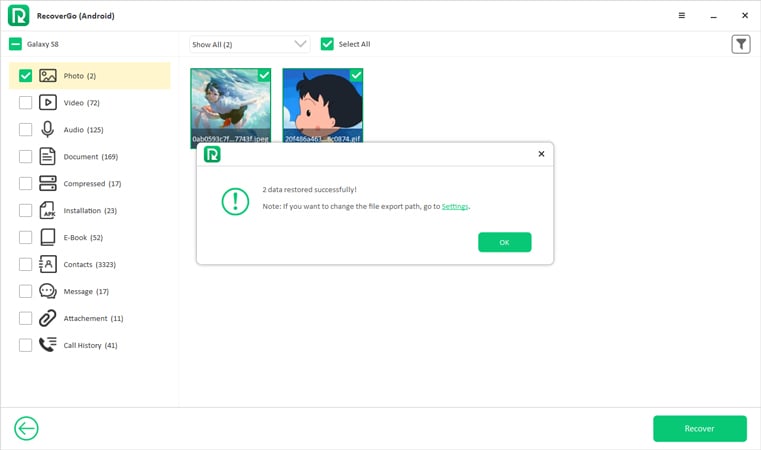
Step 4 After the scan, preview the recoverable files and select the ones you need. Click ‘Recover’ to save the selected files back to your computer or your device, depending on your preference.
Part 3. How to Fix Samsung Kernel is Not SEAndroid Enforcing via Odin
For anyone experiencing boot issues with their Samsung device, using Odin can be a reliable solution. Odin is a flashing tool specifically designed for Samsung smartphones and tablets that allows users to install firmware, which can restore the device’s software to its original state. This process is especially useful when encountering errors during startup that prevent normal usage.
Here are the steps to fix this issue via Odin:
- Download Odin from smmobile.com and install it on your computer. Find and download the correct firmware for your Samsung model, then unzip it.
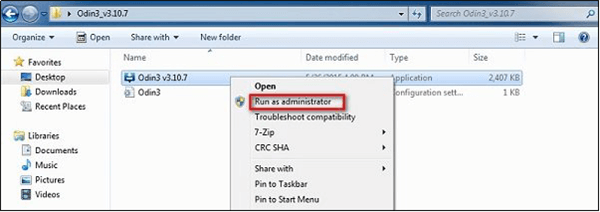
- Open Odin on your PC with administrator rights.
- Turn off your Samsung device, hold down Volume Down, Home, and Power simultaneously until the device vibrates, release the Power button, then press Volume Up to proceed into Download Mode.
- Connect your device to the PC using a USB cable. Once Odin recognizes it and shows "Added", click the PA/PDA button and load the unzipped firmware file.
- Ensure "Re-Partition" is unchecked and click "Start". Wait for the flashing to complete and for Odin to display a "Pass" message, then disconnect your device and allow it to reboot.
Final Words
To effectively address the kernel is not Seandroid enforcing error on Samsung devices, using Odin to flash the stock firmware is a reliable method. After resolving this issue, if you find that data loss has occurred, consider using RecoverGo (Android). This tool can help retrieve lost files, ensuring your valuable data is not permanently lost.

