Brimming with anxiety as your Samsung Notes not syncing issue persists? This common frustration can disrupt your workflow and data accessibility, but there’s no need to fret. Our guide provides eight straightforward methods to resolve this problem quickly and efficiently. Whether you’re a professional relying on timely note updates or a student organizing study materials, these solutions will help restore harmony to your digital notetaking. Let’s get your notes back in sync today!
Possible Reasons on Why Samsung Notes Not Syncing
8 Fixes for Samsung Notes Not Syncing
If your Samsung Notes are not syncing, it can be a major inconvenience, especially when you rely on your notes for daily tasks and reminders. Fortunately, there are several fixes you can try to get everything back on track. Here are eight practical solutions to help you resolve the syncing issues with Samsung Notes quickly.
1: Restart the Device
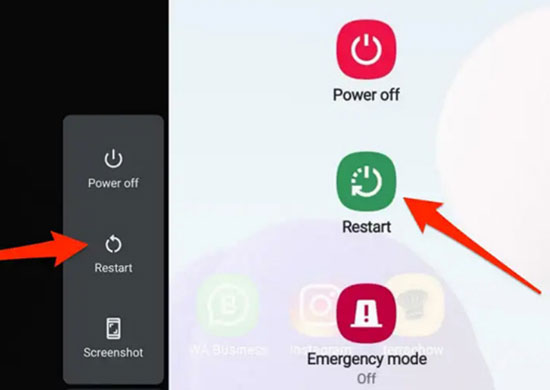
Sometimes restarting your device can do wonders, as it clears temporary glitches and refreshes system processes that might be causing Samsung Notes not syncing. This simple action often resolves syncing issues without needing further troubleshooting.
Here are the steps:
- Press and hold the power button on your device until the power menu appears.
- Select ‘Restart’ or ‘Reboot’ and wait for the device to power off and turn back on.
2: Check Internet Connection
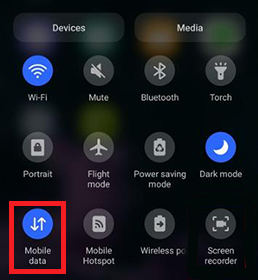
A stable internet connection is crucial for syncing Samsung Notes, as it ensures that your device can communicate effectively with the cloud servers. If the connection is unstable or too slow, your notes may not sync across devices.
Here are the steps:
- Turn your device’s Wi-Fi off and on again to see if the internet connection improves.
- Try turning off Wi-Fi and switching to cellular data.
3: Update the Samsung Notes App
Updating the Samsung Notes app can resolve syncing issues by applying the latest fixes and improvements released by the developers. New updates often include enhancements that improve stability and connectivity, ensuring smoother sync operations.
Here are the steps:
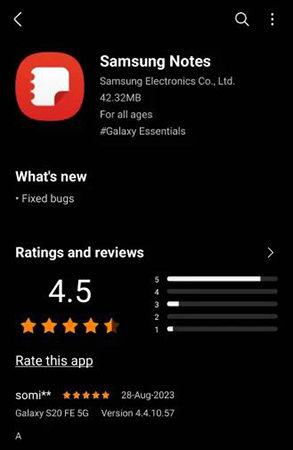
- Open the Google Play Store or Samsung Galaxy Store on your device.
- Search for Samsung Notes, select it, and then tap ‘Update’ if an update is available.
4: Check the Date & Time Settings
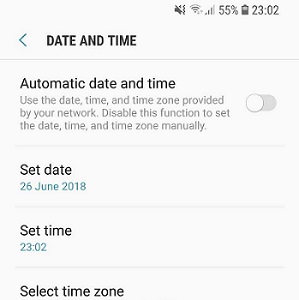
Incorrect date and time settings on your device can cause syncing problems with Samsung Notes, as many servers require accurate time information to authenticate and process data.
Here are the steps:
- Open the ‘Settings’ app on your Samsung device.
- Scroll to and select ‘General management.’
- Tap on ‘Date and time.’
- Ensure ‘Automatic date and time’ is toggled on to allow your device to receive the correct time from your network provider.
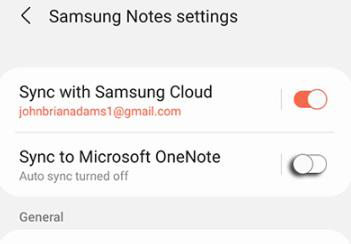
5: Re-sync Samsung Notes
Re-syncing Samsung Notes forces the app to refresh its connection with the cloud, potentially clearing out any errors or hitches that are preventing proper synchronization. This action can help ensure that all your notes are up-to-date across all devices where you use Samsung Notes.
Here are the steps:
- Open Samsung Notes on your device and go to the app’s settings.
- Look for a synchronization option or similar, often labeled as ‘Sync now’ or ‘Manual sync.’
- Tap this option to initiate a re-sync of your notes data with the cloud servers.
6: Check Sync Using Settings
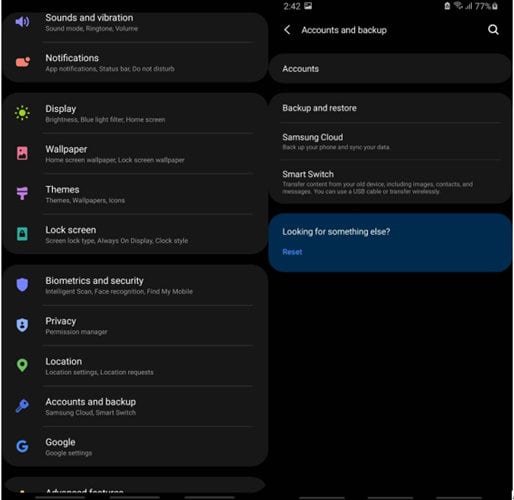
Checking the sync settings directly in your device’s settings ensures that Samsung Notes is set to automatically sync with your Samsung account. This is crucial because if sync is disabled, your notes will not update across devices no matter what other measures you take.
Here are the steps:
- Open the ‘Settings’ app on your Samsung device and navigate to ‘Accounts and backup’ or ‘Cloud and accounts’ depending on your device model.
- Tap on ‘Accounts’, select your Samsung account, and then make sure that the sync option for Samsung Notes is turned on.
7: Clear Cache
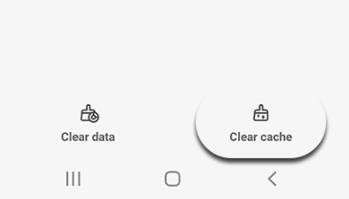
Clearing the cache for Samsung Notes can resolve issues by removing temporarily stored data that may be corrupt or causing the app to malfunction. This action does not delete any of your notes but simply refreshes the app’s temporary storage, potentially fixing sync issues.
Steps to Clear Cache for Samsung Notes:
- Open the ‘Settings’ app on your Samsung device.
- Navigate to ‘Apps’ or ‘Applications’, find Samsung Notes in the list, and tap on it.
- Select ‘Storage’, and then tap ‘Clear Cache’ to remove temporary files.
8: Re-Add Your Samsung Account
Samsung Notes relies heavily on your Samsung account for syncing across devices. Removing and re-adding your Samsung account can resolve deeper sync issues by re-establishing a fresh connection with the cloud, ensuring all settings are correctly aligned for syncing.
Here are the steps:
- Go to ‘Settings’ on your Samsung device, tap on ‘Accounts and backup’, and select ‘Accounts’.
- Remove your Samsung account by selecting it, tapping ‘Remove account’, and confirm. After removal, add it back by selecting ‘Add account’, choose ‘Samsung account’, and follow the prompts to log in.
Extra Tips: How to Recover Samsung Notes without Backup
RecoverGo (Android) is an essential tool for users needing to retrieve Samsung Notes without a backup. It offers a powerful solution for recovering lost notes and other valuable data. This software provides peace of mind by restoring essential information that seemed lost forever.
RecoverGo is a data lifeline. It enables you to recover lost Samsung Notes, restore missing data, and revive your essential notes, making it indispensable for every Samsung user. Plus, it’s compatible with a wide range of Android devices and systems, ensuring broad accessibility and usability.
✨ Versatile Data Recovery: Capable of retrieving over 11 different file types, including photos, contacts, and videos, making it a comprehensive recovery tool.
✨ Preview Before Recovery: Before finalizing the recovery process, RecoverGo allows you to preview the photos, ensuring that you are recovering the right data.
✨ High Compatibility: Supports more than 6000 Android phone models, covering a wide range of brands and versions.
✨ Selective Data Recovery: Allow users to selectively recover the data they need, saving time and storage space.
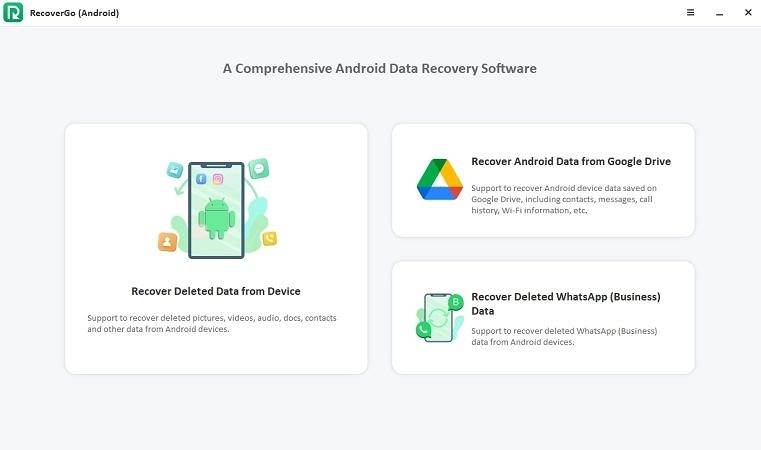
Step 1 Start by opening the RecoverGo software on your computer. Once recognized, select the “Recover Deleted Data from Device” option on the main screen.
Step 2 Connect your Android device to the PC and enable USB Debugging to allow RecoverGo (Android) to access the device.
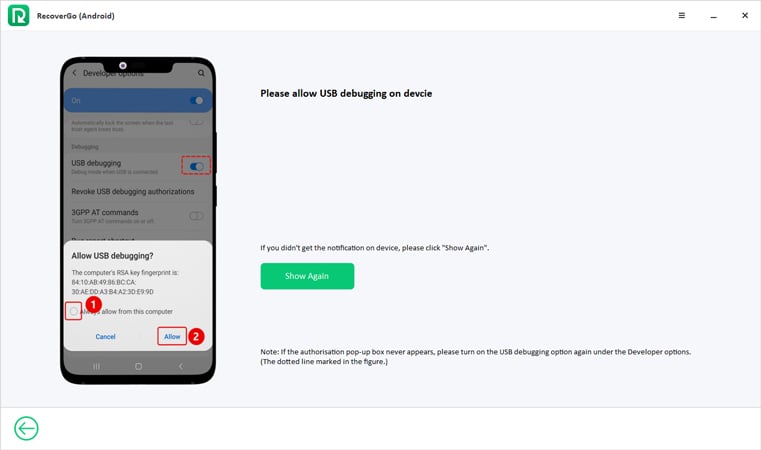
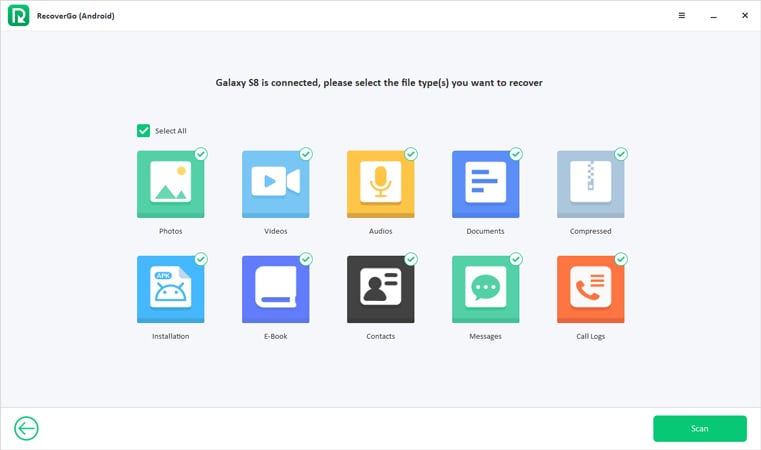
Step 3 The software will display various data types that you can recover. Select “PDF Files” or any other types of data you wish to restore and then proceed to the next step.
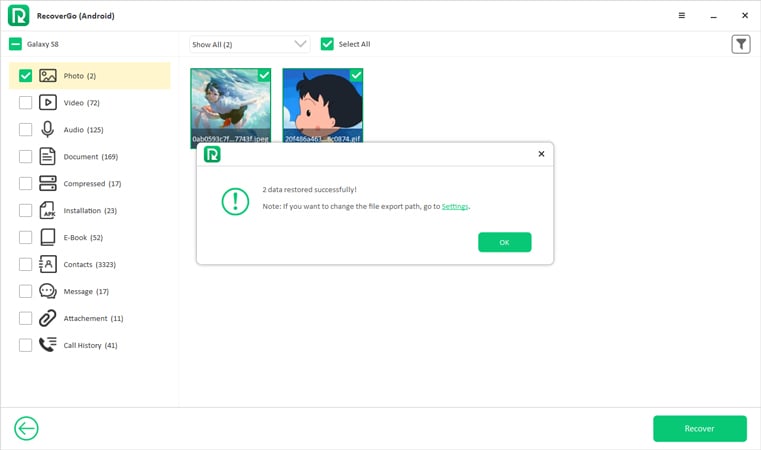
Step 4 RecoverGo will scan your device for recoverable data. After the scan, you can preview the found PDF files (and other data if selected) to check their contents before recovery. Once you have identified the files you want to retrieve, select them and click on the “Recover” button. Choose a destination on your computer where you want to save the recovered files.
Conclusion
If you’re facing issues with Samsung Notes not syncing, there are several strategies you can employ to resolve this problem, from checking your internet connection to updating the app and clearing its cache. For those instances where notes are lost and there’s no backup, RecoverGo (Android) offers a reliable solution. We recommend using RecoverGo to ensure your important notes are never permanently lost, providing an extra layer of security and peace of mind.


