In this guide, we will show you what you can do when “Hey Siri” is not working on your iPhone or iPad.
This problem often occurs soon after an iOS 16 update, although it may also happen even when you are not updating the device. Whatever the reason, the solutions outlined here are proven to get “Hey Siri” working normally again.
Let’s dive right in.
9 Common Ways to Fix Siri Not Working
If Hey Siri not working on your iPhone, the solutions mentioned here will help solve this issue.
1. Check If Your Device Support Siri
It is also important to note that not all iOS devices support the “Hey Siri” functionality and the reason why you are not able to use “Hey Siri” is because your device doesn’t support it. With many devices, you have to connect the device to a power source such as a computer’s USB port or the AC adapter for Hey Siri to be active.
The iPhone 6 and newer models and the iPad Pro or newer iPad models, support Hey Siri without needing to connect the device to a power source.
But if you have the iPhone 6, iPhone 6 Plus, iPhone 5s, and iPhone 5, then you will not be able to use Hey Siri without connecting the device to a power source. This is because on these devices, Hey Siri has high battery demands and you may not be able to run it in the background without a significant drain to the battery.
2. Make Sure Siri is Enabled
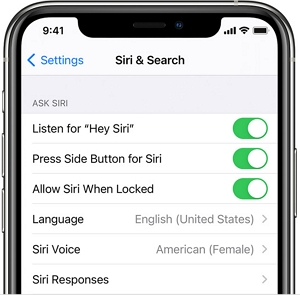
Before you attempt to fix the problem, you might want to make sure that Siri is enabled. The reason why you “Hey Siri” is not working maybe simply because it is not turned on.
Therefore, go to Settings > Siri & Search to make sure that “Listen for ‘Hey Siri’” is enabled.
3. Turn Off Low Power Mode
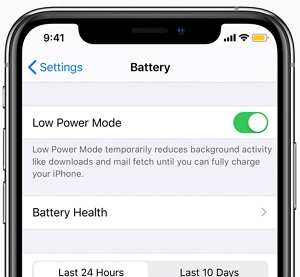
Because Hey Siri has such high battery demands, it will not work if you have enabled “Low Battery Mode.” Apple will automatically disable Hay Siri when you enable “Low Battery Mode.” So, you may want to turn it off and charge it again to gain access to Hey Siri.
4. Check Your Internet Connection
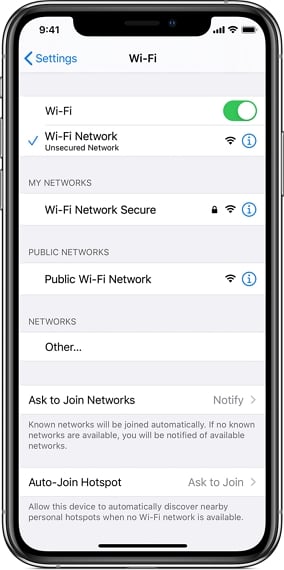
For “Hey Siri” to work, your device needs to have a stable internet connection. This means that you need to be connected to Wi-Fi or a cellular network. If you at home or at a location where you can access Wi-Fi, check for the Wi-Fi logo at the top of the device. If it is not there, then you need to make sure that the device is connected to Wi-Fi.
If you are connected to a network but you don’t see the Wi-Fi icon at the top of the device, check your router. You may need to unplug it and then plug it again to reboot it. If that doesn’t work, contact your service provider to check if the problem is on their end.
If you are using Cellular data, you should be able to see LTE or something similar at the top of the screen to indicate that you are connected to a network.
5. Check Apple System Status
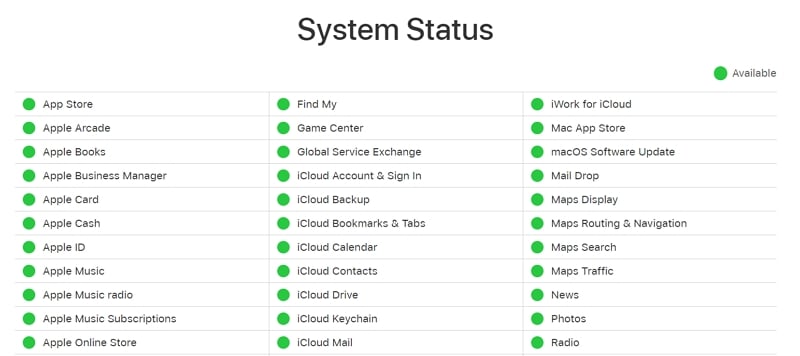
Sometimes, the problem is not with your device at all, but with the Apple System. We, therefore, recommend going to the Apple System Status site to check the list of services to see if something is amiss with Hey Siri that could be preventing your device from using the service. If there is, you should also see when you can expect the feature to be working again. All you have to do is wait and the good news is, Apple usually fixes these issues very quickly.
6. Adjust the Settings
If this problem occurred soon after an iOS 16 update, it is possible that some of the settings may have been reconfigured to affect Hey Siri. Follow these simple steps to check and then adjust the settings accordingly:
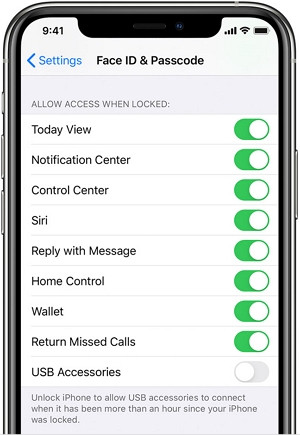
Step 1: Go to Settings > Face ID and password or on some devices, Touch ID and password.
Step 2: Scroll down to the “Allow Access When Locked” section and then toggle the switch next to “Siri” to ON.
You can also go to Settings > Siri and Search and make sure “Allow Siri When Locked” is turned on.
7. Restart Your iPhone
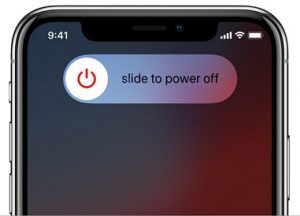
A soft reset (a restart) of your iPhone is a good way to fix some of the minor issues that may cause conflicts with the Hey Siri functionality. Therefore, close Siri and then restart your iPhone in a normal way. If it doesn’t work, a forced restart may be necessary.
To force restart your iPhone 8 or newer model, press and release the Volume up button, press and release the Volume Down button and then press and hold the Side/Power button until you see the Apple logo appear on the screen.
For iPhone 7 and 7 plus, press and hold the Power and Volume Down button until the Apple logo appears.
For iPhone 6s and earlier models, press and hold the Home and Power buttons at the same time until the Apple logo appears.
8. Reset Network Settings
Since this problem could also be caused by a problem with the Wi-Fi or Cellular connection, resetting the network settings may refresh the connections and allow your device to connect to these networks more readily.
It is however important to note that resetting your network settings will restore all connections settings to their default. This means that all your saved Wi-Fi networks will be deleted along with their passwords and any other network settings.
That said, here’s how to reset the network settings:
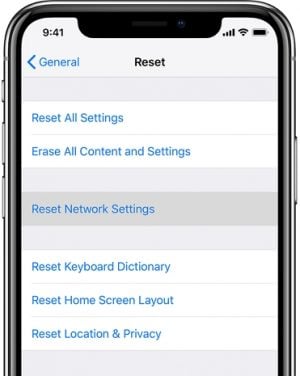
Step 1: Open the Settings and tap “General.”
Step 2: Tap “Reset”.
Step 3: Select “Reset Network Settings” and enter the device’s passcode when prompted.
Step 4: Confirm the action and the iPhone will reboot when the reset is complete.
9. Factory Reset Your Device
But if everything you have tried so far has failed, there is one last thing that you can try. Factory resetting the device will erase all data and settings on the device and in so doing remove some of the data and poorly configured settings that could be causing problems with the device. But since this will cause data loss, it is important to ensure you have a backup of all the data on the device before following these steps:
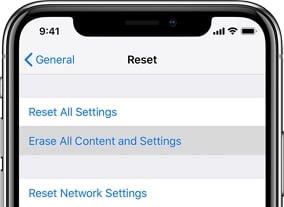
Step 1: Open the Settings and then tap on “General.”
Step 2: Tap “Reset” and from the options presented, select “Erase all Content and Settings”.
Step 3: Enter your passcode when prompted and then tap “Erase all Content and Settings” again to confirm that you want to factory reset the device.
When the device restarts, set it up again and restore your data from the backup before checking if the problem has been resolved.
Use FixGo to Fix Hey Siri Not Working in Minutes
Once you have reset the network settings, Hey Siri should be able to work normally. If it doesn’t, then there may be deeper software issues with the iOS system. The best way you can restore the iOS system without affecting the data on the device is to use iToolab FixGo. This is the only iOS system recovery tool that can fix most if not all iOS system issues.
To use FixGo to get Hey Siri working normally again, follow these simple steps:
Step 1: Download and install FixGo on to your PC or Mac.
iToolab FixGo
Fix 200+ iOS/iPadOS/tvOS Issues at Home Like A Pro
- Standard and advanced to Fix iPhone safely.
- Fix iPhone/iPad/Apple TV system problems.
- Downgrade iOS 16 to any supported versions.
- Support all iOS devices and versions.
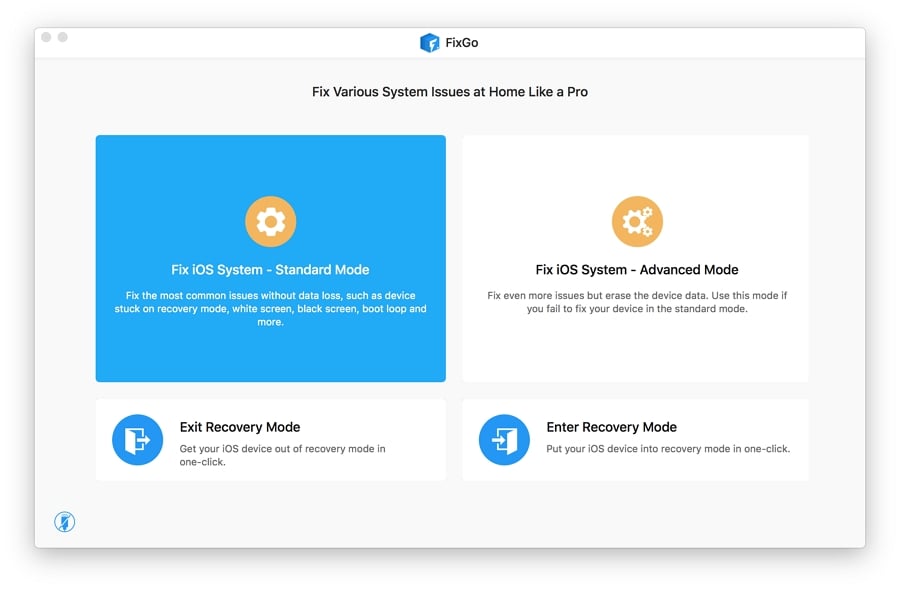
Step 2: Run FixGo and select “Standard Mode.” Use a lightning cable to connect the device to the computer. When the program detects the device, click “Fix Now” to begin the process.
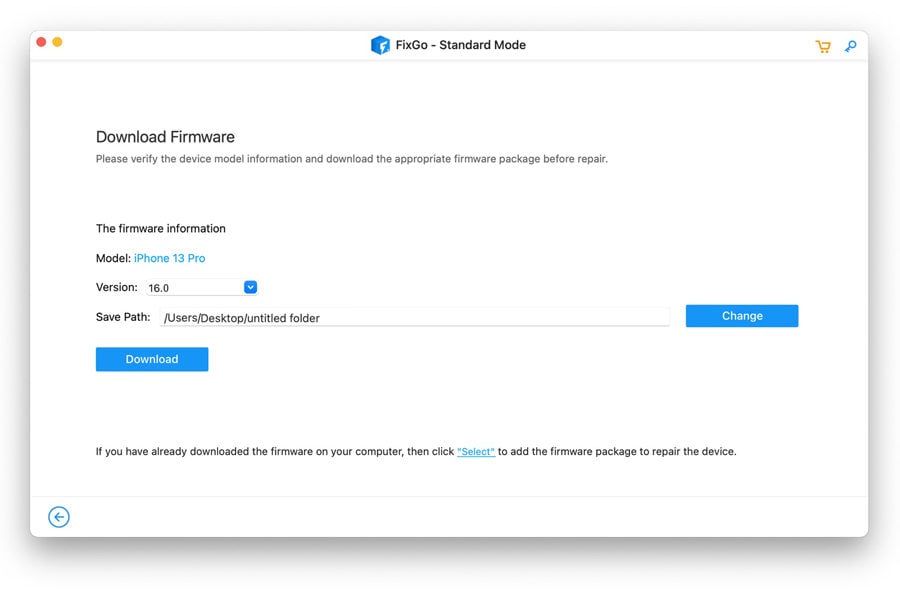
Step 3: To update the iPhone’s system, the program will need to download the latest firmware. Just click “Download” to begin downloading the necessary firmware.
Step 4: Once the firmware has been downloaded, click “Repair Now” and the program will start to fix the device.
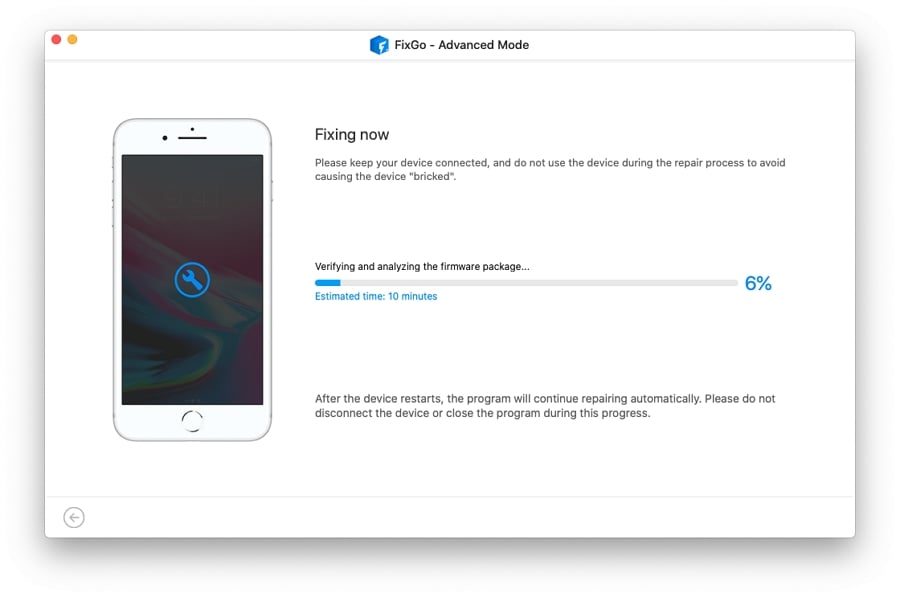
When the iPhone restarts, you should be able to use Hey Siri as you would normally.
Conclusion
Now, your iPhone should hear you say “Hey Siri” and respond accordingly. Next time Siri is not working on your iPhone, you’ll know exactly how to fix the problem! And we highly recommend iToolab FixGo, which is easy to use and will surely solves your problem quickly. If you have any other questions about your iPhone, feel free to leave them in the comments section below.


