
In this article, we’re going to explore different ways to resolve problems with your iPad green screen problem.
For a while, my iPad screen was covered in stripes, making it look like a deckchair, but I soon resolved that issue by following a few simple steps. Want to know what they were? Let’s get started.
#1 Reboot the Device
A simple software error could be causing your green, red, or striped screen effect. By performing a simple reboot, you will force all your apps and programs to shut down completely, which is often all it takes to fix a software glitch.
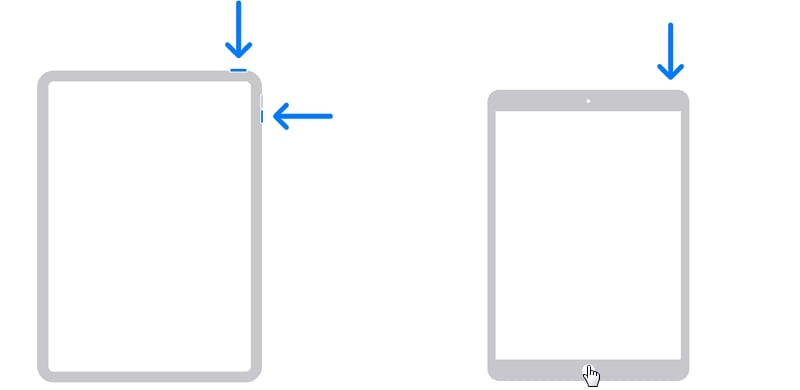
To reboot an iPad with Face ID:
- Press and hold the Top button and either the Volume Up or Volume Down button
- Wait for the Slide to Power Off instruction to appear;
- Release both buttons and drag the slider to the off position;
- Wait 30 seconds for your device to shut down;
- Restart your iPad by pressing and holding the top button until the Apple logo appears.
To reboot an iPad with a Home button, follow the instructions above but just press and hold the Top button to start the process.
#2 Make Sure Your iPad Battery is Charged
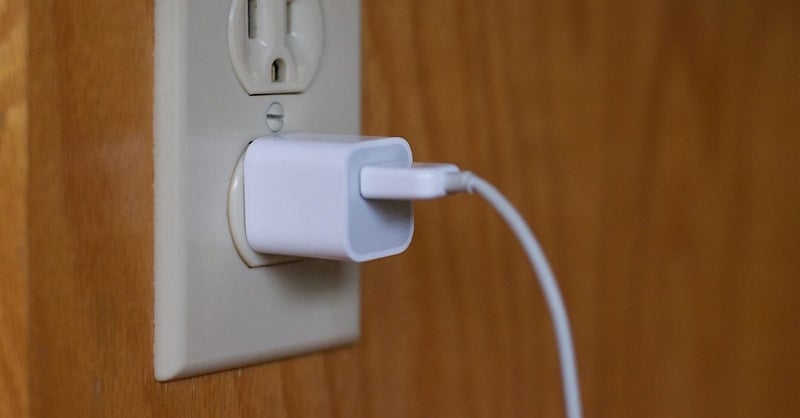
Problems with the battery are sometimes the reason your iPad screen is not displaying as usual. If all you see is a black screen, it could be because your battery is low or flat. Maybe you had it plugged into another device, using a USB cable to charge it. It could be that the port wasn’t compatible with your device, so, although you thought it was recharging, it wasn’t.
Plug your iPad into a wall outlet using the charging hardware that came with the device. Make sure it’s charging correctly before turning it on to see if your black screen has disappeared.
#3 Adjust the Display Settings
In a dark room or on a gloomy day, an iPad that has a low screen brightness setting may appear dark red or even black. You can quickly check on this and resolve the issue by following these simple steps:
Step 1: Go to your iPad Control Center.
Step 2: In the Settings menu, select Display & Brightness.
Step 3: Drag the slider to your preferred brightness.

#4 Use FixGo to Fix iPad Green Screen without Data Loss
iToolab’s FixGo tool is capable of resolving over 200 iOS and iPadOS problems in a matter of minutes. Better still, it solves the issue without deleting your precious data. Whether it’s a black screen, a green screen, or one that is disrupted by vertical stripes, FixGo can, as its name suggests, fix it.
With two different repair modes at the ready, FixGo can resolve simple problems like screen and display issues or, with its Advanced option, apply advanced techniques to troubleshoot your problems.
To use FixGo, follow these instructions:
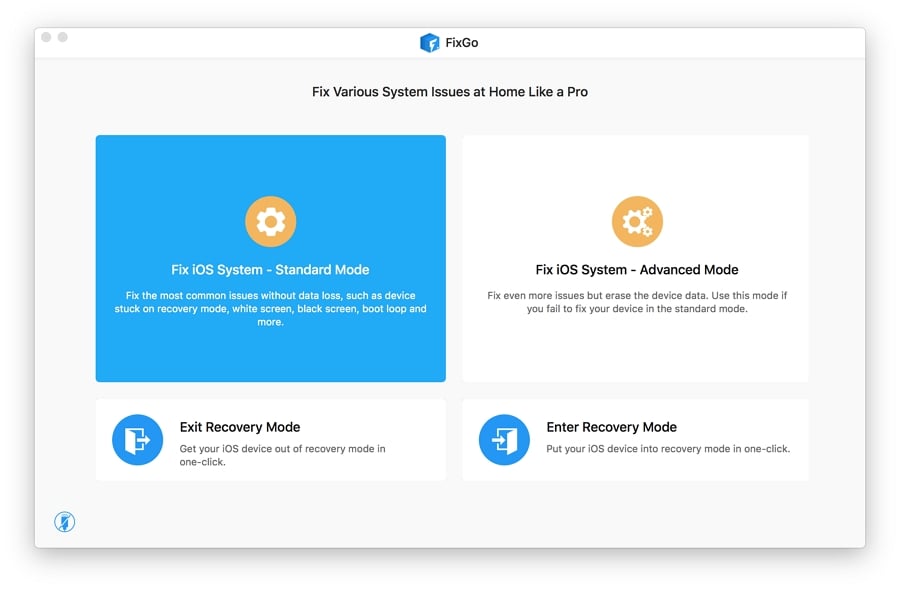
Step 1: Download and install the FixGo tool onto your computer. Once installed, open the app and navigate to the main user interface;
Step 2: Click on Standard Mode to start the process. Using a USB cable, connect your iPad to a computer;
Step 3: Once your computer detects your iPad, use the FixGo app to navigate to and select the “Fix Now” option;
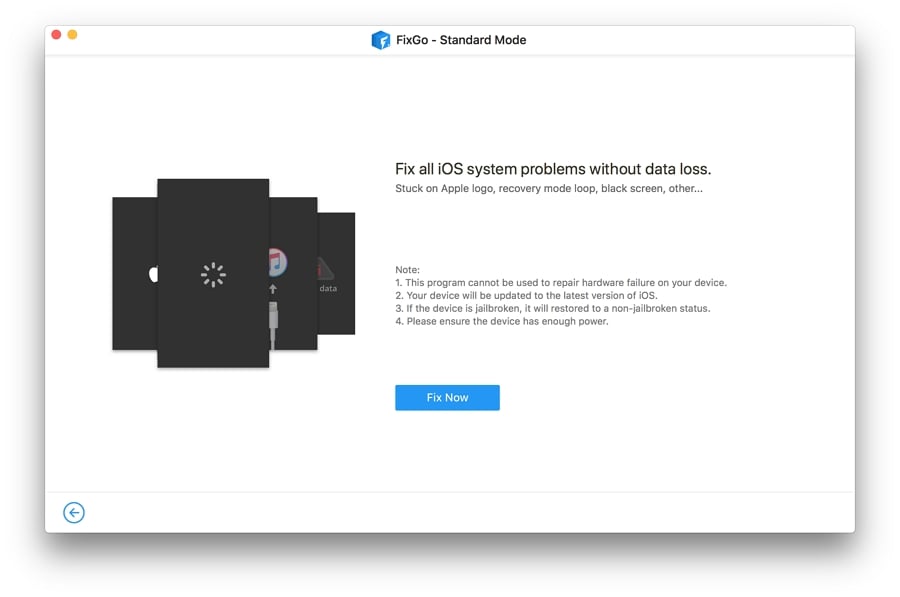
Step 4: If additional firmware is required, let FixGo download it for you;
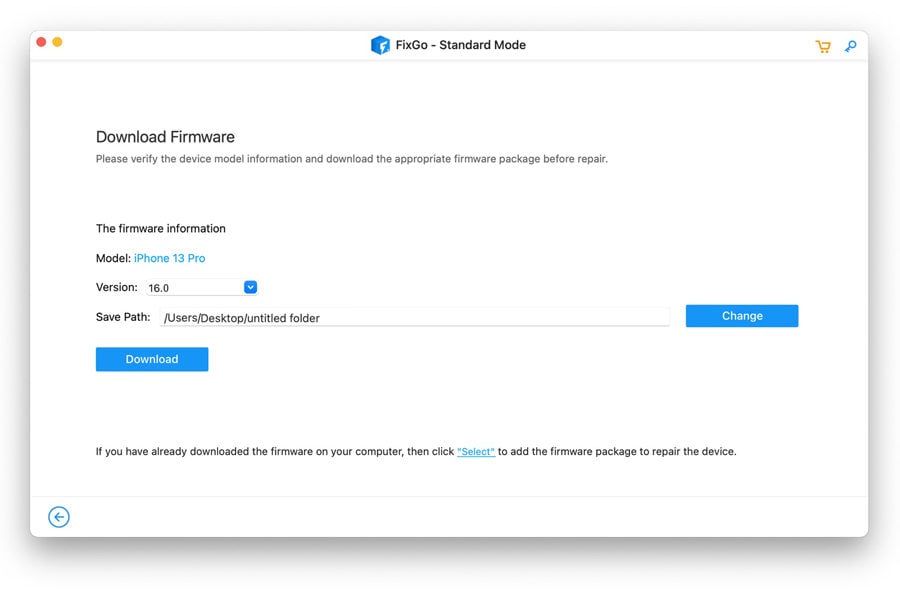
Step 5: Now click on the “Repair Now” button and let FixGo put your screen back in order.
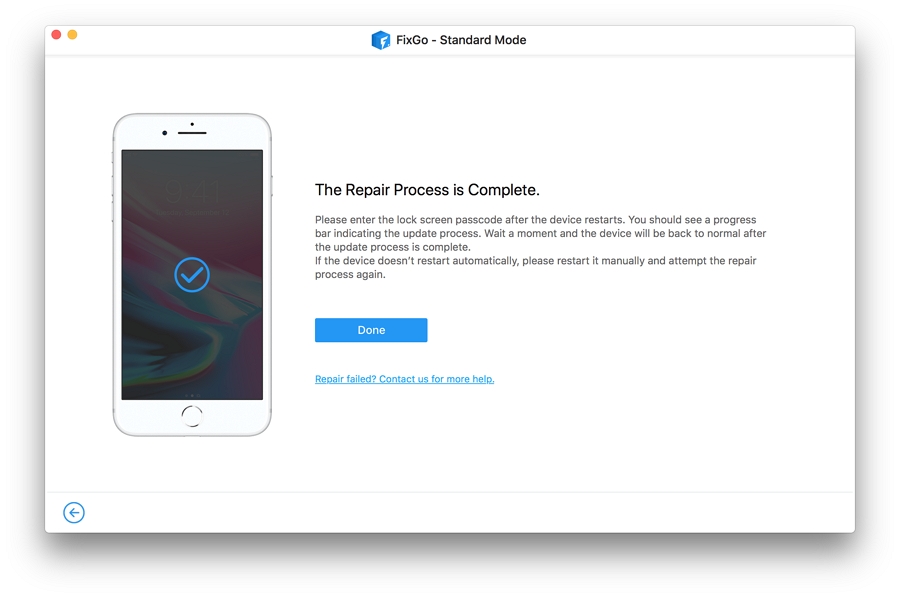
FixGo will let you know when the repair process is complete, after which you can restart your iPad and revel in its newly restored perfection.
#5 Reset to Factory Default
If your screen is still stubbornly refusing to display normally, you need to take more extreme action and force it back to its factory settings. As this will wipe all your settings and data, it’s vital you back up the device before following these step-by-step instructions:
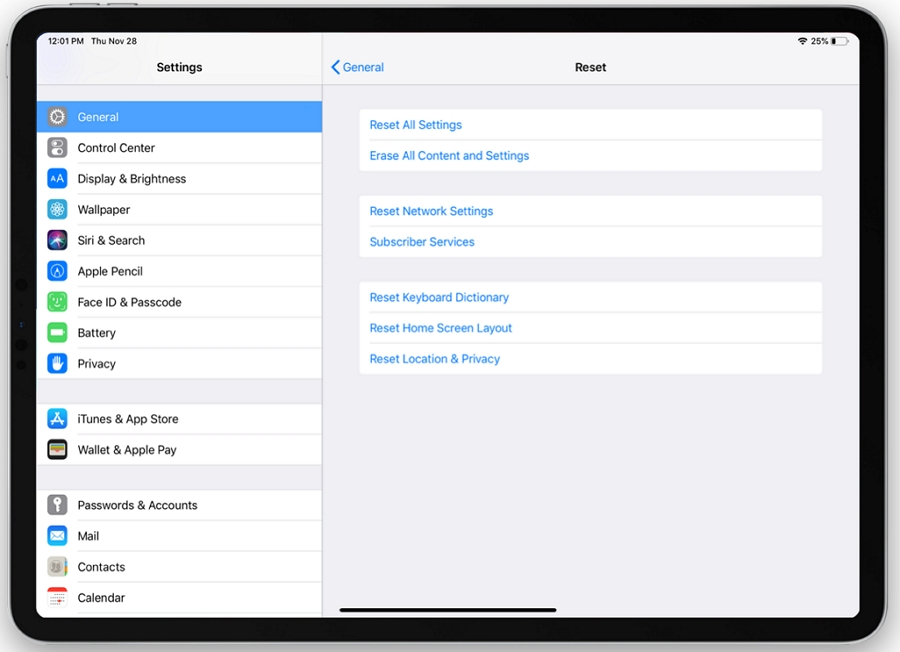
Step 1: On your iPad, navigate to the Settings menu;
Step 2: Under General Settings, choose the Reset option;
Step 3: Now select Erase all Content and Settings, and confirm your decision. Wait for a few moments for the process to complete;
Step 4: Restore your iPad by following the on-screen instructions.
#6 Check Your Warranty
If none of these solutions have fixed your fuzzy screen problem, it’s time to either call Apple Support or pop into an Apple store for expert assistance. The trouble is, if your iPad is no longer under warranty, this can be an expensive option.
It is your last resort, however, and there are few other viable options left open to you. Some suggest giving the device a few slaps on the back like you would a burping baby, but this may end up causing more damage than even FixGo can resolve. Instead, maybe you should play it safe and take it to the professionals.

Conclusion
Most screen problems, whether they manifest themselves with a color or vertical or horizontal stripes, can be resolved by rebooting your iPad or even by charging up the battery and adjusting the display settings.
Resolve more critical issues with a versatile and powerful FixGo tool. An iPad in critical condition that isn’t just green on the screen but around the gills as well needs professional assistance from an Apple technician.
Hopefully, this tutorial saved you that expense and solved your iPad problem. If not, then good luck!