Is your iPad stuck on a red screen and has rebooted multiple times by itself? It’s experiencing the Red Screen of Death (RSOD).
RSOD is a fairly common issue that causes the iPad’s screen to become fuzzy or obscured. It also prevents you from using any app, tinkering with settings, etc.
Many industry experts claim that the red screen issue on the iPad could be the outcome of a faulty software installation.
Other potential causes could be a hardware malfunction, iPadOS bugs, and so on.
Fortunately, there are various methods to fix the red screen on iPad. Below, we share five methods to help you solve the issue.
1. Restart and Force Restart iPad
Restarting is the simplest way to resolve various issues. When you restart, you reset the current power cycle of the device while addressing the common problems associated with it. So, if your iPad is showing the red screen of death, restarting it may help fix the problem.
You can restart your iDevice in several ways.
To restart iPad using the Home button:
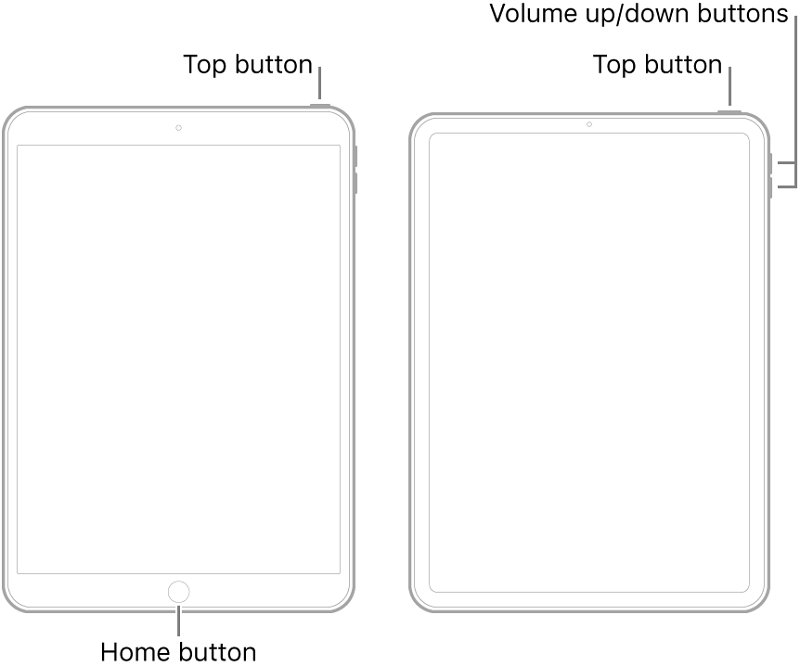
- Press and hold the Power button and wait for a slider to appear on the screen (the Power button will be at the side or the top of the device, depending on which iPad model you own).
- Shut off your iPad by dragging the slider to the right.
- Wait a few seconds for the device to turn off completely. Once it does, press and hold the Power button until the Apple logo shows on the screen.
To restart iPad with Face ID:
- Press and hold the Power button present opposite the volume controls and any one of the volume buttons. In a bit, a slider should show up on the screen.
- Turn off your iPad by dragging the slider to the right.
- Wait a few moments for the iPad to turn off. Now press and hold the Power button and the Apple logo should appear on the screen.

A force-restart has the same goal as a normal reboot, but it requires a different method of execution. To perform a force-restart on iPad:
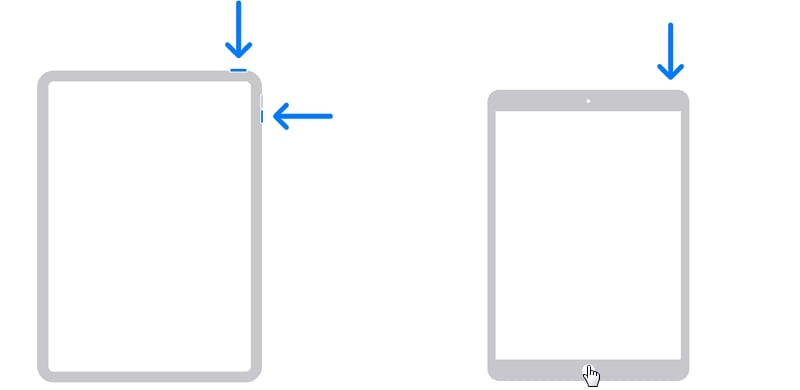
- Press and hold the Home and Power buttons simultaneously
- Wait 10 seconds while continuing to hold the buttons. The Apple logo should then appear on your screen.

2. Put the iPad in Recovery Mode
If restarting or force restarting the device doesn’t address the red screen iPad problem, you can boot the device in Recovery mode to see if it helps solve the issue. It is handy for fixing various software-related issues.
To put iPad in Recovery mode:
1. Install the latest version of iTunes on your PC, open it, and then connect your iPad to the program.
2. Switch off your iPad. Now press and hold the Home and Power buttons for about 10 seconds.
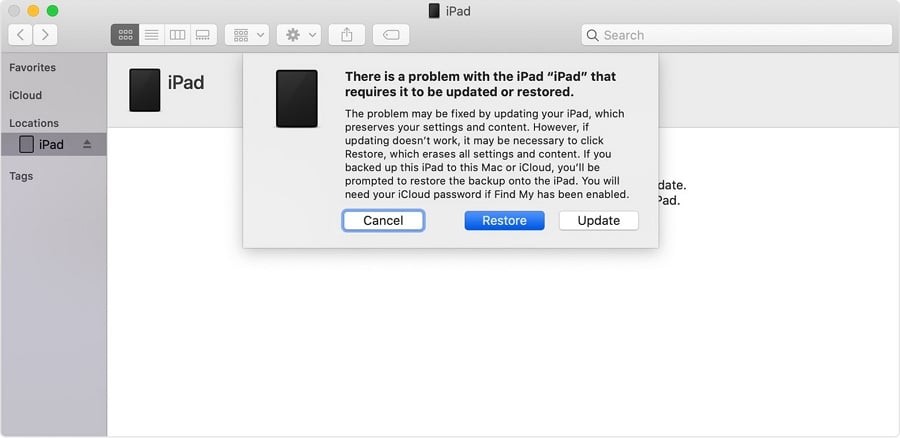
3. Let go of the Power button while still holding the Home button. iTunes will indicate that the device is in recovery mode.
4. Taking these steps will restore your iPad, after which it should return to normal function. Keep in mind that restoring the iPad will wipe your data clean.

3. Use FixGo To Refresh the iPad’s System
Not to brag or anything, but iToolab FixGo is by far the simplest route to fixing the iPad Red Screen of Death issue.
Unfamiliar with it? FixGo is an iOS and iPadOS repair applicant that refreshes the iPad system to address the issue it is experiencing.
Think of it as a superhuman device-repairing tool at your command. With FixGo, you can repair over 200 iOS and iPadOS issues – including Red Screen of Death – without data loss or requiring any technical skills.
How to Fix Red Screen of Death Via FixGo
FixGo has two modes for fixing iOS and iPadOS issues: Standard and Advanced. For the iPad red screen issue, you just need to use the Standard Mode. The Standard Mode will address the issue without causing any data loss.
Here are the steps:
1. Download and install FixGo on your Mac or Windows PC. After the installation is complete, launch the application.
2. Choose the Standard Mode in the main window.

If FixGo doesn’t detect the iPad, it will recommend that you put the device in recovery mode. The app will also provide you with relevant instructions.


4. Hit the iPad’s Back Literally
Sometimes, a hardware issue is the reason behind the red screen on the iPad. Hitting the back of your device might help fix the issue.
Perhaps a display cable has moved slightly from its default position. Knocking the back of your iPad can get it where it needs to be. Make a small fist and hit the back of your iPad, but don’t go too hard. You don’t want to damage any internal components.

5. Send to Apple for Repair
If you’ve taken all the previous steps and your iPad screen is still flashing red, you probably need to contact Apple. The company is often able to repair iPads with a fuzzy or red screen. Head over to your local Apple store or use Apple’s in-mail service by visiting their website.
If you want to discuss your problem with a Genius Bar staff at your local Apple Store, make sure to get an appointment first to ensure they’ll attend to you on time.

Over to You
Hopefully, the above steps will help you fix iPad Red Screen of Death. Out of all these methods, using FixGo is the safest way to get your iPad back to normal. Feel free to give it a try and leave a comment if you have any questions about using the application.

