Apple produces top-quality electronic products that come with attractive features. One such product is the iPad, an intelligent and high-quality tablet. Although the iPad comes with many extensive features, they also have some technical problems.
Some users have complained that after using an iPad for a certain period of time, its screen will flicker on and off. This becomes very annoying, especially when you are in the middle of important activity.
To help you solve this problem as soon as it occurs, we have listed here some practical solutions for you to follow.
#1. Force Restart Your iPad
Some of the problems you might experience with your iPad include an application stopping or the entire device running sluggish.
No matter the problem you are experiencing, you should force restart it anytime you are just trying to bring your iPad back to normal or troubleshooting it. A force restart is known to fix a lot of issues.
Force Restarting your iPad is an easy and fast process. The process will take you about one minute, with no risks involved. However, the approach you force restart your iPad with will vary depending on the model.
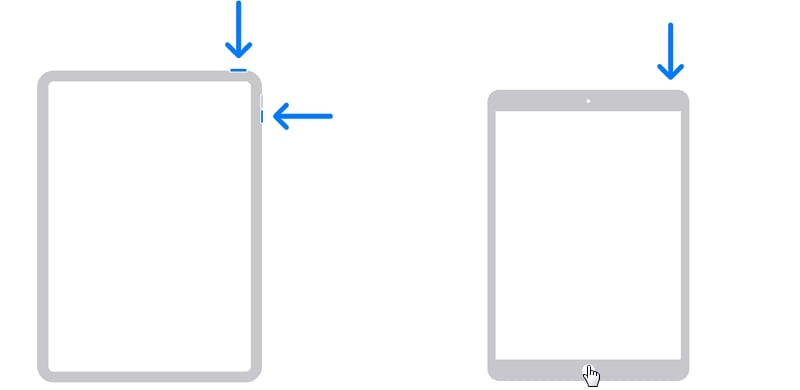
Force restart iPad with face ID
- Press your iPad’s volume Up button for almost one second and then release it.
- Repeat the same for the volume down button.
- Press and hold the iPad’s power button for almost 5 seconds until you see the Apple logo.
The iPad will force restart by itself, hopefully resolving its problems.
Force restart iPad with home button
- Press and hold the iPad’s home button.
- Simultaneously, press and hold its power button.
- Do this for almost 10 seconds until you see the Apple logo.
#2. Check Your iPad Apps
There is still a chance that your iPad’s flickering will not be solved by forced restarting. Therefore, you should check if it flickers while using a certain application. Some iPads flicker when particular applications misbehave.
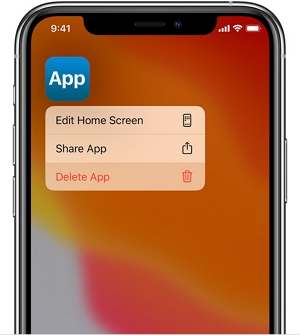
If you identify such an app, try to force quit it. However, how do you force quit an application?
For iPads having a Home button, press the home button to open the application switcher. Proceed to remove the application with the problem.
For iPads without a Home button, slide your finger to open the application switcher. Proceed to swipe away the application to quit it by force.

Try to relaunch the app, and if it continues to flicker, proceed to uninstall it. Install it later when the problem is resolved.
#3. Adjust Screen Brightness
All iPads are developed with an auto-brightness feature that allows them to adjust their screen light depending on the environment. If this auto-brightness mode is enabled, your iPad screen may appear to flicker.
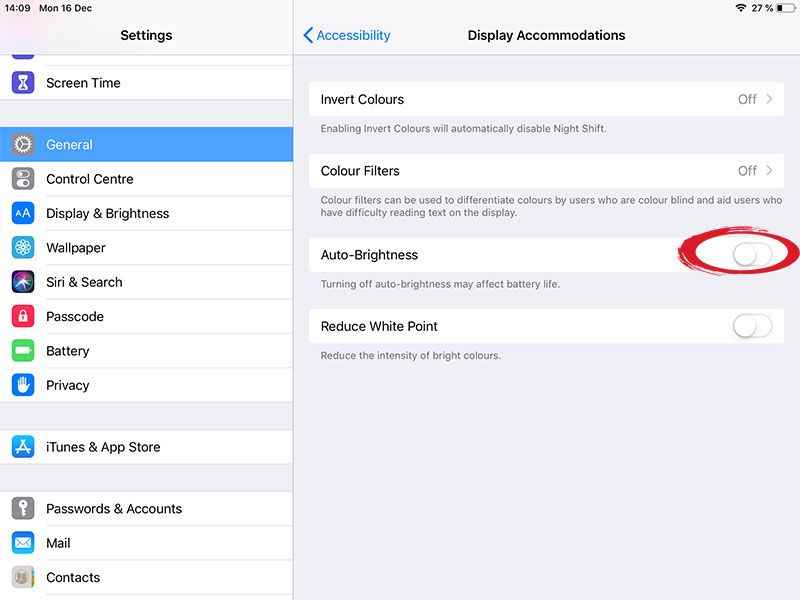
Sometimes, this might not be the cause of the flickering. To be fully sure of this, you should disable the feature. To switch off the auto-brightness feature, follow the steps below:
- Click on the settings from the main screen.
- Scroll down the menu and click on accessibility.
- From the available options, select ‘display accommodations’.
- You will see the auto-brightness feature; move the slider to disable it. The screen will remain constant after you have disabled this feature.
#4. Check and Manage Internal Memory
Performance issues such as low storage space or insufficient memory can also cause screen flickering. Although this is not common with new iPads since they are packed up with extra storage capacity, a similar issue can still be triggered by a downloaded application using up a lot of storage space or just acting up.
To clear this issue, you must follow the following steps:
- From the iPad’s home screen, click on settings.
- From the options, select General.
- Tap on the ‘Storage’.
- Select the option to view more information on available memory and used storage.
- You can also manage storage from there.
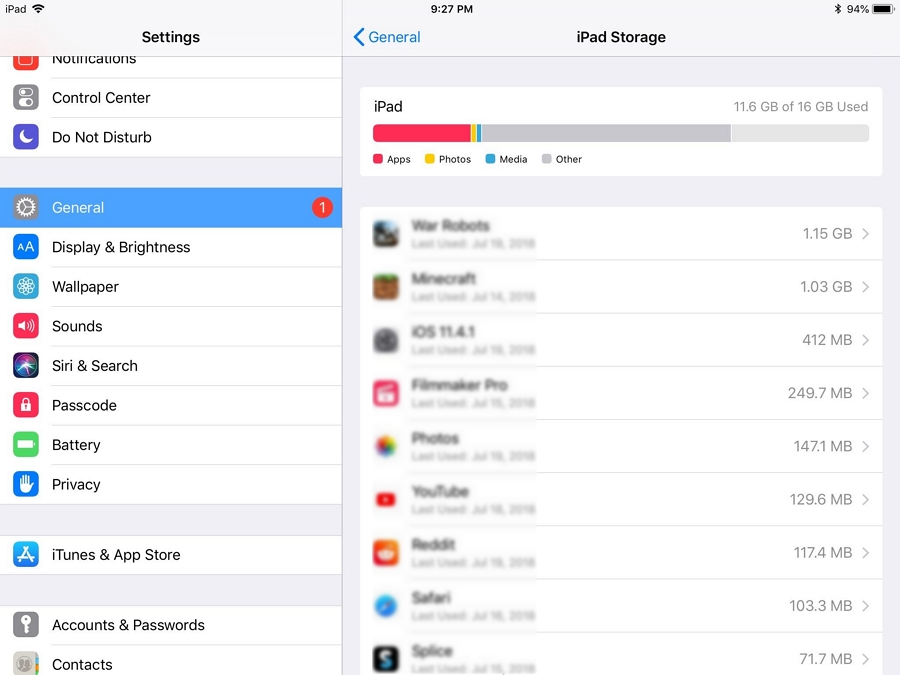
After viewing the memory that applications have used, you can delete all the unused apps. This will free up some memory space, thus solving the problem. If the problem is not solved, continue to the next option.
#5. Reset All Settings on Your iPad
Resetting all settings helps to eliminate any invalid system settings. This can greatly solve the problem, especially if some major settings were overwritten by an update that might have caused certain conflicts.
It would help if you did not worry about losing critical files in the process, as this reset doesn’t affect internal storage and data.
However, the reset deletes all your customized options and current system settings. For you to reset your iPad successfully, follow the steps below:
- Tab on settings from the home screen.
- From the options, select General.
- Scroll down the menu and tab reset.
- From the given options, tap reset all settings.
- When prompted to continue, enter the passcode.
- Confirm the action by tapping reset all setting from your device.
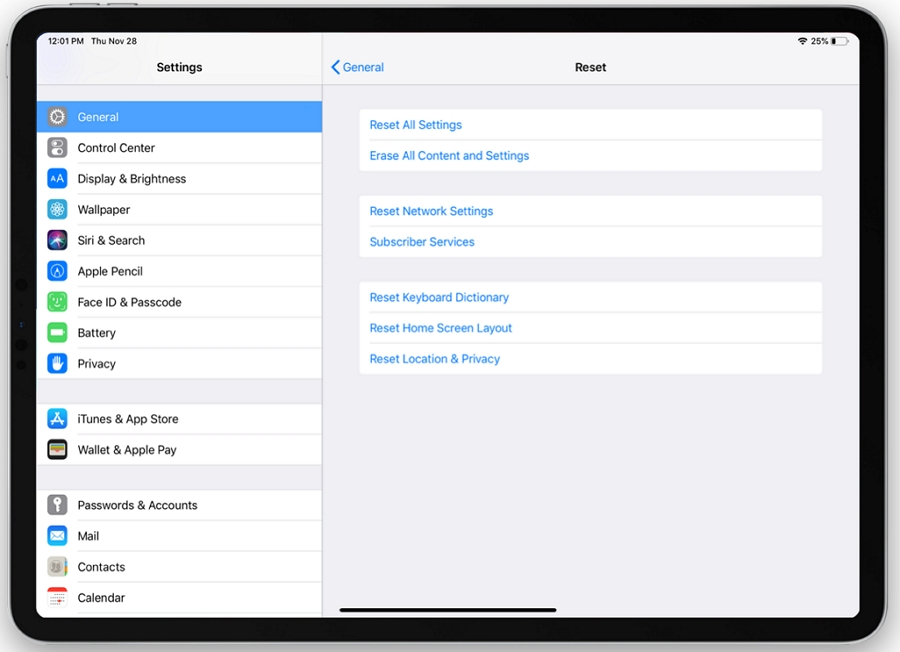
All the default options and values are restored after resetting your iPad. You will be required to re-enable necessary features, especially those disabled by default.
#6. Using FixGo
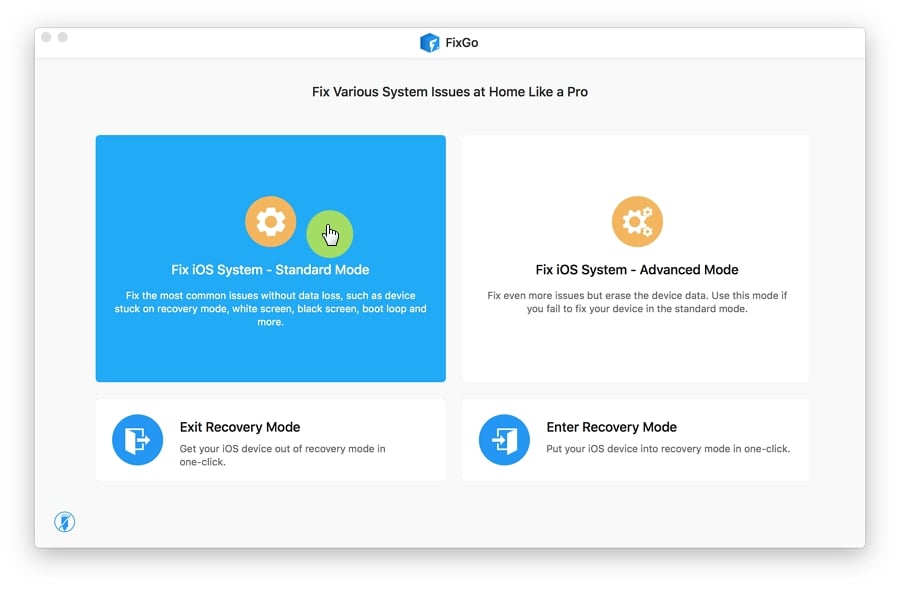
If all the suggested solutions fail to work, then FixGo system recovery will be your best chance to solve the problem once and for all. FixGo is meant to enable you to resolve serious and common iOS errors without having to lose data from your iPad. At this point, your screen might be flickering due to the failure in iOS. The software offers two repair modes which include Advanced Mode and Standard Mode.
Since FixGo is very easy to use and designed for the technical novice, users can use it by themselves to fix software-related issues at home. It also prevents the loss of data on your iPad when it isn’t working properly.
With FixGo, you can also repair over 200 other system issues. With just a single click, you can exit or enter the recovery mode for free. The software is compatible with the latest systems including iPadOS 14.4. You can follow just three steps to fix your issue:
- Download and install FixGo onto your computer.
- Select the standard mode.
- Download the relevant firmware.
- Restore your iPad to normal.
#7. Restore iPad to Factory Default Setting
A factory default setting wipes everything from your iPad, including contacts, personal information, customized settings and saved apps. All sorts of complex system errors caused by an iOS update that triggers flickering issues will likewise be deleted.
However, this solution will lead to a permanent loss of data. It is therefore recommended that you create a backup in this case. Once a backup is ready, follow the following step to factory reset successfully:
- Tap on settings from the home screen.
- Select General.
- Scroll through the options and tap reset.
- Tap ‘erase all content and settings’.
- If prompted to enter the passcode, proceed to do so.
- Tap on the erase and reset option to confirm your action.

Conclusion
These solutions have proven critical in solving iPad flickering problems, more so if it results from some software glitch. Using FixGo system recovery will give you an upper hand in solving the problem.
The process also guarantees 100% data safety. However, you can only use it to resolve software-related challenges. For hardware-related challenges, visit an Apple service center or a professional.

