

If you need to use DFU to restore your iPhone, this article will prove very useful to you. In it, we are going to be looking at what is iPhone DFU mode, how to put your iPhone in DFU mode, and get it out of DFU mode as well as the main difference between DFU and Recovery Mode.
Let’s get started.
What Is iPhone DFU Mode?
DFU mode is a state that you can put your iPhone into where the device’s operating system or bootloader doesn’t load but the device still interfaces (communicates with) iTunes. DFU is an acronym for “Device Firmware Update” and it is intended for advanced users only.
This is why people often choose DFU mode when all other troubleshooting options fail to produce the desired results.
DFU mode is therefore useful when an iPhone is completely unresponsive, it is bricked, or when the user wants to downgrade the device to an older version of iOS.
It can also be very useful when you want to install custom firmware to the device for jailbreaking or SIM unlocking purposes.
What Is the Difference Between DFU Mode and Recovery Mode?
One of the main ways that DFU mode differs from recovery mode is that a device in DFU mode will interface with iTunes without iTunes automatically installing the latest iOS firmware into the device.
When you put your device in recovery mode and connect it to iTunes, iTunes will restore the device while installing the latest version of iOS and firmware on to the device.
DFU mode lets you change and choose the firmware you want to install onto your device. therefore, you could use DFU mode to install a previous version of iOS if you want.
It is however important to note that if you restore your device in DFU or recovery mode via iTunes, you will lose most of the data on the device, in-app data that wasn’t included in the last iTunes backup, and any modifications to the device’s settings.
What Is DFU Mode Used For?
Like we mentioned before, DFU mode is intended for advanced users only. The main reason, however, that most people choose to use DFU mode is they want to change or update the firmware and iOS on the device to fix problems with the device or just because they want the features in a particular version of iOS.
DFU mode, therefore, becomes the best solution for a bricked device or a device that is disabled and won’t respond to any of the normal troubleshooting solutions. But the majority of people who use DFU mode, do it to downgrade their current version of iOS to another firmware package that they prefer.
DFU mode also proves very useful in installing custom firmware, often required when jailbreaking or unlocking the SIM on an iOS device.
How to Put iPhone into DFU Mode?
The method to put your iPhone in DFU mode will depend on the device model. The following is a description of how to put an iPhone in DFU mode for all device models:
Put iPhone 8 or Later in DFU Mode:
- Connect the iPhone to the PC or Mac and make sure that iTunes or Finder (macOS Catalina and Later) is running.
- Quickly press the volume up button and then quickly press the volume down button. Press and hold the “Side” button and then drag the slider to turn off the device.
- Now, press and hold the Power button on the right side of the device for about 3 seconds.
- While still holding the Power button, press, and hold the volume down button. Keep holding both buttons for at least 10 seconds (If the Apple Logo appears, you’ve held them for too long and you need t to start over).
- Let go of the Power button, but continue to hold the volume down button for another 5 seconds (if you see the connect to iTunes icon appear on the screen, you’ve held them for too long and you need to start over).
- If the screen goes black, you’ve successfully entered DFU mode.

Put iPhone 7 and 7 Plus in DFU Mode:
- Connect the iPhone to the computer and open iTunes or Finder (macOS Catalina and later).
- Turn off the device. To do that, press and hold the side button for at least 3 seconds and then swipe the “power off” slider to the right.
- Now press and hold the side button for at least 3 seconds.
- While holding the side button, press, and hold the volume down button (at the front of the device). Keep holding both buttons for at least 10 seconds. (If the Apple Logo appears, you’ve held them for too long and you’ll need to start over).
- If the screen remains black, you will have successfully entered DFU mode.

Put iPhone 6, 6 Plus or earlier in DFU Mode:
- Connect the iPhone to the computer and open iTunes or Finder (macOS Catalina and later).
- Press and hold the power button for at least 3 seconds and then swipe the slide to the right to turn off the device completely.
- Once the device is completely off, press and hold the “Power” button for about 3 seconds.
- While still holding the Power button, press and hold the Home button and keep holding both buttons for about 10 seconds. (If the Apple Logo appears, you’ve held the buttons for too long and you need to start over).
- Release the Power button, but continue to hold the Home button for another 5 seconds. (If you see the connect to iTunes logo on the screen, you’ve held the buttons for too long and you need to start all over again).
- If after 5 seconds the screen is still black, the device is successfully in DFU mode.

How to Exit DFU Mode?
To exit DFU mode, all you have to do is to force restart the iPhone. Here’s how to do that for the various iPhone models;
- iPhone 6s and below: hold down the Home and Power buttons until the device reboots and you see the Apple Logo on the screen.
- iPhone 7 and 7 Plus: Press and hold the Side button and the Volume down button until the device restarts and the Apple Logo appears.
- iPhone 8, iPhone 8 Plus, and iPhone X: Press and quickly release the Volume up button, press and quickly release the volume down button, and then hold the side button until the device restarts.
What If DFU Mode Won’t Help?
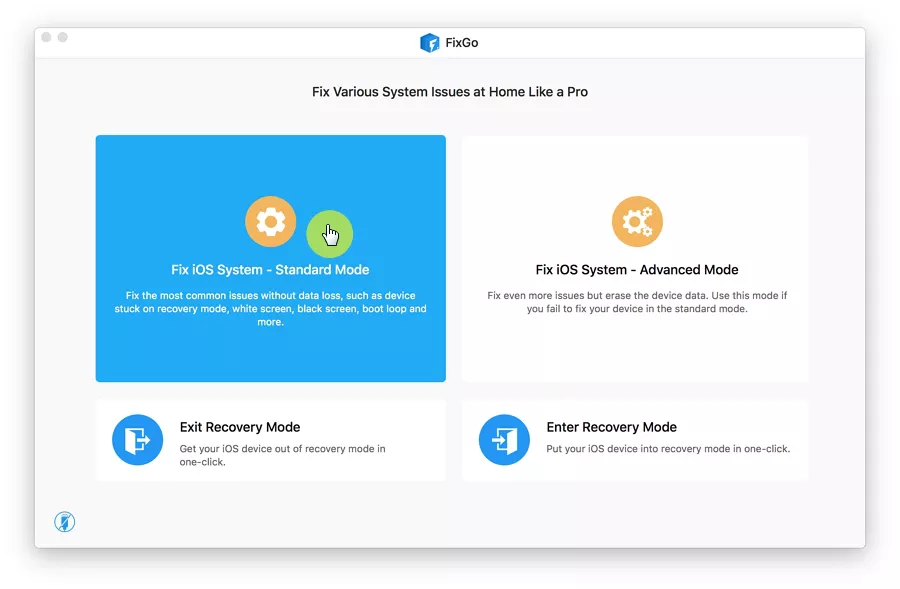
If you are using DFU mode to fix some of the common iOS issues, but it doesn’t work, we recommend using iToolab FixGo. FixGo is a third-party iOS system repair tool that is designed to help you fix up to 200 of the most common iOS stuck issues including a device that is stuck on the Apple Logo, Black screen, and up to 200 other stuck issues. When using the program’s Standard Mode to repair the device, FixGo will fix the device without causing data loss.
This guide will help you to show how to use “FixGo” step by step in your iDevices
Followings are the easy 3 step methods of fixing issues:
Step 1 Connect the device to PC or Laptop
First, connect your defective device to the PC or laptop with a data cable and double click “Fix Now” to start.
If it still not showing your device, then you must click “Enter DFU Mode” to put your device in DFU mode.
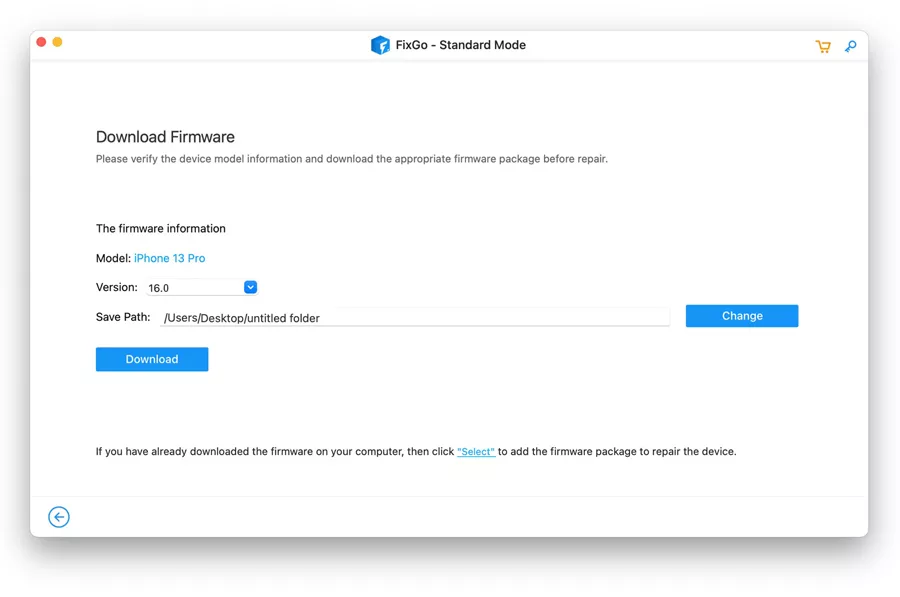
Step 2 Download firmware package
Next, you need to install the latest firmware program on the device. Click “Browse” to select the path and then click “Download” to download the latest version of the firmware.
Note: You need to have a stable and fast internet connection because it is a bit large file and takes sometimes in downloading.
If you have already installed firmware then you just need to select the firmware to import manually.
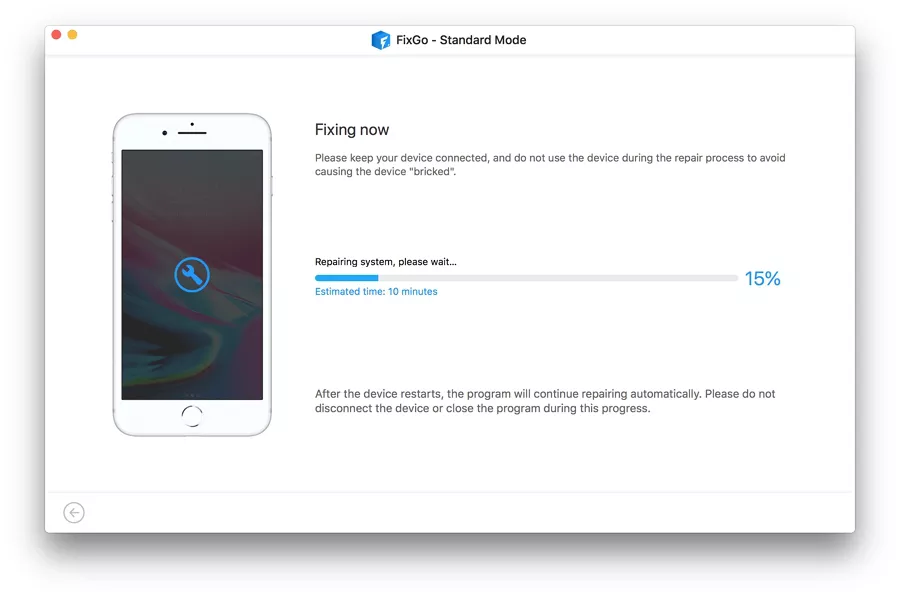
Step 3 Fix the Issue
Now the last and main step is to fix the problem. You need to just click the “Repair Now” button to repair your iPhone.
Conclusion
Well, it can be a little complex to get your iPhone, iPad, or even iPod touch into DFU mode since the timing is a little tricky. However, with this useful guide, you should get it. Sometimes, put iPhone into DFU mode cannot help you fix problems, iToolab FixGo is the the most trusted tool to fix all the major issues related to an iOS device without causing any damage to it. Simply download the tool and take the assistance of it now! If you still have questions about how to put an iPhone in DFU mode, write them in the comments and I will answer them.