
I was working on an important Word document for hours when my computer suddenly crashed. I hadn’t saved the file. Is there any way to recover an unsaved Word document?
— From Reddit
Computer crashes at the worst possible moment. Power cuts out mid-sentence. Or worse—clicking “Don’t Save” by mistake. These moments feel like gut punches, especially when hours of work disappear in seconds.
But here’s the good news: that document isn’t necessarily gone forever. This guide explains how to recover unsaved Word documents using methods that actually work on Windows.
Part 1: Can I Recover a Word File I Didn’t Save?
Short answer: Yes.
Microsoft Word has an option for auto recovery. It automatically saves copies of documents as one works, typically after every 10-minute interval. Word has temporary backup files even though the save button was never pressed.
These files sit in specific folders on your computer with an .asd extension. Think of them as safety nets—Word quietly saves your progress without you asking it to.
Common Scenarios for Document Loss
Document loss happens in predictable ways:
Part 2: How to Recover Unsaved Word Document on Windows?
Windows saves recovery files at specific locations. Try these built-in methods first.
Method 1: Check Temporary Files
Windows keeps AutoRecover files in a hidden folder. Even if you didn’t hit “Save,” a copy may still exist. Here’s how to find them:
Quick Route:
- Press Windows Key + R.
- Type %temp% and hit Enter.
- Sort by “Date Modified” (click that column header).
- Look for recent files with Word icons or .tmp extensions.
- Double-click the Word file to open it.

Direct Route:
- Open File Explorer.
- Navigate to C:\Users\[YourUsername]\AppData\Local\Microsoft\Office\UnsavedFiles.
- Find files with .asd extensions.
- Double-click to open.
- Save immediately with a real filename.

This method is best for recovering Word documents that crashed before being saved. The .asd files are Word’s AutoRecover snapshots from your previous work cycle.
Method 2: Utilize the Manage Document Feature
Word has a built-in recovery option that collects all available unsaved files in one place. You don’t need to search through system folders or dig around manually.
Follow these steps:
- Open Word (doesn’t matter which document).
- Click “File” → “Info” on the left.
- Click “Manage Document.”
- Select “Recover Unsaved Documents.”
- Pick the document from the list that appears.
- Click “Open.”
- Save it immediately.

This is the quickest method for accessing unsaved Word documents. Word gathers all recovery files in one location rather than forcing you to search system folders manually.
Part 3: How to Recover Unsaved/Deleted Word Documents with Professional Tools?
If Word cannot find your file, or the document is missing from AutoRecover, it may still be recoverable using professional data recovery software- RecoverGo Windows Data Recovery.
This software scans your drive deeply, helping you find Word files that are no longer accessible through Word or Windows folders.
Why Choose RecoverGo:
- High recovery capability: Retrieve all permanently deleted Word documents with a success rate of 99.7%.
- File filter: Locates files based on specific criteria, such as file type, file path, date modified, etc.
- Simple process: Recover unsaved Word documents in three steps.
- Works across multiple storage devices: Such as SSD and NVMe drives, USB flash drives, SD cards and more.
- Handles multiple situations: Like system crashes, accidental deletion, and unsaved document loss.
- Pause and resume recovery: Keep the process less disruptive and easier to handle in your workflow.
How to Use RecoverGo (3 Simple Steps):
Step 1 Download and launch RecoverGo. Choose the drive where the missing document was stored. Click “Search for Lost Data.”

Step 2 Let it scan. The time depends on the drive size and data volume.
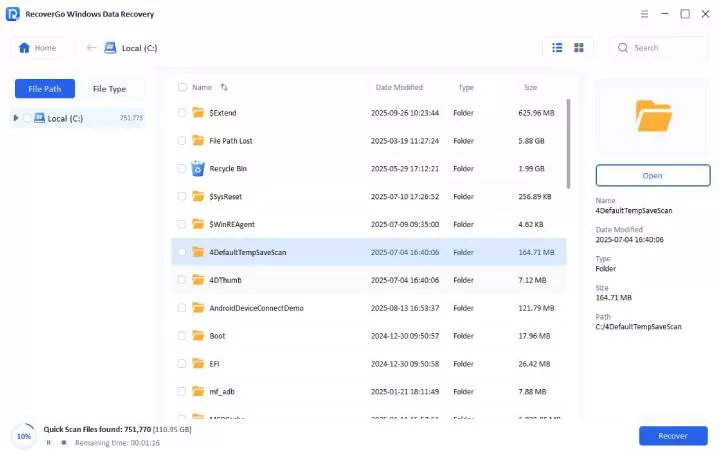
Step 3 Browse found files. Preview documents to confirm they’re correct. Select what to recover. Pick where to save them.

This method is ideal when all other efforts fail. Particularly helpful for documents lost days or weeks ago, or when files were accidentally deleted.
Also Read: How to Recover Deleted Word Documents on Windows 10/11?
Part 4: How to Prevent Unsaved Document Loss?
Prevention is better than recovery. Small adjustments in settings can prevent most disasters.
Optimize Word’s AutoSave Settings
The default 10-minute AutoRecover interval is too long. Reducing it minimizes work loss:
- Open Word → File → Options.
- Go to the “Save” section.
- Change “Save AutoRecover information every X minutes” to 5 minutes or less.
- Check “Keep the last autosaved version if I close without saving.”
- Click OK.
Use Cloud Storage
Cloud storage basically eliminates unsaved document problems:
OneDrive Benefits:
- Saves every few seconds automatically.
- Keeps version history (can go back to earlier drafts).
- Access from any device.
- Protects against hard drive failures.
Quick Setup:
- Save documents to OneDrive, Dropbox, or Google Drive.
- Enable the AutoSave toggle in Word (top-left corner).
- Stop worrying about crashes.
Conclusion
Lost documents aren’t always permanent losses. This guide covered how to recover unsaved Word documents on Windows—from built-in AutoRecover features to temporary file locations to professional recovery software.
Speed is important. The quicker you act, the higher the chances of recovery. Built-in methods work well for recent files. For difficult cases—deleted files, older files, or corrupted data—use professional software like iToolab RecoverGo Windows Data Recovery.
Don’t risk losing important work. Set up proper AutoSave settings and consider cloud storage. Having recovery tools ready before disaster hits saves hours of stress.