
My NVMe SSD has a lot of personal photos and videos. But it stopped being recognized in the BIOS two days ago. So, I used an external NVME enclosure to connect it to a different system. It now shows up as uninitialized. Can I fix it and recover data?
— From Reddit Tech Support
Detection issues like these are common among SSD users. The users report that the drive is not detected in the BIOS. It also doesn’t show up in File Explorer.
In this guide, we will look at the common reasons for NVMe not showing up. Next, we will show you multiple ways to fix the NVMe drive not showing up error. We will also explore 2 ways to recover data even if no NVMe drive is detected.
Part 1: What Causes NVMe Not Showing Up?
A number of reasons can make an NVMe SSD not show up in the BIOS or Windows. It can be something simple like a configuration issue. In more extreme cases, hardware failure can also make the SSD disappear.
Let’s look at some common causes why the SSD doesn’t show up:
Wrong Installation
An NVMe SSD will only work if it is installed in a compatible M.2 slot. The slot must also support the NVMe protocol. So, a drive will not be detected if it is in the wrong slot.
A loose connection can also cause detection issues in BIOS. In some cases, the drive is not fully seated or properly secured with a screw. So, the SSD fails to have proper contact with the motherboard.
Incorrect BIOS/UEFI Settings
Correct UEFI or BIOS configuration is also required for an NVMe to work properly. The SSD will not show if UEFI boot mode is disabled. Wrong PCIe lane settings can also make the SSD unrecognizable.
So, did you tinker with the BIOS or UEFI recently? If you have made changes recently, then that could be the culprit!
Uninitialized Drive
A damaged file system can also make an NVMe appear as uninitialized. An uninitialized SSD can appear in Disk Management. But it won’t show in File Explorer.
A corrupted partition table can also make the SSD disappear from the File Explorer. In such cases, the drive will show up in the BIOS or the UEFI. But it will stay hidden in the File Explorer as Windows can’t read it without a proper file system.
Outdated Drivers
A driver allows Windows to communicate with the NVMe SSD. But the drives can get outdated or even corrupted in some cases.
So, yet another reason for the NVMe SSD not showing up is the drivers. The driver issue usually happens after a recent hardware change or system update.
Missing Drive Letter
If the storage device is missing a drive letter, then it won’t show up in the File Explorer. Windows can only access a partition or a drive through its drive letter.
Now, you may think why a drive would lose its drive letter all of a sudden? Well, it can happen due to hardware issues, registry conflicts, or file system damage.
Part 2: What to Do if NVMe Not Showing Up?
NVMe (Non-Volatile Memory Express) is a fast and new technology. But it is also prone to various issues. An NVMe can disappear due to driver issues, missing drive letter, and a number of other reasons.
You can perform a few checks before jumping into fixes. This helps you understand the root cause. It also helps you prevent any unnecessary changes that could lower the chances of data recovery.
Start with these basic and safe checks:
Check BIOS/UEFI
Check if the NVMe shows up in the BIOS. Not there? Then it is a hardware issue. Either the drive is dead, or you have installed it incorrectly.
Check Physical Slot
Turn off the system and physically examine the SSD slot. Make sure it is installed correctly in the M.2 slot. Also check the screws or built-in latch.
Check Drivers
Does the SSD show up in the BIOS? But it is missing in Windows? Then you can try updating or reinstalling the drivers.
What Not to Do:
You should avoid the following when dealing with NVMe not detected issue:
- Stop using the SSD (do not write new data).
- Do not reinstall Windows.
- Do not format or reformat the drive.
- Do not use any cracked recovery tools.
Part 3: How to Fix NVMe Not Showing Up?
The right solution to fix the NVMe detection issue depends on the underlying cause. So, we have provided different solutions based on the scenario:
- Scenario 1: NVMe Not Detected in BIOS
- Scenario 2: NVMe Not Detected in File Explorer
- Scenario 3: NVMe Not Detected in Disk Management
Scenario 1: NVMe Not Detected in BIOS
Not appearing in the BIOS can be due to many reasons. It can be incorrect settings, wrong installation, or a hardware issue. Try these fixes one by one:
Fix 1: Enable UEFI mode
- Turn on your computer and enter BIOS/UEFI settings. You should start pressing F10, F2, or the Del button at startup. If this doesn’t work, check the brand’s website to find the common BIOS keys.
- Go to the Boot section and then select the Boot Mode.
- Change the settings from Legacy to UEFI.
- Save the changes. Restart the computer.
- Enter the BIOS settings again. Confirm if the NVMe has appeared or not.

Fix 2: Check PCIe lane configuration
Some motherboards share PCIe lanes between the M.2 slots and SATA ports. But wrong settings can prevent the SSD from being detected.
Follow these steps to check and fix the PCIe lane settings:
- Restart the computer. Enter the BIOS.
- Go to Advanced. Open the PCIe/NVMe configuration menu.
- Select the Auto option.

Fix 3: Update BIOS Firmware
Most users never pay attention to the BIOS until a hardware issue appears. In some cases, an outdated BIOS version can cause NVMe SSD detection problems.
NVMe SSD works on a new technology. So, an old BIOS may not support the newer SSD!
Follow these steps to update the BIOS:
- Check your motherboard model.
- Download the BIOS update based on motherboard model.
- Copy the BIOS file to a USB drive (FAT32).
- Restart the computer. Access the BIOS. Open the built-in update utility.
- Select the BIOS file on the USB drive and start the update.
- Restart the computer once the update is complete.

Scenario 2: NVMe Not Detected in File Explorer
The NVMe shows up in BIOS but not in File Explorer? This is usually a software issue. Try these fixes:
Fix 1: Initialize the Disk
An uninitialized SSD won’t show in File Explorer. Here’s how to initialize it:
- Press Win + X and open Disk Management.
- Right-click on the NVMe SSD and choose “Initialize Disk”.
- Select GPT or MBR partition style.
- Wait for the disk to initialize.

Fix 2: Change Drive Letter
A missing drive letter means Windows can’t interact with the SSD. And two drives with the same drive letter can also cause conflicts.
Follow these steps to change the drive letter and fix the NVMe not showing up error:
- Press Win + X. Open Disk Management.
- Right click on NVMe SSD and choose “Change Drive Letter and Paths”.
- No drive letter? Click on Add. Click on Change if there’s already one.
- Click on OK to confirm the changes.

Fix 3: Enable Device
What if the NVMe SSD is working perfectly but has simply been disabled? It may sound unlikely, but a disabled SSD is another common reason why an NVMe drive fails to appear in the BIOS or Windows. This is how you can fix it:
- Press Win + X. Click on Device Manager.
- Expand the Disk Drives section.
- Find the NVMe SSD. Right-click on it and choose Enable Device.
- Restart the computer.

Scenario 3: NVMe Not Detected in Disk Management
When an NVMe SSD is detected in the BIOS but does not appear in Disk Management, the problem is often related to outdated drivers. Fortunately, updating the appropriate drivers can usually resolve the issue without replacing any hardware.
Follow these simple steps to update NVMe controller driver
- Press Win + X. Open Device Manager.
- Expand the storage controllers or disk drives to find the NVMe.
- Right-click on the SSD and click Update Driver.
- Select this option: “Search automatically for drivers”.
- Restart the computer and check if the NVMe SSD shows up.

Part 4: How to Recover Data from NVMe Not Showing Up?
The top priority should be data recovery from the SSD. This is especially true if it is important data.
The right recovery method depends on the drive’s condition. We have explained the different situations along with the best solution:
Method 1: Data Recovery Software – Fast and Simple
Do you want an easy and fast way to recover data? Then, you should use iToolab RecoverGo Windows Data Recovery.
RecoverGo supports NVMe SSDs and provides a simple way to recover files lost due to accidental deletion, formatting, partition issues, or file system corruption.
Key Features of RecoverGo:
- 99% Recovery rate: Advanced recovery algorithms maximize recovery chances.
- Easy to use: Simple 3-step recovery process.
- Supports 1000+ file types:Restore photos, videos, documents, archives, emails, and more.
- Broad NVMe SSD compatibility: Supports leading NVMe SSD brands such as Samsung, Western Digital, Crucial, Kingston.
How to Recover Data from NVMe with RecoverGo:
Step 1 Launch the software and select the NVMe SSD. Click on “Search for lost data” to start the scan.

Step 2 The tool will begin scanning your drive. Three scan modes help you to find more deleted or lost files.
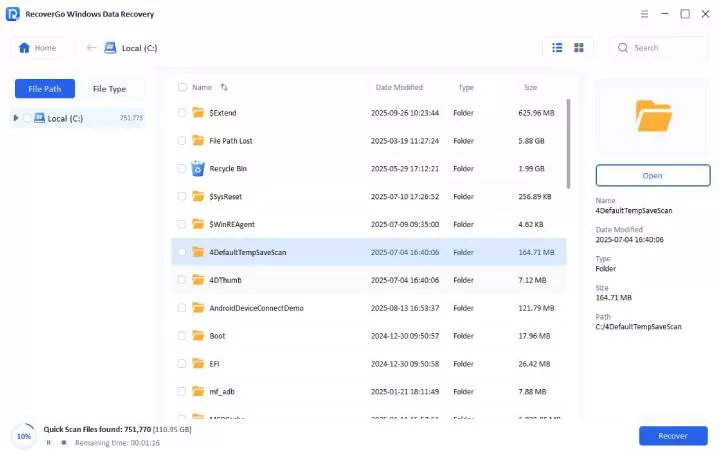
Step 3 Preview the files and then click on Restore to save your data.

Method 2: Data Recovery Services
You can’t use data recovery software if the NVMe SSD is missing in the BIOS. Such cases are most likely due to hardware failure.
If the solutions mentioned above don’t work, then your only choice is to get help from a data recovery service. These services use specialized equipment and advanced techniques to recover data from damaged SSDs.
Popular NVMe Data Recovery Services:
- DriveSavers
- DataLab
- ACE Data Recovery
How much does NVMe recovery cost?
It costs anywhere from $200 to more than $2500. It all depends on the condition and the failure type of the NVMe SSD.
Most of the data recovery services usually offer free evaluations. They also operate on a “No data no charge” basis. In simple words, you only pay if they manage to recover the data.
Bonus Tips: Avoid NVMe Data Loss in Future
It is actually quite easy to avoid data loss on a NVME drive! Just follow these simple tips:
Enable TRIM
Make sure the TRIM feature is enabled on your SSD. This feature clears invalid data and increases the drive’s lifespan.
Make Backups
Never compromise on making regular backups. You should keep a copy of your files on both cloud storage and local storage.
Avoid Power Surge
Always use a stable power source for your computer. Sudden power surges can damage the SSD in the long run.
Proper Airflow
Try to keep the temperature of the SSD under 70°C. One thing that can help you achieve it is proper ventilation.
The End
It definitely feels scary to experience the NVMe not showing up all of a sudden. But it can be easily fixed in most cases. We have shared multiple ways to make the NVMe appear again in the BIOS, File Explorer and Disk Management.
If you are experiencing NVMe detection issues, then you should prioritize data recovery first. iToolab RecoverGo Windows Data Recovery is a good option because of its 99% recovery rate and 3-steps recovery workflow. Once you have recovered the data, you can then try the different fixes to solve the NVMe detection issue.