At times, the excel sheet we are working on has some important information. Cells containing functions and formulas are so crucial that losing them can create huge problems for us. However, protecting a cell in excel can solve these problems as it can define which cells can be used for data entry or editing. Securing excel cells using passwords is a secure and effective method.
In this guide, you will learn how to protect a cell in excel from unwanted use. Just prevent a cell and specific cells from editing, leaving other cells to be edited or changed. But if the cells locked by accident or forgot the password of how to unprotect it, here also gives a ultimate solution – PassWiper for Excel to help you out.
Part 1. How to Protect Cells in Excel without Protecting Sheet
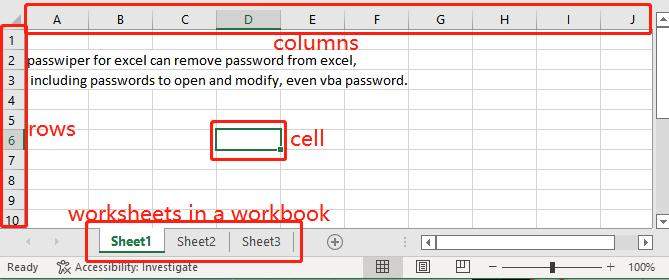
First let’s understand what is cell and row and column in excel. Cells can make up a row, rows can make up a column, columns makes up a sheet. Sheets to Workbook. This is the simple knowledge of excel. Here we will learn how to protect a cell and cell ranges (specific cells) in excel, ’cause protecting all cells means lock excel worksheet, this step you can click ‘Info’ to lock it.

Now we have known which part of excel we need to protect. You can protect a single cell and cell ranges in Excel in several ways that will only allow others to read, but not edit your protected data. This guide will help you to learn how to protect a cell from editing in excel.
Here are 3 easy ways to protect cells in Excel.
Way 1. Protecting a Cell in Excel
You can protect a specific cell in excel by following the below-mentioned steps.
Note: Pay attention to these steps as the steps involved in this way are used in other ways as well.
Step 1. Before protecting a cell, you need to unprotect all of the cells on your sheet. You can do this by selecting all of the cells in your worksheet. Right-click, and from the menu, select the ‘Format Cells’ option.
Step 2. This will open the Format Cells window. From there, select the Protection tab. Uncheck the ‘Locked’ checkbox then click OK.

Step 3. Now, select the cell that you want to protect. Right-click again, and select the ‘Format Cells’ option.
Step 4. Select the Protection tab from the Format Cells window. This time check the ‘Locked’ checkbox and click OK.

Step 5. The protection of a cell will only take effect when you protect the worksheet as well. For this purpose, go to the Review tab from the toolbar and select the option ‘Protect Sheet’.

Step 6. You will see a Protect sheet window. You can enter a password to protect the sheet if you want. However, this is optional. Click OK.
Way 2. Protecting Cells Ranges in Excel
Excel also gives you the ability to protect cells in a spreadsheet. However, protecting cells in excel is not the same as protecting an Excel file. This way is specifically for protecting cells in excel.
Step 1. On the worksheet, select just the cells that you want to lock.
Step 2. Bring up the Format Cells popup window again (Ctrl+Shift+F). This time, on the Protection tab, check the Locked box and then click OK. On the Review tab, click Protect Sheet.
Step 3. In the Allow all users of this worksheet to list, choose the elements that you want users to be able to change.
Way 3. Protecting Formula Cells
Protecting formula cells is crucial when dealing with sensitive data and calculations.
You can protect formula cells in your worksheet in the following steps.
Step 1. Open the Home Tab. Click ‘Editing’. Select ‘Find Select’. Choose ‘Go To Special’ from the drop-down menu.
Step 2. Now, check the ‘Formulas’ section along with the types of formulas. Once done, click OK.
Step 3. Now, press CTRL + 1 with the formulas selected.
Step 4. Now follow steps 4, 5, and 6 of Way 1 to protect the formula cells in excel.
Note: There’s no quick formula or shortcut to lock cells in excel, but you can create a macro to achieve it, but this way is difficult if you don’t know how to make a vba code. So this blog can solve all your worries.
Part 2. How to Unprotect Cells in Excel with/without Password
In the first part of this guide, we’ve discussed the ways of protecting a cell and cells in excel. In this way, only you’ll be able to edit those cells with knowing password.
Unlocking protected cells in excel is as easy as locking them when you get the password on hand.
Here’s a step-by-step procedure of how you can do it.
Step 1. Select that specific cell that you want to change when the sheet is protected.
Step 2. Navigate to the Review tab. Go to the Changes group. Click Allow Users to Edit Ranges (only available in an unprotected sheet).
Step 3. A dialog window will open up. From there, click New to add a new range of your choice.
Step 4. In this dialog window, you need to do the following:
- Type a range name
- Select a cell
- Type a password
- Click OK
Step 5. A Confirm password window will appear where you have to re-type the password to confirm. When done, click OK.
Step 6. Now, click the Protect Sheet button to protect the sheet.
Step 7. In this window, you have to type the password to unprotect the sheet. Now, check the boxes next to the actions you want to allow, click OK.
Step 8. Now re-type the password and click OK to finish!
Then your excel cells can be edited freely without any restrictions.
From the above parts, you probably understand how to password protect a cell in excel and how to change it. In the above part, you can change a protected cell if you know the password. But what if you forget the password and still need to change the cell urgently?
This is where PassWiper for Excel can help you out. It is an efficient and effective tool that can recover your excel passwords for you in just a few clicks. PassWiper for Excel can remove the restrictions in excel within easy three steps to unlock it. Regardless of the complexity and length of the password, you can easily unprotect the locked cells without password.
1. Download and install this tool in your computer.
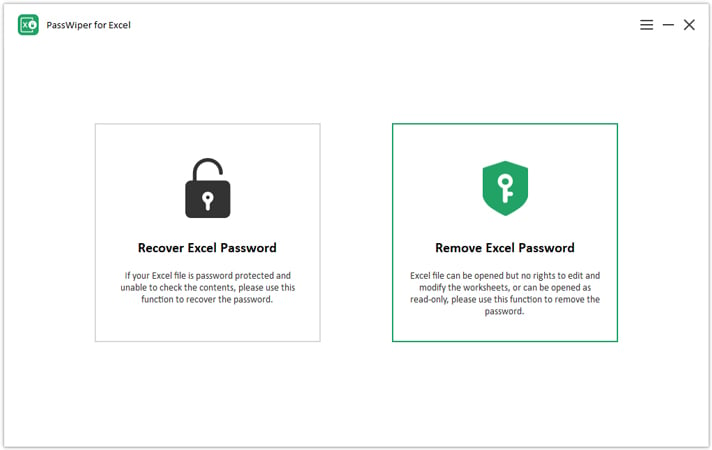
2. Select “Remove Excel Password”, then you can drag your excel file locked cells and then click “Remove”.

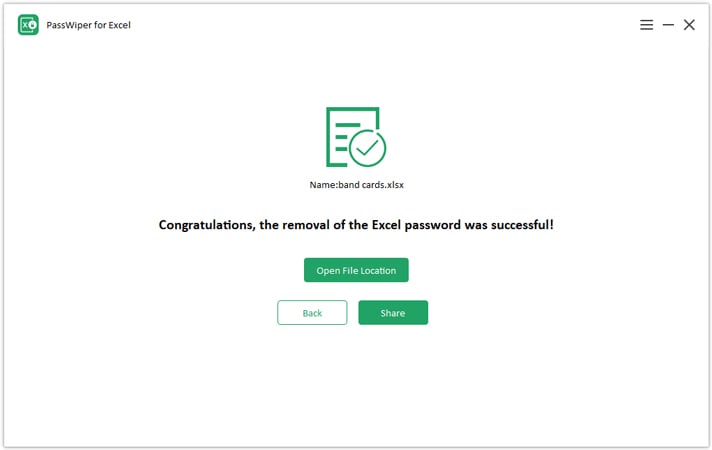
3. Then you can share the open excel file to your friends or co-workers and open it to edit the cells.

Summary
After reading through this guide, hope you’ve learned how to protect a cell in excel. You can protect the cells in several ways to prevent them from being used by untrusted users. Password-protected cells are secure. However, when you don’t know the password and want to make changes, don’t waste your precious time and try PassWiper for Excel as it is capable of recovering the excel password quickly. This tool has a higher recovery speed and causes no damage to your Excel data making it an ideal choice for excel password recovery.

