Let’s begin.
1. Force restart the iPad
Follow this simple process to restart an iPad depending on the model that you have:
Force restart an iPad with Face ID:
- Step 1: Press and hold one of the volume buttons and the power button until the power off slider appears.
- Step 2: Drag the slider and wait about 30 seconds for your iPad to turn off.
- Step 3: Now press and hold the Top button until the Apple Logo appears.
Force restart an iPad with a Home button:
- Step 1: Press and hold the top button until the power off slider appears on the screen.
- Step 2: Drag the slide and then wait at least 30 seconds for your iPad to turn off.
- Step 3: Then, press and hold the top button until you see the Apple Logo.

2. Close the apps running in the background
This problem can be caused by apps that don’t close properly and therefore continue to run in the background, especially if there are too many of these apps running in the background. To close this apps completely, tap on the Home button twice and then swipe up on the apps to close them.
3. Update the apps
To make sure that the problem is not being caused by the apps on your device, you may want to update the apps on the iPad. Follow these simple steps to do it:
Step 1: Open the App Store on your device and then tap on the “Updates” section at the bottom-left corner of the screen
Step 2: Tap “Update All” to update all apps or you can choose tap “Update” next to each up to update the apps individually.
4. Remove suspicious apps
While we are still on the apps, you may also want to remove some of the apps on your iPad that are acting suspiciously, including apps that crash frequently. To do that, follow these steps:
- Step 1: Go to Settings > Privacy > Analytics & Improvement > Analytics Data.
- Step 2: Here, you will a list of apps that have a “suspicious report” such as they crash too often.
- Step 3: Now, delete the apps on this list one by one, checking after each if the problem has been resolved. You can always restore them later.
5. Reset all settings on the iPad
Resetting all settings on the iPad can remove some of the faulty settings that could be causing this problem. This solution will not affect the data on your device. To reset all settings on the iPad, do the following:
- Step 1: Open the Settings on your iPad and then tap “General”.
- Step 2: Scroll down to tap on “Reset” and then select “Reset All Settings” from the options presented.
- Step 3: Enter your passcode when prompted and then confirm you want to reset the settings.
6. Update iPadOS in iTunes
Updating the iPadOS on your device is also one of the best ways to fix some of the bugs that can cause this problem and many others. Since you are unable to access your iPad, the best way to update the OS is in iTunes. Follow these simple steps to do it:
- Step 1: Connect the iPad to the computer using your iPad’s lightning cable and then open iTunes.
- Step 2: Click on the iPad when it appears in iTunes and then click on “Summary” on the left side of the screen.
- Step 3: Click on “Check for Update” and if an update is available, click on “Download and Update”.
- Step 4: When prompted, enter your iPad’s passcode and then follow the on-screen instructions to complete the process.
7. Use FixGo to fix iPad keeps restarting issue without data loss
If an update is unavailable or you are unable to update your iPad’s software via iTunes, we recommend using iToolab FixGo . This is an iOS repair tool that can be used to fix any iOS stuck issues including iPad keeps restarting, iPad couldn’t turn on, iPad stuck at Apple logo without causing data loss.
Download and install the program on your computer and then follow these simple steps to fix your iPad:
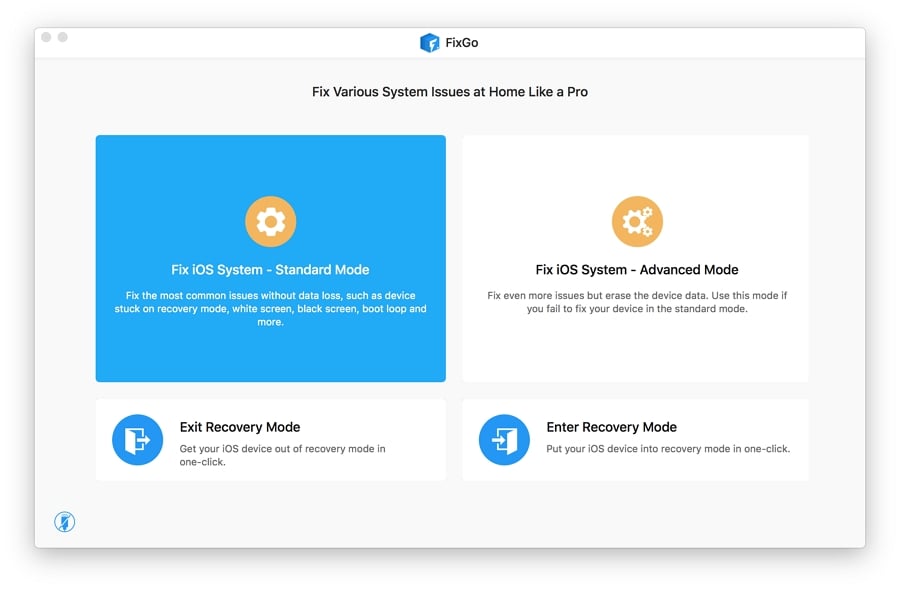
Step 1: Open the program on your computer and then select “Standard Mode” in the main window. Connect the iPhone to the computer. When the program detects your iPad, click on “Fix Now” to begin the repair process.
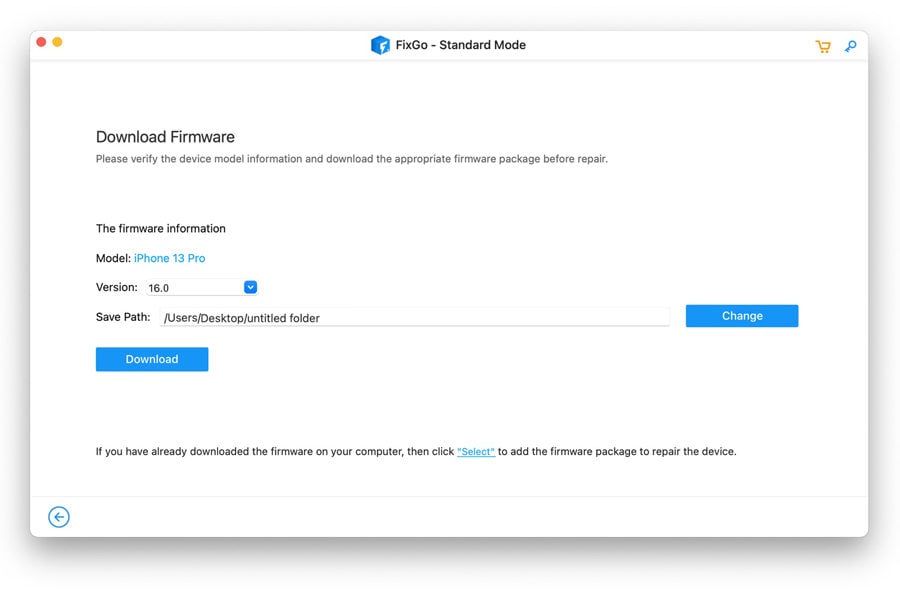
Step 2: In the next window, click on “Download” to begin downloading the firmware package that is essential for the repair process.
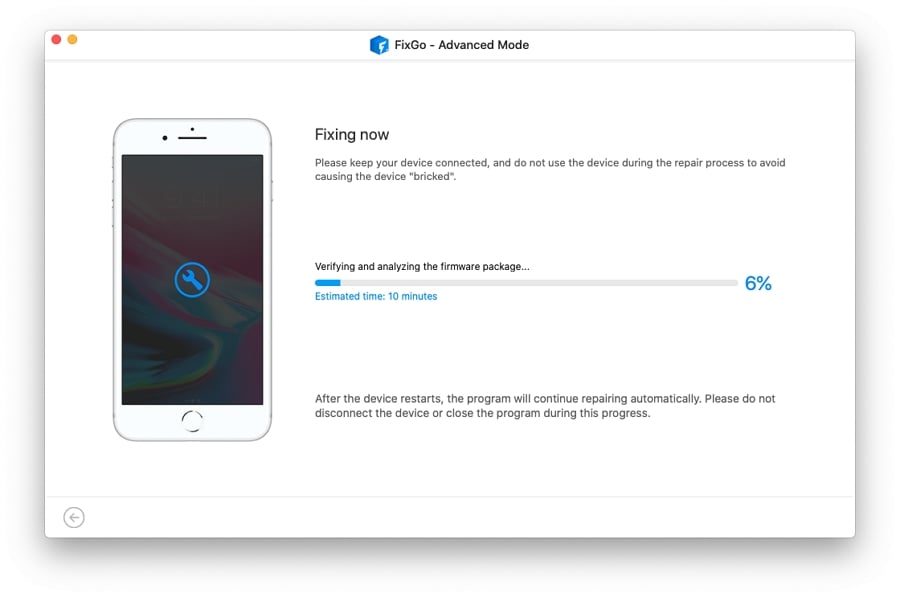
Step 3: When the download is complete, click “Fixing Now” and the program will immediately begin fixing your iPad. Keep your iPad connected to the computer until the process is complete and your iPad restarts.
8. Restore in Recovery mode
Recovery mode is a great way to fix the iPad if some of the common solutions outlined above fail. But this process will cause total data loss, so if you can, it is a good idea to back up the data on your iPad before doing this.
That said, here’s how to restore the iPad in recovery mode:
Step 1: Connect the iPad to the computer using your iPad’s original lightning cable and then open iTunes.
Step 2: Now, quickly press and release the Volume up button, quickly press and release the Volume Down button and then press and hold the Power button. Keep holding the power button until you see the Recovery mode screen.
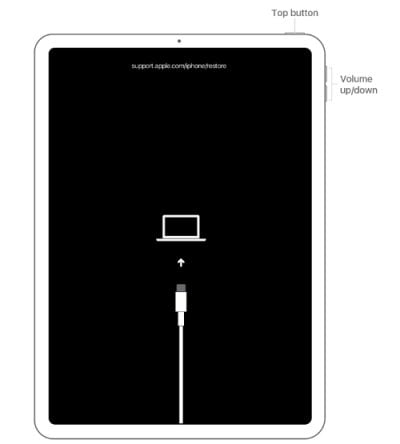
Step 3: You should see a message in iTunes saying that a device in recovery mode has been detected. Click “Restore” and wait while iTunes repairs your iPad.
9. Restore in DFU mode
A DFU restore should be used as a last resort and only when all other solutions don’t work. To restore the iPad in DFU mode, follow these simple steps:
- Step 1: Connect the iPad to the computer and then open iTunes.
- Step 2: On the iPad, quickly press and release the Volume Up button, press and quickly release the Volume Down button.
- Step 3: Press and hold the Power button until the screen goes black. While still pressing the Power button, press and hold the Volume Down button for about 5 seconds. Release the Power button, but keep holding the Volume Down button for another 5 seconds.
- Step 4: In the message that pops up in iTunes, click “Restore” to restore your iPad in DFU mode and hopefully fix the problem.

