Although iPhones are famous for their best cameras, many users reported a problem stating that their iPhone camera is shaking, especially after the latest iOS update. This is troublesome because it ruins what could have been perfect moments captured on your iPhone. Since no one wants blurry or shaky images or videos, you must be looking for a solution. However, finding its underlying cause is a must.
No worries; let’s delve into this guide to learn about the common causes of the iPhone camera shake and the 12 leading methods to overcome this situation.
Common Causes for iPhone Camera Shaking
Below are some common causes for your iPhone camera shake issue:
Dirty Lenses
Smudges or dirt on the camera lens disrupt the camera’s ability to focus, which might appear as shaking.
Software Glitches
Software-related issues, including bugs and virus attacks, significantly cause iPhone camera shaking.
Interference from Metal Shield
If the metal shielding around the iPhone’s camera is not aligned correctly, it can sometimes cause magnetic interference, making the iPhone camera shaky.
Low Light Situation
In low-light situations, your iPhone’s camera may use a slower shutter speed to get more light, resulting in motion blur if the subject or camera moves.
Exposure to Vibrations
Exposing your iPhone to high-amplitude vibrations can degrade the camera performance. Likewise, attaching your iPhone to vehicles with small-volume or electric engines leads to lower-amplitude vibrations.
11 Methods to Fix iPhone Camera Is Shaking
Let’s explore some practical methods for ensuring smooth and stable photography and videography if your iPhone camera is shaking.
- Remove the Phone Case
- Clean Camera Lenses
- Reboot Your iPhone
- Fix Shaking with an Efficient Tool
- Update Your iOS
- Reset All Settings
- Use a Magnet
- Toggle on Lock Camera Lenses
- Use Different Camera Apps
- Restore iPhone Through iTunes
- Contact Apple Support
Remove the Phone Case
Removing the phone case can alleviate pressure on the camera lens and stabilizers, especially if the case is tight or misaligned with the camera components. Thus, it can reduce or eliminate shaking during use.
Clean Camera Lenses
Regularly cleaning your iPhone camera lenses with a soft, microfiber cloth removes dirt and smudges that can interfere with the autofocus and stabilization features, thus improving clarity and reducing camera shake.
Reboot Your iPhone
Rebooting your iPhone can resolve temporary software glitches that may cause the camera to shake. Refreshing the operating system may restore standard camera functionality. Here is the procedure depending on your iPhone model:
To reboot iPhone X, 11, 12, 13, or 14:
- Press & hold the Volume and Side buttons until the slider appears.
- Drag this slider to shut down your iPhone. Wait for about 30 seconds.
- Press & hold the Side button until the Apple logo appears. Your iPhone will turn back on.
To reboot iPhone 6, 7, or 8:
- Press & hold the Side button until you see the power-off slider.
- Drag the slider to turn your iPhone off. Wait for 30 seconds.
- To turn your iPhone back on, press & hold the Side button. Leave it when the Apple logo appears.
To reboot iPhone 5 or Earlier:
- Press & hold the Top button till the slider appears.
- Power off your iPhone by dragging the slider. Wait for about 30 seconds.
- Turn it on by pressing and holding the Top button. When you see the Apple logo, release this button.
Fix Shaking with an Efficient Tool
If restarting your iPhone doesn’t solve the issue, don’t worry. The perfect solution is to try FixGo iOS System Repair. This industry-leading application can help you fix iOS-related problems in seconds, such as repairing iPhone camera shaking. Since it supports all iOS devices and versions, you won’t have to worry about solving even the iPhone 15 Pro Max camera issue. Plus, even beginners can use this tool, implying no technical knowledge is required. Here are the main features of this program:
- Fix iPhone camera shaking issue with no data loss
- One-click method to enter/exit recovery mode
- Best choice for iOS update or system issues
- Reset iPhones with camera vibrating issues efficiently
- Downgrade iOS to any supported version without jailbreak
Let’s comply with the given steps of using FixGo iOS System Repair:
Step 1 After launching this software, choose Fix iOS System – Standard Mode. Connect your iPhone to any computer via a lightning cable and press the Fix Now button. Put it into recovery or DFU mode if the program fails to detect it.
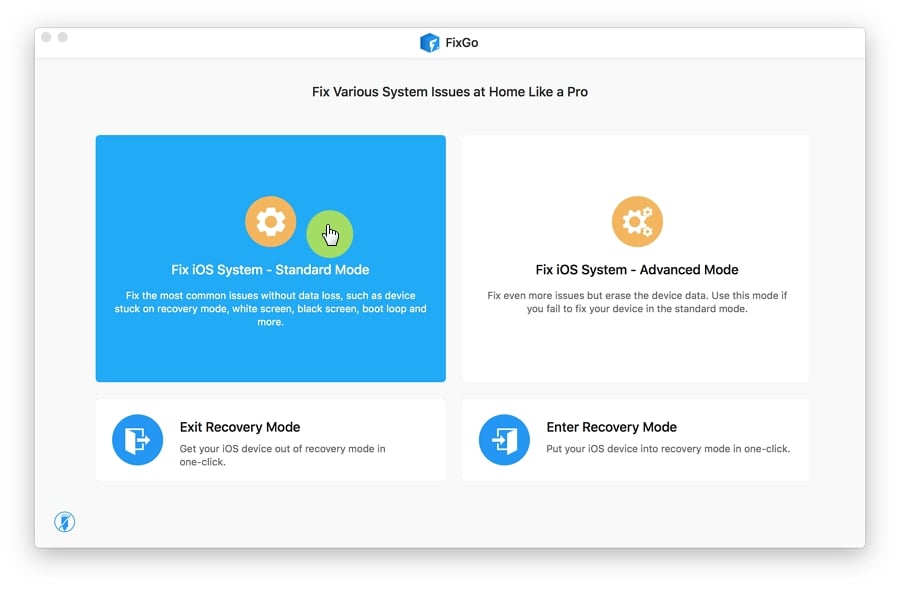
Step 2 Now, click the Change button to choose the save path for downloading the necessary firmware. However, tap Select to import the file if it has already been downloaded.

Step 3 After downloading the firmware, click the Repair Now button to start the repair process. FixGo will immediately repair your iPhone. That’s all!

Update Your iOS
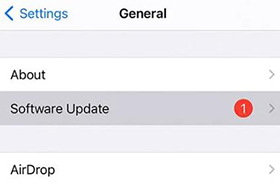
Keeping your iPhone updated ensures you have the latest software patches, which can fix bugs causing camera shaking and improve overall device stability and performance. Here is how:
- Launch the Settings app and tap General.
- Navigate to the Software Update. Turn on the Automatic Updates.
- Click Download and Install if there is any available update.
Reset All Settings
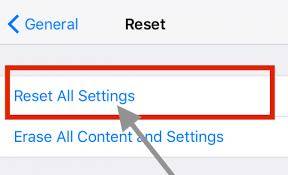
Resetting all settings to their defaults can solve underlying conflicts or errors in the system settings that might be causing the camera to shake without erasing your data. For this purpose:
- Launch Settings and tap General.
- Open the Reset section.
- Choose Reset All Settings to clear all the settings.
Use a Magnet
Applying a small magnet near the camera area on the iPhone’s back might help realign the optical stabilization components, effectively reducing or eliminating the shaking during camera operation.
Toggle on Lock Camera Lenses
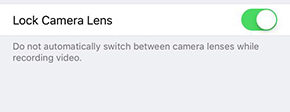
The Lock Camera feature is available in iPhone 13 and 14. Activating this feature can stabilize the camera during video recording, especially in dynamic or shaky environments, ensuring smoother and clearer video output. Here is how to do this:
- Launch Settings and open Camera.
- Now, click Record Video.
- Turn on the slider for the Lock Camera Lens.
Use Different Camera Apps
Sometimes, the default camera app may have glitches; using alternative camera apps can determine if the shaking is app-specific and offer a temporary workaround.
Restore iPhone Through iTunes
Restoring your iPhone through iTunes reinstalls the operating system, which can fix persistent software issues causing the camera to vibrate. Remember to back up your data first since it results in complete data loss. Here are the steps to restore the iPhone via iTunes:
- Launch an updated version of iTunes on a computer and connect your iPhone to it via a USB cable.
- When the iTunes detect the iPhone, click on it from the iTunes window.
- Press the Restore option and follow the onscreen instructions to complete the restore process. After restarting, check if the camera works well!
Contact Apple Support
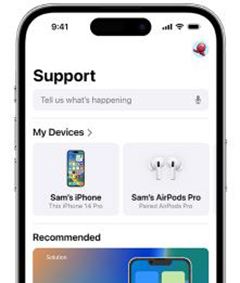
If all else fails, contacting Apple Support for professional assistance or repairs can resolve issues causing your iPhone’s camera to shake.
FAQs About iPhone Camera Shaking
Why Is My iPhone Camera Stuttering
The possible reasons for your iPhone camera stuttering include a buggy app running in the background, low storage on your iPhone, the iPhone being in Low Power Mode, etc.
How to Stop Video Shaking on iPhone
To stop video shaking on iPhone:
- Open Settings and click Camera.
- Go to the Record Video option.
- Turn on the Enhance Stabilization feature.
Final Words
If your iPhone camera is shaking, there are several methods you can try to address the issue. These include simple fixes like cleaning the lens and updating iOS to professional solutions like FixGo iOS System Repair. This tool is recommended for its ability to address various iOS system problems without data loss, making it a versatile solution for camera issues and other system glitches. But if these methods don’t resolve the problem, contacting Apple Support for repair or replacement is advised.


I’ve done all these but still my camera doesn’t stop shaking