
Talking about iPhone error 9, you should know that this problem is due to the use of itunes to restore or update your iPhone. Howeverm it’s not a big deal. In this guide, we will show you 6 of the most effective solutions when faced with the Error 9 on iPhone 13/12 and other models. The solutions we will outline below are some of the most effective; tried and tested by some of our users with great results. Let’s start with exactly what the iPhone error 9 is.
What is Error 9?
Error 9 is just one of the many iPhone errors that can occur when you try to update or restore your iOS device using iTunes. Apple’s official description of the error is that this error can occur when there is a problem with the USB connection, causing the device to disconnect unexpectedly during the update or restore.
This error may also be accompanied by a message saying, “iPhone has timeout” before the update or restore process stops. Other than a faulty USB connection, the following are just some of the other factors that can cause this error;
- The Security software on your computer preventing the system from communicating with Apple Servers
- The firewall on your computer blocking access to Apple servers
- Corrupted or faulty network settings
- A jailbroken device
- A corrupted network database that you used to hack or jailbreak the iOS device
You will know that the iPhone is experiencing error 9 when you see one or more of the following symptoms;
- You see the message, “an Unknown Error occurred” when you try to sync the iPhone
- You see “iPhone has timed out” when syncing
- iTunes error 9 or iTunes error 2001-2011 occurs when updating or restoring the iPhone
- You see the message, “Your device can perform faster if you use higher speed USB port”
- You see the message, “The USB device cannot operate because it requires more power.”
The following are the solutions that we recommend you try when you see one of the above error prompts;
1. Check USB Cable and Port
Since this problem is often caused by a faulty USB cable or connection, the first thing you want to do is to check that the cable you are using is working correctly and it properly connected to a USB port. Check the following to make sure your USB connection is not the problem;
- Is the USB cable loosely connected to the Port? If it is, unplug it and then reconnect it more firmly
- Are you using the USB cable that came with the iPhone or another certified cable? If not, try using the correct cable.
- Is the USB port damaged? The only way to check is to try to connect the USB cable to a different port or a different computer.

2. Force Restart Your Device
If you determine that there is no problem with the USB cable you are using or the USB port, you may want to perform a force restart. This is often one of the best ways to repair any system errors that may be causing the issue. Here’s how to force restart an iPhone depending on the model’
iPhone 8 and newer models; Press and release the Volume Up button. Press and release the Volume Down button. Then press and hold the Side button until the Apple Logo flashes on the screen.
iPhone 7 and iPhone 7 Plus; Press and hold both the Side and the Volume Down buttons for at least 10 seconds or until you see the Apple Logo appear on the screen.
iPhone 6 and earlier models; Press and hold the Power and Home buttons for at least 10 seconds or until the Apple Logo appears on the screen.

3. Update iTunes to the Latest Version
This and other iTunes errors can be easily prevented by ensuring that you are running the latest version of iTunes. Here’s how to update iTunes on Mac or PC;
For Mac: Open iTunes on your Mac. Click on “iTunes” on the Menu bar and the select “Check for Updates” and follow the on-screen instructions.
For Windows: Open iTunes on your Windows PC and then click on “Help > Check for Updates.” If an update is available, follow the on-screen instructions to update iTunes.

4. Fix the Error Without Data Loss
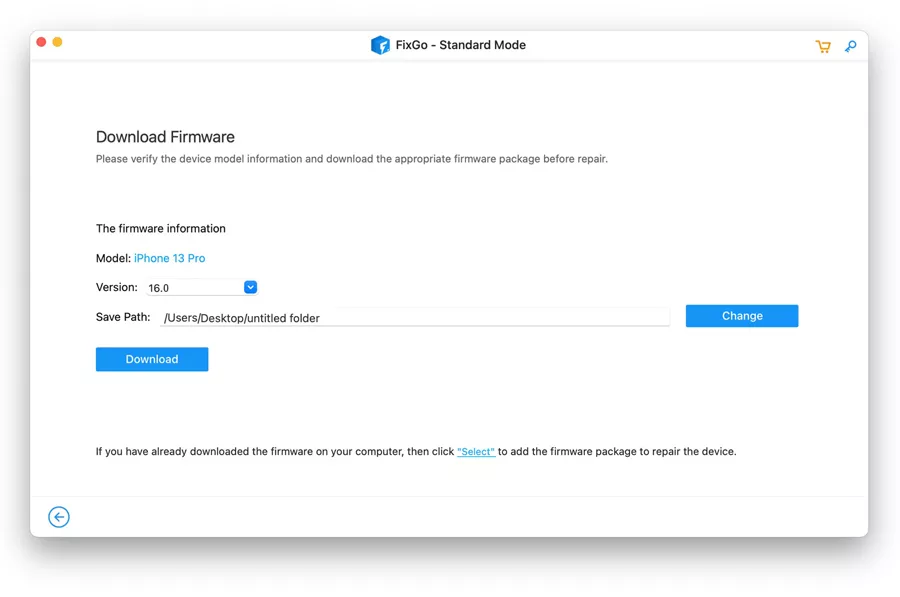
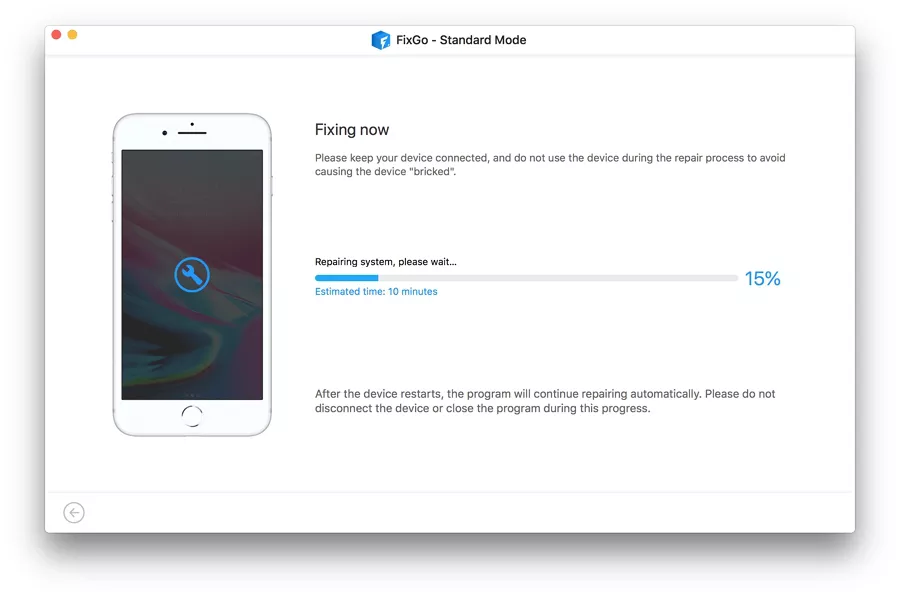
Even if you can get iTunes to work again, there is little guarantee that you will be able to resolve the issue without losing data. So, if you are having problems restoring or updating the iPhone via iTunes, we recommend trying an iTunes alternative that will not cause data loss. One of the best is iToolab FixGo, a third-party solution that allows you to update or restore your iPhone without losing any of the data on the device.
The following are just some of the things it can do;
- This program can fix over 200 of the most common iOS issues including an iPhone stuck on the Apple Logo, blank screen or recovery mode.
- It is the most effective way to prevent data loss on an iPhone or iPad that is not working properly.
- It can also be used to enter and exit recovery mode in a single click
- It is very easy to use; you don’t need any technical expertise to repair the device
To use FixGo to update or restore your iPhone, download and install the program on to your computer and then follow these simple steps;
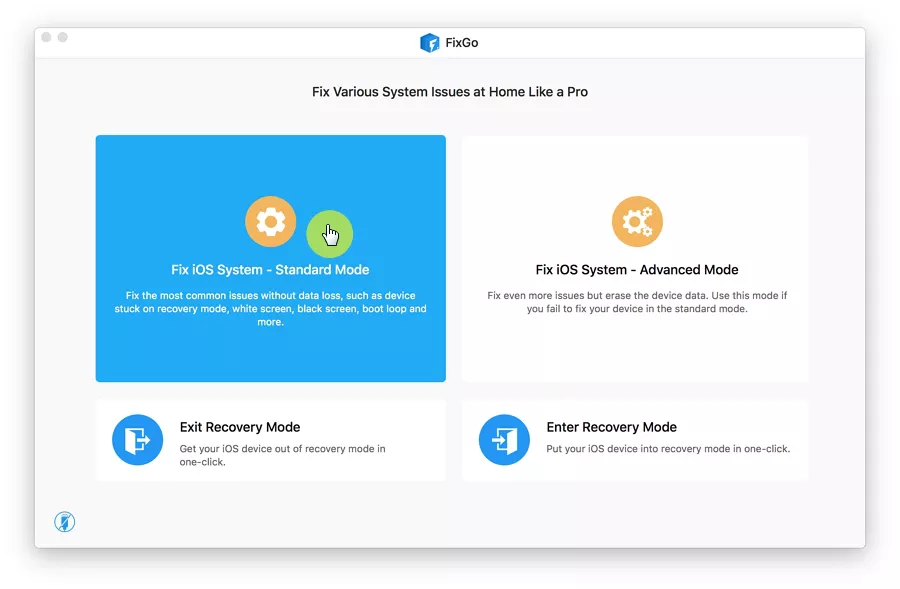
Step 1: Run FixGo and in the main window, click on “Standard Mode”.

5. Use DFU Mode
If the methods above fail to resolve the issue, then you should put your device in DFU mode. But keep in mind that restring your iPhone in DFU mode will delete all the data on your device including the camera roll, contacts, calendar, messages and app settings. Therefore, if you can, always backup your iPhone before restoring it in DFU mode.
Once you have completed the backup process, follow these simple steps to enter DFU mode. Please note that the process outlined below is for iPhone 8 and newer models;
Step 1: Connect the iPhone to the computer.
Step 2: Press and release the Volume up button.
Step 3: Press and release the Volume Down button.
Step 4: Press and hold the Side button and continue to hold the button until the screen goes black.
Step 5: While pressing the Side button, press and hold the Volume Down button. Hold both buttons for at least 5 seconds.
Step 6: Release the Side Button, but continue to hold the Volume Down button until the iPhone appears in iTunes.
Step 7: Release the button and then follow the on-screen instructions to restore the iPhone in iTunes.
6. Restore iPhone with iTunes on another Computer
Since error 9 is a hardware-related problem, it can sometimes be difficult to determine exactly what is causing it. This is why we sometime recommend that you try to update or restore the iPhone using iTunes on another computer. This solution will often work, particularly if the problem is the hardware components on the computer or even the USB connection.

Summary
The ways mentioned in this article may not working for you. But, with iToolab FixGo you can 100% to fix iPhone error 9 issue. Also, you should notice that if you didn’t backup your device then the way such as reset your device will erase all your data. So, choose a right way and solve this problem perfectly.