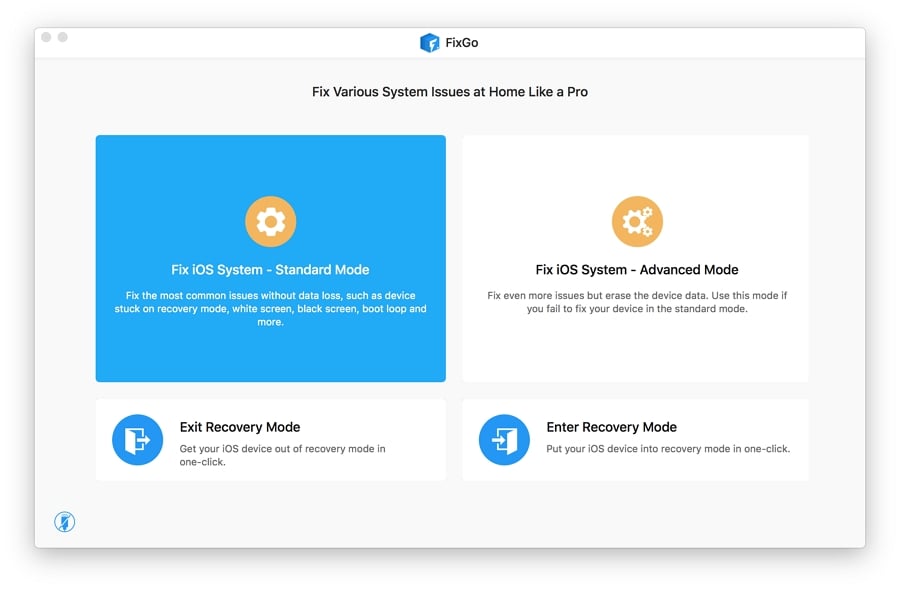
This guide will show you how to use FixGo step by step to fix your iPhone/iPad/iPod touch easily.
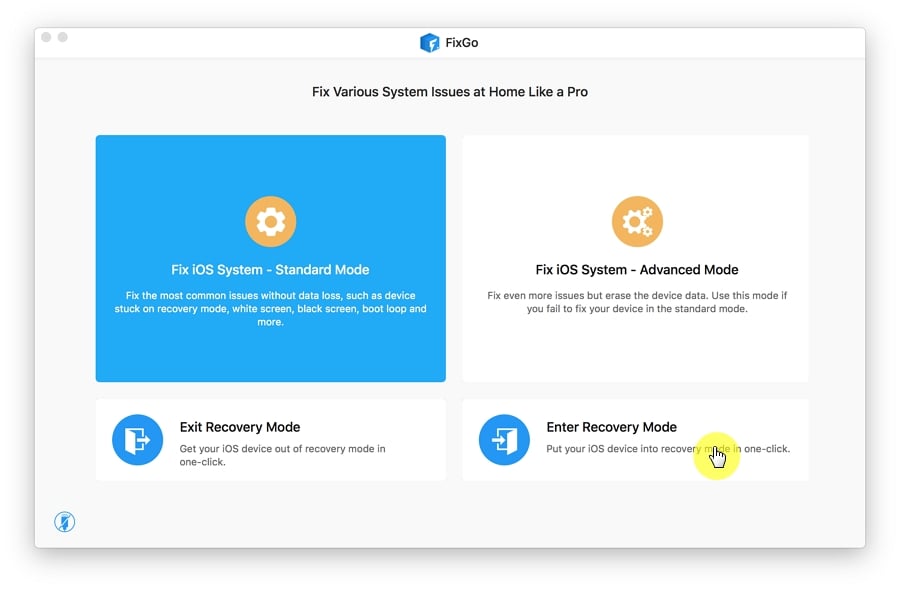
Note: The Standard Mode will fix most iOS system issues without data loss. The Advanced Mode on the other hand will fix the most stubborn iOS issues but will cause total data loss. It is therefore advisable to only choose the Advanced Mode when the Standard Mode fails.
To get started, download and install FixGo onto your computer. After the successful installation, launch it.
You can also watch the video below to know how to get the most of FixGo.
Part 1: Fix iOS Issues in Standard Mode
Select the Standard Mode from the options on the main page.
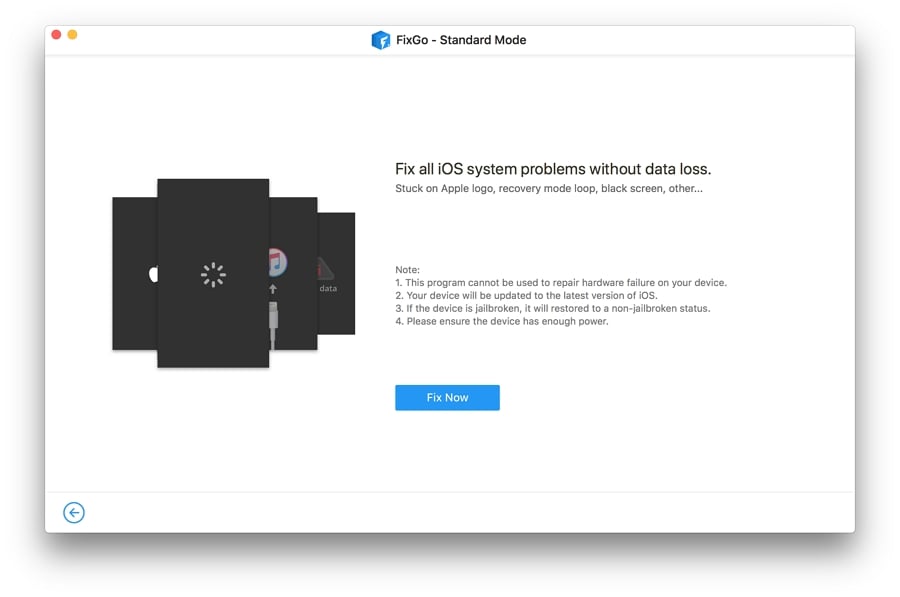
Step 1: Connect the Device to the Computer
Connect the faulty iOS device to the computer using the device’s lightning cable and click “Fix Now” to begin.
If the program fails to detect the device, FixGo will recommend that you put the device in recovery mode and guide you on how to do it.
If the device is still not detected even when in recovery mode, you will need to click “Enter DFU Mode” to put the device in DFU mode.
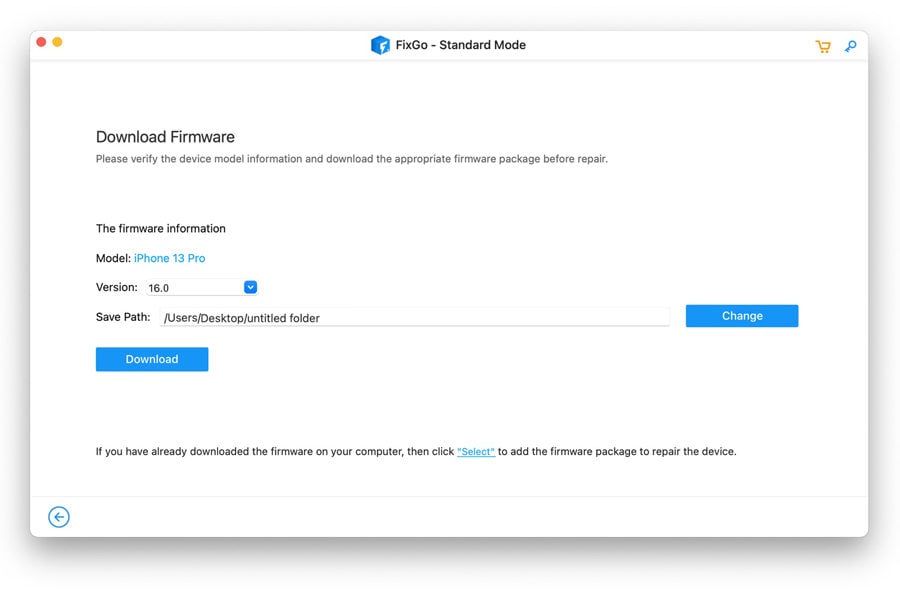
Step 2: Download Firmware Package
In order to repair the device, the program needs to install the latest firmware on the device. Click on “Browse” to select the path for the firmware and then click “Download” to begin downloading the latest iOS firmware for the device.
Note: The firmware file is large so it may take some time to complete. A stable internet connection will speed up the process considerably.
If you had already downloaded the firmware package to your computer, simply click “Select” to manually import the firmware.
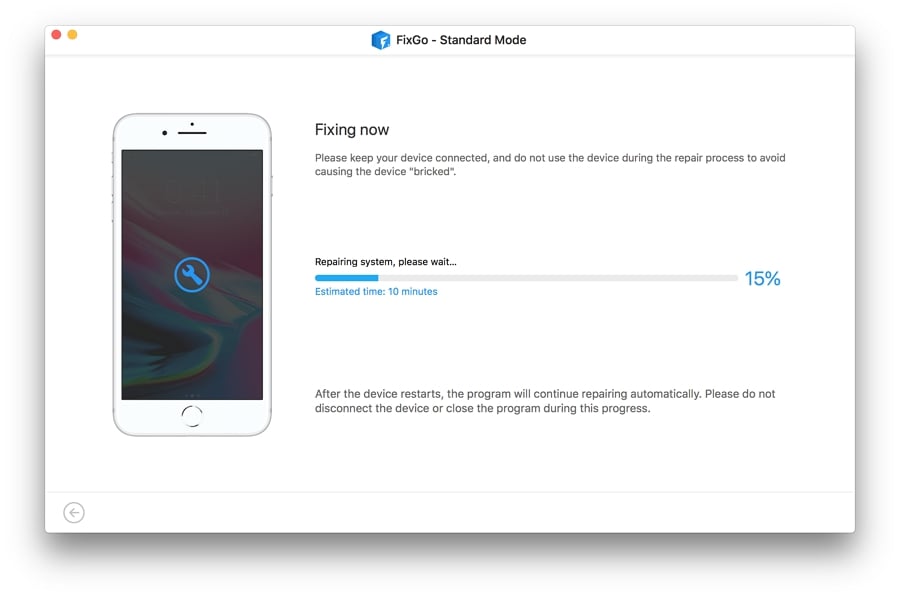
Step 3: Fix the System Issue
Once the firmware has been downloaded to your computer, you are now ready to begin fixing the device. Simply click “Repair Now” and FixGo will immediately begin repairing the device.
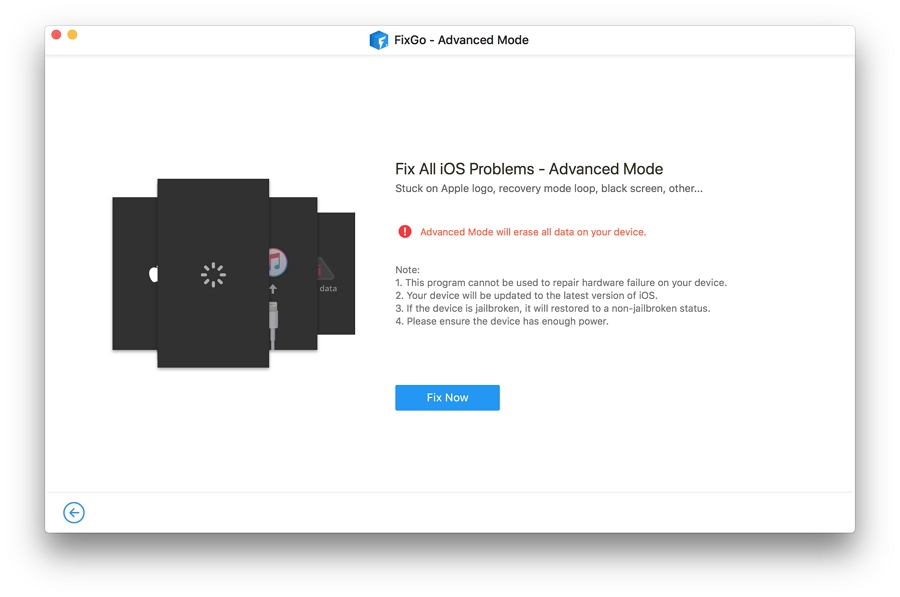
Part 2: Fix System Issues in Advanced Mode
If the Standard mode fails to fix the iOS/tvOS issues, you can try using the Advanced Mode. Keep in mind that while the repair process in Advanced Mode is the same as in Standard Mode, your device will be erased completely.
Step 1: Connect the Device to the Computer
To begin, select the “Advanced Mode” in the home page and then click “Fix Now” to begin the process.
Connect the device to the computer using the lightning cable. The program should detect the device. If it doesn’t, it will guide you on how to put the device in recovery mode.
If the device is still not recognized even in recovery mode, click “Enter DFU Mode” to put it in DFU mode.
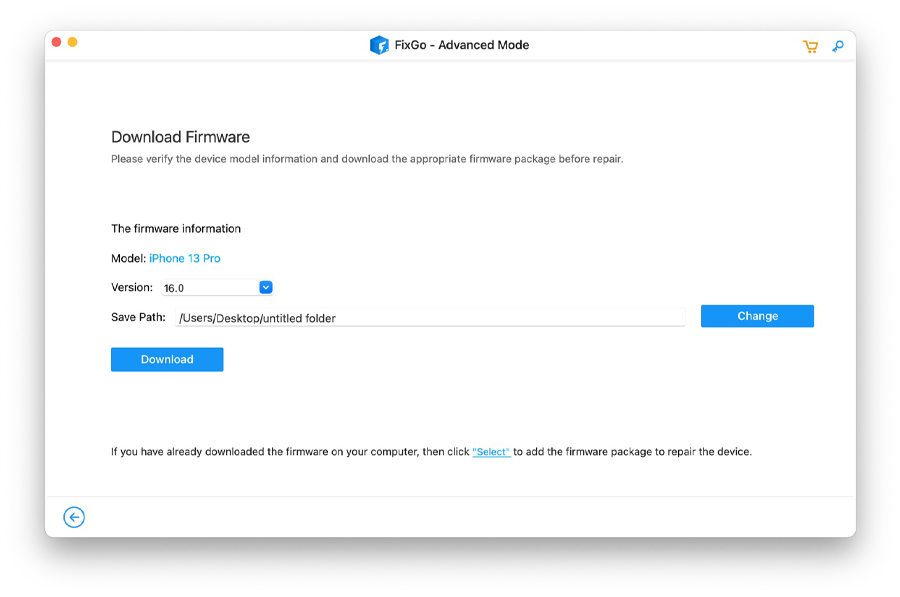
Step 2: Download the Firmware
The next step will be to download the latest firmware for the device. You can click on “Browse” to choose the path for the firmware and then click “Download” to begin downloading the firmware.
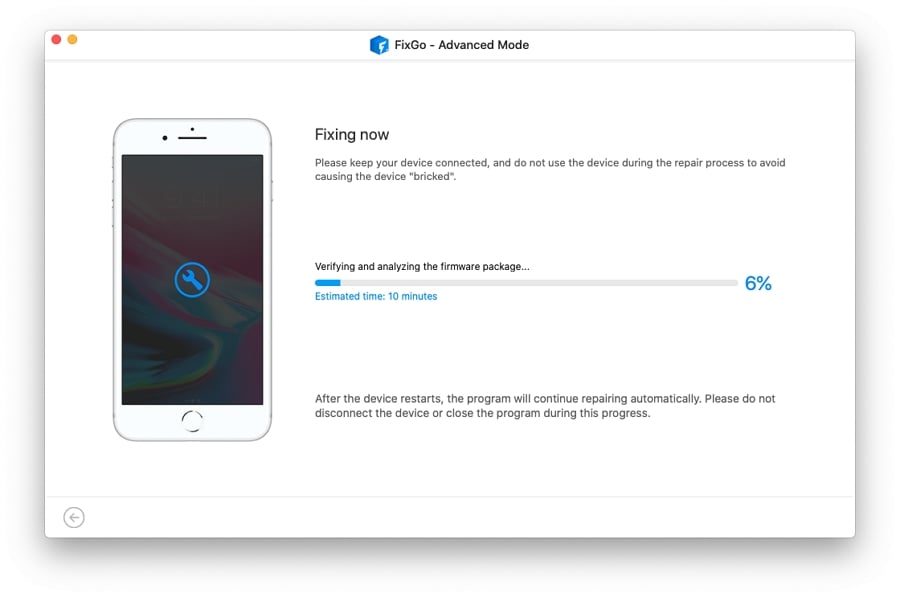
Step 3: Fix the System Issue
As soon as the firmware download is complete, click on “Start Repair” to begin resetting the device. The Advanced Mode will do a more thorough and in-depth repair of the device.
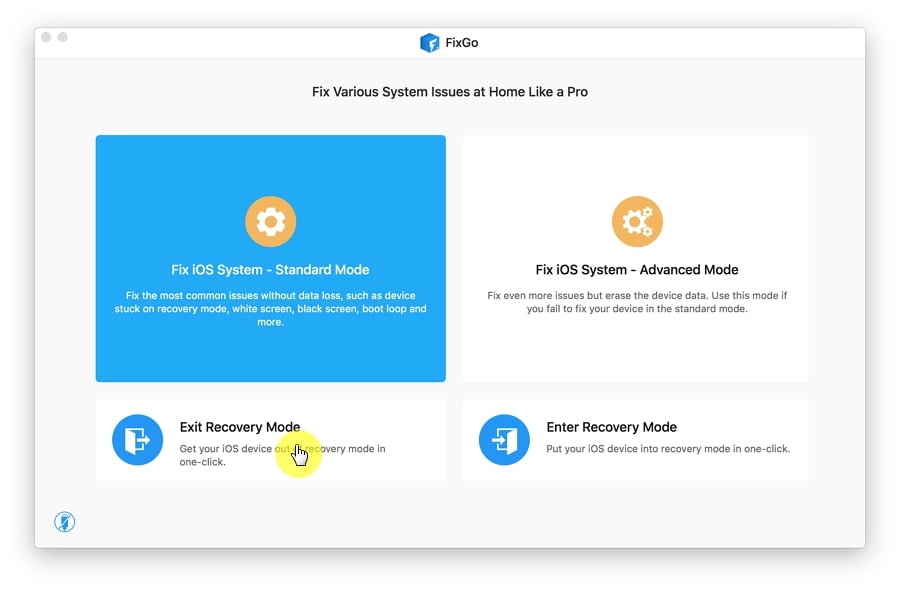
Part 3: How to Enter Recovery Mode
It can sometimes be difficult to put the device in recovery mode, particularly if the home button is not working properly. Fortunately, FixGo allows you to easily put the device in recovery mode in a single click. Just choose the “Enter/Exit Recovery Mode” option in the home page to begin.
Step 1: Connect your Device to a Computer
Connect the device to the computer using USB cable and then tap “Trust” if a message pops up on the device’s screen. Click “Enter Recovery Mode” to begin the process.
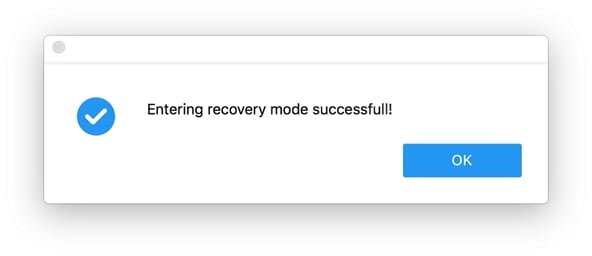
Step 2: Successfully Enter Recovery Mode
Your device will enter Recovery Mode in less than a minute and you should see the “Connect to iTunes” logo on the device’s screen.
Part 4: How to Exit Recovery Mode
As you may well know, it is also not uncommon for iOS devices to get stuck in Recovery Mode, usually, after a software update, restore, or a jailbreak that didn’t go according to plan. With FixGo, you can easily exit recovery more on iPhone, iPad or iPod very easily and without losing any of the data on your device.
Step 1: Connect the device to the Computer
Connect the iOS device to the computer using USB cables. Click on “Trust” if a message pops up on the device. Click on “Exit Recovery Mode” to get the device out or Recovery Mode.
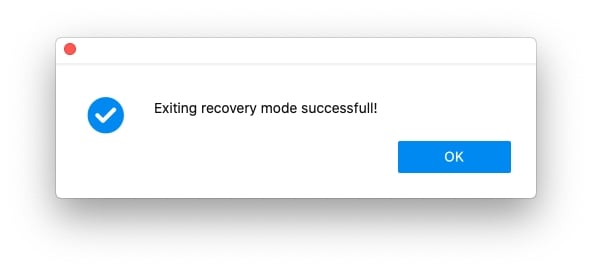
Step 2: Exit Recovery Mode Successfully
The device will reboot and in one minute the iOS device will reboot in normal mode.
i purchased v2.3.4 from bundlehunt spring bundle but the dmg installer gave me 1.3.3? How do I get the newer verssion i purchased without buying again? #6. FixGo 2.3.4 20.1225 iToolab
Hi, Just upgrade your program, This is a lifetime free upgrade.
How to register fixgo ?
Please follow this tutorial: https://itoolab.com/guide/how-to-register-itoolab-software/
My children bought me a second-hand iPhone XS as a present.
I purchased “Fixgo” and ran to delete the iCloud Password in both the General and Advanced modes.
I have been UNSUCCESSFUL in removing the iCloud Security Lock.
Please advise if the Fixgo program can, as advertised, successfully remove the iCloud Security Lock program, and if so how (instructions)
Hi Chris, we highly recommend you can try UnlockGo – iCloud Bypasser(https://itoolab.com/unlock-icloud/) to remove the iCloud Password. Whether you forgot your Apple ID or bought a second-hand phone, UnlockGo – iCloud Bypasser can help you activate your iPhone easily.
It’s very good
Thank you so so much iOS 16
i had locked my phone up and it started saying iPhone unavailable.
Hi laquatos, iToolab UnlockGo can unlock your unavailable iPhone.
Hi thery i went to tell i have account in unlockgo i went to trife the account in to the fixgo plase sen me a massage OK
Hi Abdul, can you please describe your problem in detail? I didn’t get your meaning.
nice
ill see if itr works