Recover Lost Data from Android Devices without Root
So, you accidently deleted your photos or other data on Android devices? Have no idea how to get them back? Here, you can easily restore the lost files with RecoverGo for Android, no matter the data stored in internal memory or SD card. Let’s get started.
You can also check the video guide here:
Step 1. Connect the Android device
Install and launch RecoverGo for Android and connect your device to computer via a USB cable. Once connected, select “Recover Deleted Data from Device” to move on.
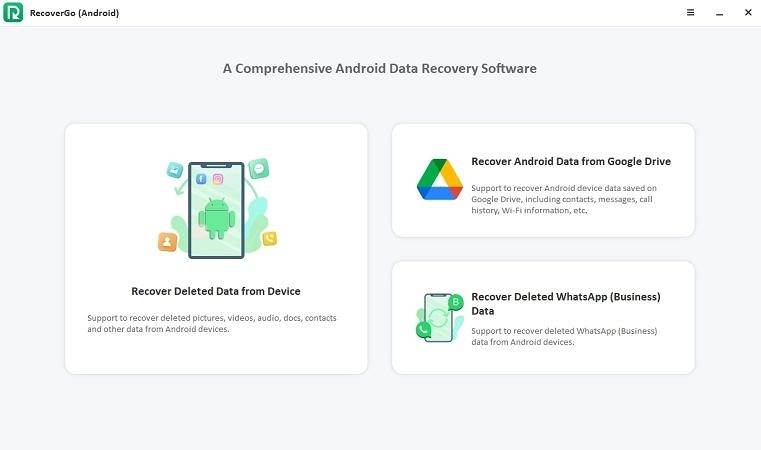
Step 2. Get into USB debugging mode
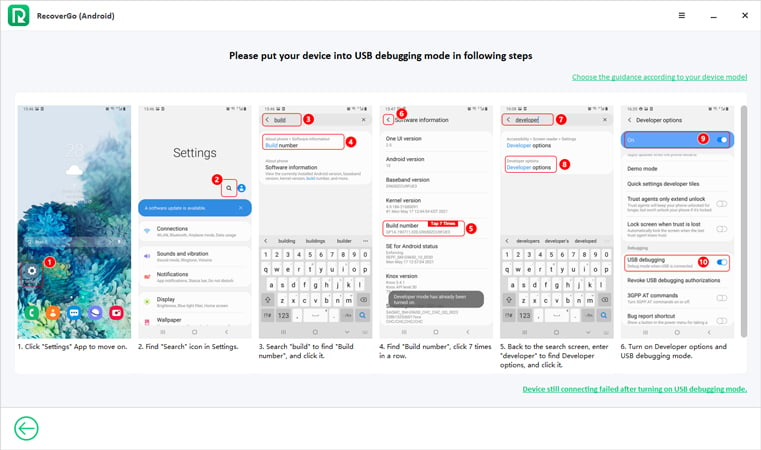
Now, you should follow the on-screen steps to put your Android device into USB debugging mode.
- After connecting device, click on USB charging option and then select Transfer File option.
- Enter “Settings” and search “build number” and click it.
- Next, tap Build number 7 times continuously and back to the search screen.
- Now, search developer options, turn on it and USB debugging mode.
![enable usb debugging recovergo android]()
Next, you will receive a message that need you to allow USB debugging on your Android phone, click “OK” to move on.
If you didn’t receive the message, please click “Show Again” on the software. If the notification still fails to appear please turn on USB debugging option again.
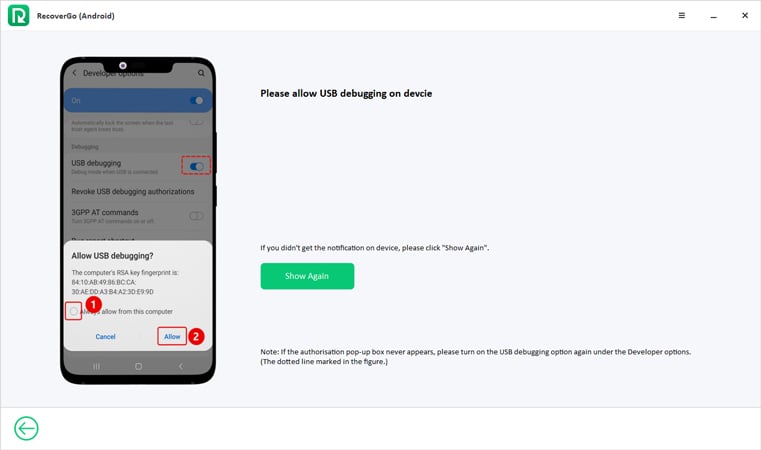
Step 3. Select the file type you need
All the supported file types will be displayed, select the file and click “Scan” button to start scanning. All file types will be selected by default.
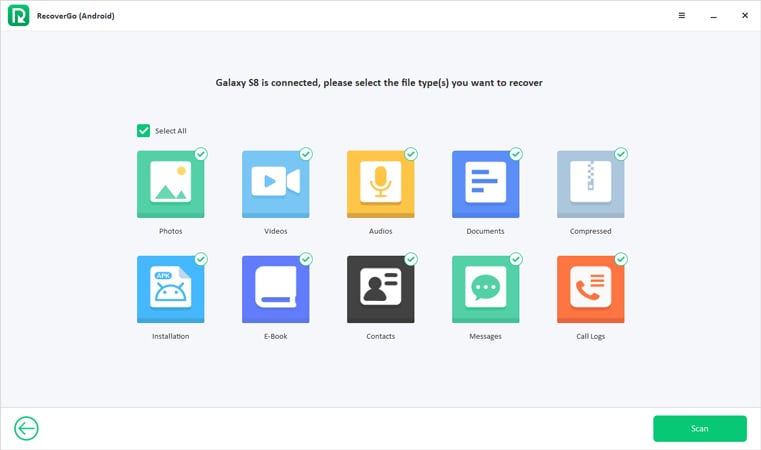
Step 4. Start the scan process
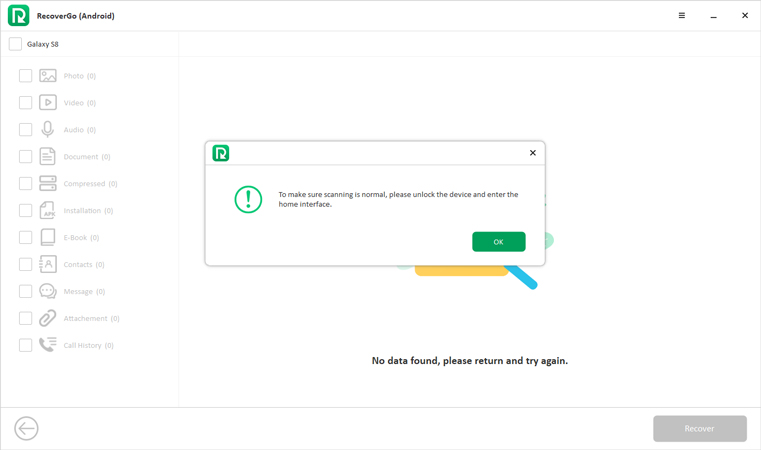
Now, select the files you want to start the scan process. The scanning process will take a few minutes to finish. For the scanning process to go smoothly, you should leave your phone in an unlocked state until the scan is complete.
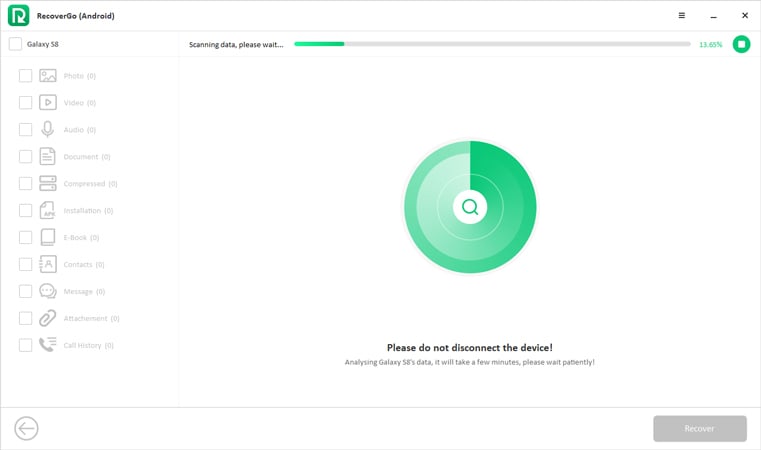
Otherwise, you will get this warning notification.
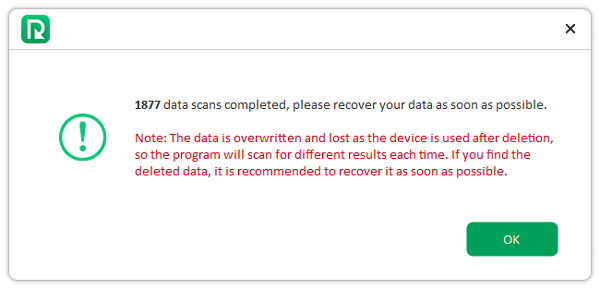
Once completed, you will see the amount of data that RecoverGo scanned for you.
Step 5. Recover Lost Android Files
Now, you can find the data you want to recover in the corresponding file type directory. You can click your device name to select all the files. You can also select the specific file one by one.
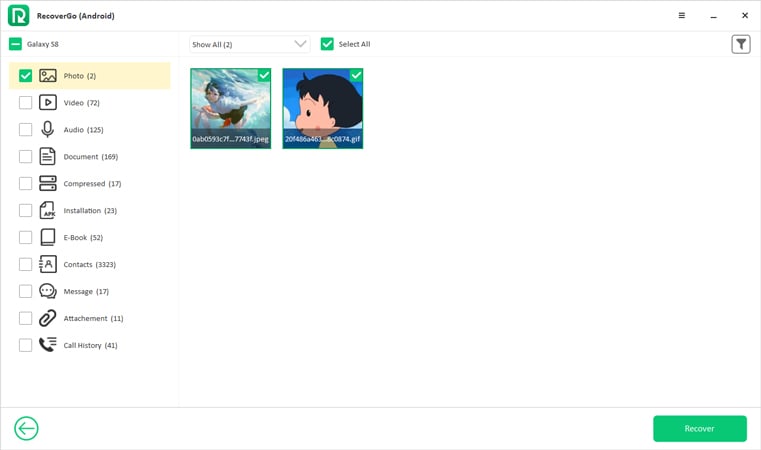
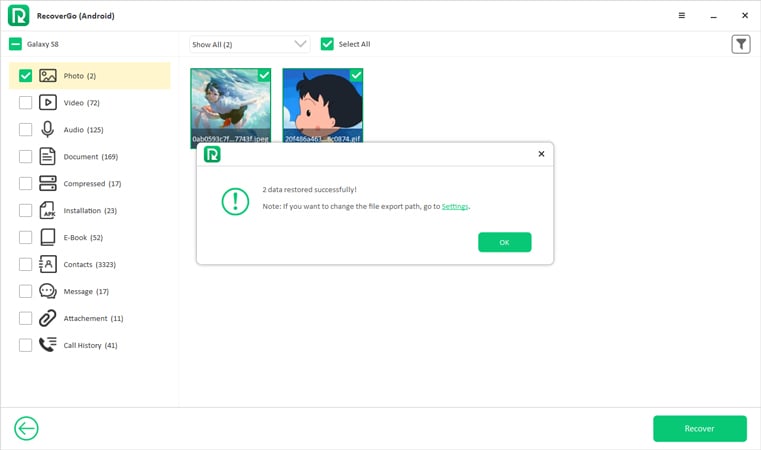
After you have determined the data you want to recover, click “Recover” button to move on. In a while, your files will be restored to your computer.
Recover Android Data from Google Drive
Delete files from Android device and want to recover from Google Drive? RecoverGo (Android) works perfectly in this case. What’s more, you can view backup details and select certain files including contacts, meassages, call logs, Wi-Fi, ect.
You can also check the video guide here:
Step 1. Launch RecoverGo (Android) and select recover mode
Download and launch RecoverGo (Android) on your PC, then select “Recover Android Data from Google Drive” to move on. With this function you can download and view backup data directly.

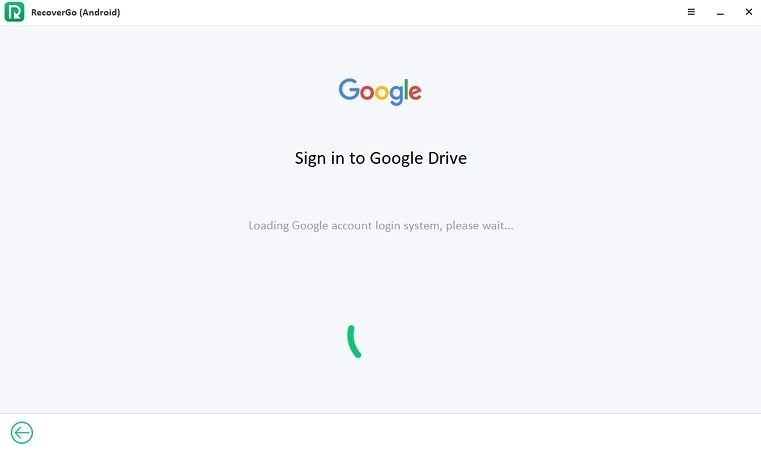
Step 2. Sign into Google Drive account
Log in to the Google Drive account which you have the backups. Make sure you are logged into the correct account and software will analyze the backup.
Step 3. Select the file type to download
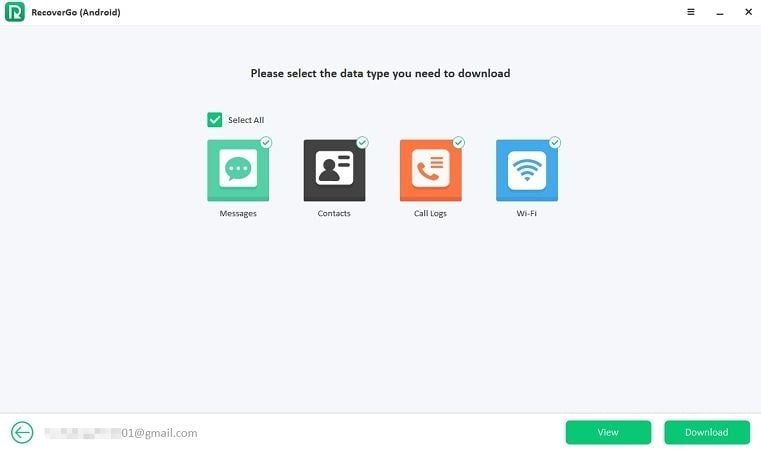
After logging in, all the supported file types will be displayed and checked in default, also you can select file type one by one. Then tap “Download” to continue.
Step 4. Start the scan process
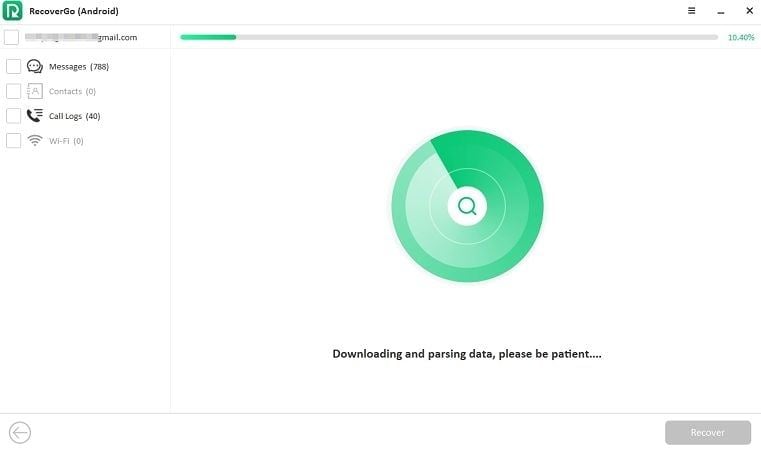
It will automatically analyze the most recent backup and start the scan process. For the scanning process to run smoothly, please keep your network stable.
Step 5. Select data and recover
After the scan process finished, all the data will be listed. You can preview the details and choose data to recover.
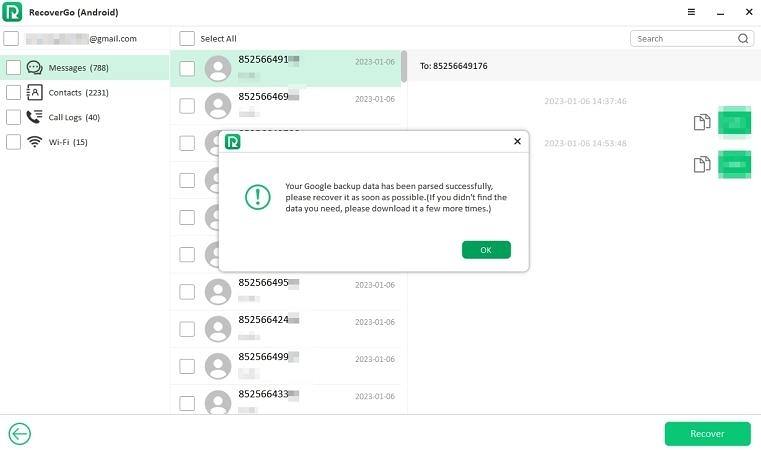
You can select the complete type of file or select files one by one. Click on the upper left Google account email, all the data will be checked on, also you can use the search bar on the upper right to search a certain file.
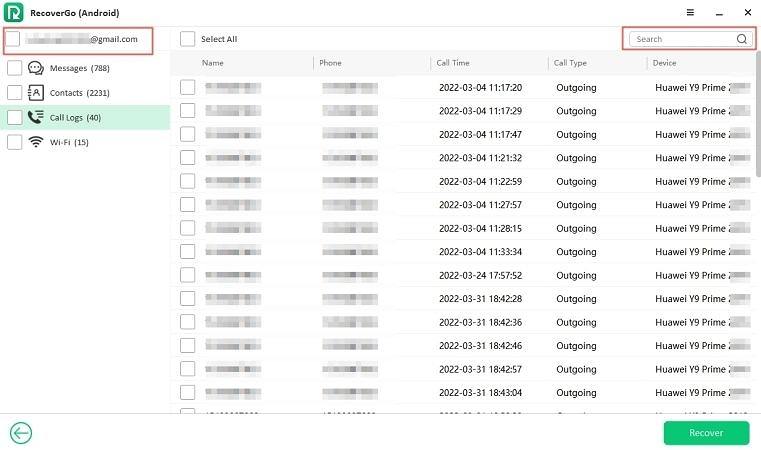
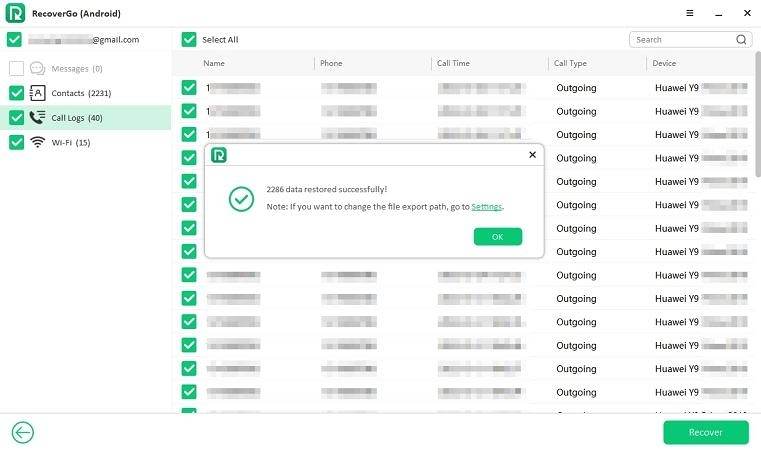
After you have determined the data you want to recover, click “Recover” button, data will be restored to your PC directly.
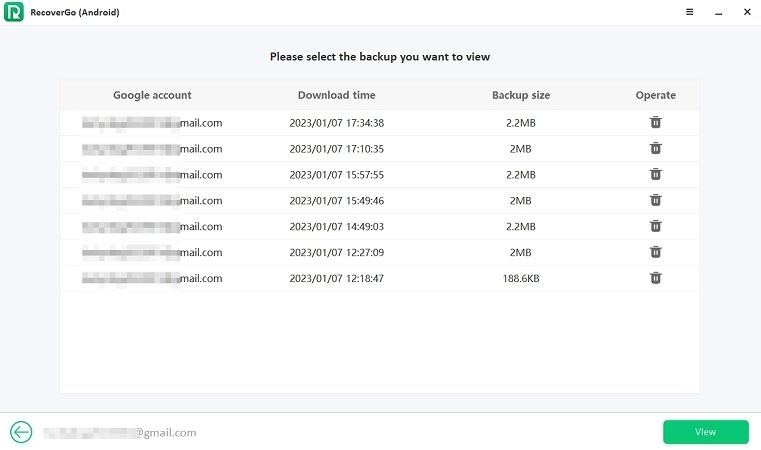
If you want to view downloaded Google Drive backup, please go back to below interface and click “View” to see the backup details.

When you see the downloaded backup, select the backup you want to preview and tap “View” button.
Recover Deleted WhatsApp Data without Backup
You can easily recover deleted WhatsApp messages from Android devices with RecoverGo (Android). What’s more, you can also recover more than 10 file types from WhatsApp such as attachments, stickers, voice note, etc. Check the step-by-step guide to recover WhatsApp data.
You can also check the video guide here:
Step 1. Connect Your Android device
Launch RecoverGo (Android) and select the feature “Recover Deleted WhatsApp (Business) Data”, click on “Recover Deleted WhatsApp Data”.

Step 2. Enable USB debugging
You should also enable USB debugging on your device to allow RecoverGo (Android) to access your device and find the deleted WhatsApp data.
Step 3. Scan deleted WhatsApp data
Now, you will see the supported data on the interface, click “Scan” button to move on.
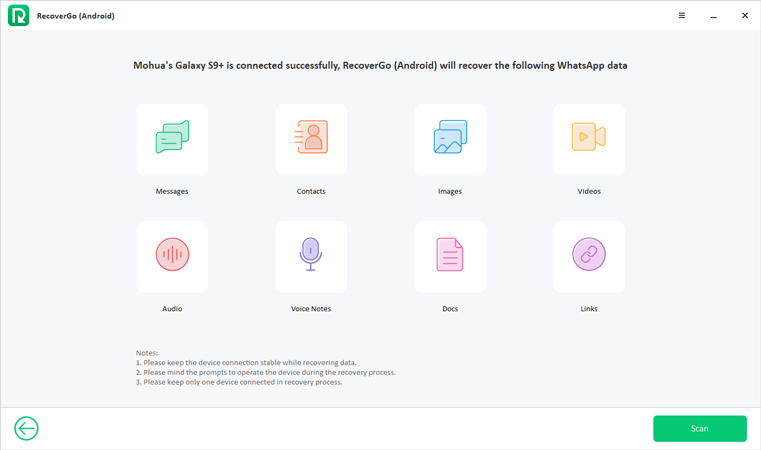
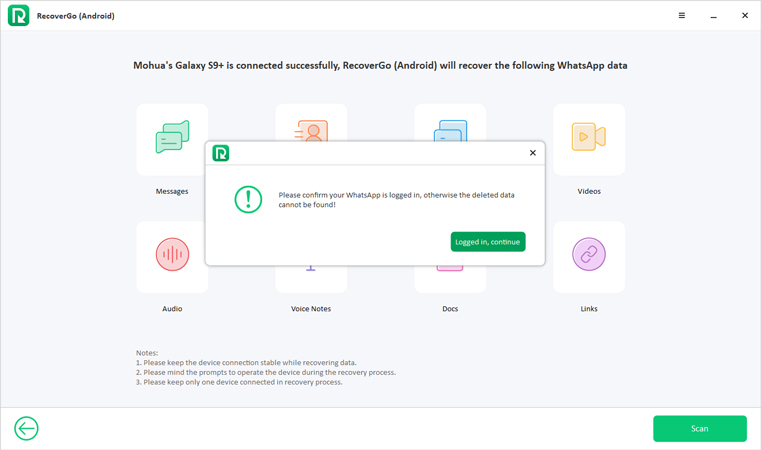
Before scanning, RecoverGo (Android) will remind you to log into your WhatsApp account.
Step 4. Backup WhatsApp data
Now, you need to back up your WhatsApp data by following the on-screen steps and then click “Backed up, continue”.
- Click more info logo > Settings > Chats > Chat backup > Back up to Google Drive (Never) > BACK UP.
![backup whatsapp data recovergo android]()
Step 5. Activate and restore WhatsApp account
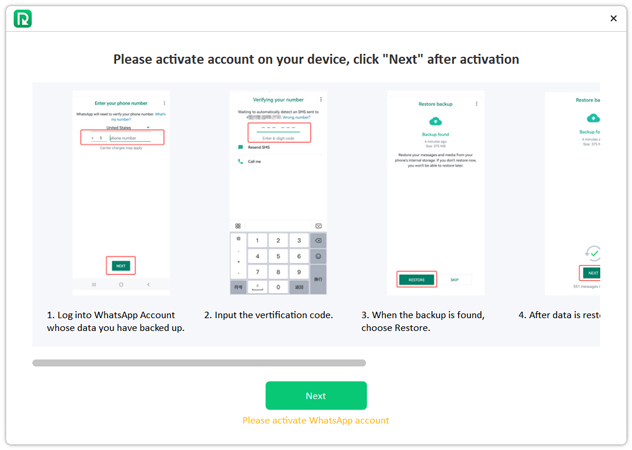
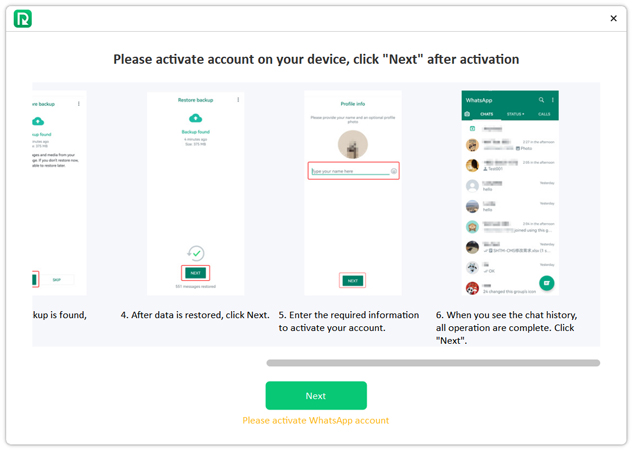
You should activate your WhatsApp account on the following steps:
Enter your phone number to get activation code.
- Type a new name and click Next to finish the activation and restore.
![activate restore whatsapp recovergo android 1]()
![activate restore whatsapp recovergo android 2]()
Step 6. Recover deleted WhatsApp data
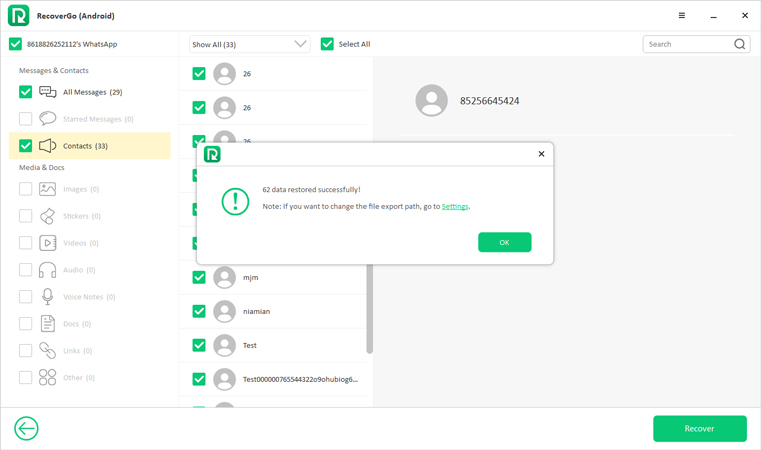
Once the scanning process is complete, click “OK” to select the files you want to recover.
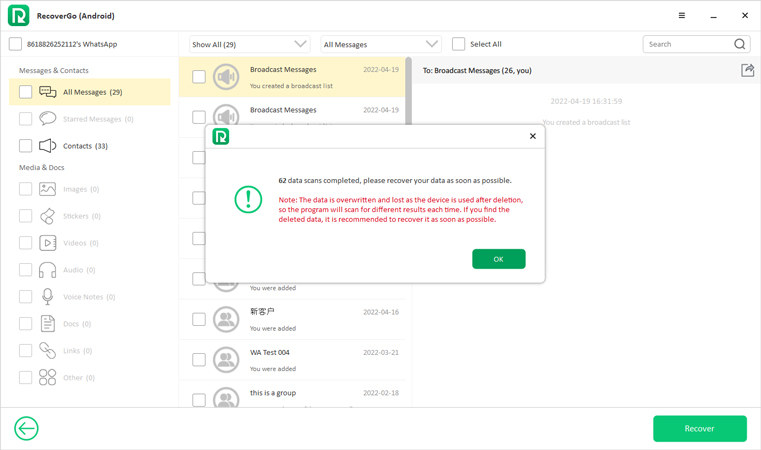
You can select all the data at once by clicking the options box in the upper left corner, you can also select the data one-by-one and click “Recover” to finish the steps.
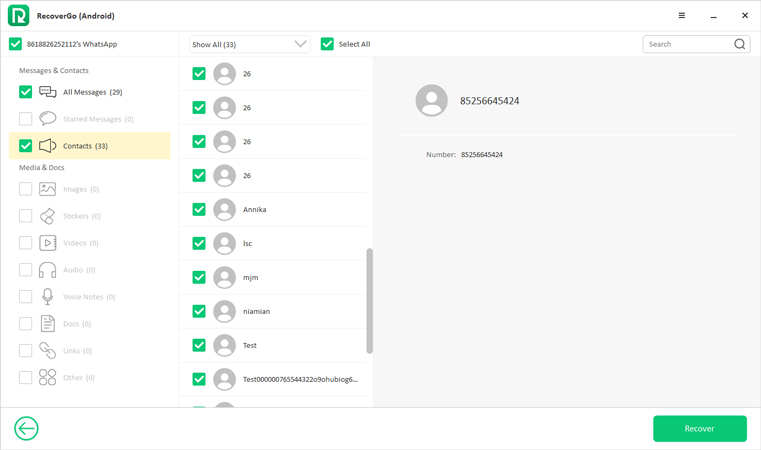
Data will be restored to your computer, you can check the Recover folder to see the files.
Recover Deleted WhatsApp Business Data without Backup
When you lost all your business contacts and important business messages, you can always trust RecoverGo (Android) to get your deleted WhatsApp Business data back.
Step 1. Download and Install RecoverGo (Android)
After installing RecoverGo (Android), launch it and connect your device. Select the feature “Recover Deleted WhatsApp (Business) Data”, then click on “Recover Deleted WhatsApp Business Data”.

Step 2. Enable USB Debugging on Android
Just like other two feature, you should also enable USB debugging on your Android device. Follow the on-screen introductions to move on.

Step 3. Scan WhatsApp Business Data
In this screen, you will see the file types and then click “Scan” option to go on.
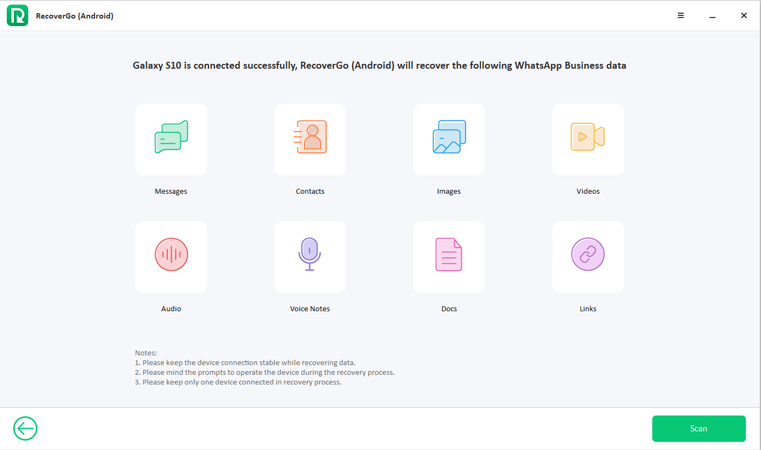
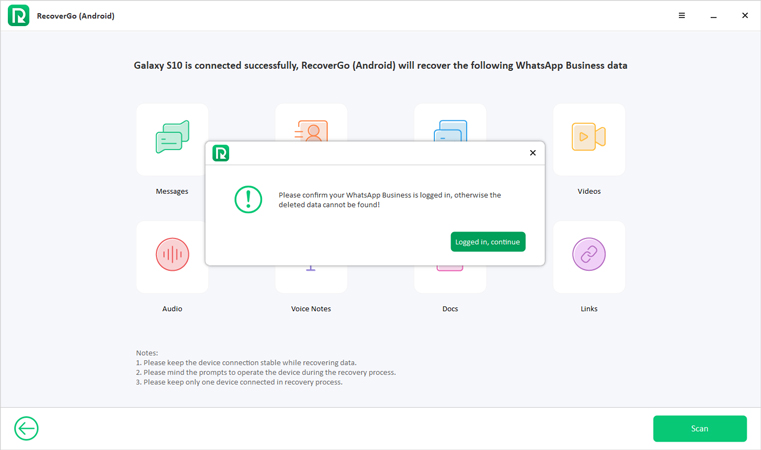
You should also log into WhatsApp Business account before scanning.
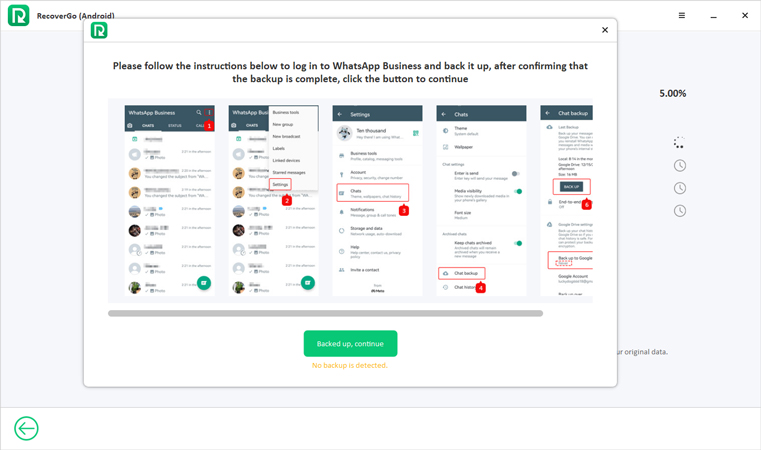
Step 4. Backup WhatsApp Business Account
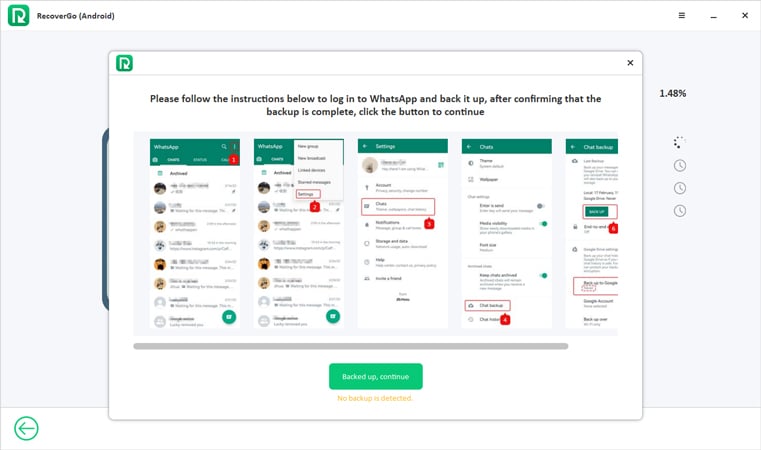
Next, follow the steps on interface to backup WhatsApp Business account to continue.
Step 5. Activate and Restore WhatsApp Business
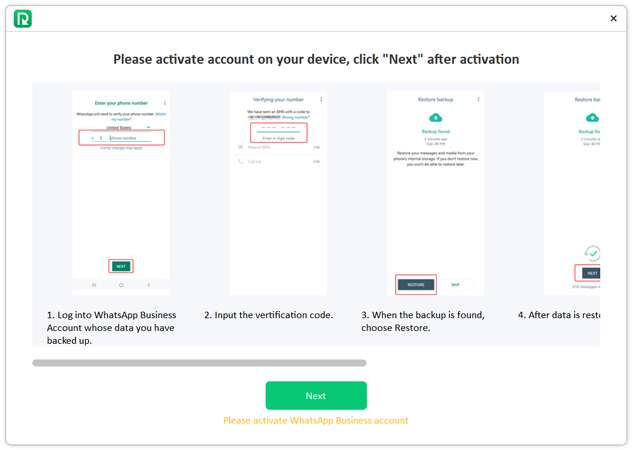
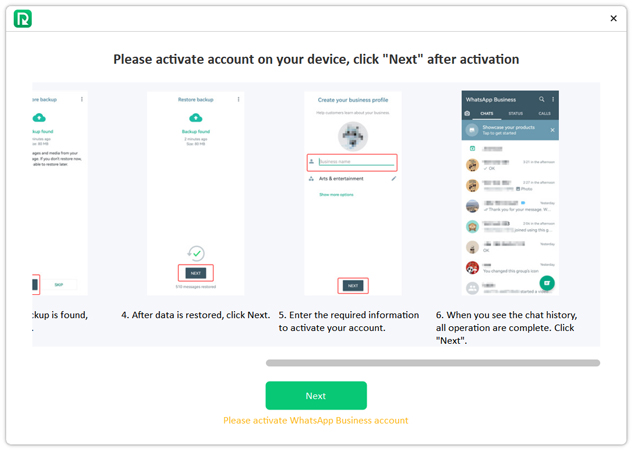
You should also activate WhatsApp Business and restore the backup with the on-screen steps.
- Enter your phone number to get activation code.
- Choose Restore > Next to move on.
- Type a new name and click Next to finish the activation and restore.
![activate and restore whatsapp business recovergo android 1]()
![activate and restore whatsapp business recovergo android 2]()
When the scanning is done, click “OK” to recover your data.
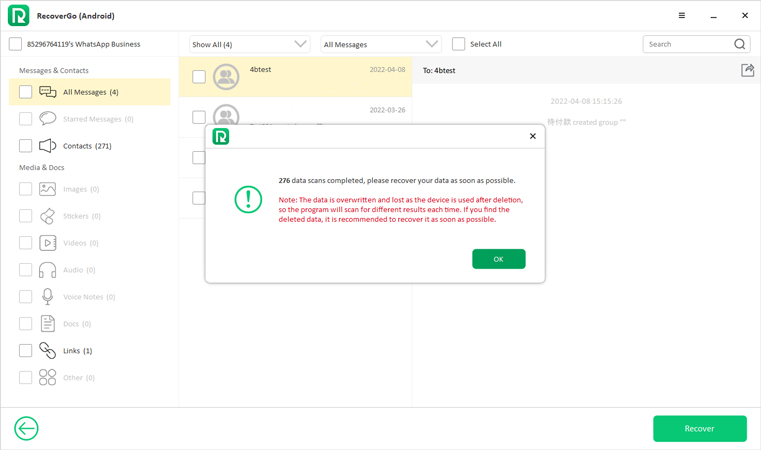
Step 6. Restore WhatsApp Business Data
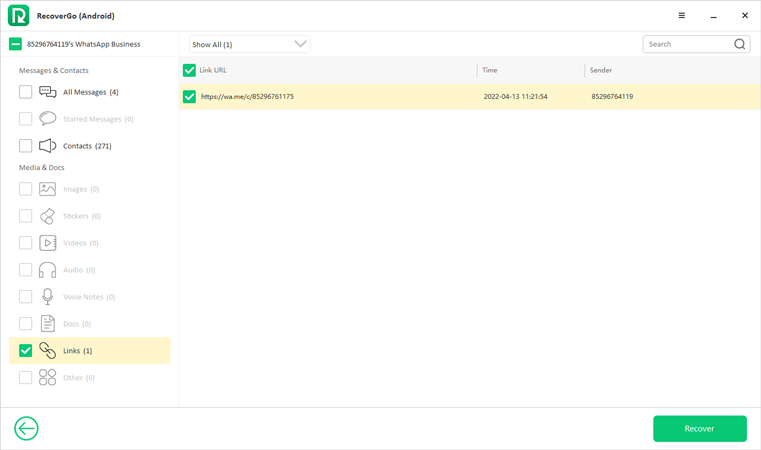
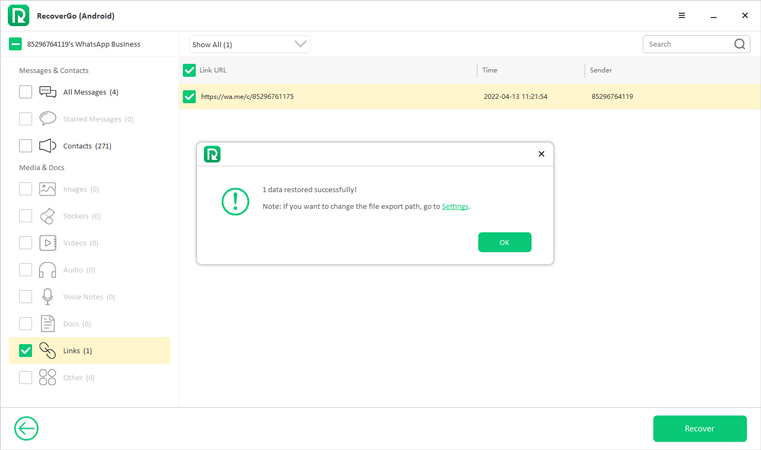
Select the specific data or select all your data and click “Recover” button to restore the data to your computer.



please my privacy passwords reset
Hi Aryan, iToolab UnlockGo Android Unlocker can help you remove the privacy password. You can visit the official page to learn more information.
want into my Samsung galaxy s24fe