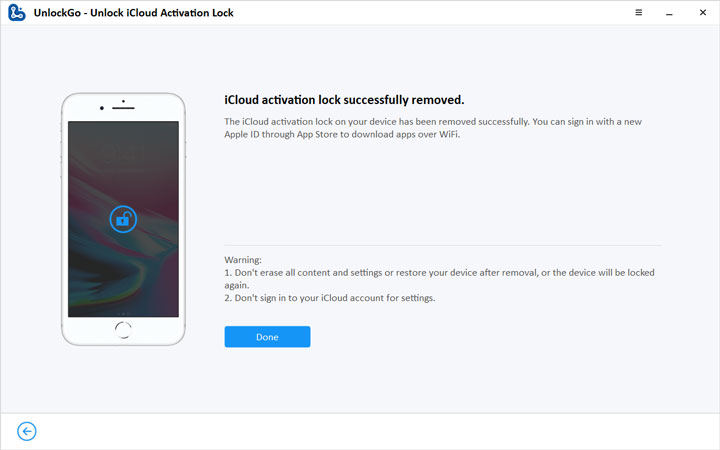
Jailbreaking iOS device on Windows is quite difficult until we found this new way. You are allowed to jailbreak iPhone without Ubuntu now! And the success rate is up to 99%. iToolab’s products use this jailbreak tool for all features that involve jailbreaking, such as UnlockGo, SIMUnlocker. The steps to jailbreak are the same on each tool.
Also Read: How to Jailbreak iPhone on Mac with Checra1n Easily.
Before Jailbreaking iPhone on Windows
Unlike Mac, there are some requirements for jailbreaking iOS devices on Windows. Please make sure:
- Windows 7 or later, 32 or 64 bit.
- USB flash drive with a capacity of 50 MB or more.
Supported device and iOS versions:
- A10/A10X devices: iPhone 6/6s/7/7Plus/ running iOS 14.x versions (Support iOS 14.7.1 Now).
- A11 devices: iPhone 8\8 Plus\X running iOS 14.x versions without screen passcode or FMI password.
- iPad (2018, 6th generation)/iPad (2019, 7th generation), iPod touch (2019, 7th generation).
- iPhone 5s users are suggested to use Mac jailbreak the device, MacOS version 10.13-10.15.
Step-by-Step Guide: How to Jailbreak iPhone on Windows
Now, follow the below tutorial to jailbreak iPhone on Windows. You can also check the video guide below:
Step 1. Download and Install iToolab’s Software
Download and install iToolab’s software on your computer, then connect your iPhone to computer with a USB cable. Next, select the feature that need to be jailbroken. If your iPhone is no jailbroken, iToolab will auto download the jailbreak tool for you.
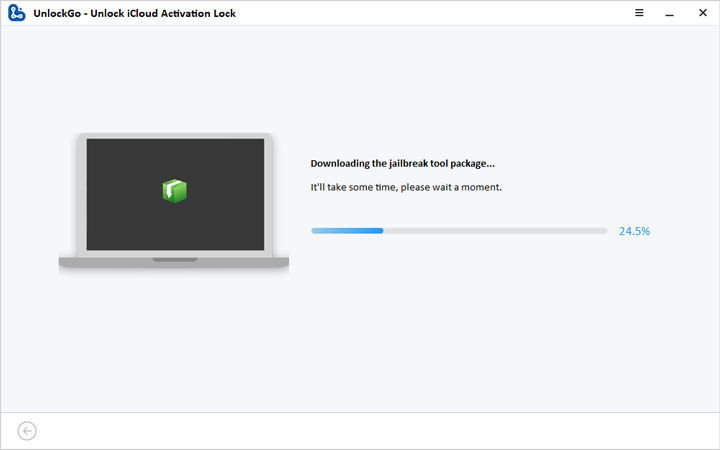
Step 2. Create A USB Boot Disk
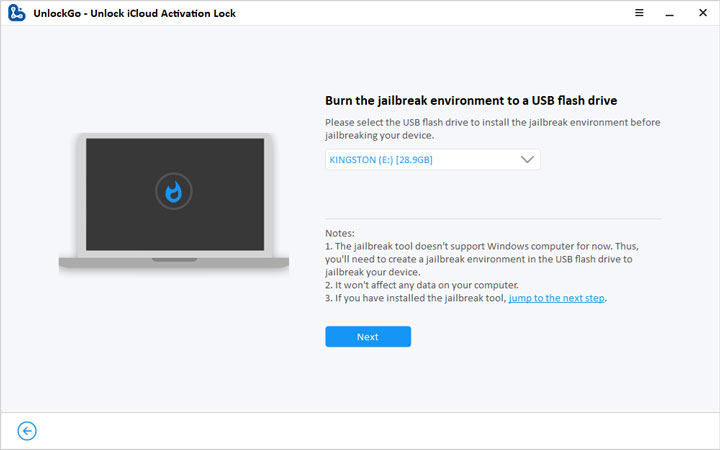
Once the jailbreak tool downloaded on your computer, plug your USB flash drive to the pc. Now, select your USB and click “Next”. If you already made a USB boot disk, click “please check the next step” to go on.
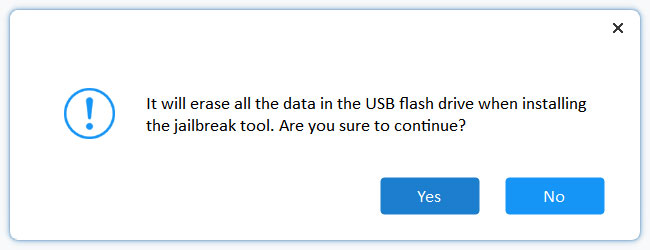
Note:During the process, a warning window will pop-up to remind you that installing the jailbreak tool will erase your USB data. Click “Yes” to continue.
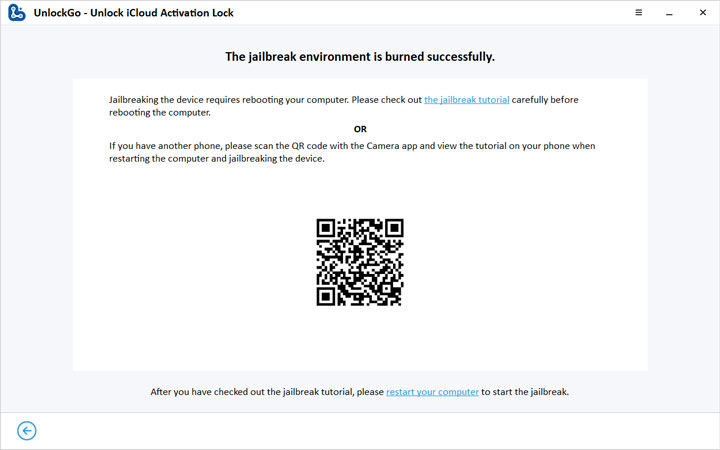
Now, the jailbreak tool will be burned to your USB flash drive. If you have another device, scan the QR code to check the tutorials. It is more convenient for you to follow the steps.
Step 3. Boot into the jailbreak environment
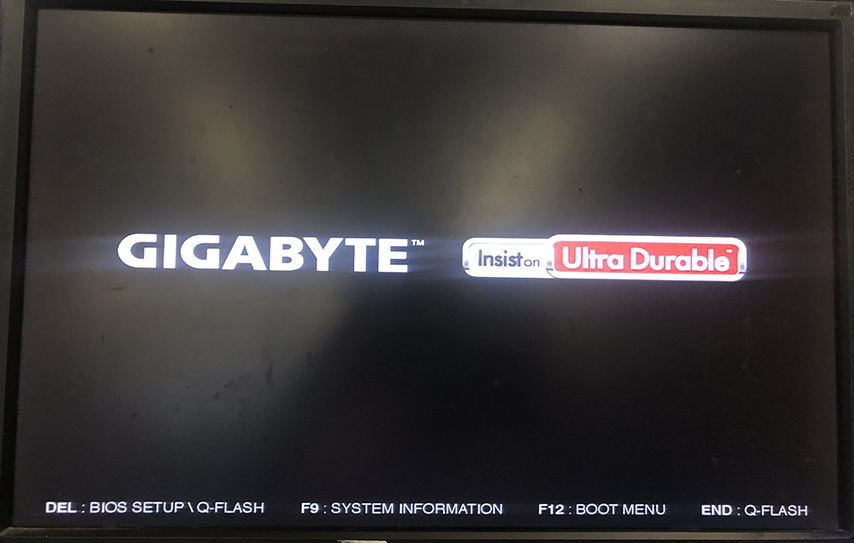
Reboot your computer and keep pressing F12 when the startup screen appears. Then, you will get into Boot Menu.
Note:
1. F12 applies to most computer models. If not working, please check the following “Boot Menu” shortcuts.
2. Do not use bluetooth keyboard or it will cause enter boot menu fail.
| Boot Shortcut Key | Desktop Brand | Laptop Brand | Motherboard Brand |
|---|---|---|---|
| ESC | Dell | ASUS, Sony | MAXSUN, UNIKA, SUPOX, Spark, SOYO, EPOX, UNIKA, Jetway, J&W, Colorful, ECS, SOYO, FOXCONN |
| F8 | ASUS, BenQ | ASUS, YESTON, J&W | |
| F9 | HP, BenQ | BIOSTAR, GUANMING | |
| F10 | ASL | ||
| F11 | MSI | MSI, ASRock, ONDA, Colorful, ECS, Gamen, Topstar |
|
| F12 | Lenovo, HP, Acer, Hasee, eFound, THTF, Haier |
Thinkpad, Dell, Lenovo, TOSHIBA, Samsung, IBM, Acer, Hasee, Haier, eFound, THTF, GIGABYTE, Gateway, eMachines |
GIGABYTE, Intel, Cthim, SOYO, FOXCONN, Gamen, Topstar |
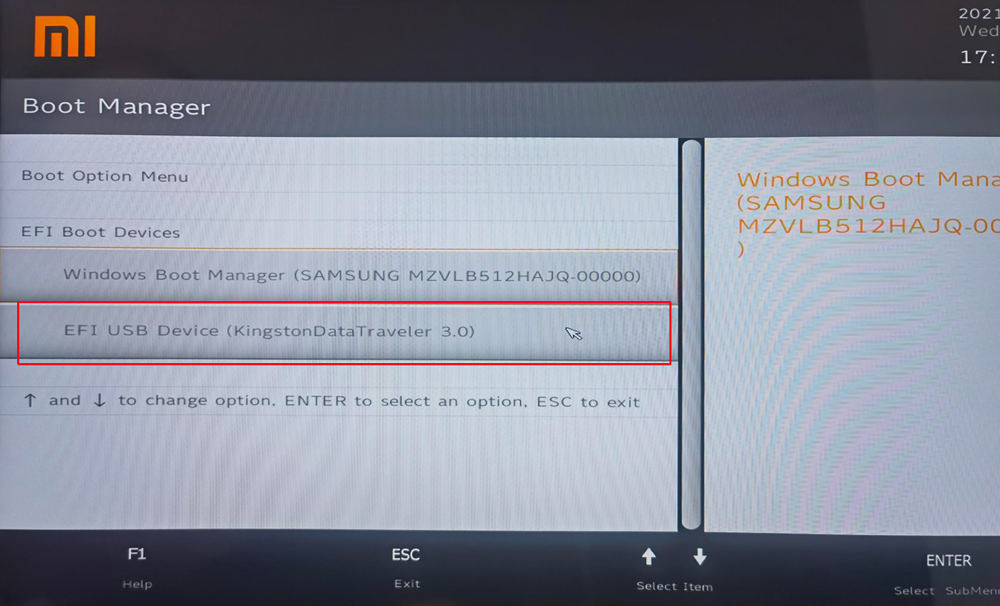
In the startup window, select your USB flash drive using the arrow keys and hit Enter to confirm it.
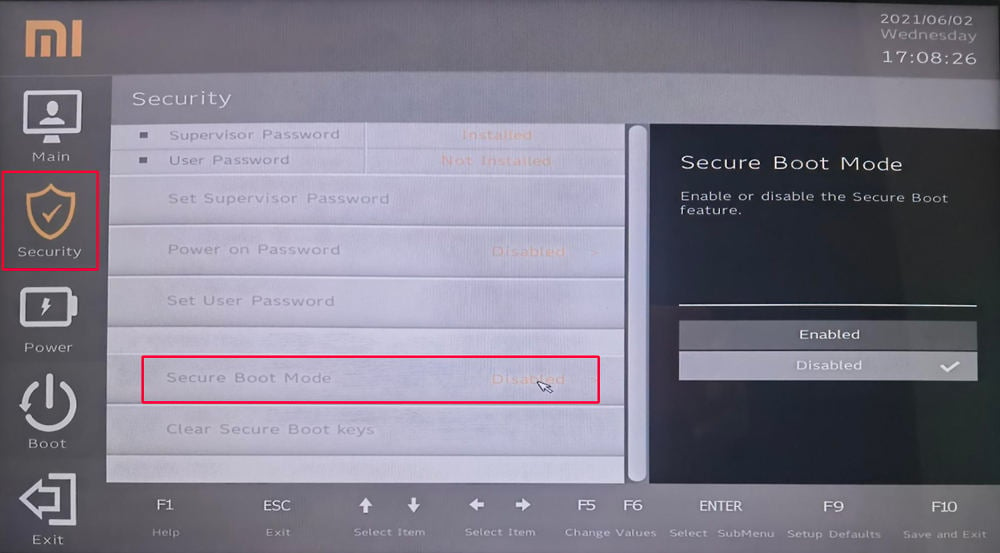
If there is no selection, please select “Security” > “Secure Boot Mode” > “Disable” by using arrow keys.
Next, select “Boot” option on the left box, and choose “EFI Boot Devices” > “EFI USB Device(with your usb name)” and hit “Enter”.
Step 4. Jailbreak iPhone in the jailbreak environment
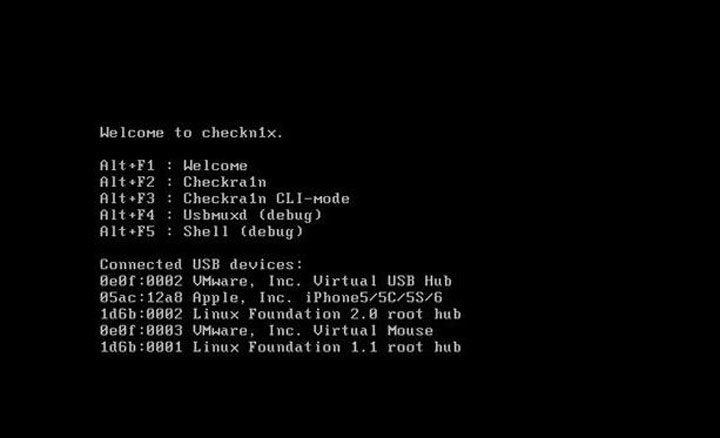
Now, you will go the below screen, press “Alt” + “F2” to enter the Checkra1n screen.
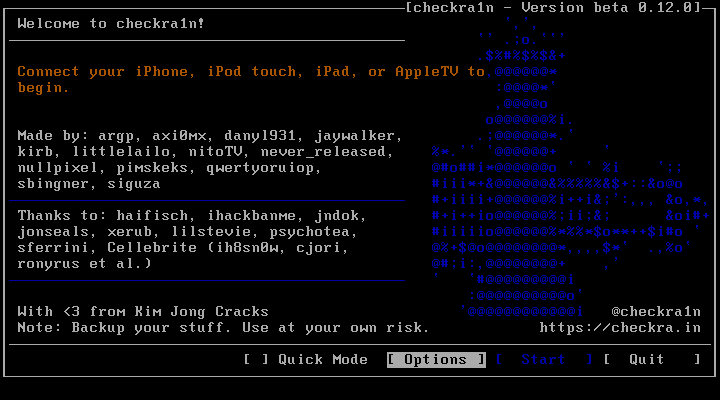
Then, you will get into jailbreak environment, still using the arrow keys to select “Options” and press Enter to set jailbreak tool.
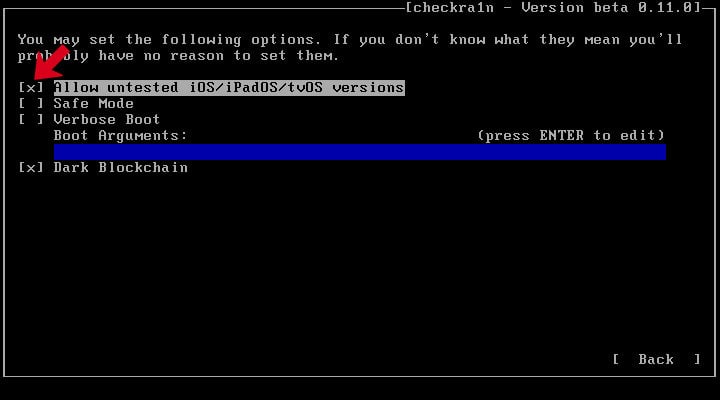
In the next screen, choose “Allow untested iOS/iPadOS/tvOS versions” using arrow keys and press Enter.
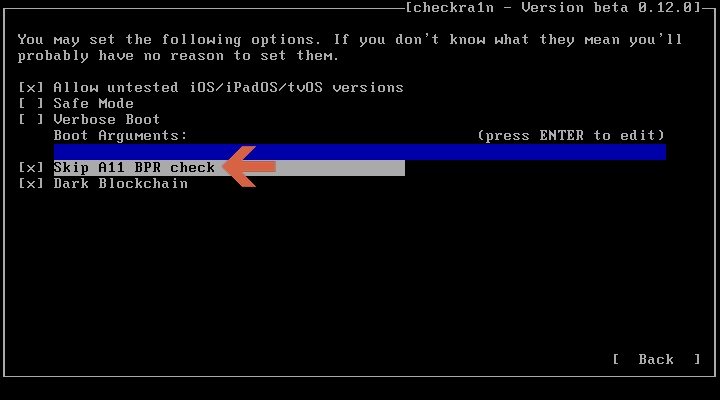
Note: For iPhone 8/8P/X with iOS 14 version, an option “Skip A11 BPR check” will appear, select it and press Enter. Also, if iPhone 8/8P/X set a screen passcode, you should turn it off, otherwise it will cause jailbreak failed.
Next, select the “Back” option and press Enter to exit the screen. You will back to the main interface.
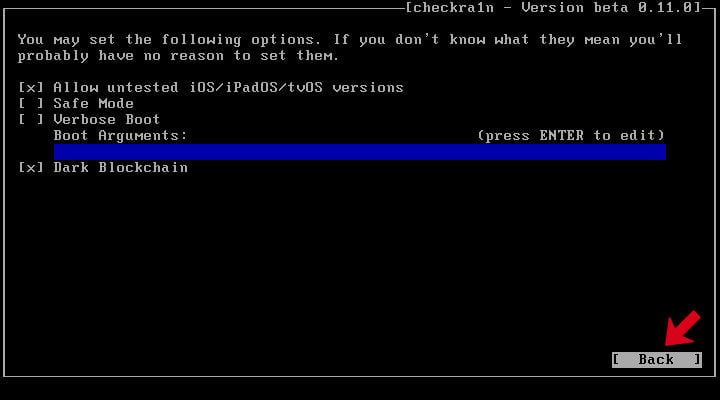
Now, choose “Start” button and press Enter to start the jailbreak.
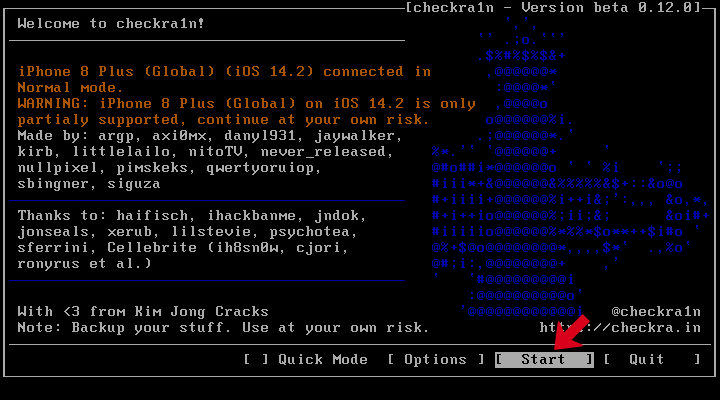
Checkra1n will auto put your device into recovery mode, choose “Next” to go on. After that, follow the steps on screen to put your device into DFU mode.
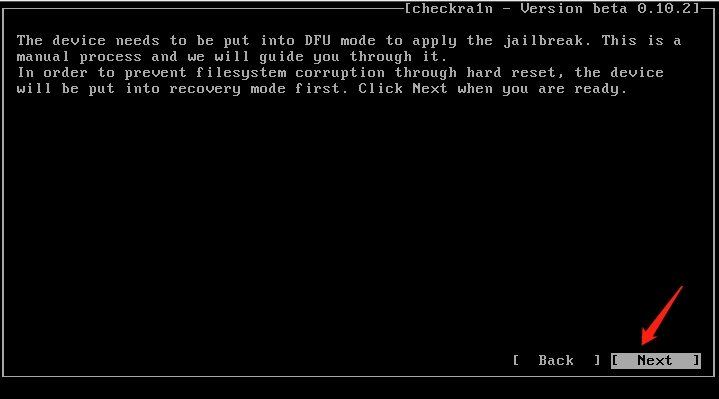
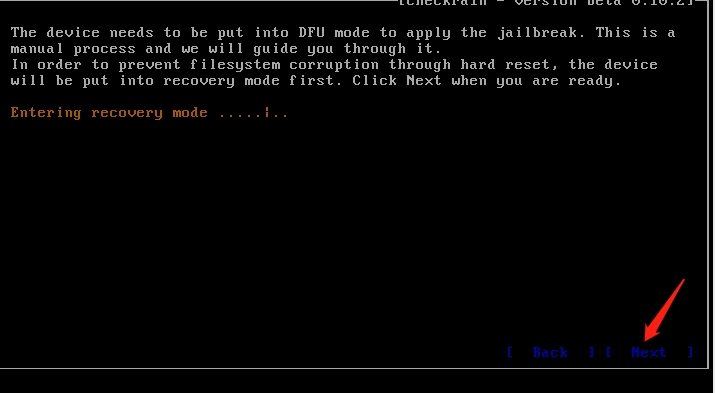
The instructions on the right, select “Start” button to start putting you iOS device into DFU mode.
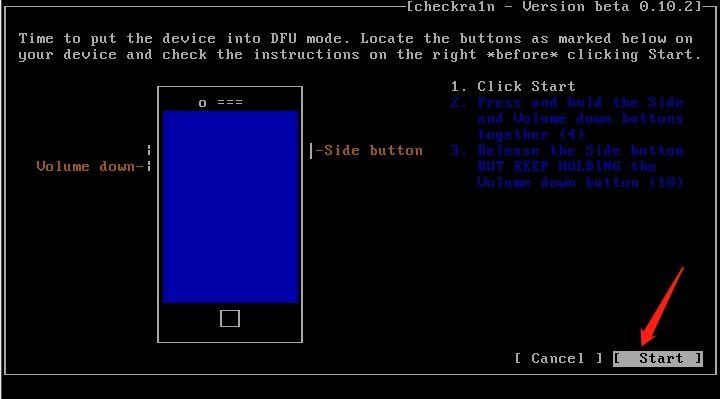
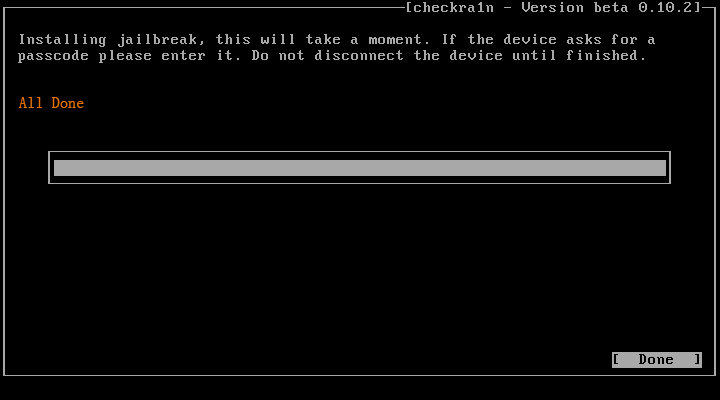
Once you’ve entered DFU mode, Checkra1n will jailbreak the iOS device. When the process is completed select “Done” and unplug the USB flash drive.
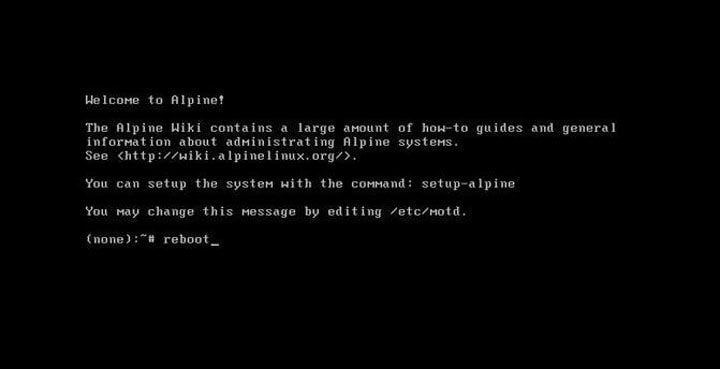
Next, press Alt + F5 and type “reboot” to exit the checkra1n screen and your computer will auto reboot.
Once your computer reboot, launch UnlockGo again and choose “iCloud Activation Lock” again, then UnlockGo will auto remove iCloud Activation Lock for you. It will take 2-3 minutes.
