Encountering the ‘0 bytes available on iPhone’ alert can be frustrating, indicating a critical shortage of storage space. This issue often arises unexpectedly, leaving users perplexed about their device’s capacity. It can hinder the functionality of the iPhone, affecting app performance and the ability to download new content or updates. Understanding the root causes and exploring potential fixes is essential for restoring your iPhone’s optimal functionality and ensuring a seamless user experience. This guide aims to address this common yet challenging problem with practical solutions.
Why Only 0 Bytes Available on iPhone?
The “0 bytes available on iPhone” message is a clear indicator that your iPhone has run out of available storage space. This current period roaming 0 bytes can occur due to a variety of reasons:
How to Fix the iPhone Storage 0 Bytes Available Issue
When faced with the ‘iPhone Storage 0 Bytes Available’ issue, there are several fixes you can try to regain access to your storage space. These methods range from simple restarts to more complex solutions like factory resets. It’s crucial to approach these fixes methodically to avoid data loss.
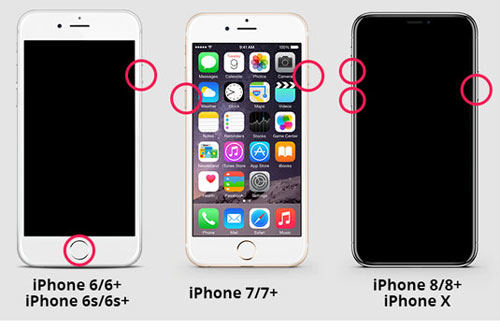
Fix 1: Force Restart iPhone
A force restart clears your iPhone’s RAM without erasing data, potentially resolving minor software glitches that could be showing incorrect storage data.
To do this:
- iPhone 8 and later: Press and quickly release the Volume Up button, press and quickly release the Volume Down button, then press and hold the Side button until the Apple logo appears.
- iPhone 7 and 7 Plus: Press and hold both the Volume Down and the Sleep/Wake (Side) buttons until the Apple logo appears.
- iPhone 6s and earlier: Press and hold both the Home and the Sleep/Wake (Top) buttons until you see the Apple logo.
Fix 2: Run Antivirus Software
Although rare, malware can cause storage issues. Antivirus software can scan your iPhone for malware and remove it, potentially resolving the issue. Note, however, that due to iOS’s robust security, third-party antivirus apps may have limited access and functionality.
Fix 3: Factory Reset iPhone
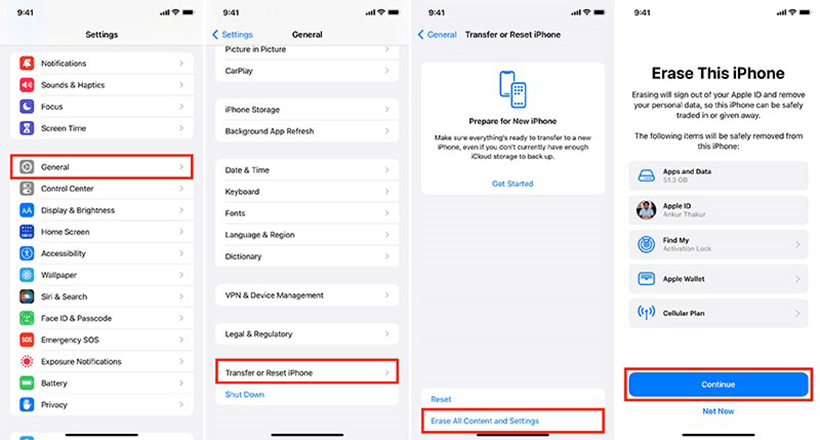
A factory reset erases all content and settings from your iPhone, which can resolve deeper software issues causing the storage error. It’s crucial to back up your data before proceeding.
To do this:
- Ensure your data is backed up to iCloud or your computer to prevent data loss.
- Open the Settings app on your iPhone. Navigate to General > Transfer or Reset iPhone > Erase All Content and Settings.
- You’ll be prompted to enter your passcode and confirm the reset.
- The process may take a few minutes. Once done, your iPhone will restart as if it were new.
3 Easy Ways to Restore Data on iPhone
Whether you’ve accidentally deleted your important files or need to access specific data from your backups without overwriting current data, iToolab RecoverGo (iOS) offers an effective and straightforward approach. It’s especially useful for retrieving deleted data without any backup, a common issue for many iPhone users. Additionally, the tool allows for selective viewing of call history from iCloud and iTunes backups, ensuring that your current data remains untouched and intact during the recovery process.
✨ Recover Data without Backup: Quickly restores lost or deleted data directly from your iPhone, even without a backup.
✨ Selective Data Recovery: Enables you to selectively recover data from iCloud and iTunes backups, providing flexibility and control over what you restore.
✨ No Data Overwrite: Safely recovers data without overwriting existing information on your iPhone, ensuring your current data stays safe.
✨ User-Friendly Interface: Designed with simplicity in mind, making data recovery accessible for users regardless of their technical expertise.
- Way 1: Directly Accessing Deleted Data on iPhone
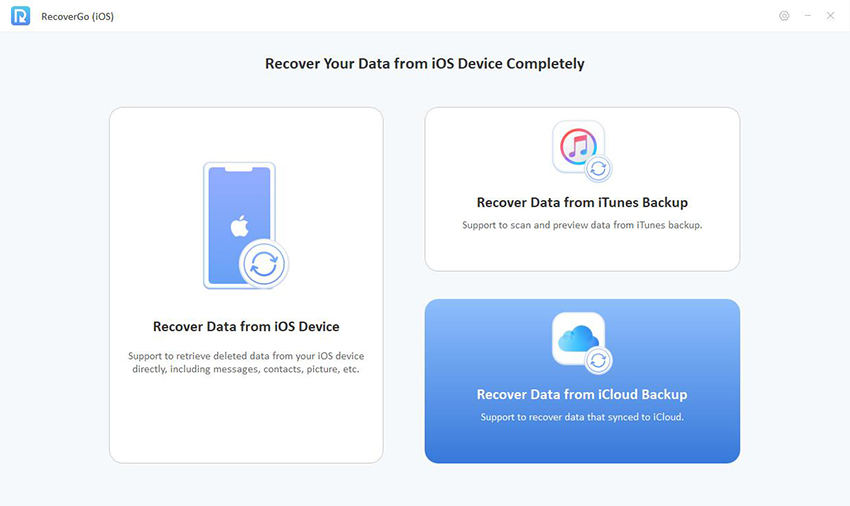
- Way 2: Accessing Deleted Data via iCloud Backup
- Way 3: Retrieving Data on iPhone via iTunes Backup
Way 1: Directly Accessing Deleted Data on iPhone
Recovering deleted data directly on your iPhone is straightforward with the right software, allowing you to access data are no longer visible on your device.
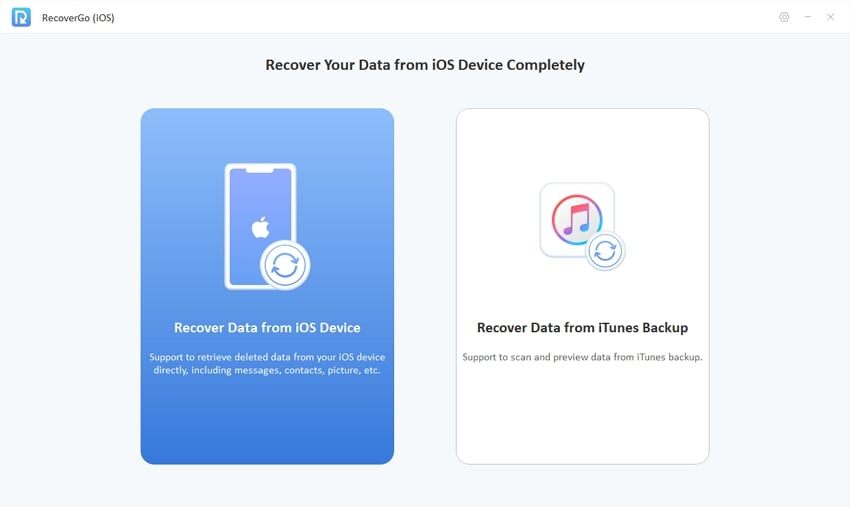
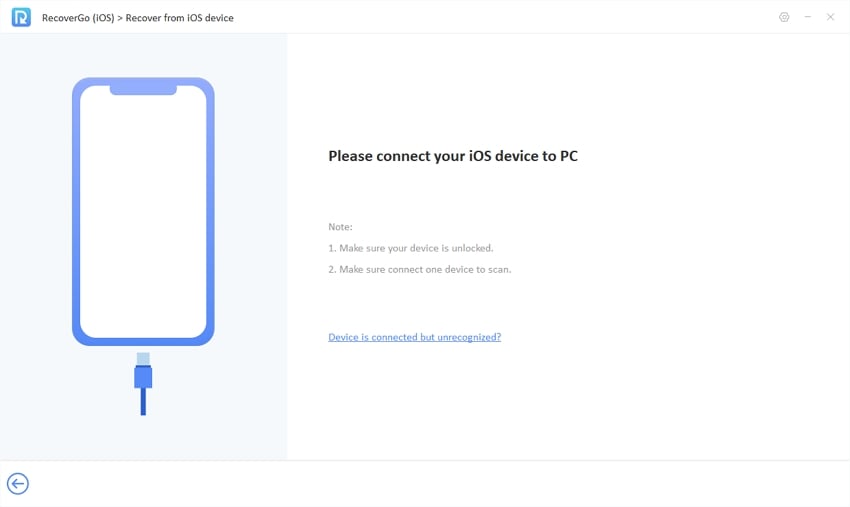
Step 1 Open RecoverGo (iOS), select “Recover Data from iOS Device” and connect your device to the computer.
Step 2 Choose the data type to recover.
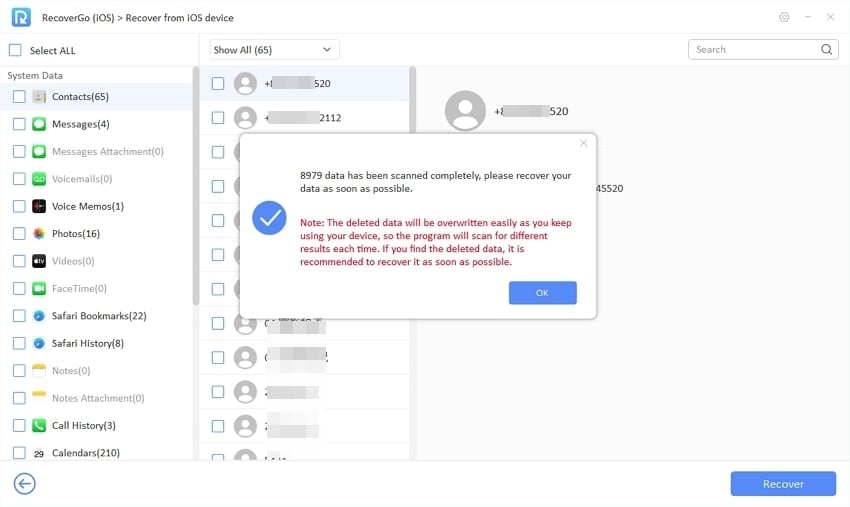
Step 3 Let the software scan your iPhone for recoverable data.
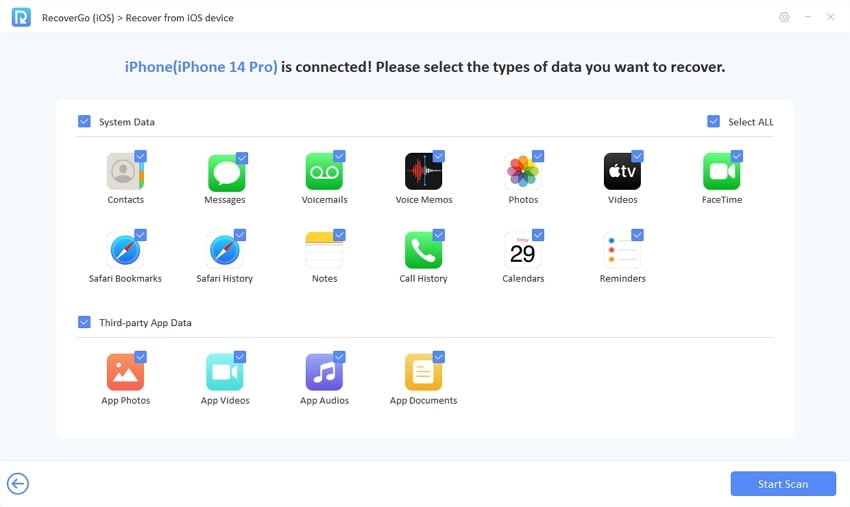
Step 4 Preview the found data, select data to recover, and save to your device or computer.
Way 2: See Older Call History on iPhone via iCloud Backup
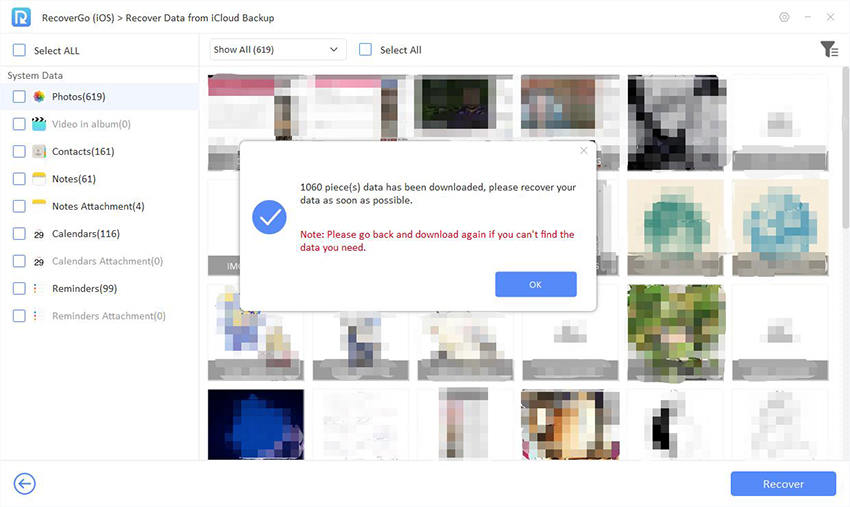
Viewing data from an iCloud backup is an effective solution for those who regularly back up their iPhones to iCloud but don’t want to perform a full restoration.
Step 1 Open data recovery software and choose “Recover Data from iCloud Backup”.
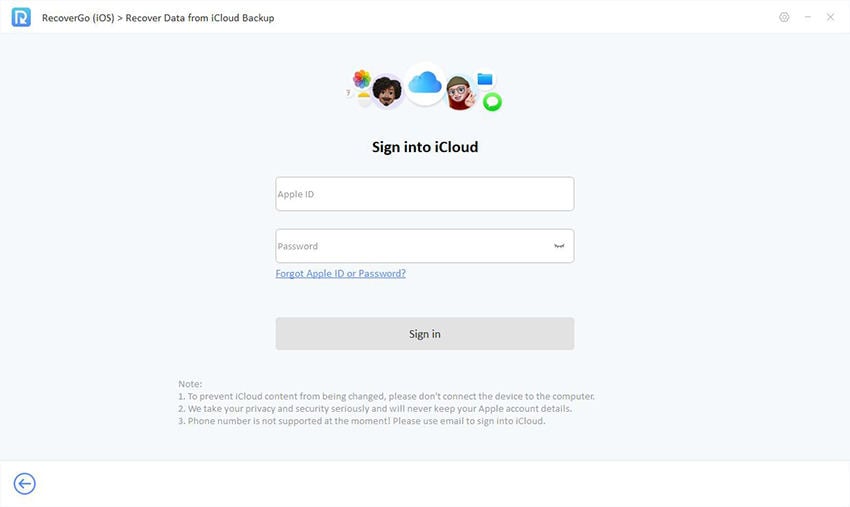
Step 2 Log in with your iCloud credentials.
Step 3 Preview and select data from iCloud backup, then recover to iPhone or computer.
Way 3: See Older Call History on iPhone via iTunes Backup
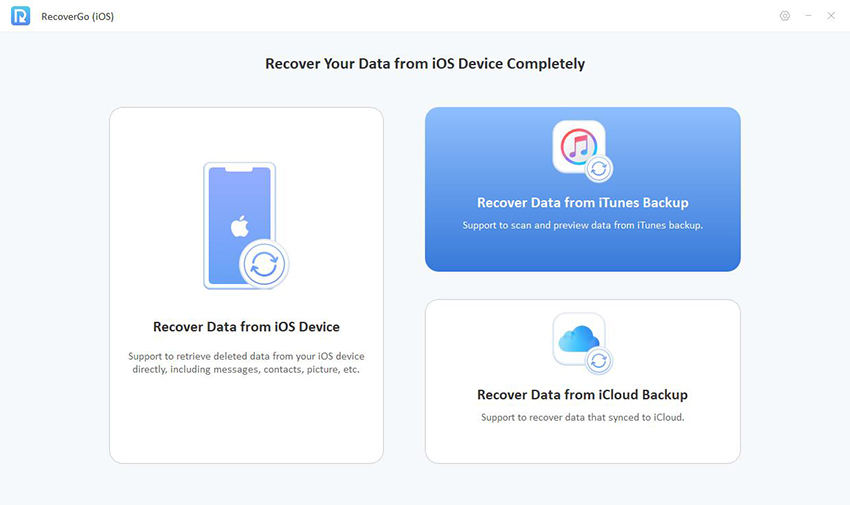
Accessing lost data through an iTunes backup is a reliable method for those who have backed up their iPhone to iTunes and need to recover data without restoring the entire backup.
Step 1 Launch the data recovery software and select “Recover Data from iTunes Backup”.
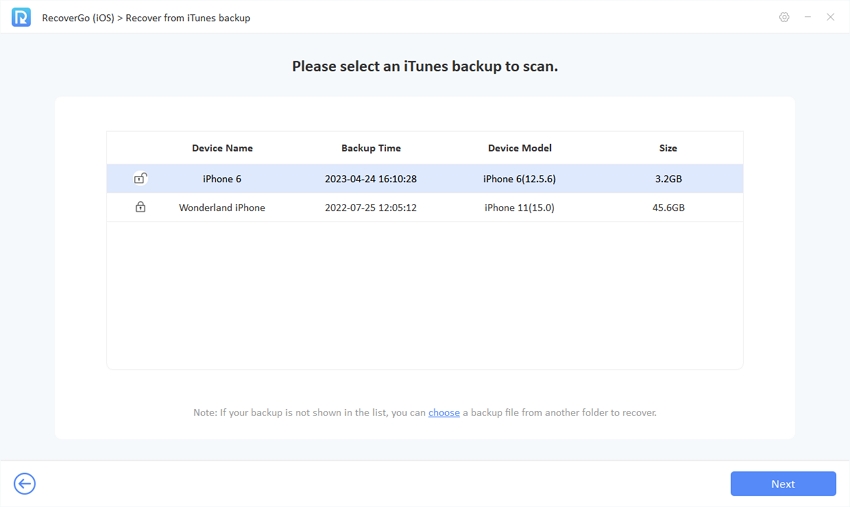
Step 2 Choose a relevant iTunes backup by checking the backup dates.
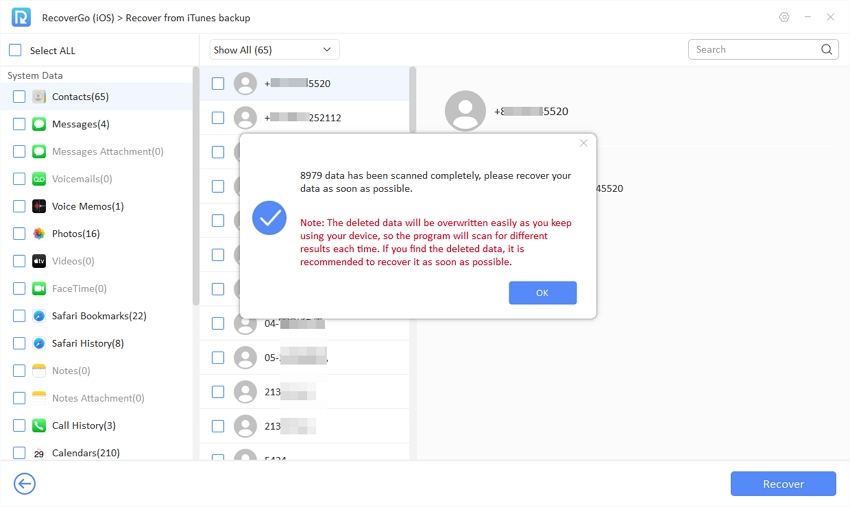
Step 3 Preview the extracted data, select the needed logs, and recover them to your iPhone or computer.
Bottom Line
In conclusion, the ‘0 bytes available on iPhone’ issue can be a significant inconvenience, but there are efficient ways to tackle it, especially when it comes to recovering lost data. Solutions like iToolab RecoverGo (iOS) offer a seamless and user-friendly approach to retrieving deleted data, whether directly from the device, or through iCloud or iTunes backups. For those facing storage issues or data loss on their iPhones, RecoverGo (iOS) stands out as a reliable and versatile tool, providing targeted recovery options without the risk of data overwrite. Its ability to address a range of data recovery needs makes it a highly recommended solution for iPhone users navigating the complexities of data management and recovery.


