Microsoft’s Windows is a popular operating system, and with the latest release of Windows 11, it has become even more feature-rich and powerful. It also comes with improved security features, giving you more peace of mind as you work. You can even lock down your files or folders in Windows 11 with a password, just as you can in previous versions of the operating system.
Locking the windows account can be a great way to keep your sensitive data safe from prying eyes and identity thieves, or simply keep personal files away from house guests who may use your computer. In case you would forget the password, we here also write the ultimate solution – UnlockGo – Windows Password Recovery that you can be done once for all with UnlockGo for windows by your side.
How to Lock Folder on Windows 11 Home
Increased convenience and accessibility make today’s digital world better than ever for communication and information access, but also means you should take some extra security measures to protect your privacy. Knowing how to password protect a folder in Windows 11 is a great approach to ensure that no one can access your private data, especially if you share your computer with others.
Securing your folder with a password can be very helpful in the following ways:
- Prevent other people from accidentally or intentionally opening/modifying/removing crucial data.
- Help you share files only with those authorized people.
- Allow you to keep your important data safe from prying eyes.
So, after all this, the question is how to lock a folder on windows 11?
Well, though there are many tools available in the market just for locking and unlocking files and folders, it doesn’t make sense to buy a software to do it: you can simply set a password on a folder by using Windows built-in security system.
Here is a simple, easy-to-follow guide to doing it.
Step 1: First, you need to go to the folder that you want to protect, and then right-click on it and select “Properties” from the drop down menu.


How to Unlock Password-Protected Folder on Windows 11 Home
Above, we explained the easy procedure of windows 11 password protect folder. But after setting it up, you may also want to know how to unlock a password-protected folder when you need access again. Well, It depends on how you have set up your password protection. For example, whether you’re using the built-in tool to lock a folder, a third-party software, or any other method.
Either way below we have mentioned two methods that will help you to unlock a password-protected folder without any hassle.
1. Unlock with Known Password from Folder Properties
If you had previously used the Windows built-in security system to password protect your folder through Folder Properties, then you can follow the steps below to unlock it without any software.
Step 1: First of all, go to the folder location where you encrypted folder is located.
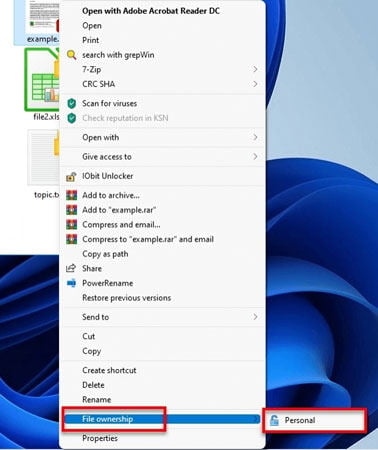
Step 2: Right-click on the folder, select ‘File Ownership’ from the menu and choose ‘Personal’ to remove the lock. You may also uncheck the box next to Encrypt contents to secure data in the ‘Properties’ setting and click on ‘OK.’
2. Unlock without a Password with CMD
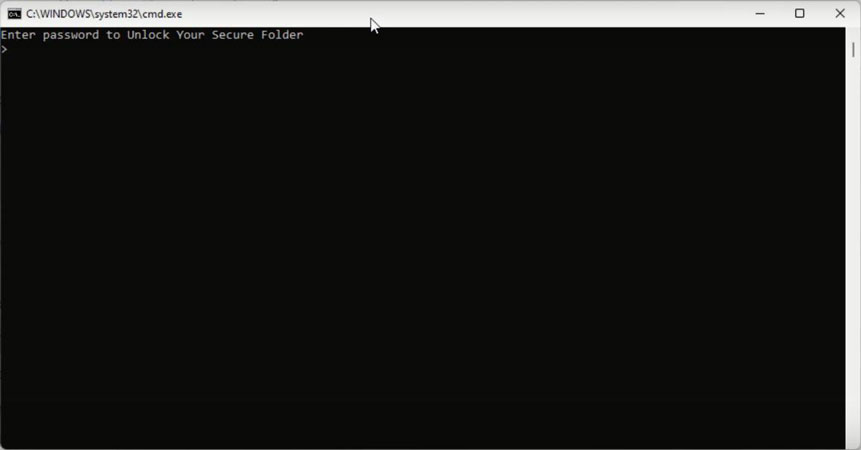
If you have locked a folder by creating a batch file and need to access the folder again without having a password, you can use the CMD method on Windows 11. Although this is a bit of a complicated process, it works perfectly if you follow the steps correctly.
Step 1: First, go to the location where you have locked your file. Then right-click on the batch file and select ‘Edit’.
Step 2: After you have opened the script file, search for the section labeled ‘:UNLOCK’ and you will see the password you chose there.

Extra Tips about Unlock Windows Password on Windows 11
So, that is all about how to lock and unlock a folder in Windows 11 with or without a password. If you have not already set up a login screen password and created a new user account for other people to use your computer, do so. This will add an extra layer of security and help prevent others from accessing your important data.
However, if you forget your password and none of the above methods work for you to unlock the Windows 11 password-protected folder, then you may feel helpless because of not being able to access its contents. In such a scenario, you can take the assistance of iToolab UnlockGo for windows – a reliable windows password recovery tool to help you reset or remove your forgotten password for both local and administrator accounts in Windows 10/8.1/8/7 and other earlier versions.
With the help of UnlockGo – Windows Password Recovery you don’t even need to reinstall the operating system, and all your data, files, and settings will remain intact. You can also use it to delete a user account entirely, as well as create new ones – all within a few clicks.
Let’s see how to use this tool to solve our windows 11 password issues.
Step 1. Download and install UnlockGo for windows on another accessible computer, then insert your bootable USB/CS/DVD to burn.
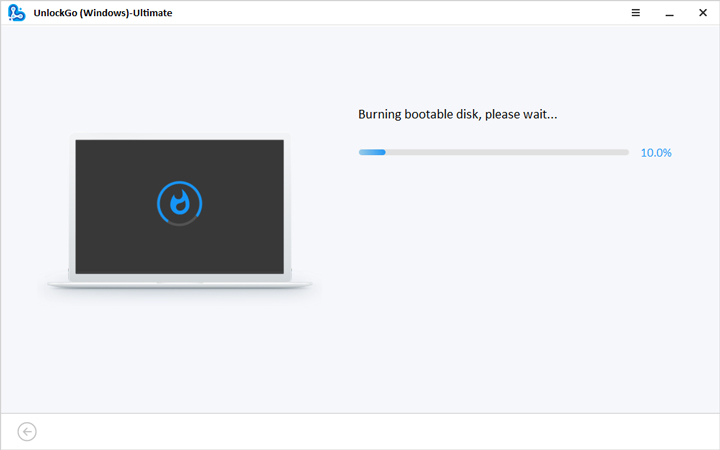
Step 2. After burning, insert it into your locked PC, then press F12 or ESC to enter the boot menu for most PC, you can follow the on-screen instructions to enter it. Then choose the boot tab to select the boot device priority. Last, click F10 to save and exit.
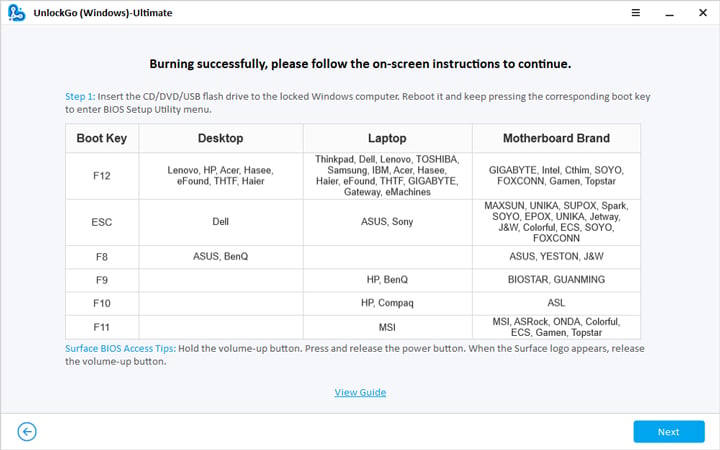
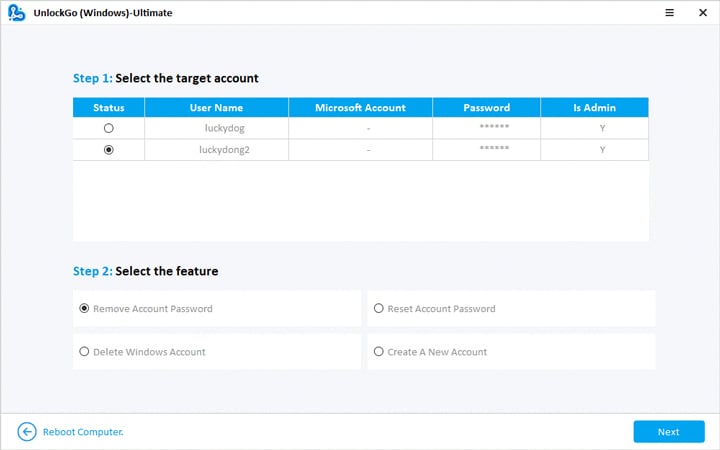
Step 3. After that, your locked PC will reboot, then it will show up a window asking for choosing windows system, then choose the target account to reset/remove account password. You can choose the features according to your requirement.
You can check this blog to see more windows 11 password recovery tools that can help you unlock windows 11 when locked out.
Conclusion
In conclusion, it is important to take measures to protect your data – whether it’s personal or professional. And the best way to do that is to password-protect your folders and lock your windows account.
By doing these things, you’ll be able to protect your data while also being able to access it whenever you need to. And if you choose to use UnlockGo – Windows Password Recovery to reset your password, then you can be sure of a secure and convenient experience. We hope this article was helpful to you in case of lock/unlock folder on windows 11. Do let us know your thoughts in the comments section below.
UnlockGo (Windows)
Reset/Remove Password on Windows 11
- Reset or Remove Windows Local, Admin, Microsoft, Domain account passwords.
- Create or Delete Windows Local Admin, Domain Admin, Guest accounts.
- Support All Windows system versions.


