
Have you ever seen a message asking you to format it when connecting a hard drive or USB drive? This happens because the drive has suddenly become RAW, which means Windows cannot read file system such as NTFS, FAT32, or exFAT in this drive. As a result, your files become inaccessible, and the drive may show 0 bytes.
Losing access to professional work or personal data can be frustrating. However, the good news is that the data from the RAW drive can be recovered if you use the right tools and approach. In this guide, we will further explore the reasons and introduce 4 proven ways to restore your valuable data.
Part 1: What Causes a Drive to Become RAW?
If your SD card, disk, or pen drive has turned into a RAW file system, there may be common reasons.
- Corruption of the File System: Due to improper shutdowns or system crashes, a damaged file system structure causes the drive to lose its format and appear as RAW.
- Virus Attacks: Sometimes a virus or faulty software can destroy the file system and turn the drive into a RAW state.
- Bad Sectors: Physical damage poses to the disk can create bad sectors. If critical areas of the file system are affected, the entire partition may become RAW.
- Improper Drive Removal: Removing external drives without safely ejecting them leads to file system damage.
Part 2: How to Recover Data from a RAW Drive?
A RAW drive does not mean your data is gone. The data remains on the disk, but the operating system cannot recognize it. Therefore, you can easily recover files from raw hard drive from these 4 proven methods below:
- Method 1:Using Raw Partition Data Recovery Software – 99% Recovery Rate🔥
- Method 2: Recover Files by File Signature Scanning
- Method 3: Raw Disk Data Recovery by Repairing RAW Partition
- Method 4: Ask for Professional Help
Method 1: Using Raw Partition Data Recovery Software – 99% Recovery Rate🔥
iToolab RecoverGo Windows Data Recovery is a powerful data recovery tool. This software helps users recover data from raw drive in three easy-to-use steps, which is particularly friendly for beginners.
Main Features
- High recovery rate, up to 99%.
- Recover files from exFAT drives in just minutes.
- Just select, scan, preview, and recover —no technical skills required.
- Can work with many types of systems (RAW, NTFS, FAT32, and exFAT).
- Provides three scan modes help users find more lost or deleted data.
- Preview files before recovery.
- Compatible with HDDs, SSDs, USB drives, and SD cards.
How to use iToolab RecoverGo
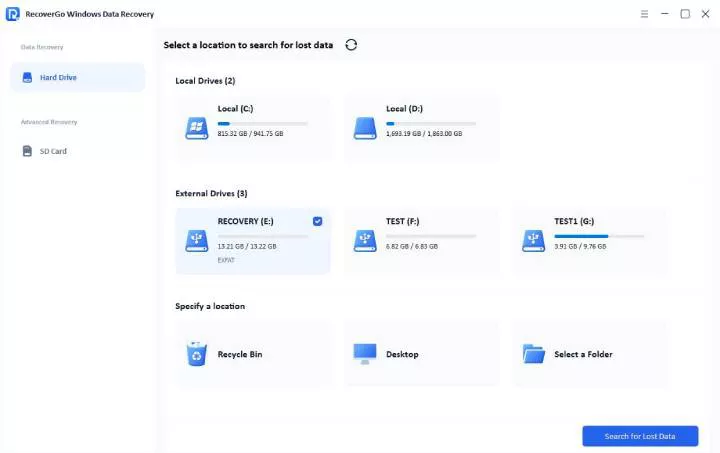
Step 1 Download and install RecoverGo Windows Data Recovery on your computer. Choose a location from which you want to recover data. Then click the “Search for Lost Data” button.
Step 2 The software starts to scan your drive.
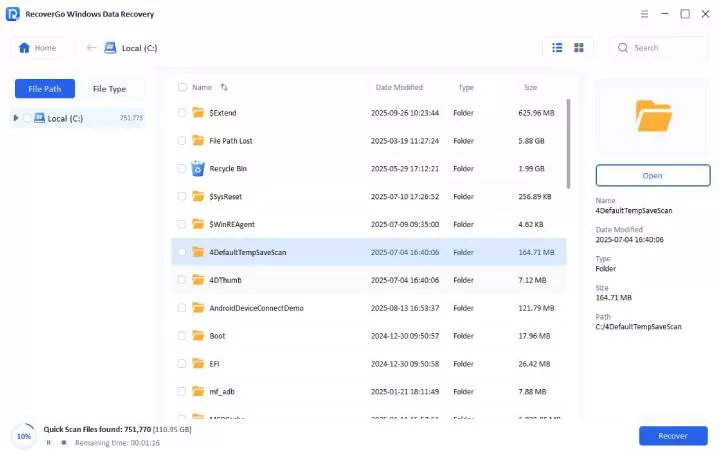
Step 3 After finding the deleted data, you can click “Preview” button on the right panel. And select the “Recover” button to restore it.

Method 2: Recover Files by File Signature Scanning
PhotoRec is a powerful, free, open-source tool. Instead of relying on the file system, it scans for known file types directly even when the system is totally damaged or erased. It supports hundreds of file formats and works across multiple operating systems.
Step-by-step to use PhotoRec
- Download and launch the program, select the affected drive and click Enter.
- Choose the partition type if you know it. Open “File Opt”. Choose the file system type. For most Windows drives, exFAT, and camera cards, you select “Other” as the go-to choice.
- Start the scanning process.
- Next, Save recovered files to a different location.

Method 3: Raw Disk Data Recovery by Repairing RAW Partition
TestDisk is another open-source raw partition data recovery software. It helps recover lost partitions and repair partition tables. For users dealing with partition corruption, TestDisk offers a comprehensive raw disk data recovery. A combination of TestDisk and PhotoRec ensures a more thorough recovery process. It doesn’t have a graphical user interface; rather, it works with commands.
Steps to use TestDisk
- Download TestDisk, extract the files, and run this program.
- Select your RAW drive from the list of detected storage devices. Now, press “Enter”.
- Choose your partition table type. If you’re not sure, TestDisk can auto-detect this correctly.
- Choose the “Analyze” option from the main menu to examine the current partition structure.
- First, you may attempt a “Quick Search” to scan for lost partitions. If Quick Search shows incorrect results or is unable to find your partition, then run “Deeper Search” for a detailed scan.
- When TestDisk finds your partitions, press “p” to preview the files in each detected partition to verify it’s the correct one. Click on “Enter” to confirm your selections.
- Once the correct partitions are selected, type “Write” to save the new partition structure. Now, restart your computer. It will apply the changes.

Due to its command-line interface, many beginners may feel challenging while using PhotoRec and TestDisk. That’s why iToolab RecoverGo is strongly recommended. Its user-friendly interface guides uses to recover files with a few steps.
Method 4: Ask for Professional Help
If RAW hard drive data is extremely important, you may need to consider seeking professional data recovery services as the next option. Here are well-known professional data recovery companies:
- DriveSavers
- Secure Data Recovery
- SalvageData Recovery
- Gillware Data Recovery
How much does it cost?
Data recovery prices can range from a few hundred to several thousand dollars, depending on the level of damage and recovery difficulty. What’s more, Faster service options typically come at a higher cost.
Final Thought
When your drive turns RAW, choosing the right recovery tool is critical. Unlike complex open-source software like PhotoRec and TestDisk, iToolab RecoverGo Windows Data Recovery offers a clean, user-friendly interface with no command-line required, which is ideal for beginners. What’s more, its advanced algorithms can provide professional-level data recovery up to 99% success rate.