If you were trying to update your iPhone or iPad and you see a message saying, “An error occurred installing iOS 16”, this article will show you what to do to fix the issue.
This is a very common issue and can have varied causes. But the solutions outlined below have worked for so many other users facing the same issue.
Let’s get started with the most basic of these solutions:
1. Free Up Some Space
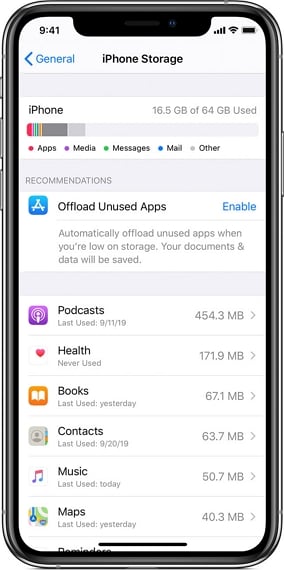
A lack of adequate storage space on your iOS device can hinder the update process. While the size of the update can vary depending on the new features and enhancements that the update is introducing to the device, there still needs to be at least 2GB of storage space for the update to be completed.
To check if inadequate storage space is your problem, follow these simple steps:
Step 1: Open the Settings on your device from the Home Screen.
Step 2: Tap “General” and then choose “[Device] Storage”.
Step 3: If you find that there isn’t adequate space on the device, you can select some of the unused apps and content on the device and then tap “Delete” to remove them and make room for the iOS 16 update.
2. Connect the Device to a Power Source
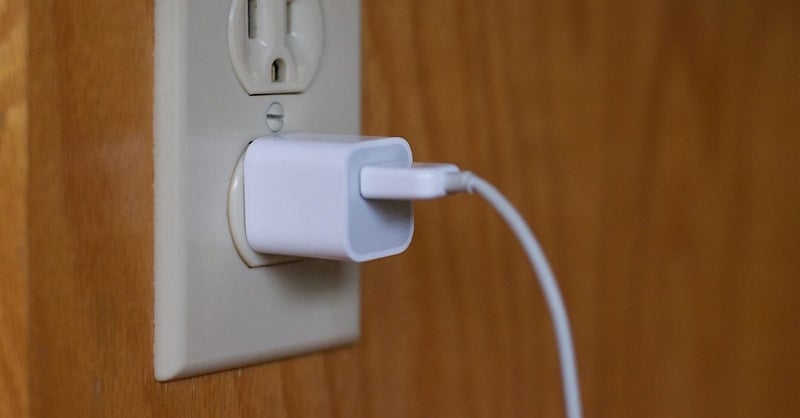
When your device is running low on battery power, you may have problems completing the update process. Connect the device to a power source and then try to update the device again.
3. Toggle Wi-Fi Off and On
If there is a problem with your network connection, you may also experience problems updating the device since an iOS 16 update requires a strong and stable Wi-Fi network to complete. One of the best ways to troubleshoot your Wi-Fi network is to toggle Wi-Fi on and off. Here’s how to do it:
Step 1: Open the Settings from the Home Screen.
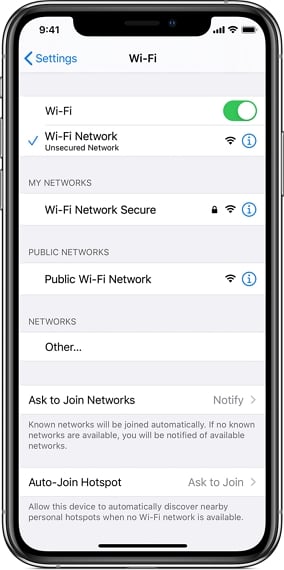
Step 2: Tap “Wi-Fi” and then tap on the switch next to it twice: once to turn it off and again to turn it back on.
4. Forget Wi-Fi Network and Add It Back on
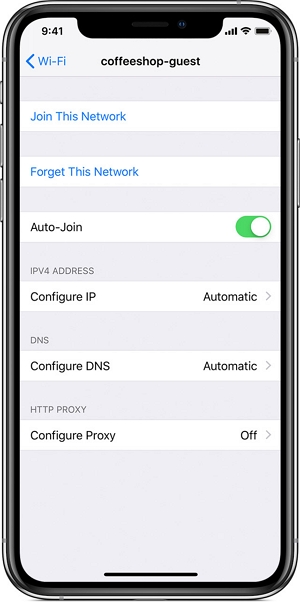
If you have a problem connecting to the Wi-Fi network or you keep seeing a prompt saying the password you entered is incorrect even though you know it is not, you should try forgetting the Wi-Fi network and then joining it again. Here’s how to do it:
Step 1: Go to Settings > Wi-Fi and then tap “Forget this Network”.
Step 2: In the popup that appears, confirm that you want to forget the network by tapping “Forget”.
Step 3: Now go back to Settings > Wi-Fi and then select the network again. Enter the password and join the network.
5. Reset Your Network Settings
If you are still unable to successfully download the software update, there could be a problem with the network configurations on the device. You may therefore want to try resetting the network settings. This is one of the best ways to eliminate any conflicting settings and errors that could be preventing you from updating the device. Here’s how to do it:
Step 1: Open the Settings and then tap “General”.
Step 2: Scroll down the list of options to tap “Reset”.
Step 3: Select “Reset Network Settings” and then enter the device’s passcode when prompted.
When the process is complete, the device will reboot. Setup and rejoin your Wi-Fi networks and then try updating the device again.

6. Force Restart Your iOS Device
You should also consider force restarting your device. A network reset will eliminate bugs in the network settings, but a force restart will eliminate bugs in the iOS system. Here’s how to force the various iOS devices:
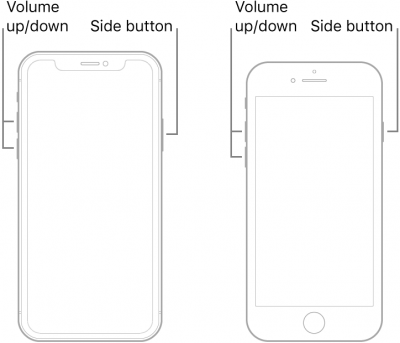
iPad with Face ID, iPhone SE (2ND Generation), iPhone 8 or iPhone 8 plus:
Step 1: Press and release the Volume Up button.
Step 2: Press and release the Volume Down button.
Step 3: Press and hold the Side (Power) button until the Apple Logo appears.
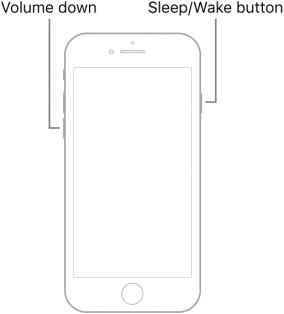
iPhone 7 and iPhone 7 Plus:
Step 1: Press and hold the Volume Down and the Power button.
Step 2: Release the buttons when the Apple logo appears.
iPad with Home Button, iPhone 6s, iPhone 6s Plus and iPhone SE (1st Generation):
Step 1: Press and hold the Home and the Power button at the same time.
Step 2: Release the buttons when the Apple Logo appears on the screen.

7. Delete the iOS Update and Download it Again
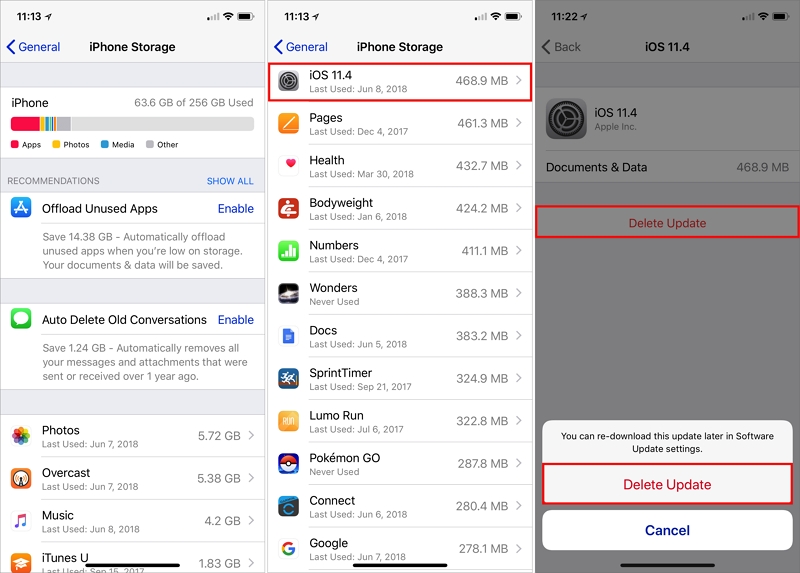
If the update began downloading but then stopped, it is possible that some of the components of the update may have become corrupt. The best solution, in this case, is to delete the updated files again and then start the download process again. Here’s how to do that:
Step 1: Open Settings on your device and then tap on “General”.
Step 2: Tap on “iPad/iPhone Storage”.
Step 3: Find the iOS update from the list of apps and files and then tap on it to select it.
Step 4: Tap “Delete” and confirm the action to delete the iOS update from the device.
Reboot the device and then go back to Settings > General > Software Update to download the update again.
8. Use iTunes or Finder to Update the Device
If you continue to have problems updating the device via the settings on your device, then you should try updating the device by connecting it to the computer. Follow these simple steps to do it:
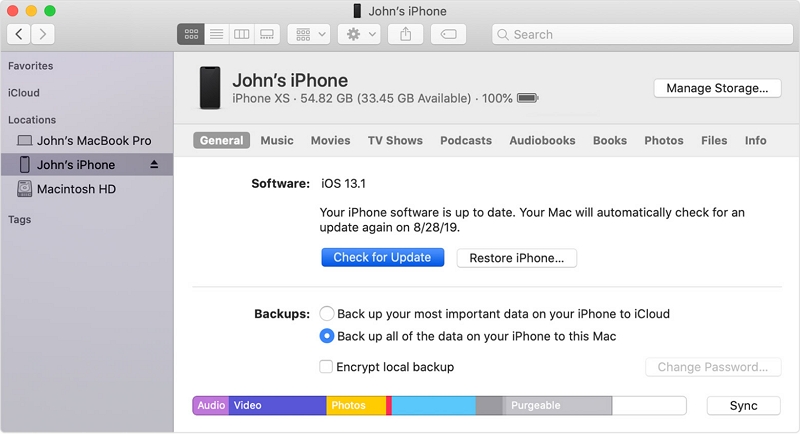
Step 1: Connect your device to the computer and open iTunes or Finder (for macOS Catalina).
Step 2: When the device appears, click on it under the Devices list.
Step 3: Click on “Check for Update”.
Step 4: Click “Download and Update” to begin installing the update on your device.
If you run into any problems updating the device via iTunes, remove all other USB connections and then make sure that the version of iTunes you are using is up to date.
9. System Update Your iPhone without Losing Data
There is another solution that will repair any software issues that the device is experiencing and update the device at the same time. This program is iToolab FixGo, one of the best iOS system repair tools in the business. The following are the program’s most useful features:
- When you use the program’s standard mode, it will fix all issues with the device while preventing data loss.
- It can fix more than 200+ iOS system issues including a device that will simply not update normally.
- It is also one of the best ways to enter and exit recovery mode when you can’t use the device’s hardware buttons to do so.
- It is fully compatible with the latest iPhone SE(2nd) & iOS 16 and iPadOS 16.
Follow these simple steps to use FixGo to repair the issues with the device while installing the latest version of iOS on to the device:
Step 1: Download and install the program on to your computer.
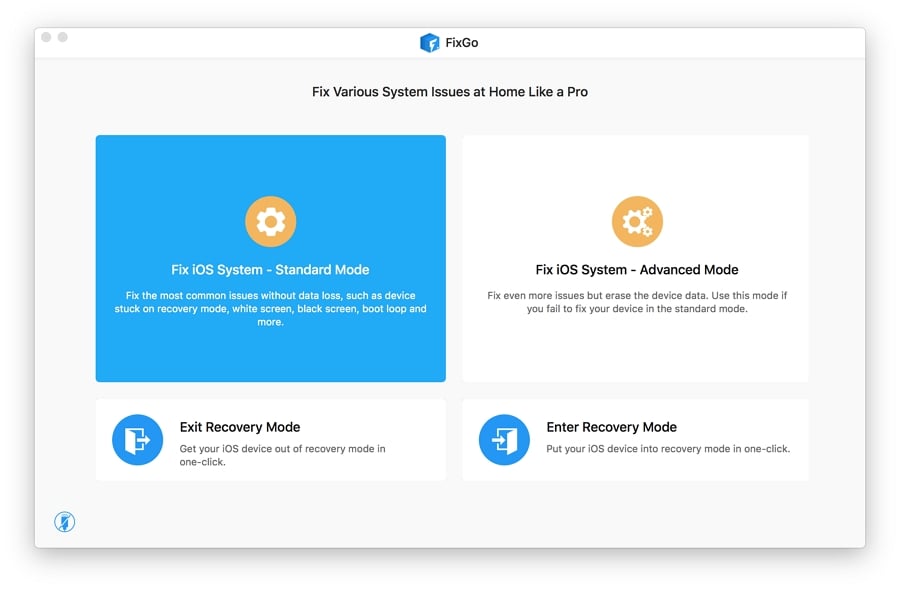
Step 2: Open it and then select “Standard Mode” in the main interface.
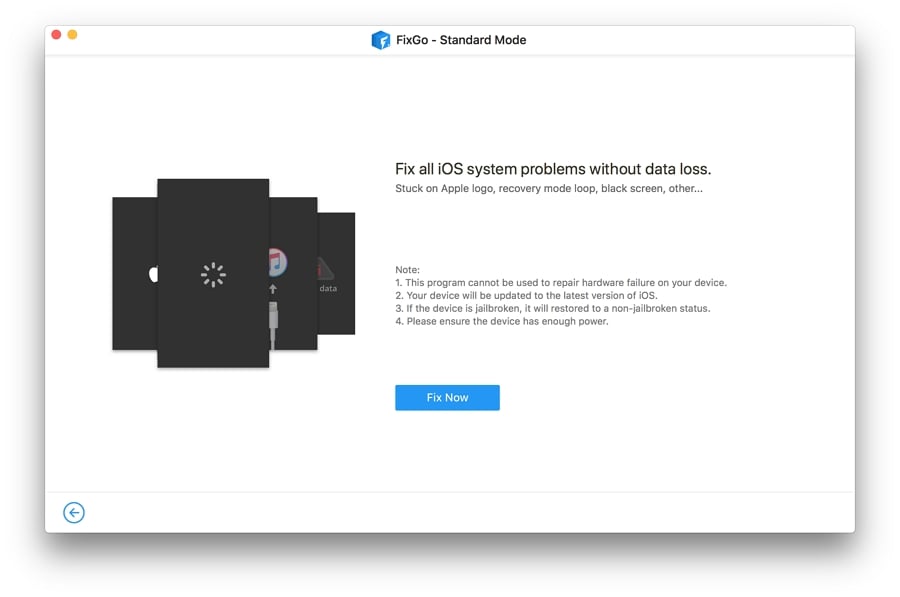
Step 3: Connect the iOS device to the computer and when the program detects the device, click “Fix Now” to begin.
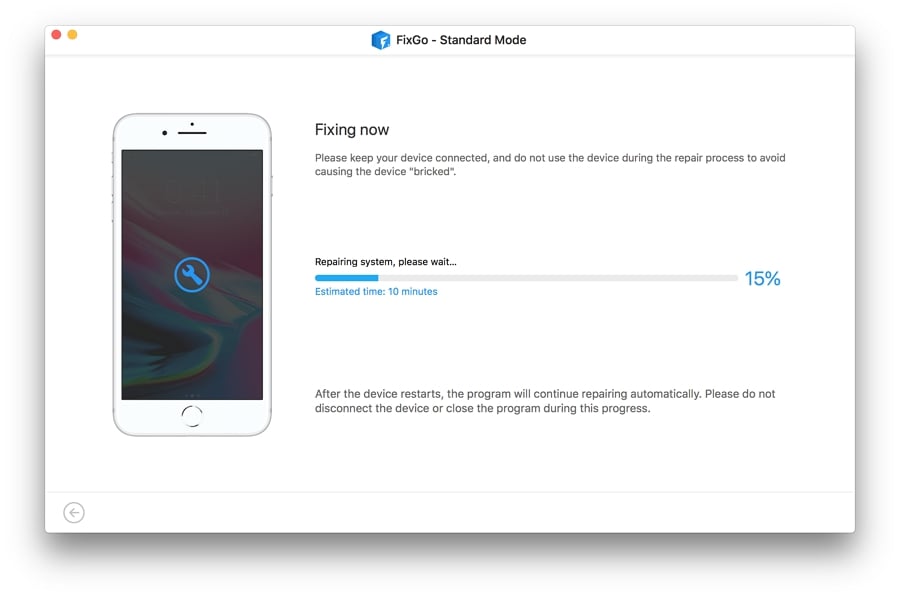
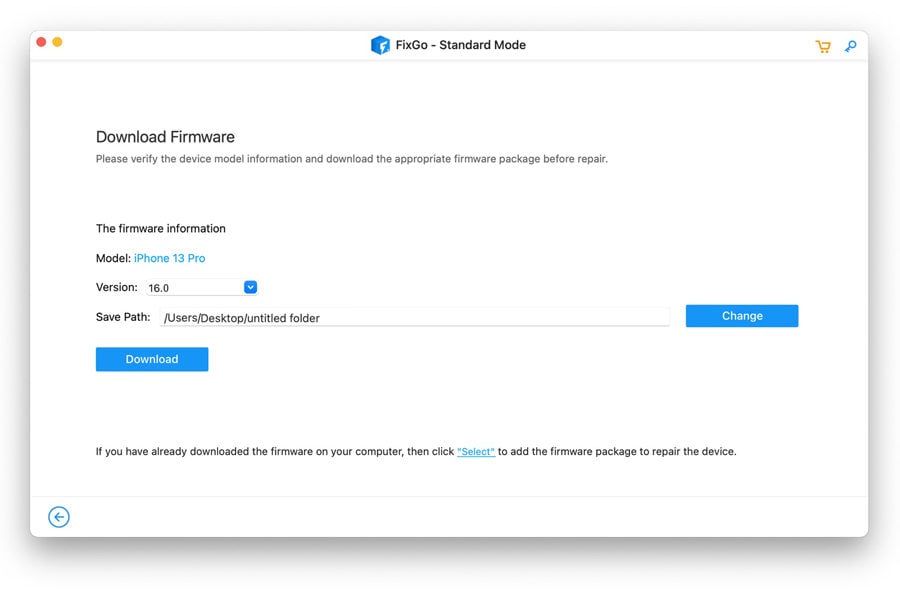
Step 4: The program will need to download the latest firmware on the device before the repair process can begin. Just click “Download” and wait while the program downloads the needed package.
Step 5: When the download is complete, click “Repair Now” and FixGo will immediately begin repairing the device. Keep the device connected until you see a notification that the repair process is complete.