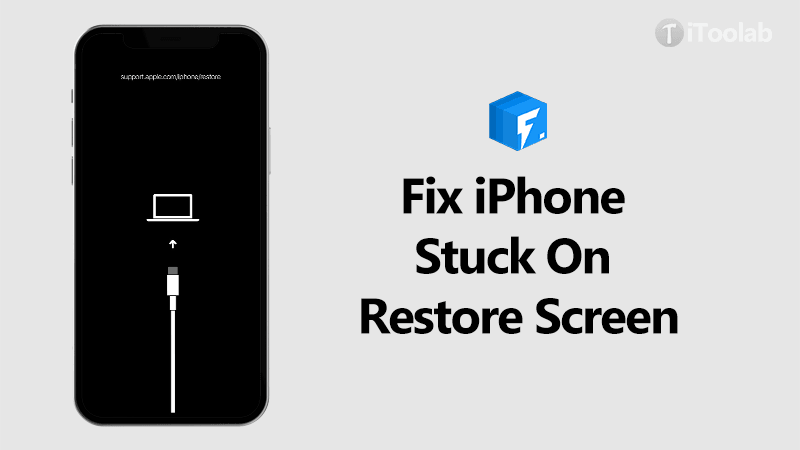
Talking about iPhone stuck on recovery mode, you probably don’t know what should you do. In fact, going into recovery mode can help you solve many iOS 18/26 problems. In this guide, we will show you an essential way to fix iPhone 16/15 stuck on recovery mode without data loss.
Does Recovery Mode Erase My Data?
Recovery mode in itself doesn’t necessarily threaten the data on the device. But when the device is stuck in recovery mode, you will need to erase the data to fix it. This means that most solutions will cause you to lose any data on the device that may not be included in a backup.
Use FixGo to Fix iPhone Stuck in Recovery Mode without Data Loss
While most conventional solutions may cause you to lose all the data on the device, there is a way to get the device out of recovery mode long enough to save your data. This is iToolab FixGo, a tool that can force your device out of recovery mode. You can download the free trial version of FixGo and then follow these simple steps to get the device out of recovery mode without data loss:
🏆 Key Features:
✅ Free to enter/exit recovery mode with 1-click.
✅ Easily and safely to repair iPhone update issues.
✅ Fix iPhone/iPad/Apple TV system problems.
✅ Save your apple devices and no data loss.
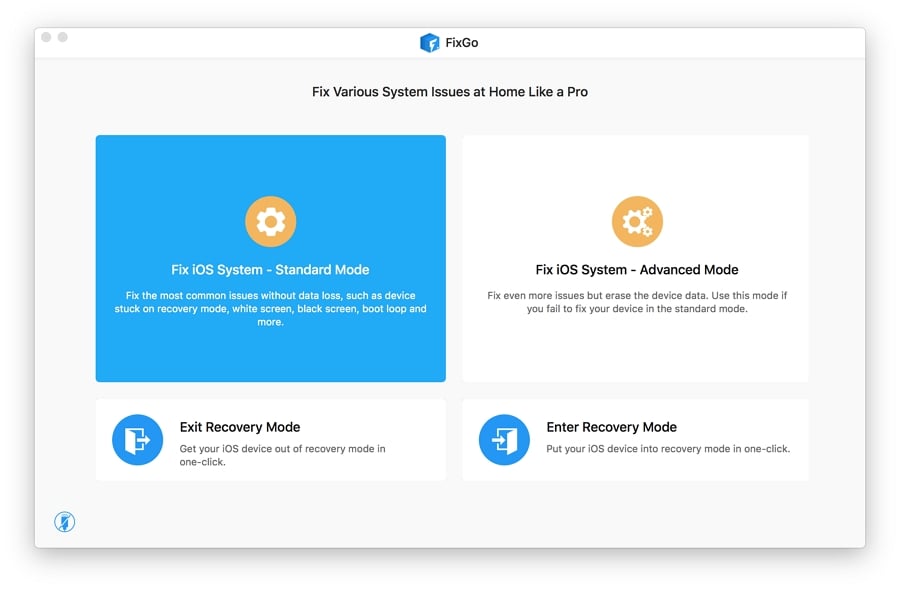
Step 1 Open FixGo on your computer and then click on “Standard Mode” to begin the process. Connect the iPhone to the computer and as soon as the program detects the connected iPhone, click “Fix Now”.
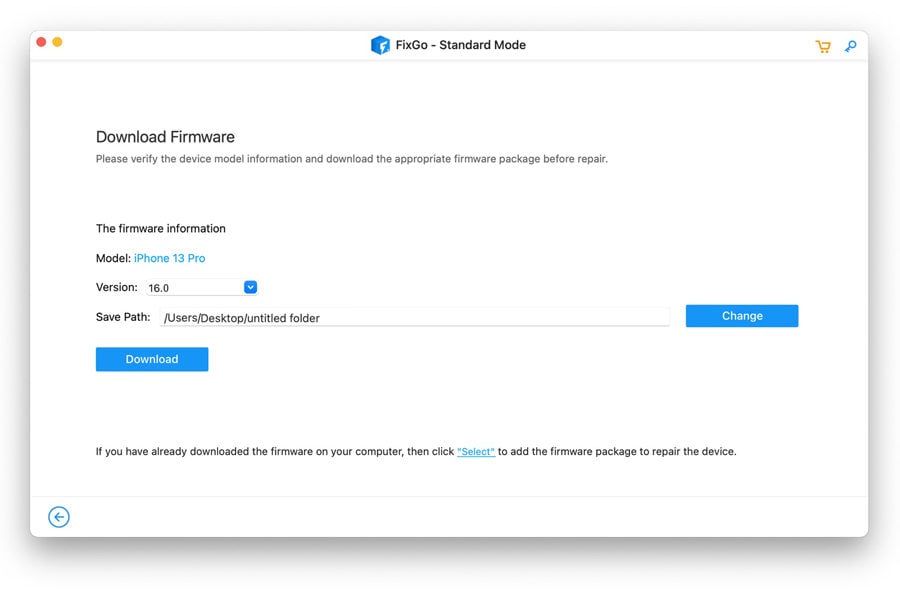
Step 2 You will need to download the latest firmware for your iPhone to repair it. The program has already detected the latest firmware, all you have to do is click “Download” to begin downloading the firmware package.
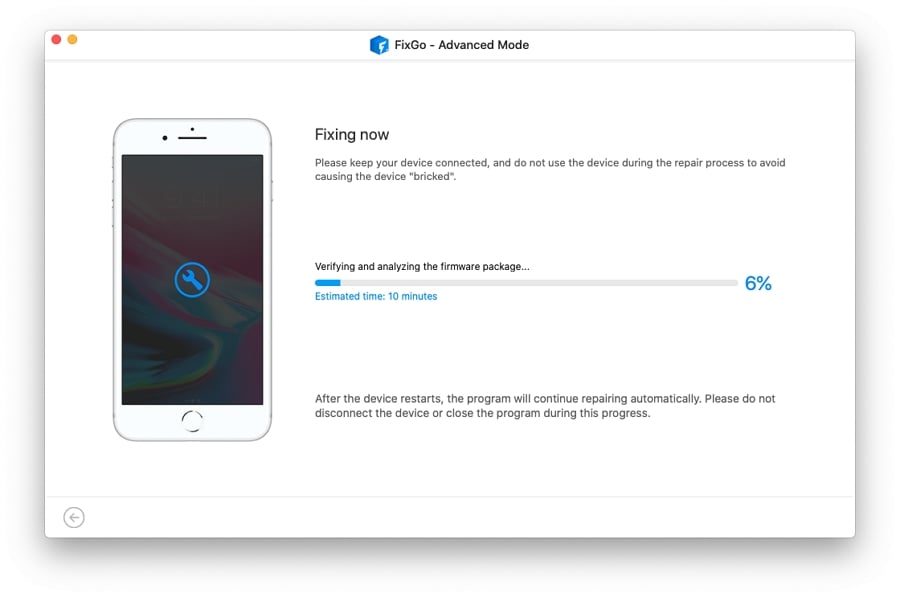
Step 3 When the firmware package has been downloaded, click “Repair Now” and FixGo will immediately begin to fix your iPhone. Keep it connected to the computer until the process is complete and it should exit recovery mode safely.
How to DFU Restore Your iPhone?
Sometimes the device can remain stuck in recovery mode because of a problem with the firmware. You can therefore attempt to reinstall the firmware by putting your iPhone in DFU mode and then restoring it on your computer. DFU mode is a lot like recovery mode, except that when you put your iPhone in DFU mode the screen will be black. But the computer should still be able to detect the device even when the screen is blank.
Here’s how to put your device in DFU mode and restore it:
Video Tutorial
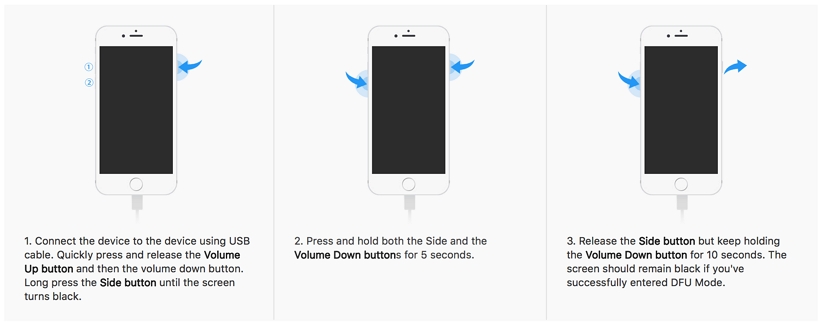
For iPhone 8, iPhone X iPhone 11 or Later
- Connect the iPhone to the computer using its lightning cable and then open iTunes or Finder.
- Now press and release the Volume Up button and repeat the same action with the Volume Down button.
- Press and hold the Power button. When the screen goes black, press and hold the Volume Down button in addition to the Power button.
- Hold both buttons for about 5 seconds before releasing the Power button. Continue holding the Volume Down button.
- The iPhone screen will go black, indicating that the device is in DFU mode. It will also appear in Finder/iTunes. If the screen doesn’t go black, you may need to repeat the steps above.
- The computer will then reinstall the device’s software. Just follow the prompts to restore the device in Finder or iTunes.
For iPhone 7 and 7 Plus
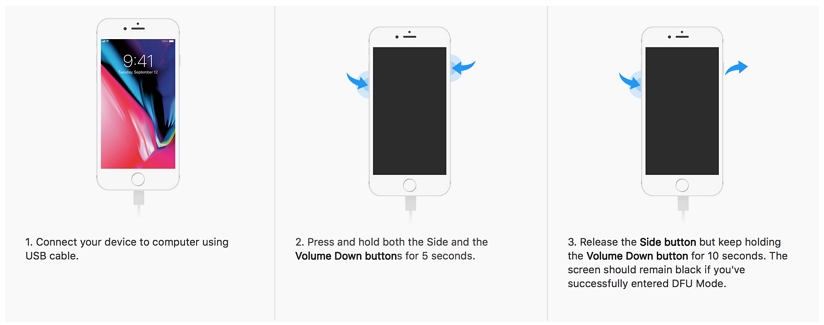
- Connect the iPhone to the computer using the device’s lightning cable and then open iTunes or Finder.
- On the device, press and hold the Power and Volume Down buttons at the same time.
- Hold the two buttons for about 8 seconds and then release the Power button but continue to hold the Volume Down button.
- The screen should go black, but the device should appear in Finder or iTunes. Repeat the steps above if you see anything appear on the screen.
- The computer will then download the relevant software and then follow the prompts to restore the device.
For iPhone 6s and Earlier
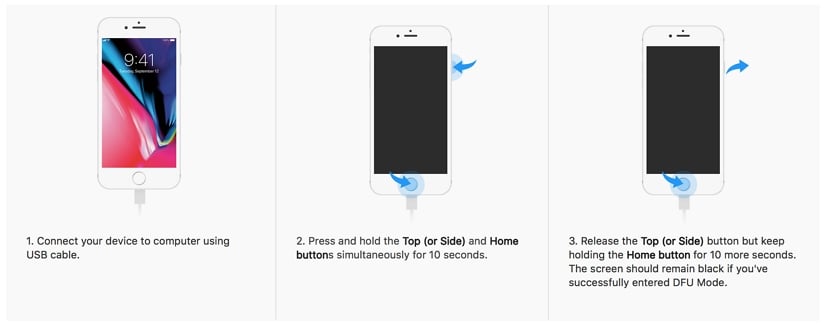
- Connect the iPhone to the computer and open iTunes or Finder.
- Press and hold the Power and the Home Button at the same time.
- Let go of the Power button, but keep holding the Home button.
- The screen will go black in a few seconds and the device should appear in iTunes or Finder. If the screen doesn’t go black or if you see something else on the screen, start all over.
- Just follow the prompts to restore the iPhone after the computer downloads the relevant software for the device.
Schedule A Physical Repair for the iPhone
If any of the solutions above do not fix the problem, then it is very likely that there is a hardware problem with the device. In this case, the only thing you can do is schedule an appointment with Apple support to get them to fix the device.
Make an appointment at the Genius Bar to get the device checked out and repaired. They will be able to quickly diagnose the problem and repair the device. If the device is still under warranty, you may be able to save on the cost of repair. But if it is not, repairing the device can be costly, depending on the problem.

Conclusion
As you can see, fix iPhone stuck on recovery mode is easy by using iToolab FixGo. More than this, you can also use this powerful to fix the issue such as stuck on install iOS 26 update or stuck on Apple logo for no reason. Hopw this article provides you a lot help!


Second nor I phone 14 leiya to screen lock bhul gay to kise unlock kare phone
Hi Ninama, our program iToolab UnlockGo can help you remove screen locks on all iPhone models.