In this article, we provide the most effective ways to fix iPhone error 14. This is an error message that you may see when you try to update the device and it may very well prevent you from updating the device.
The good news is, the solutions we will outline here have been extensively tested and proven to be ideal for this issue. But since the solution you choose will depend on the main cause of this issue, let’s start with some of the reasons why you may be seeing error 14.
Why Error 14 Appears
The following are some of the main reasons why error 14 can appear when trying to update iOS devices in iTunes;
USB Cable Incompatibility
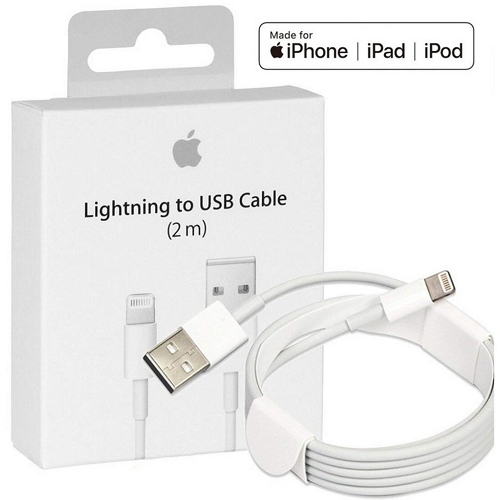
This problem can occur when you use a faulty or incompatible USB cable. This is why we recommend only using a USB cable that is MFI certified to connect the iPhone to the computer.
Low Storage Space on your iPhone
A new update typically comes with new features and improvements for the device and these require some storage space to be installed on the device. Therefore, you may see error 14 when your iPhone has insufficient storage space.
Corrupted Firmware
In some very rare instances, the firmware can become corrupt. This may happen if there are some missing files in the overall firmware package, rending it unusable. It is therefore very important to make sure that all firmware files are in the correct order when updating the device via iTunes.
Outdated iTunes
You will experience problems and errors like error 14 if you are using an outdated version of iTunes. This is because an outdated version of iTunes may not be able to download the latest version of iOS. Keeping iTunes updated is one of the best ways to prevent these errors.
Network Connection Issues
If you are having issues with the network connection, then you may experience issues updating the device via iTunes and you may see the error 14. This is because iTunes needs to connect to Apple Servers to download the firmware package, a process that requires an internet connection.
Regardless of the cause of the problem, the following are the solutions you can try;
1. Check USB Cable
When you use an incompatible USB cable to connect the iPhone to the computer, the connection may be misconfigured, and iTunes may be unable to connect with the device. We, therefore, recommend using a USB cable that is Apple Certified every time you connect the device to the computer to avoid these issues.
If you suspect that the USB cable is the problem, try using a different cable or try a different port on your computer to connect to. Once you have changed the cable or the port, try reconnecting the device to see if the issue has been resolved.
2. Manage Storage Space on iPhone
To update the version of iOS on your device, you need at least 5GB of storage space. If you don’t have adequate storage space, you can create additional storage space by deleting some of the content, apps, and data that you don’t need. Most people find that by simply creating more storage space, they can fix this error.
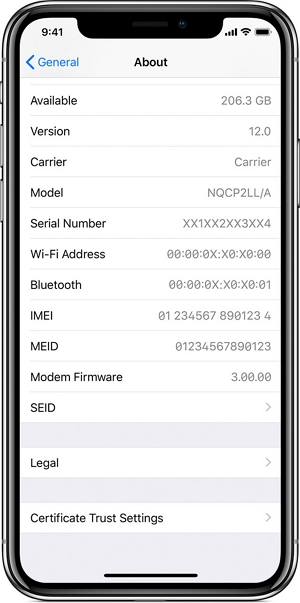
Follow these simple steps to check the available storage space on your device;
Step 1: Open the Settings on your iPhone
Step 2: Tap “General” and then tap “About.”
Step 3: Scroll down to find “Available” and here you should be able to see the storage space that is available on your device.
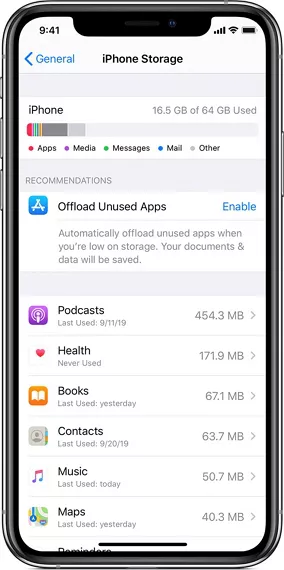
Step 1: Open the Settings from the Home Screen.
Step 2: Tap on “iPhone Storage.”
Step 3: Then simply delete some of the apps and data that you no longer need.
3. Force Restart Your iPhone
A force restart of your iPhone is also a great way to refresh the device and remove software issues that could be causing the error. To force restart your iPhone, follow these simple steps;
Step 1: Press and hold both the Power/Sleep & Wake button and the Volume Down button at the same time until the iPhone turns off.
Step 2: After a few seconds, the iPhone will automatically turn on again and you should see the Apple Logo.
Step 3: When the Apple Logo appears, release both buttons and then enter the device’s passcode to gain access to the iPhone.

4. Fix iPhone/iTunes Error 14 without Losing Data
If you are worried about losing the data on your iPhone due to this error, we recommend using FixGo to update or restore the iPhone. FixGo is a third-party iTunes alternative that allows you to everything iTunes can do without affecting the data on the device.
The following are the main features of FixGo;
- FixGo is the best way to fix most of the common iOS issues. In fact, it can easily repair more than 200 iOS system issues in three simple steps.
- It is also one of the best ways to prevent data loss on your iOS device if it is not functioning properly.
- It is very easy to use with a very simple user interface that is accessible to anyone even beginner users.
- It is fully compatible with the latest iOS 14.4 and iPadOS 14.4 as well as all iPhone models.
Install FixGo on to your computer and then follow these simple steps to use it to fix the iPhone without data loss;
Step 1: Run FixGo and select “Standard Mode.”


5. Delete the Corrupt Firmware
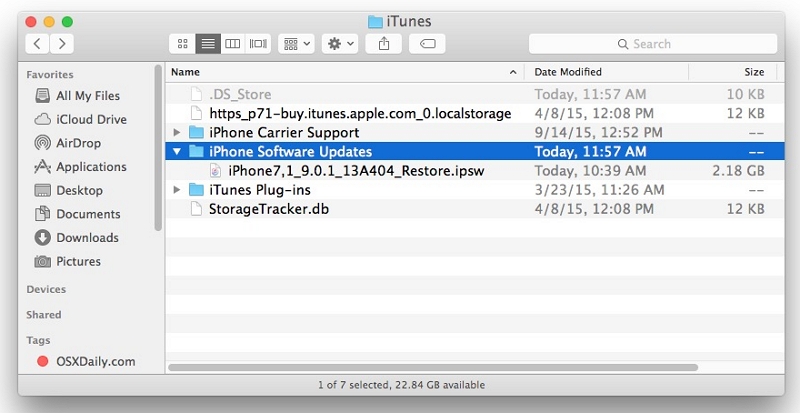
Since error 14 can happen when some of the files in the firmware are corrupted or damaged, it may be necessary to remove, rename or move the IPSW files to a different directory.
To do that, you will need to find the file. The location of the folder will depend on the operating system you are using. The following are the common locations depending on the operating system;
macOS: /Library/iTunes/iPhone Software Updates
Windows XP: C:\Documents and Settings\\Application Data\Apple Computer\iTunes\iPhone Software Updates
Windows Vista, 7 and 8: C:\Users\\AppData\Roaming\Apple Computer\iTunes\iPhone Software Updates
Windows 10: C:\Users\USERNAME\AppData\Roaming\Apple Computer\iTunes
6. Update iTunes
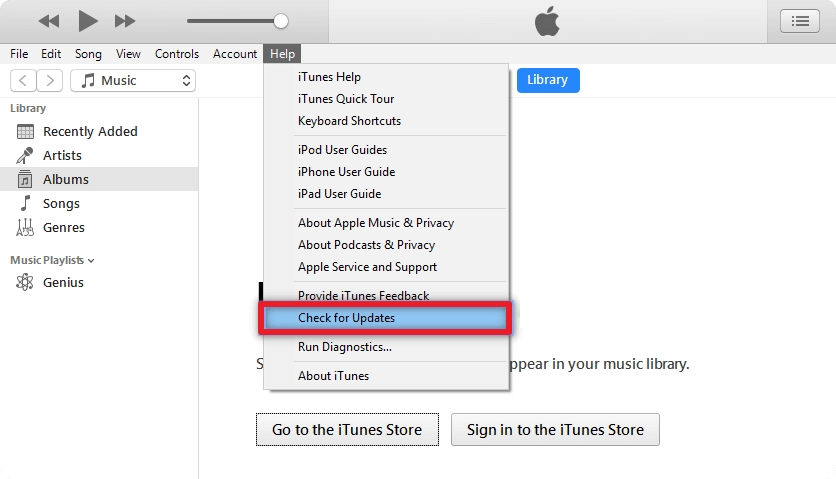
It is important to also make sure that the version of iTunes you are running on your device is up-to-date. Having the latest version of the application can help eliminate some of the bugs that could be causing problems with the device.
To get the latest version of iTunes, simply open it on your computer and iTunes will let you know if an update is available. If it is, follow the on-screen instructions to update iTunes.
Once iTunes is up to date, connect the iPhone to the computer again to see if the error has been resolved.
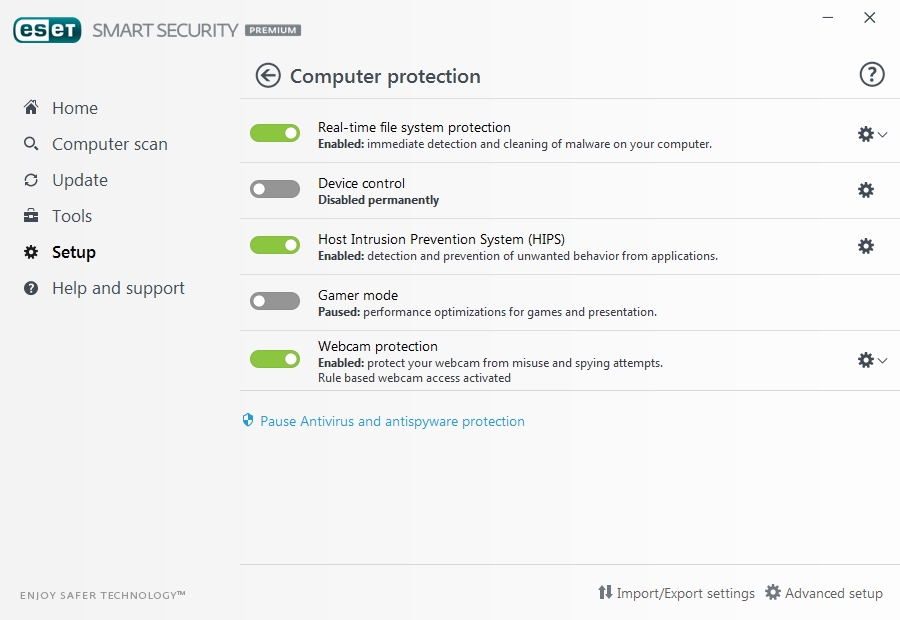
7. iTunes Error Caused by Third-Party Security Software
If all the solutions above fail to fix the problem, you may want to check if the security software you are using is causing the problem. Some third-party security software have been known to prevent iTunes from communicating with Apple Servers to restore or update the device.
If you suspect this may be the case, the best course of action would be to temporarily disable any third-party security software until the update is complete.
