“My iPhone unable to check for iOS 16 update, how to fix it???”
— From Apple Community
Since iOS 16 was released, many users have run into such situations and asked why the new iOS not showing up in the Settings. In this guide, we will show you what you should do when your iPhone is unable to check for an update. This very common error can happen for any number of reasons, but the solutions in this article will work regardless of the reason.
They have proven effective for most of our users who have encountered similar problems.
Let’s begin.
Use FixGo to Fix iPhone Unable to Check for Update without Data Loss (First Choice)
Your device may also fail to find the update because of major systems issues. Therefore, if you are still unable to get the device to update to the latest version of iOS, then we recommend using an iOS system repair tool to eliminate some of these issues. The best tool to use is iToolab FixGo because it can fix more than 200 different iOS issues and therefore gives you the best possible chance of repairing any issue you may have with the device.
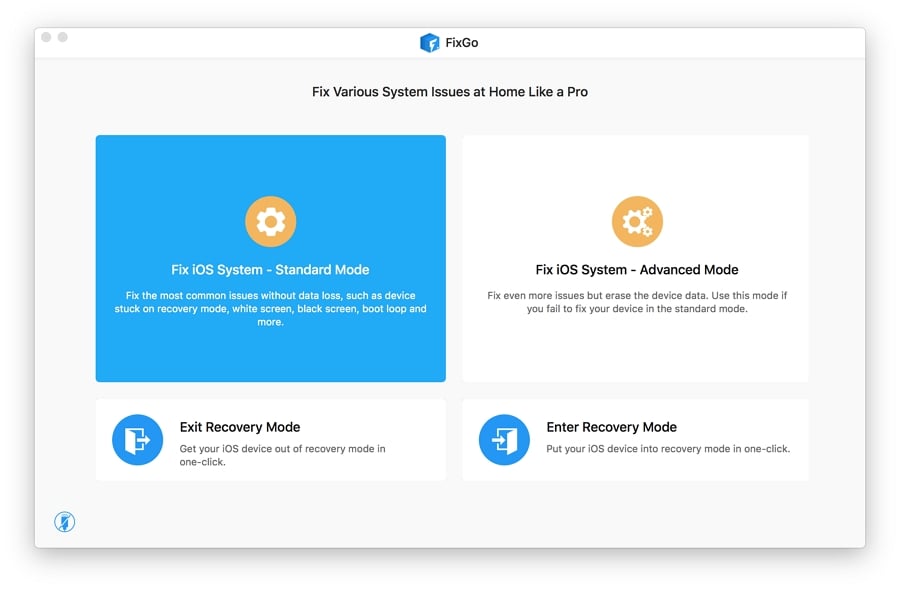
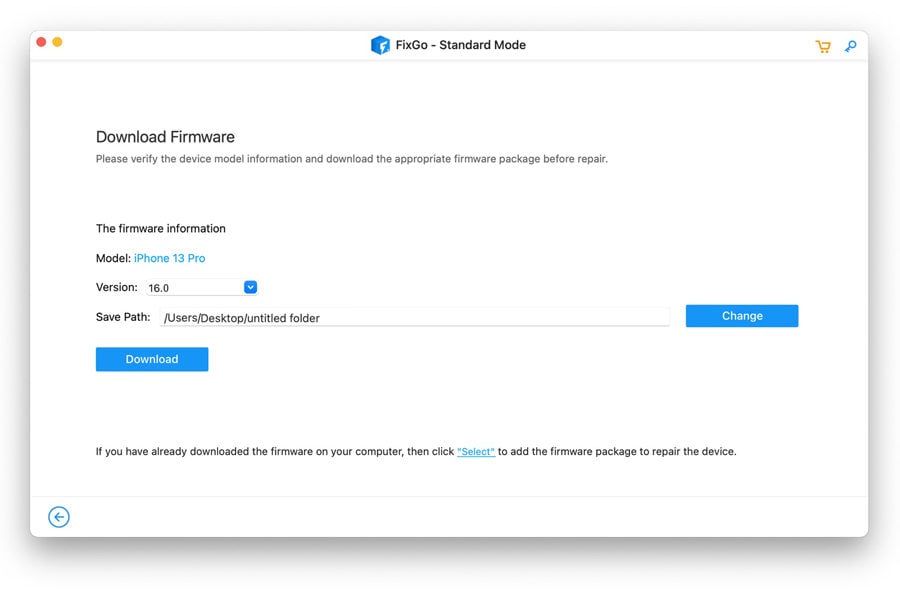
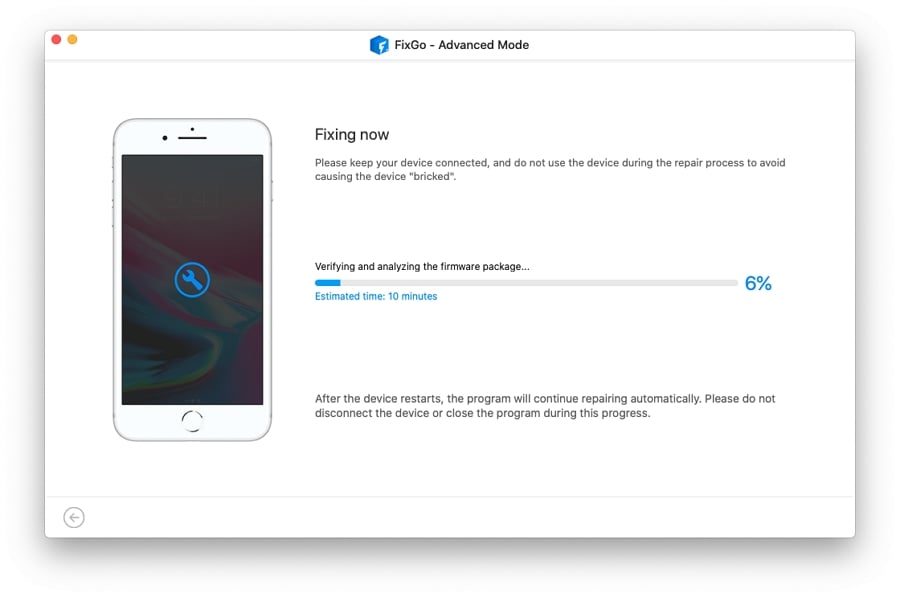
When you use the standard mode to repair the device, you also get to fix the device without affecting any of the data on it. Download the free trial version today to try it.
Step 1: Run FixGo and select “Standard Mode.” Use a lightning cable to connect the device to the computer。
Common 7 Ways to Fix iPhone Unable to Check for Update
- Way 1. Visit Apple’s System Status Page
- Way 2. Delete/Forget Wi-Fi Network then Reconnect
- Way 3. Check Network Settings
- Way 4. Restart or Force Restart the Device
- Way 5. Delete and Reinstall the Update
- Way 6. Manually Install iOS Update using iTunes
- Way 7. Remove any Beta Profiles
Way 1. Visit Apple’s System Status Page
It is entirely possible that the problem is not with your device at all and that the Apple servers are having problems with the volume of traffic. This commonly occurs when Apple releases a new update and millions of users attempt to update their devices at the same time.
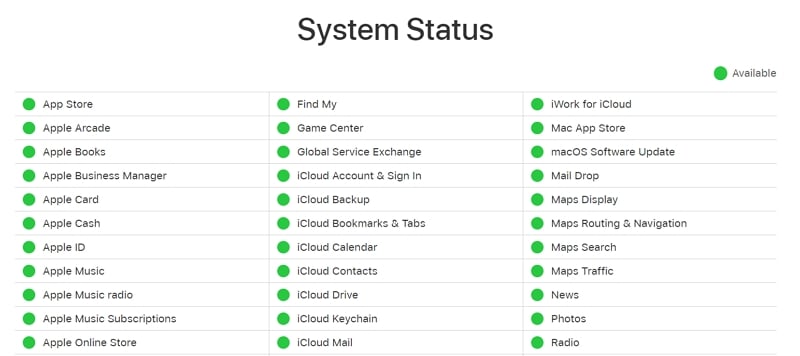
Therefore, the first thing you should do is go to Apple’s system status page to check for any systems that may be offline.
If all the different systems listed on this page are all green, then the problem is with your device in which case you should try one of the other solutions on this guide.
But it is worth pointing out that sometimes the status can appear green even when there is a small problem with the servers. So, if you try all the solutions we are about to outline below and you’re still unable to download the update, check news stories to find out if the problem is with Apple Servers.
If on the other hand any of the systems appear with the yellow caution sign, then there is a problem with the current Apple servers. In this case, there is nothing you can do but wait for Apple to fix the issue. You can try to update the device again in a few hours.
Way 2. Delete/Forget Wi-Fi Network then Reconnect
If there is nothing wrong with the Apple Servers, then the most logical place to look for errors is your Wi-Fi network. An iOS update requires a strong and stable Wi-Fi connection and if there are any errors with your network, you may find it very difficult to update the device.
The best way to fix these errors is to delete or forget the Wi-Fi network and then reconnect to it. Here’s how to do that:
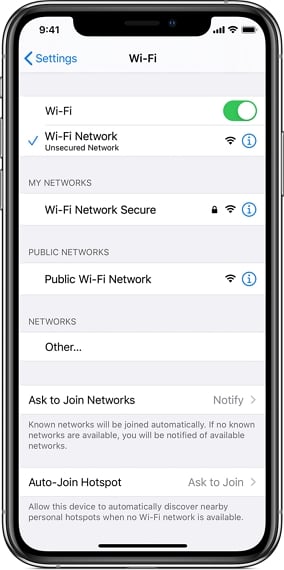
Step 1: Open the Settings from the Home Screen.
Step 2: Tap on “Wi-Fi” and then go to the W-Fi network you are using.
Step 3: Tap on the “I” icon next to the network and then select “Forget this Network”.
Step 4: Tap “Forget” to confirm the action.
Step 5: Restart the iPhone to refresh the memory and then go back to Settings > Wi-Fi to reconnect to the network. Once the device connects to the network, try downloading the update again.
Way 3. Check Network Settings
It is also possible that there are some network errors keeping you from updating the device. So, if you reconnect to the Wi-Fi network of your choice and you’re still unable to update the device, you may want to reset the network settings to remove some of these errors.
Follow these simple steps to reset the network settings:
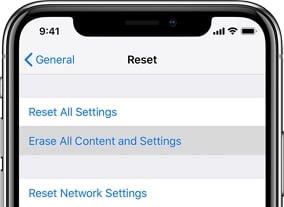
Step 1: Open the Settings and tap on “General”.
Step 2: Scroll down to tap on “Reset”.
Step 3: In the options that appear, “Reset Network Settings” and enter the device’s passcode.
Step 4: Confirm the action and when the device restarts, reconnect to your network to try updating the device again.
Way 4. Restart or Force Restart the Device
Rebooting your device is also another great way to refresh the device and remove some of the errors that may be interfering with the update process. Begin with a soft reset using these simple steps:
Step 1: Press and hold the Power button (and one of the Volume buttons for iPhone X and older) for a few seconds
Step 2: When the “Slide to Power Off” slider appears, release the buttons and drag the slider to turn off the device.
Step 3: Wait at least 30 seconds and then press and hold the Power button again to turn on the device.
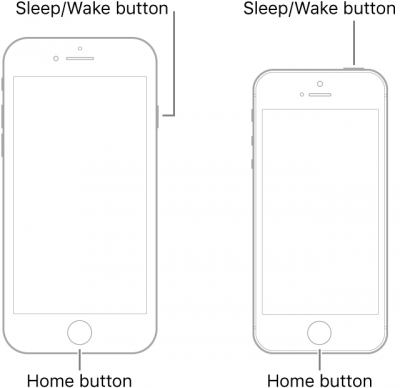
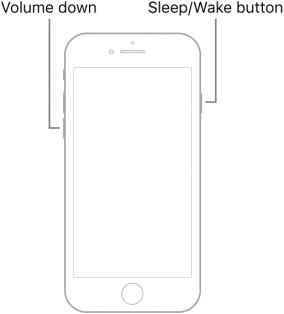
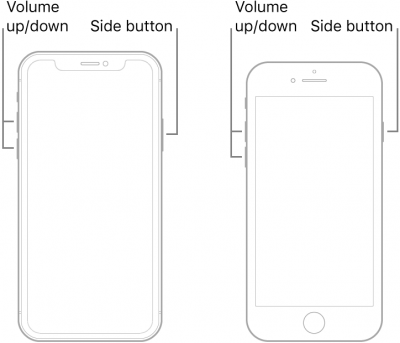
If a soft reset doesn’t work, then try a force restart. Here’s how to do that for the various iPhone models:
iPhone 6s and earlier: Press and hold the Home and Power buttons at the same time until the screen goes completely black and the Apple Logo appears.
Way 5. Delete and Reinstall the Update
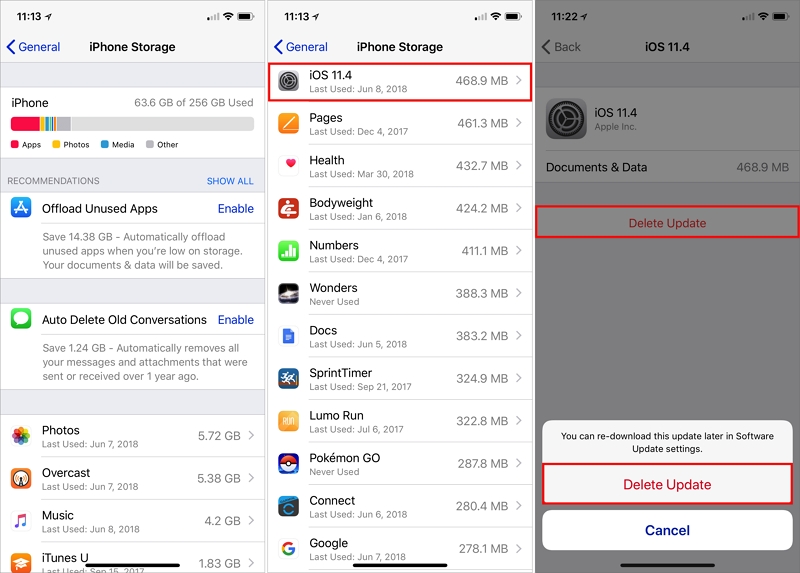
An update can also fail if some of the update files are corrupted, Therefore, it may be worth deleting the update and reinstalling. To delete the update, follow these simple steps:
Step 1: Open Settings and then tap “General > iPhone Storage.
Step 2: Scroll down to locate the iOS update. Tap on it to select it.
Step 3: Tap on “Delete Update” and confirm that you want to delete the update in the popup that appears.
Way 6. Manually Install iOS Update using iTunes
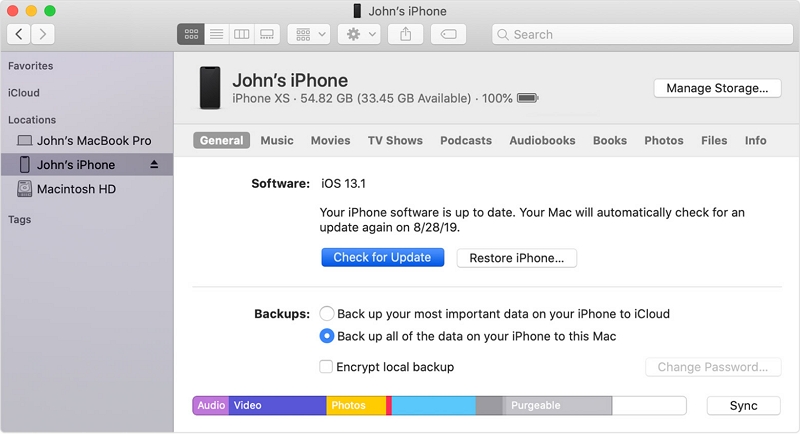
If none of the solutions above help, you should consider installing the update via iTunes. Begin by making sure you are running the latest version of iTunes on your computer and then follow these simple steps:
Step 1: Connect the device to the computer using the device’s lightning cable.
Step 2: Open iTunes (or Finder if you’re running macOS Catalina) and click on the device when it appears in the sidebar.
Step 3: Click on “Summary > Check for Update” to download and install the latest version of iOS on to the device.
Way 7. Remove any Beta Profiles
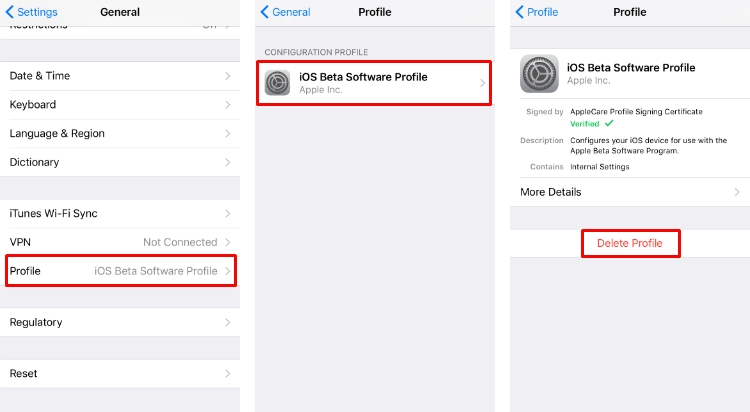
If you had downloaded the beta version of iOS, then the update may not show up in the settings. You may therefore want to delete the beta profile before attempting the update again.
To delete the beta profile, go to Settings > General > Profiles & Device Management and tap on the beta version to delete it.
Summary
Hope you can fix unable to check for the update on iPhone with these solutions easily. We truly recommend the first choice – iToolab FixGo, which can help you fix without date loss. And it can repair 200+ iOS/iPadOS system issues. Therefore, you cannot miss this useful iOS repair tool.

