Screen recording is the creation of screencast videos of events that you find useful on your phone for future purposes. This amazing service is available on all Apple operating systems, including iPhones- thanks to the developers for integrating the screen recording feature into their devices.
The screen recording feature is very handy and easy to operate. Except there is an issue with the feature, it should function properly and give you that quality service seek. Do you have a problem with the screen recording feature on your iPhone? We’ve got some hacks to help you fix that here in this article.
Part 1. Why Is My Screen Recording not Working?
Before discussing the solutions/hacks to fix the screen recording not working issue you are experiencing on your iPhone, let’s take a look at the reasons for the problem.
Fix the poor connection error your experience on FaceTime using the solutions provided below:
- iOS System Glitch: When your iPhone operating system (iOS) glitches, all or some of the apps, whether built-in or installed, start malfunctioning.
- Mismatch Settings: Here is another reason why you may experience screen recording not working on your iPhone. The mismatched settings could be network settings or screen recorder settings.
Besides the reasons above, you may also experience screen recording not working if the platform you want to make a screen recording of doesn’t support screen recording services. Should this be the case, there is no solution/hack to fix the problem.
Part 2. Common Solutions to Fix iPhone Screen Recording Not Working
Fix iPhone screen recording not working issue with these 8 hacks below:
- 1. Restart Device
- 2. Update the iPhone Operating System
- 3. Add Screen Recorder to Control Centre
- 4. Check Restrictions
- 5. Low Power Mode
- 6. Check Storage
- 7. Enable Microphone
- 8. Reset All Settings
Way 1. Restart Device
Rebooting or restarting your iPhone is a great way to refresh your device memory. This solution fixes temporal glitches on your iPhone. To employ this solution, follow the instructions below:
iPhone X and Newer Versions
- At the same time, hold down the Volume Up and Lock buttons.
- Next, you should get the interface below.
- Kindly slide the slide to power off button right to switch off the iPhone.
- Now turn on your device by holding down the Volume Up and Lock buttons.
iPhone 8/7/6 and SE
- Hold the Lock button down till you get the interface below on your screen.
- Next, drag the slide to power off icon right to power off your iPhone.
Way 2. Update the iPhone Operating System
Updating your iPhone operating system is crucial as it helps enhance the system performance and fix bug issues. This solution keeps your device updated, including the system apps.
To update your iPhone operating system,
- Open the Settings tab, and then select General.
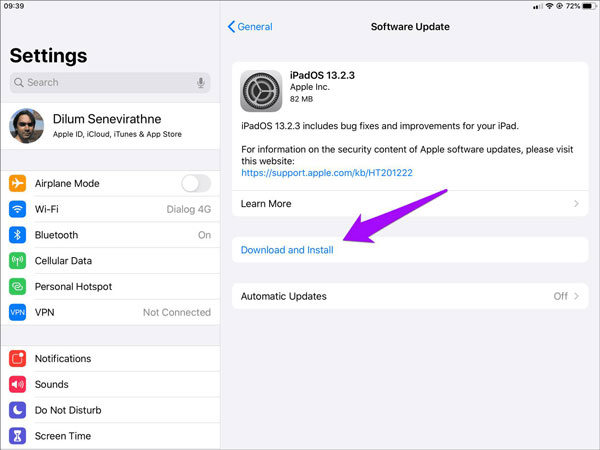
- On the next page, tap on Software Update to confirm if there is an update to be installed.
- Should you find one, click on Download and Install to update your device to the latest operating system.
Way 3. Add Screen Recorder to Control Centre
Adding the screen recording feature to your control center creates ease of use. You do not have to go to settings to search for the screen recorder before you can use it. All you need is to pull down or pull up the control center menu depending on the type of iPhone you use, and then click on the screen recorder to commence usage.
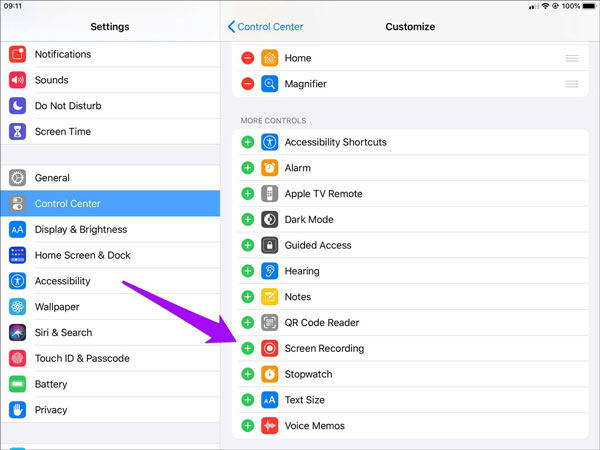
To add screen recorder to the control center menu on your iPhone, hit the Settings tab, and then select Control Center on the next page. Next, scroll to where you have Screen Recorder and then click on the + icon to complete the process.
Way 4. Check Restrictions
Are you clicking on the screen recording feature but getting no response? Chances are you’ve restricted the screen recording feature on your iPhone. You can fix this issue following the instructions below:
- Go to Settings > Screen Time.
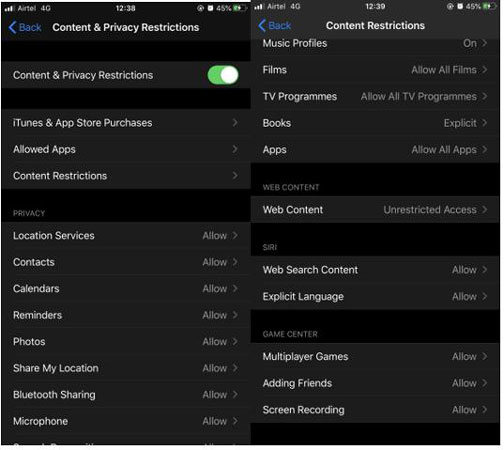
- On the next page, select the Content & Privacy Restrictions tab.
- Should you have a Screen Time passcode, kindly enter it in the empty field provided to proceed.
- Next, click on Content Restrictions, and then scroll down to the Game Recording section.
- Locate Screen Recording and confirm the settings option.
- Should you have Don’t Allow selected, kindly switch to Allow to disable restriction of the screen recording feature.
Way 5. Low Power Mode
Do you have low power mode turned on while creating a screen record? If yes, there is a possibility that the screen recording feature won’t work. The reason is that low power mode slows down your device functionality. Kindly disable low power mode so screen recording can function. Follow the guide below to do this:
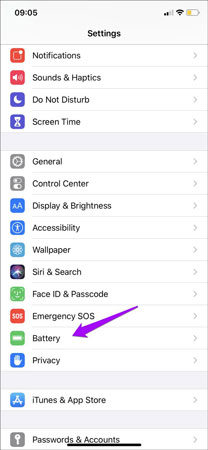
- Go to Settings > Battery.
- Next, slide the Low Power Mode icon left to disable low power mode.

Way 6. Check Storage
Screen recording files failing to save to Photos? Try checking your storage space to confirm you still have enough. To do that, open the Settings tab, and then select General. A new page will immediately pop up on your screen. Scroll to where you have iPhone Storage and then click on it. The interface below should come up:
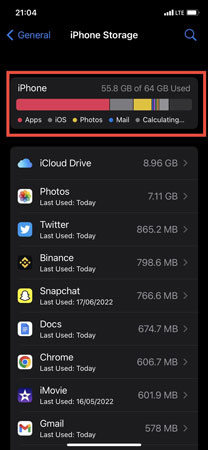
The section marked with red shows the total memory space used. Should you have low memory space, try deleting unused or irrelevant files and apps.
Way 7. Enable Microphone
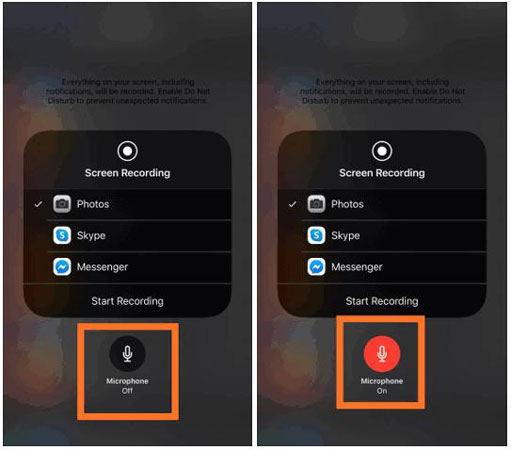
Is audio sound excluded from your screen recordings? Fix the issue by adjusting your microphone settings before screen recording. To do that, launch the Control Center menu, and then long-press the Screen Recording feature. Next, the interface below should pop up:
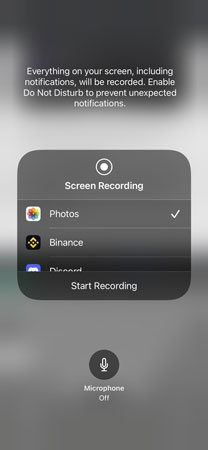
Now click on the Microphone icon to turn on the microphone. Once that’s set, you can start screen recording.
Way 8. Reset All Settings
Restore your device settings to default settings following the instructions below:
- Launch Settings.
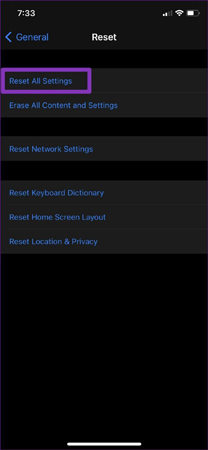
- Click on General > Reset.
- Next, tap on Reset All Settings to complete the process.
Part 3. Fix Any iOS Issues Quickly without Data Loss
Screen recording still not working after applying the hacks above? There might be an issue with your iPhone operating system or firmware.
Fixing this problem is easy if you have the iToolab FixGo system recovery software at your fingertips. This intuitive software is well-defined with mind-blowing features. The software provides several amazing services. You can employ the services of iToolab FixGo to update & downgrade your iOS, repair your device firmware, and more.
Step By Step Guide to Fix Any iOS Issues with iToolab FixGo
Check out the detailed stepwise guide below to fix any iOS-related issues on your iPhone using the iToolab FixGo system recovery software:
Step 1: Browse the official website for iToolab FixGo on your Windows or Mac computer to download and install the software. Wait a while for the installation process to complete, then you launch the iToolab FixGo for operation.
iToolab FixGo
Fix iOS/iPadOS/tvOS Issues like Screen Recording Not Working
- Resetting iOS devices without entering current password.
- Compatibility with all the iOS versions including iOS 15.5.
- Fixing iPhone, iPad or any other iDevice without losing data.
Step 2: Next, you will be requested to select a mode of repair. iToolab FixGo supports Advanced and Standard Modes. Select the Standard, and then connect your iPhone using a USB Cord.
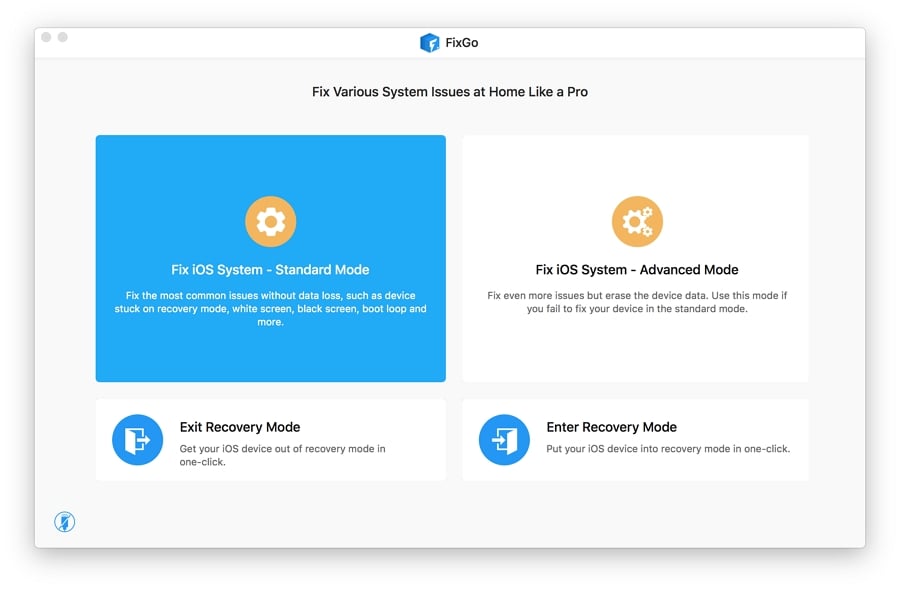
Once that’s set, click on Fix Now to proceed.
Step 3: Now iToolab FixGo will automatically source the latest firmware that you need to repair your device firmware. Should it find one, you will receive a download notification just as shown below:
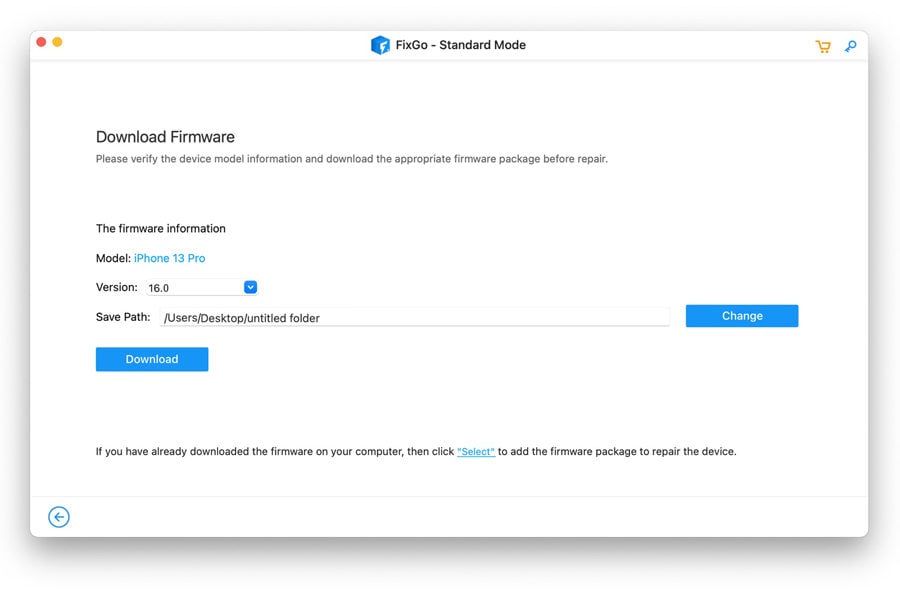
Step 4: Click on the Download tab.
Wait a while for iToolab FixGo to download the firmware. After that, click on Repair Now to commence firmware repair.
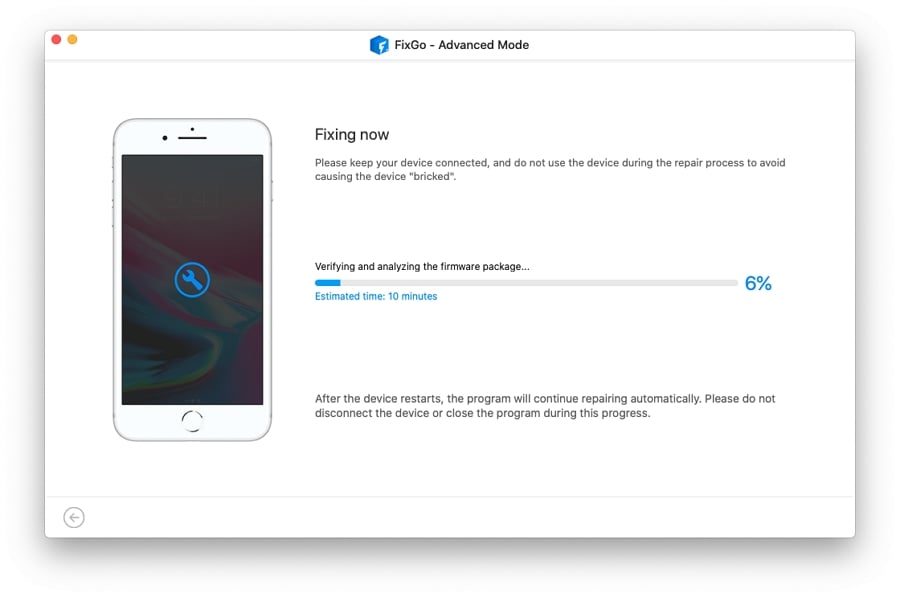
Be patient for the firmware repair to complete, then your iPhone will automatically reboot itself. Once your device comes up, try using the screen recording feature again. It should function well now.
Conclusion
No doubt screen recording is among the most amazing features supported on iPhone. Fixing it when it’s not functioning properly is crucial because of its mind-blowing utility. We’ve introduced at least 8 hacks to fix the screen recording not working issue you may encounter on your iPhone. Kindly apply the hacks should there be a need.


