If you’ve tried to use the ‘Erase All Content and Settings’ option on your iPhone and it’s not working, you’re not alone.
Resetting your device is usually the go-to solution for fixing persistent issues or when you want to prepare it for a new owner. But sometimes, things don’t go as planned.
Software bugs or even something as simple as a network problem with your Apple ID can cause the reset process to fail.
In this article, we’ll walk you through the common reasons why this happens and give you practical steps to solve erase all content and settings not working issues, so you can successfully reset your iPhone.
Part 1: Why iPhone Not Let You Erase All Content and Settings?
If your option to erase all content and settings not working, many issues can halt this process. Such as:
Internet Connection Issues: A weak or unstable connection can interfere with the erasure process. Ensure you have a reliable Wi-Fi or mobile data connection.
Apple ID Verification Failures: You may sometimes encounter problems receiving the Apple ID verification code, or the verification may fail even after entering the correct code. Apple ID verification failures can occur due to temporary issues with Apple’s verification system, connectivity problems, outdated iOS versions, two-factor authentication delays, incorrect time and date settings, or other device-related issues.
Software Bugs: These happen because of hardware or software issues in iOS or iPadOS that influence the loading and rendering of the page. Perhaps, the problems can be solved by upgrading the software of the device.
Server Outages: Sometimes the deletion cannot be completed due to outages or maintenance on the server owned by Apple.
Part 2: How to Fix Erase All Content And Settings Not Working?
If you ever find that your iPhone erase all content and settings not working, don’t panic. The following are ways to solve problems associated with erasing all content as well as settings on the device:
- Fix 1: Force Restart Your iPhone/iPad
- Fix 2: Check Internet Connection
- Fix 3: Reset Network Settings
- Fix 4: Insert a SIM Card
- Fix 5: Turn off Find My iPhone
- Fix 6: Sign Out of Apple ID
- Fix 7: Turn the Screen Passcode Off
- Fix 8: Update iOS Version
Fix 1: Force Restart Your iPhone/iPad
Let’s start the solution with a simple step – a force restart. It can clear minor glitches that might be blocking the erasure process.
Here’s how to perform a force restart depending on your iPhone model:
- iPhone 8 and Later: Quickly press and release the Volume Up button, then the Volume Down button. Press and hold the Side Button until the Apple logo appears.
- iPhone 7: Press and hold both the Volume Down and Sleep/Wake buttons simultaneously. Release when the Apple logo appears.
- iPhone 6s and Earlier: Press and hold both the Sleep/Wake button and the Home button simultaneously. Release when the Apple logo appears – your phone will be restarted.
There are many chances that this simple start would fix the can’t erase all content and settings issue. Otherwise, you can jump to the next solution.
Fix 2: Check Internet Connection
For the erasure process, a stable internet connection is compulsory because it has to connect to Apple’s server. Make sure that your device is on a good Wi-Fi connection or a reliable mobile data connection. If the connection is fairly poor or breaks off, then it is advisable to check your network connections or talk to your service provider.
Fix 3: Reset Network Settings
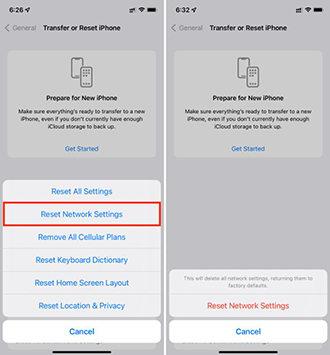
Resetting a network can resolve issues related to connectivity which might be affecting the erasure process. Here are the steps:
- Go to Settings > General > Transfer or Reset iPhone > Reset.
- Tap Reset Network Settings.
- Enter your passcode if prompted.
- Confirm by tapping Reset Network Settings again.
Fix 4: Insert a SIM Card
Inserting a SIM card can resolve issues related to network connectivity and Apple ID verification. If your device doesn’t have a SIM card inserted, follow these steps:
- Locate the SIM card tray on your iPhone.
- Insert a SIM card into the tray.
- Restart your iPhone and attempt the erasure process again.
Fix 5: Turn off Find My iPhone
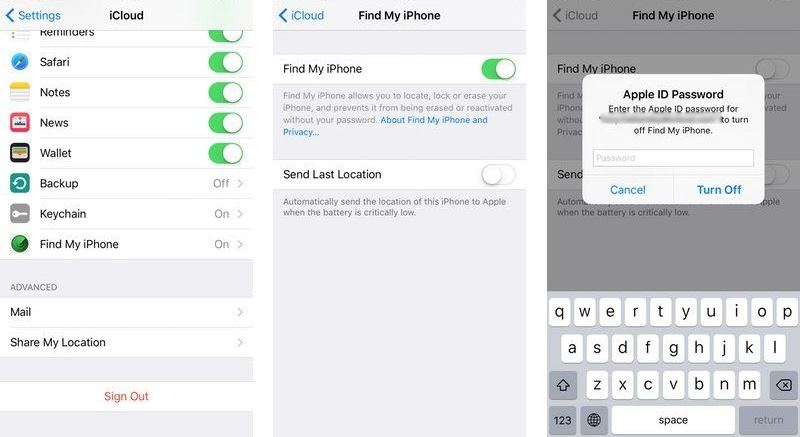
Here is another fix for erasing all content and settings not working and that is turning off the Find My iPhone. Turning off Find My iPhone can help because it disables the security features that might block the reset process, allowing the device to erase all content and settings without interruptions.
Here’s how to do it:
- Open Settings.
- Tap your name at the top.
- Select Find My.
- Tap Find My iPhone and toggle the switch to turn it off.
- Enter your Apple ID password to confirm.
Fix 6: Sign Out of Apple ID
If “Erase All Content and Settings” option isn’t working, signing out of your Apple ID could resolve issues related to iCloud or Find My iPhone that might be blocking the process. By disconnecting your account, you remove potential barriers preventing the reset.
Navigate to Settings, tap your name at the top, and select Sign Out to help ensure a smooth erasure.
Fix 7: Turn the Screen Passcode Off
If you have turned on the screen passcode, you may need to enter the passcode to confirm the erasure process. Turn off the screen passcode can help you erase the device smoothly.
- Go to Settings > Face ID & Passcode (or Touch ID & Passcode).
- Enter your current passcode.
- Tap Turn Passcode Off.
- Confirm by entering your passcode again.
If you forgot screen passcode, you can use iToolab UnlockGo iPhone Unlocker to remove screen lock.
Fix 8: Update iOS Version
Updating to the latest iOS version can resolve bugs or glitches that may be preventing the “Erase All Content and Settings” function from working correctly. Ensure your device is running the most recent software by checking for updates.
- Go to Settings > General > Software Update.
- Download and install any available updates.
Part 3: Alternative Ways to Erase All Content and Settings On iPhone/iPad
If you don’t want to spend time troubleshooting the issue, there are many alternative methods you can use to reset your iPhone or iPad.
Here’s a detailed look at these alternative solutions:
- Way 1. Erase iPhone After 10 Failed Passcode Attempts
- Way 2. Erase iPhone via iCloud
- Way 3. Erase iPhone with iTunes
- Way 4. Erase iPhone without Being Stuck on Activation Lock
Way 1. Erase iPhone After 10 Failed Passcode Attempts
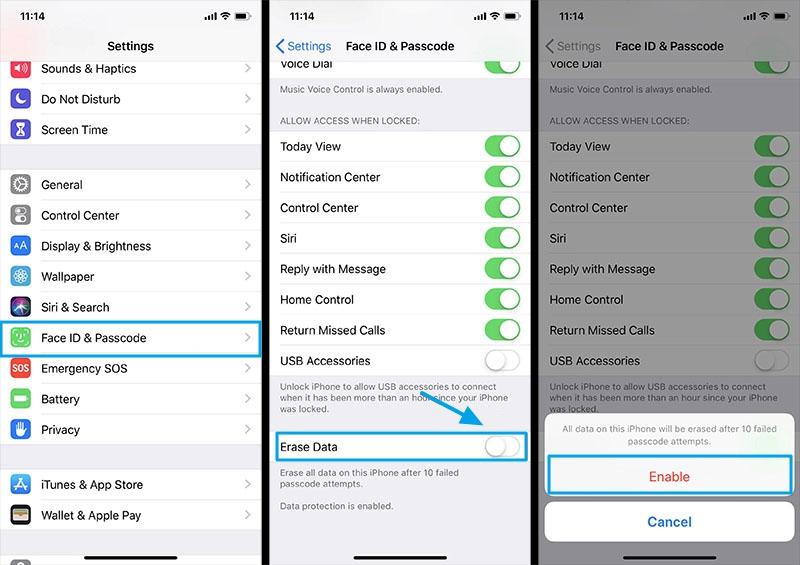
iPhone offers a feature to protect your precious data when it falls into the wrong hands. The “Erase Data” option will clear all the data on the iPhone after 10 wrong passcode attempts. This is data protection feature, but it can also help you erase your iPhone when you can’t erase iPhone via the normal way.
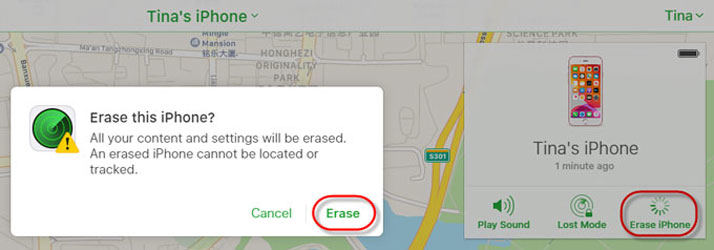
Way 2. Erase iPhone via iCloud
You can erase your iPhone remotely via iCloud if it is connected to the internet:
- Go to iCloud.com and log in with your Apple ID.
- Select Find Devices from the options.
- In the All Devices list on the left, choose the device you want to erase. If you’ve already selected a device, click All Devices to return to the list and select a new one.
- Click “Erase This Device” in the device’s Info window.
- Follow the on-screen instructions to complete the erase process.
Way 3. Erase iPhone with iTunes
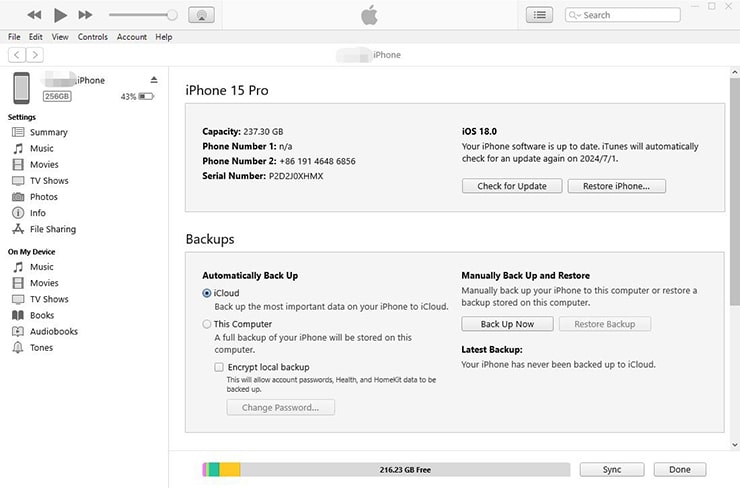
It is also possible to restore your device using iTunes, it will return your device to the state it was when you first purchased it. It can be handy when your device is experiencing issues, such as freezing or becoming unresponsive, or if you’re preparing to sell or give it away.
- Connect your device to your computer using a USB cable, or a Wi-Fi connection.
- Open the iTunes app on your PC and click the Device button near the top left of the iTunes window.
- Click Summary in the sidebar on the left.
- Click Restore, and follow the on-screen instructions to complete the process.
Way 4. Erase iPhone without Being Stuck on Activation Lock
If you have signed into your Apple ID account on the device, you’ll be stuck on the iCloud Activation Lock screen after erasing the device using above 3 methods. If you forgot Apple ID credentials or can’t receive Apple ID verification code, you’re unable to use the device.
Luckily, there is another way to erase your iPhone without being stuck on the activation lock screen. We suggest that you use iToolab UnlockGo iPhone Unlocker.
Why we recommend iToolab UnlockGo?
- It can help you erase iPhone without password or Apple ID verification code.
- It’s easy to use, and it doesn’t require any technical knowledge.
- It supports all iPhone, iPad, iPod touch models, including the latest iPhone 16.
- It’s compatible with all iOS versions, including the latest iOS 18.
All you need to do is to follow the steps provided below:
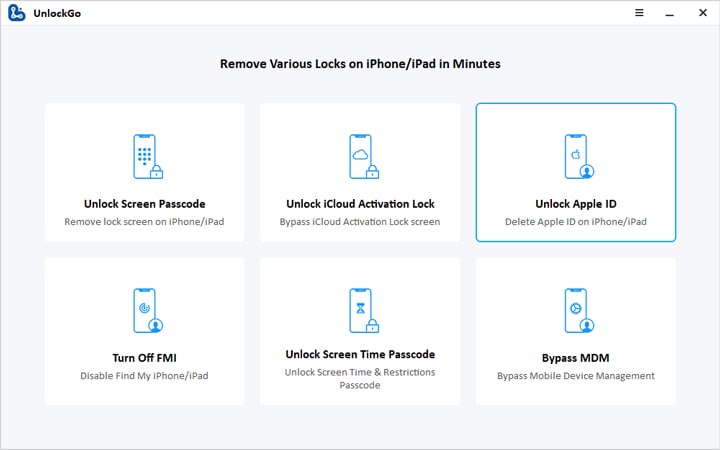
Step 1 Launch the iToolab UnlockGo on your computer then click on “Unlock Apple ID”. Connect your iOS device to the computer and select “Trust” on your iPhone or iPad screen.
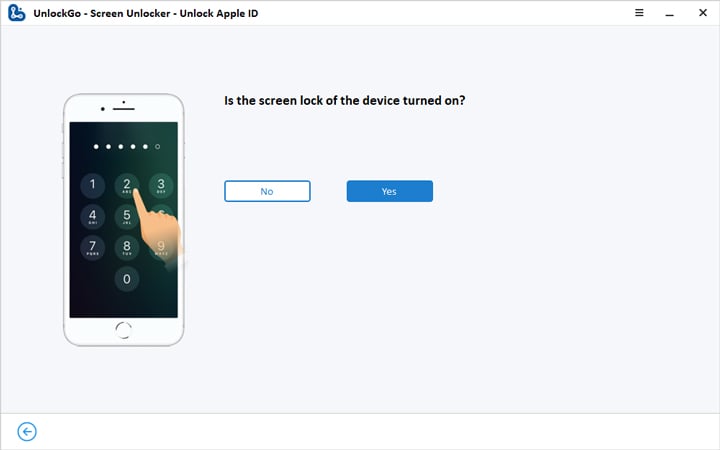
Step 2 Next, you need to ensure the lock screen and Two-Factor Authentication are turned on at your device.
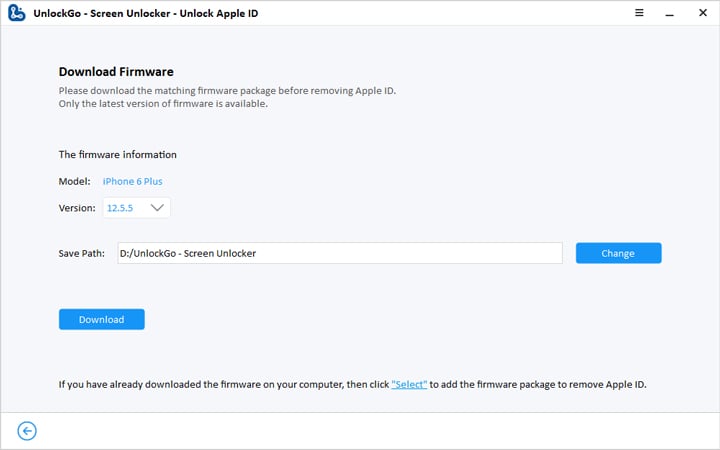
Step 3 Next, download the firmware. UnlockGo will recognize the model of your device instantly. Choose the right firmware version and click on the option “Download.”
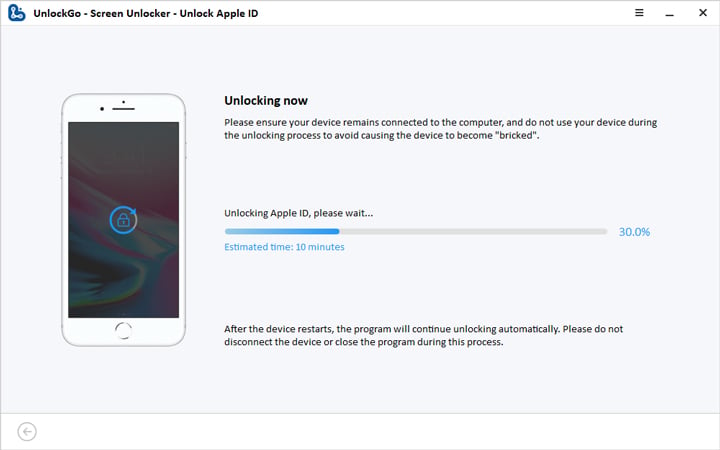
Step 4 After the firmware has been downloaded, active the button “Unlock Now” to start the process of removing Apple ID. It will take a few minutes for the removing process to be accomplished.
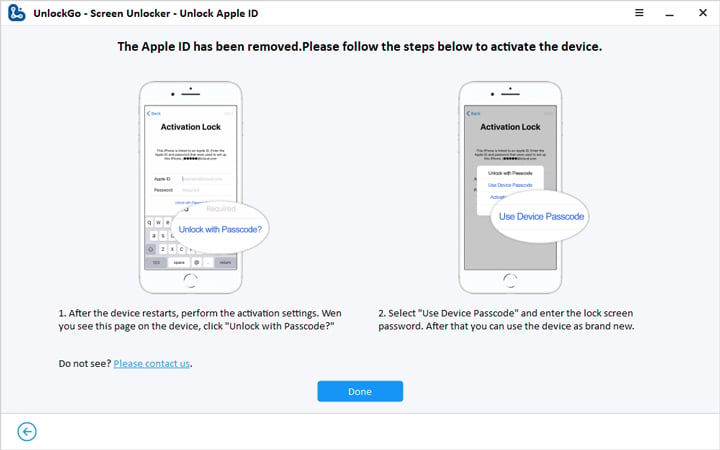
Step 5 Finally, your Apple ID will be deleted and please refer to the instruction on the screen to start your device.
Final Words
There are several possible methods to troubleshoot erase all content and settings not working issue. If you want to erase the device directly, you can also find some methods in this article. For instance, erase iPhone via iTunes, iCloud, or using a powerful tool like iToolab UnlockGo iPhone Unlocker. It can help you easily erase the device and you won’t be stuck on the activation lock after restarting.

