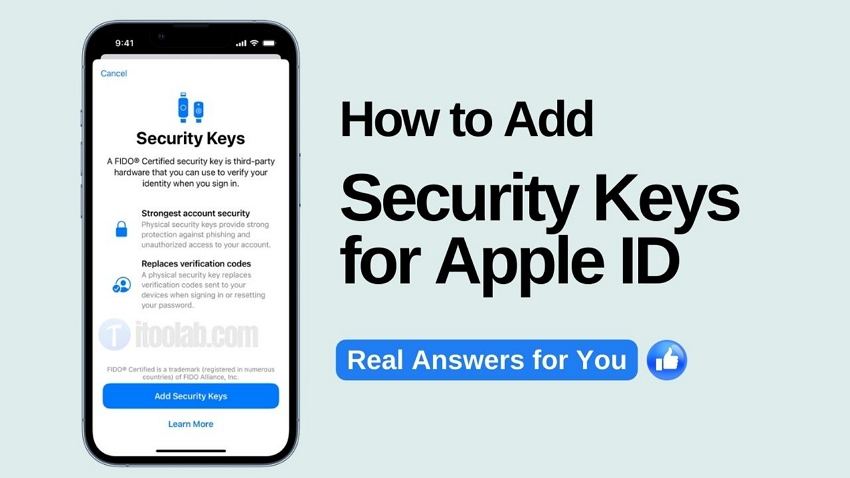
Using Advanced Data Protection, users can now add Security keys for Apple ID. Announced in December, Advanced Data Protection consists of three different layers to protect users’ data. The first one is end-to-end encryption, the second is iMessage Contact Key Verification, and the last layer is two-factor authentication on Apple ID using security keys. Those who are concerned about their security can add this option to protect their important data. Moreover, these hardware security keys are essential for the verification process and will protect your account from attackers. In short, your account security will be in your own hands. Let’s discuss what these keys are and how you can use them.
Part 1. What are Security Keys for Apple ID?
A hardware security key is a two-factor authentication process to verify that you are the actual owner of the account. You can enter these keys with the help of small USB devices that can plug into your PC. You can also wirelessly connect to your iOS device with the help of NFC or Bluetooth.
As recommended by Apple, Yubico is the popular company that provides the best hardware keys. The company offers USB-C connectors, NFC connection, and Lightning key for your iPhones. However, these keys only work with devices having iOS 16.3 and macOS Ventura 13.2.
Furthermore, it won’t be wrong to say that the USB-C, Lightning, or NFC dongle has replaced the six-digit verification code which Apple sends to another device. But remember that if you have lost the Security keys, you won’t be able to open your account and will be locked permanently.
Part 2. How to Add Security Keys for Apple ID?
With iOS 16.3, iPadOS 16.3, and macOS Ventura 13.2, users can easily add the security key to their accounts. You can even purchase a security key, but for that, you have to check if the device is compatible or not. Remember that Apple only accepts those security keys which have FIDO2 or WebAuthn standards. Once you have fulfilled all the requirements, let’s see how you can add security keys for Apple ID on iPhone and Mac.
If You’re Using iPhone:
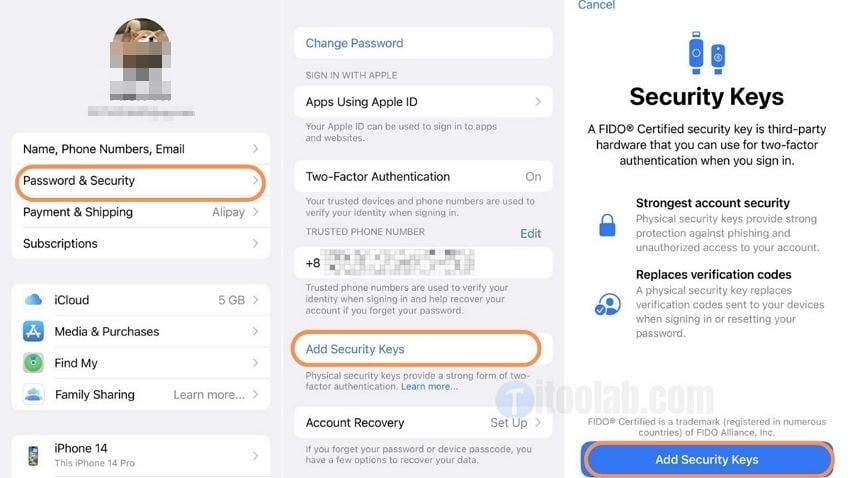
- Open your Settings and click on your profile at the top.
- Now, visit the Password & Security option.
- Scroll down a bit to look for the “Add Security Keys” option.
- Go to the next screen, click on the “Add Security Keys” option, and follow the instructions on the screen.
- You will be asked to enter two security keys. Once you have entered the key, it will replace the verification code which Apple sends during the verification process.
Read to Learn why Apple ID has been locked for security reasons.
If You’re Using Mac:
- Open System Settings, click your name, then click the “Password & Security” option. Scroll down and look for the Security Keys section, then hit Add. You will see a pop-up message showing how security keys work.
- Now, hit the “Add Security Keys” option. Next, you will see a box showing why you need to add two security keys. Click the “Continue” option.
- You will see some inactive devices; to continue the process, you have to sign out of them. Once done, enter your password to continue the process.
- Next, you will be asked to enter the first security key. Once done, click the “Continue” option. Don’t forget to press the button on the security key to turn it on.
That’s it! This is how you can easily add Security keys for Apple ID on Mac and iPhone.
Part 3. How to Use a Security Key with Apple ID?
Here are the steps to use a security key with your Apple ID for login:
- First, you have to plug your security key into your PC, or you can connect it via Bluetooth.
- Now, visit the Apple ID login page and enter your username and password as usual.
- You will be asked to enter the verification code but choose the “Use Security Key” option instead.
- Follow the instructions to complete the verification process using your security key. You may be asked to press the button on the security key or enter the PIN; it totally depends on the security key that you are using.
- Once you have successfully entered the right security key, you will be logged in to your Apple ID account.
Part 4. Does my iPhone Have a Built-in Security Key?
Yes, newer iPhones running iOS 14.3 or later have a built-in security key that can be used for two-factor authentication (2FA) to protect your Apple ID account. If you want to enable the security key, you can check the methods above.
Part 5. How to Remove Apple ID If Forgot Password?
iToolab UnlockGo – Apple ID Removeris highly recommended by 34,459,123 users around the world. It is easy to use and compatible with almost all the new latest devices including iPhone 14 series. What’s more, it can bypass the iCloud Activation Lock/MDM lock, remove the screen passcode, turn off Find My iPhone without a password, and much more.
Video Guide: How unlock your Apple ID without password
Did you enjoy this tip? Subscribe to iToolab YouTube Channel
Step 1. Launch the UnlockGo app on your PC and click the “Unlock Apple ID” option.
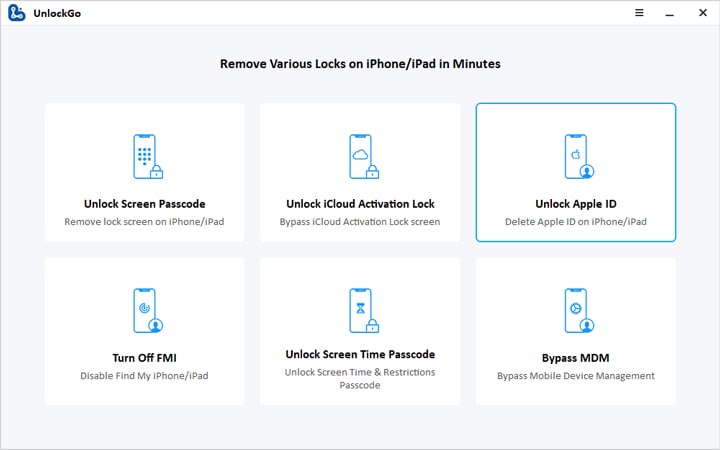
Step 2. Now delete the Apple ID linked with your iOS, hit the “Unlock” option.
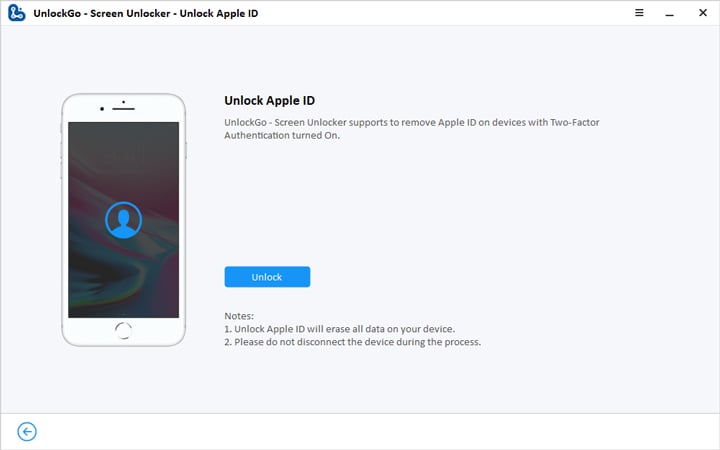
Make sure that Two-Factor Authentication is turned on. Also, don’t forget to unlock your phone to continue the process.
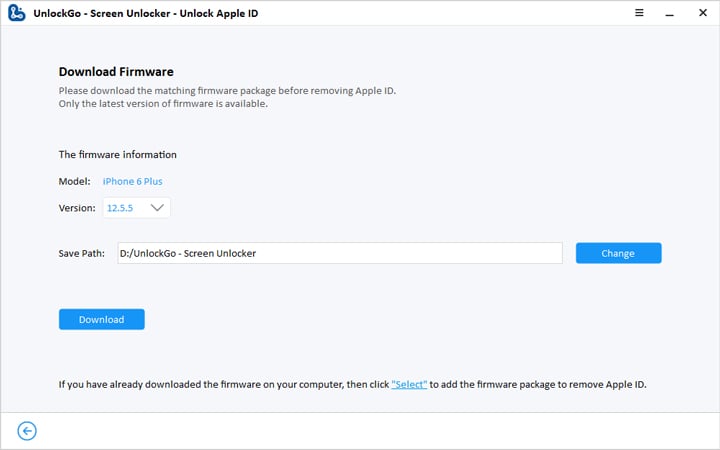
Step 3. Next, you will be asked to download the firmware package on your screen. From the drop-down menu, choose the right firmware and click the “Download” option. Once the firmware package is downloaded, click the “Unlock Now” option to remove the Apple ID.
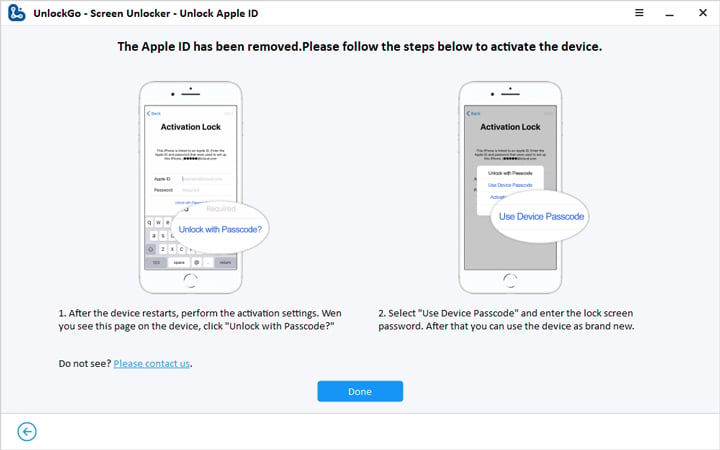
Step 4. Finally, your Apple ID will be removed, and you can follow the instructions on the screen to set up the device.
Conclusion
That’s it! We have mentioned everything about Security keys for Apple ID and how you can use them for the verification process. So, if you want to protect your data using Security keys, then follow the instructions above. If you have forgotten your password and want to remove your Apple ID, you can download iToolab UnlockGo – Apple ID Remover in no time.

