It is common for many iPhone users to update their apps whenever a new iOS beta version is available. They must thoroughly read the details and changes made in the recent version. Currently, Apple has recently released iOS 17 beta. After updating, people have given feedback about some problems: broken iTunes sync, iPhone not unlocking Apple Watch, iOS Bluetooth not working, and other issues we still need to list here.
In this article, you will get the answer to your question about how to downgrade from iOS 17 to iOS 16. Read on below to find out more!
How to Prepare before Downgrading iOS 17?
You have to erase everything on your device to downgrade from iOS 17 beta to iOS 16. Therefore, there are some essential things that you need to do before downgrading your iOS version. Follow the article below to avoid data loss.
1. Backup your iPhone: It’s crucial to back up your device before downgrading. Connect your device with a Wi-Fi connection. Go to Settings > iCloud. Under the iCloud backup settings, toggle the backup button to turn it on and click “Back Up Now” to create the latest data backup.
2. Charge the device: To avoid issues with your device, make sure it has at least 60-70% battery remaining.
Downgrade iOS 17 to iOS 16 without Data Loss
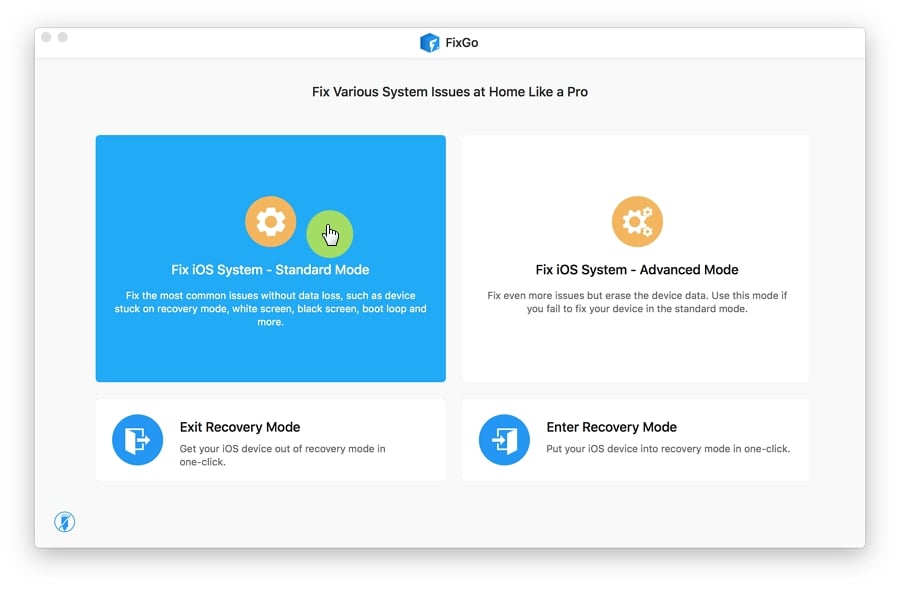
The best way to downgrade iOS 17 beta to iOS 16 without losing data is to use iToolab FixGo. It can fix all of the iOS-related problems. Firstly, you must download and install iToolab FixGo on your computer. Select the Standard Mode from the options that appear on the main screen.
Step 1 Connect Your iPhone with Computer
Connect the iOS device that is causing an error to the computer using the USB cable and click “Fix Now” to begin. If the application does not detect your device, FixGo will recommend that you put it in recovery mode and guide you on how to do it.
Step 2 Download Firmware Package
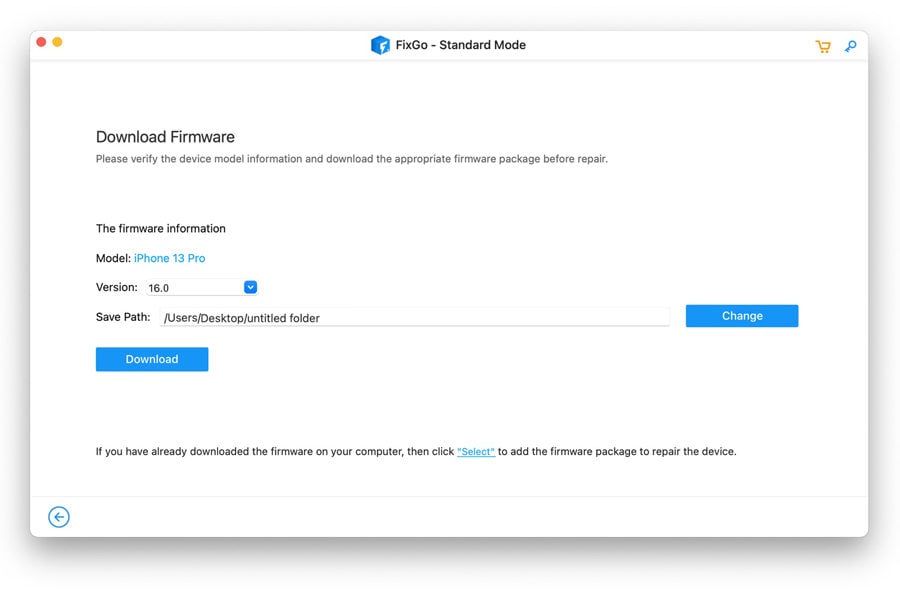
In this step, all you have to do is download and install the latest firmware package on your computer. Then, you need to select the path to save your file. Once firmware has been downloaded, you can proceed for the repairing process.
If you have already installed the firmware package on your computer, click “Select” to manually import the firmware.
Step 3 Downgrade iOS 17 (Beta)
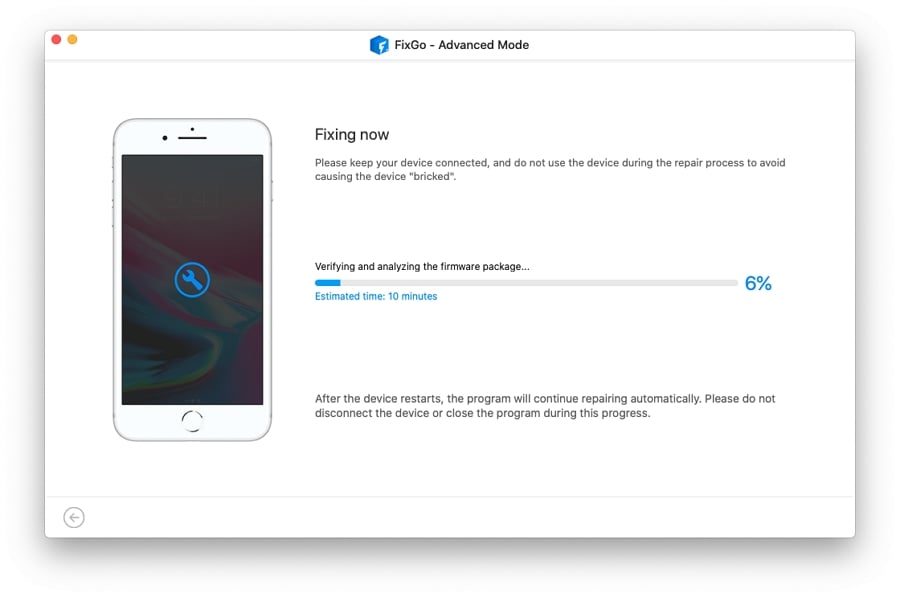
Once the firmware has been downloaded, simply click “Repair Now,” and FixGo will immediately downgrade iOS 17.
Downgrade iOS 17 (Beta) to iOS 16 by Entering Recovery Mode
One of the essential steps in downgrading from iOS 17 to iOS 16 is to put your device in recovery mode. Some of the users need help doing that manually. In that case, you can use the iToolab FixGo to enter recovery mode on-click for free. Follow the below-mentioned steps, or you might end up breaking your device or failing to downgrade. Also, back up your iPhone first with iTunes, a downgrade may cause data loss.
Step 1: Download iOS 16 firmware in ipsw.com and put your device into Recovery Mode.

Step 2: Connect the iOS device to the computer and open iTunes. You will see a pop-up box. Click “Restore” In the meantime, hold down the Shift key on your Windows computer or the Option key on your Mac.
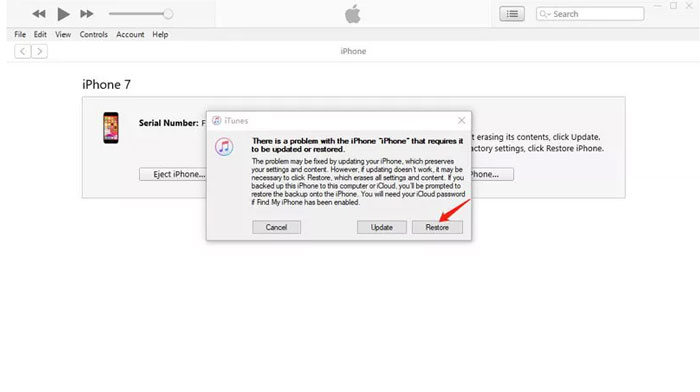
Step 3: Next, select the downloaded iOS 16 firmware on the computer, click “Open,” and then “Restore.” Once done, your device will reboot itself. Make sure to set up your device. And then, all the iOS 17 bugs go away.
Downgrade iOS 17 (Beta) to iOS 16 without Entering Recovery Mode
Step 1: Download iOS 16 firmware package in ipsw.com.
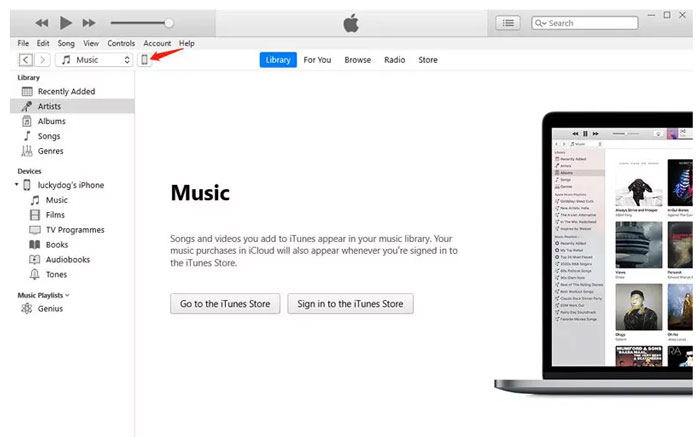
Step 2: Use a USB cable to attach your iOS device to the computer. Launch iTunes on your computer. Then locate and click on the iPhone icon at the screen’s top left corner.
Step 3: Now, select the Restore iPhone option. Meanwhile, it would help if you held down the Shift key on your Windows computer or the Option Key on your Mac.
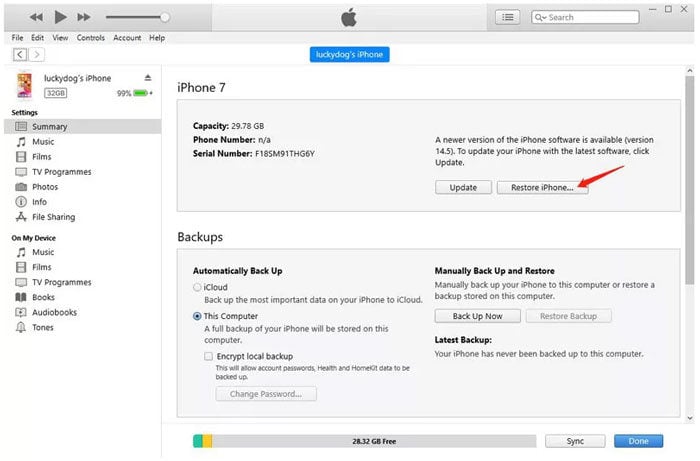
Step 4: Now, you need to choose the iOS 16 firmware package you just downloaded. As a result, iTunes will auto-extract the firmware and restore it to your iPhone.
iOS beta versions might seem exciting initially, but with time, you will likely face issues related to the lock screen, sound problems, or display errors. Therefore, wait for the public version of iOS 17 to be released. If you are already using the older version of iOS 17 and wish to use the newest features now, you can always upgrade your iOS to a more recent version. Check out the link below to upgrade your iOS.
Tips: How to Switch from the iOS 17 Beta to Official?
If you want to switch from iOS 17 Beta to the official version of iOS 17, just wait for the official release and follow the steps below:
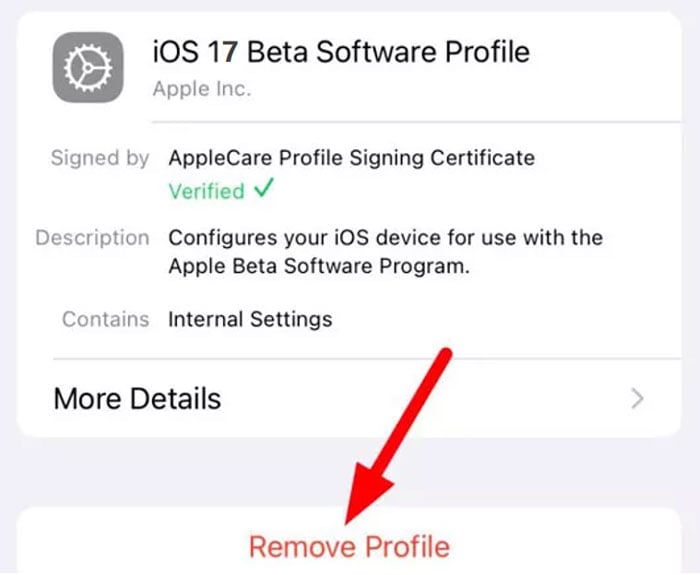
Step 1: Turn on your iPhone, go to “Settings” > “General” > “Profiles”, tap “iOS Beta Software Profile”.
Step 2: Click “Remove Profile” and enter your password (to confirm you want to delete your beta profile).
Step 3: Restart the phone, open “Settings” > “General” > “Software Update”, click “Download and Install” to install the official version of iOS 17 on your device.
Tip:
Since you deleted your beta profile, you will not be eligible to receive any future beta updates.
Above are all the methods to downgrade from iOS 17 or 17Beta to iOS 16, including how to switch from the iOS 17 beta to official. In addition, if you encounter any device issues when updating the iOS 17 system, including but not limited to being stuck in recovery mode or stuck on the Apple logo, it is recommended that you use iToolab FixGo to solve these issues with one click.

