Sometimes, we need to have a centralized system in order to improve productivity and share resources with our workgroup. However, joining the domain from the computer isn’t as challenging as removing the computer from the domain.
You may want to remove computer from domain, probably, the domain doesn’t exist anymore, or you don’t need it any further. This article discusses 5 cases that you would encounter when removing your computer from the domain.
Case 1. Remove Computer from Domain without Administrator Password
If you’re interested in how to remove your computer from the domain without an administrator password, you can effectively do that with UnlockGo (Windows).
No matter whether you want to remove win 7 computer from domain or 10, you can easily remove the computer from domain without an administrator password using UnlockGo-Password recovery software.
How to Remove Computer from Domain without Administrator Password
Step 1 Download the UnlockGo (Windows) from the official website, install it on the unlocked computer and launch it. Click Start to burn USB/CD/DVD.
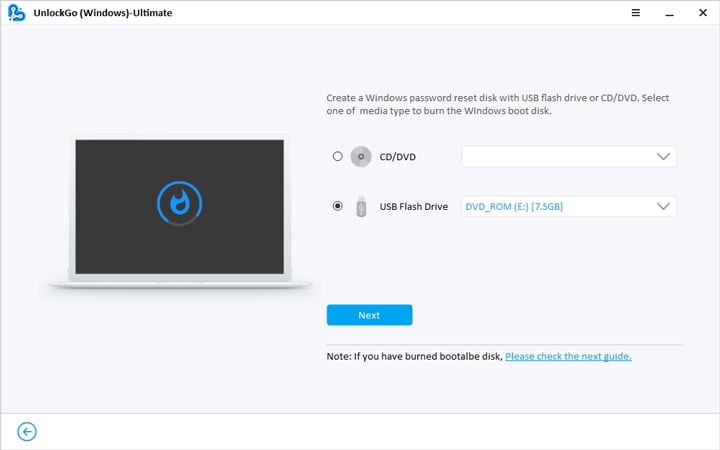
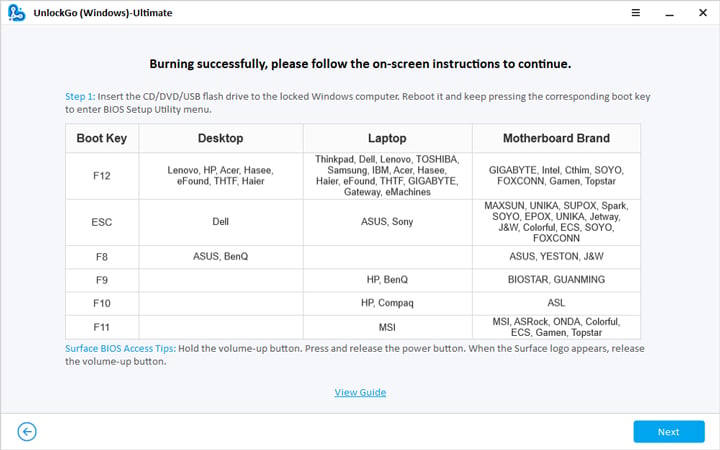
Step 2 After burning, insert it into the computer that you want to get the administrator password. Follow the on-screen instructions to enter bios menu to set your bootable USB/CD/DVD.
Step 3 Next, choose the windows system and target account, resetting/removing account password is available.
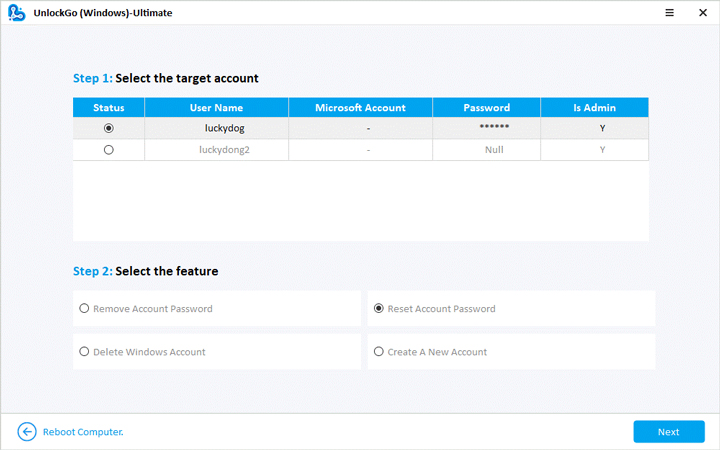
With a new administrator password, you can remove win 7 or win 10 computer from domain account easily, and keep following the cases, you will know exactly how to remove it.
Case 2. Remove Computer from Domain Powershell
Powershell is an advanced version of the command prompt with better functionality and a bit enhanced environment to work with. Using the PowerShell command prompt, you can easily remove your computer from the domain by inputting a command.
Here’s how can you remove computer from domain Powershell with simple commands and steps.
Open PowerShell, type the command “Remove-Computer” and hit enter. You’ll be asked for confirmation. Type “Y” and hit enter. You’ll be asked to restart your computer in order to remove it from the domain. Type “Restart” to proceed. Once your computer restarts, it will move to the default workgroup.
Case 3. Remove Computer from Domain Command Prompt
Removing the computer from the domain using the command prompt is a method. All you need to do is simply type the simple commands in the command prompt and hit enter. The changes will take effect after restarting your computer.
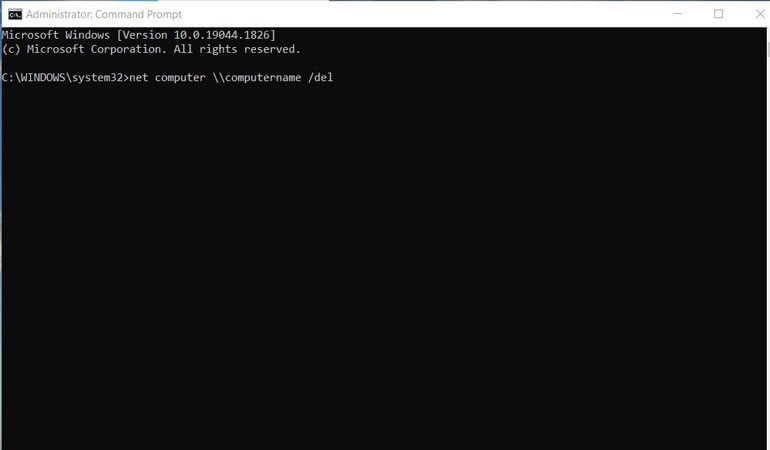
Here’s how to remove a computer from the domain using the cmd/Command prompt.
- First of all, run the command prompt as an administrator.
- Type the command net computer \\computername /del in the command prompt interface and hit enter.
- Finally, restart your computer, and your computer will be removed from the domain.
Case 4. Remove Computer from Domain in System Properties
Using system properties to remove computers from the domain is also one of the easiest ways. If any of the above methods seem complex or didn’t work for you, try removing your computer from the domain in system properties.
Here’s how to remove a computer from a domain in system properties.
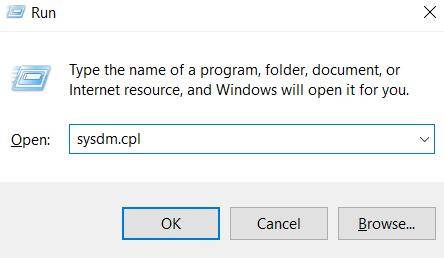
- Launch the Run Command using Windows + R buttons on the keyword.
- Type the sysdm.cpl in the given space and hit enter. The system properties will be opened.
- In the System Properties window under the Computer Tab, click on Change.
- Next, check the Workgroup radio button and type Workgroup name.
- Click on OK and again click OK to confirm the prompt.
Case 5. Remove Computer from Domain in Settings
You can also remove your computer from the domain using your Windows settings. It’s also another easiest and simplest way to disconnect the computer from the domain. Since the windows settings interface is quite user-friendly, it would be much easier for you to do so.
Here’s how to remove computer from domain in settings.
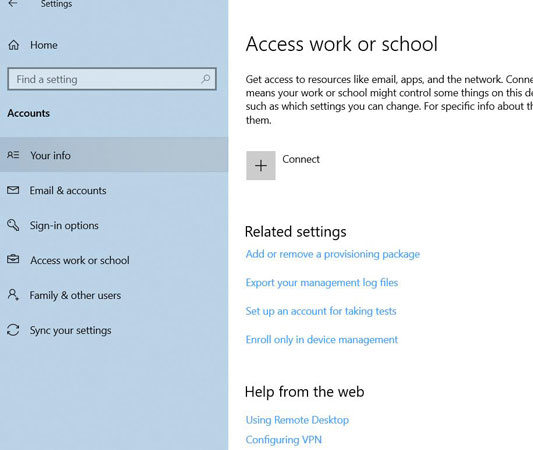
- Open up your Windows setting by pressing the Windows + I button simultaneously.
- Search for the Accounts in the list of the menu and open up.
- Next, click on Access Work or School.
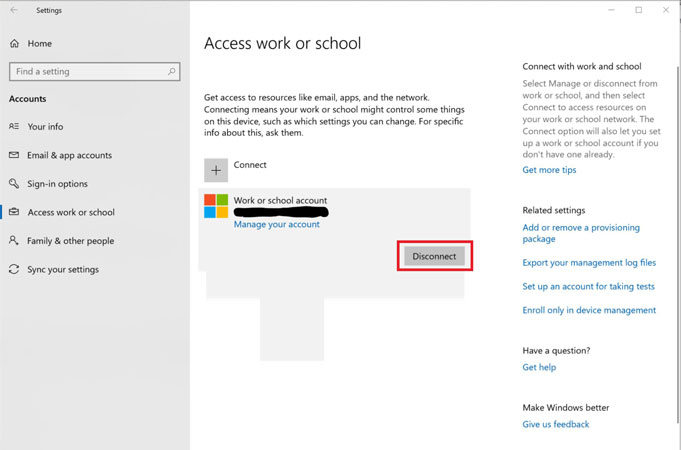
- Here, you’ll see if your computer is connected to any domain.
- Click on the disconnect to remove your computer from the domain.
Domain account controls the local users, it has absolute power, you can also create a domain admin account and control all of your windows account.
Bonus Tip: Change Computer Name on Domain without Removing from Domain
After learning how to remove pc from domain, you might also feel a need to rename your computer for some specific reasons. You can use different methods to rename your computer name without leaving the domain.
Yes, it’s possible to rename your computer on domain without removing it from the domain. There wouldn’t be any damage or loss to the machine. Just make sure to restart your computer after renaming your computer on domain.
Rename your Computer on Domain using Powershell
You can easily rename your computer on domain using Powershell with simple commands. Just copy the PowerShell command below and paste it into PowerShell to rename your computer.
Here’s how to change computer name on domain without removing from domain.
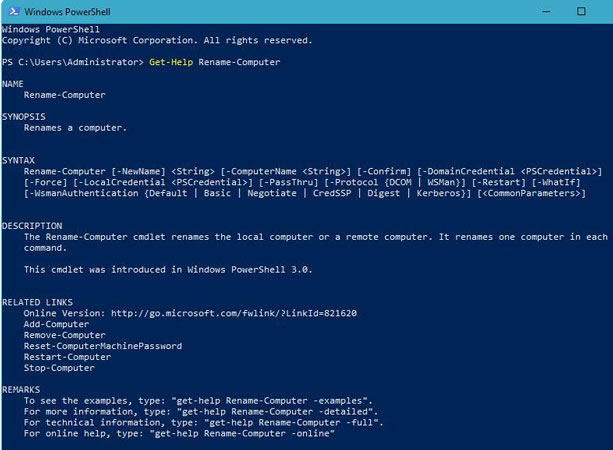
- Open up the PowerShell and type Rename-Computer WKS001, and hit enter.
- The final step is to restart your computer to effect changes, so Restart-Computer in PowerShell and enter hit.
Parting Thoughts
Removing the computer from the domain might seem a difficult task. In this blog, we discuss the 5 best ways to how to remove computer from domain and demonstrate the steps to make it understandable for the regular user. UnlockGo – Windows Password Recovery can help you regain the administrator rights to remove computer windows 7/10/11 from domain easily.
UnlockGo (Windows)
Remove Computer from Domain without Administrator Password
- One-click process to create Windows reset disk by burning USB/CD/DVD.
- Help remove or reset passwords of Windows local, Admin, Microsoft, and Domain account passwords.
- Supports all Windows versions Windows 11/10/8.1/8/7/Vista/XP including Windows server.


