On every PC, the login screen appearing after the PC has been booted allows people to log in to their computer. However, if there is a Windows 10 no login screen after booting up, then it implies that your PC is having problems with its file system. People tend to use Ctrl+ Alt+ Del to solve it, but if you’ve tried and not working, fortunately, these problems can be quickly resolved using the methods listed below.
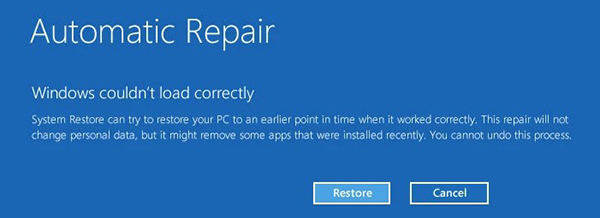
Fix 1: Try Startup Repair
The most basic way to resolve the win 10 no login screen is to try startup repair. When you restart your PC, all its cache files get emptied and restart in a new state. To restart your PC, simply press its power button and hold it until your PC reboots. After the reboots are completed, your no switch user option windows 10 login screen issue will most likely be resolved.
Fix 2: Try to Disable Fast Startup
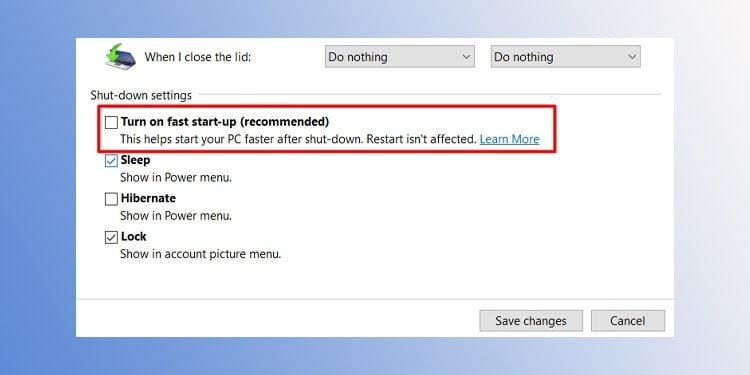
If the fast startup option is enabled on your PC, it might cause a windows 11 no login screen problem. The steps for disabling this feature are:
Step 1: Boot the PC in Safe Mode.
Step 2: After going into the Safe Mode, type Control Panel in the search box. Once Control Panel shows up in the results, click on it to open it.
Step 3: In the available options, click Power Options.
Step 4: Click Choose what the power buttons do from the options given in the left pane.
Step 5: Now, if you see the Shutdown settings section is grayed out and currently unavailable, now you have to proceed to, click Change settings options.
Step 6: In the boxes below, uncheck the box next to Turn on fast startup for Windows 11, and click Save changes to apply these newly made changes.
Fix 3: Try to Boot in Safe Mode
Logging in to your PC with safe mode can quickly help you with the windows 10 no login screen on startup problem. This method boosts your PC by running a system file checker command. This command scans and fixes any corrupt files on your PC, thus allowing it to boot faster. To begin boosting your PC in safe mode, you must follow the steps given below:
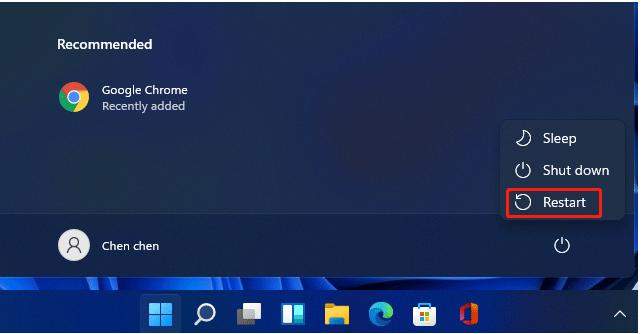
Step 1: Click the Power button and hold the Shift key. In the menu that opens, click Restart.
Step 2: On the following screen, click Troubleshoot > Advanced options. There, select Startup Settings.
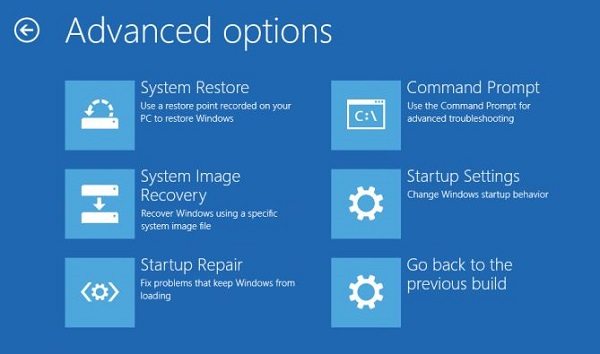
Step 3: You can reboot your PC into safe mode on this screen. To do so, choose the option Enable Safe Mode. This action will prompt your PC to log in to Safe mode.

Step 4: Once the Safe mode loads itself, press the Windows and X keys together and select Command Prompt to open a window.
Step 5: In the Command Prompt window, type SFC/ scannow and hit Enter.
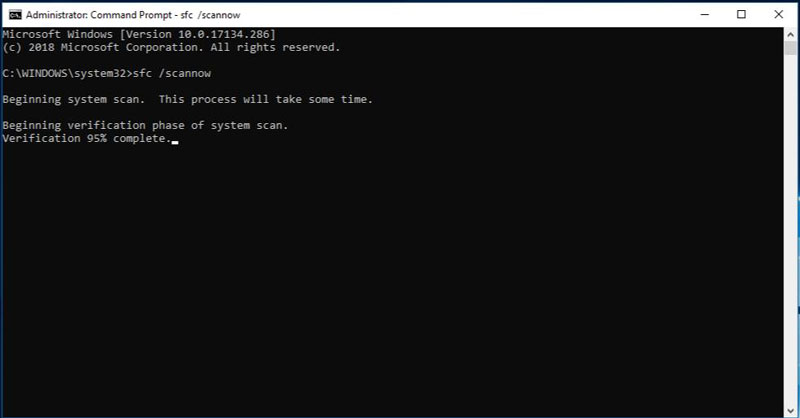
Now, your PC will look for any corrupt files hindering your PC’s reboot and fix them. Once the process is completed, you can reboot and log in to your computer.
Fix 4: Try to Rebuild MBR
Rebuilding your MBR (Master Boot Record) is another great option for resolving the ‘windows 10 no other user option on login screen’ problem. First, turn off your PC and press its power button to turn it on again. Once you see the symbol of Windows 10, hold the power button until it shuts down. Keep repeating this process until you enter WinRE. Now, follow the given steps.
Step 1: Navigate Troubleshoot > Advanced Options > Command Prompt.
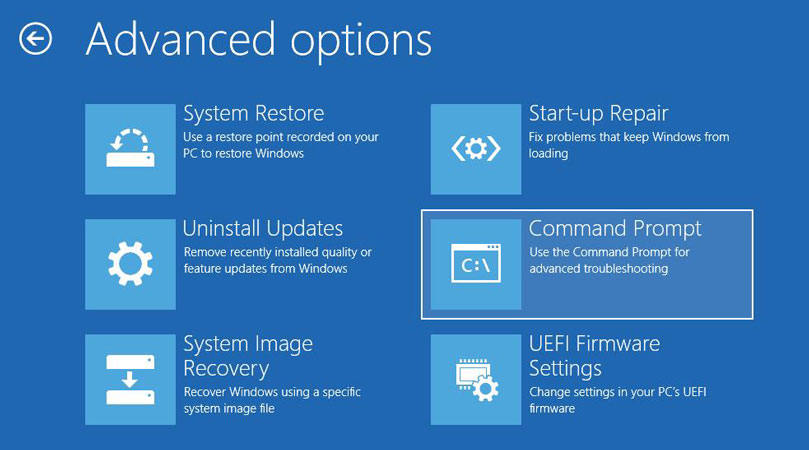
Step 2: Now, execute the three commands given below. Remember to press Enter after typing each one of them. These commands are as follows:
- bootrec /fixmbr
- bootrec /fixboot
- bootrec /rebuildbcd
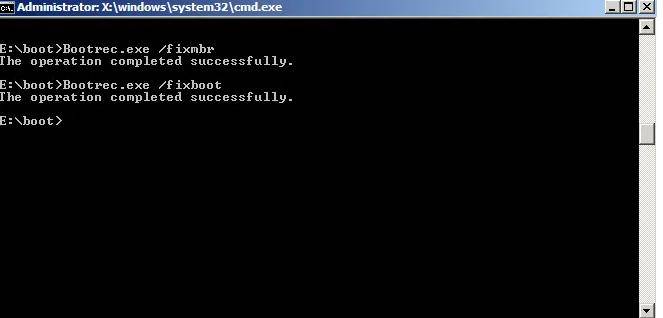
Again, remember to press Enter after typing each command. After restarting your computer, you can see that your login screen has been restored.
Fix 5: Try to Create A New User Account
It might be possible for your present user account to get corrupted. This implies your need to make a new user account to restore your login screen. This method can also help with the ‘dell laptop no login screen’ problem. A new account on your PC begins a refreshed journey with new settings. To create this new account on your PC, follow these steps:
Step 1: On the first step, Boot in your PC’s Safe Mode.
Step 2: Click the Windows icon in your taskbar. In the Start Menu, now choose Settings.
Step 3: In Settings, click the Accounts tile, and from the menu on the left side, choose Family & other users.
Step 4: Keep scrolling down until you find the Other users option in the following menu. There, click the button next to Add someone else to this PC.
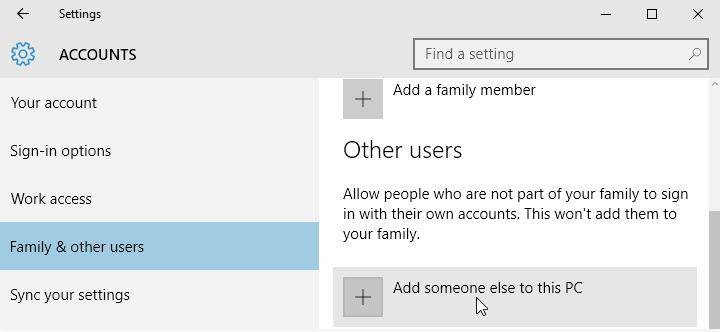
Step 5: Now, by clicking on I don’t have this person’s sign-in information, to quickly create your new account offline.
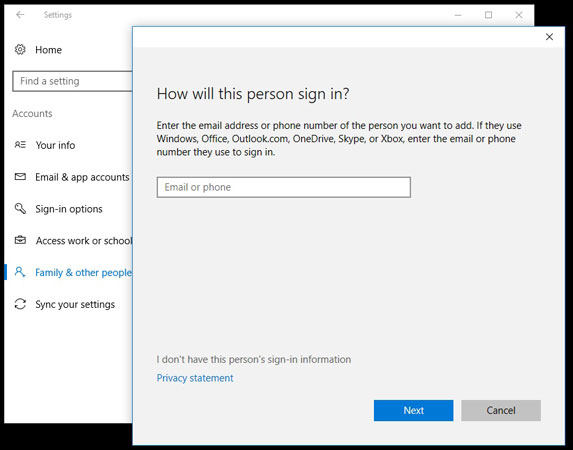
Step 6: After clicking I don’t have this person’s sign-in information, click Add a user without a Microsoft account.
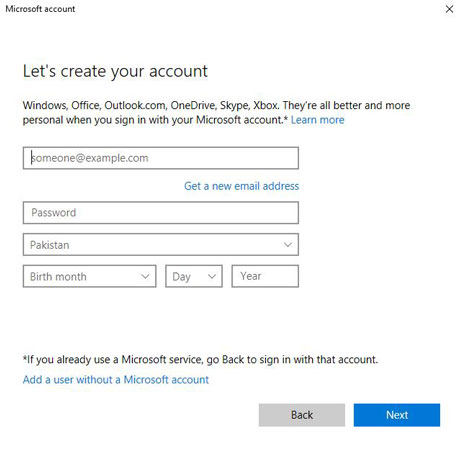
Step 7: in this window, input all the information required to create a new user account, such as name, password, and security options. After completing this procedure, click Next to finish the procedure.
Fix 6: Remove Login Password
The best solution to get an answer to your how to fix no login screen windows 10 is using UnlockGo – Windows Password Recovery Tool. It is quite helpful in restoring your login screen by removing the login password with this incredible tool.
How to Use UnlockGo – Windows Password Access Your PC’s Login Screen?
You can easily download and install Unlock Go – Windows Password Recovery on your PC, as it only takes three steps:
UnlockGo (Windows) – Windows Password Reset Tool
389,390,209 people have downloaded it
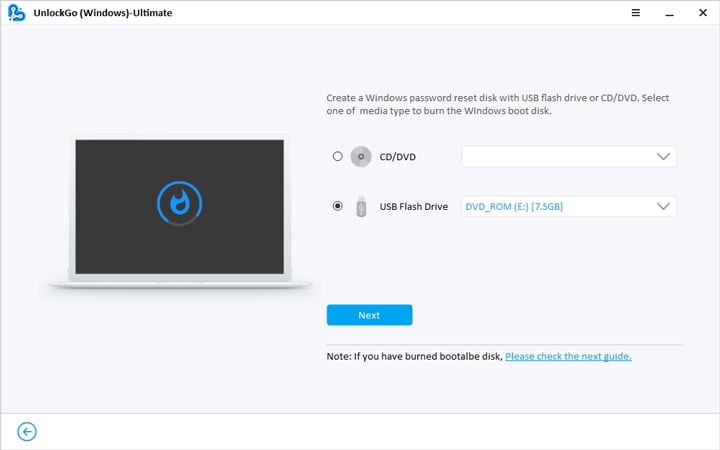
Step 1: Get another PC and install UnlockGo – Windows Password Recovery. On its main interface, you will come across different options to choose your password recovery media. Choose the one you like (in the form of a DVD, CD, or USB). Click Next. And start to burn it as your windows password reset disk.
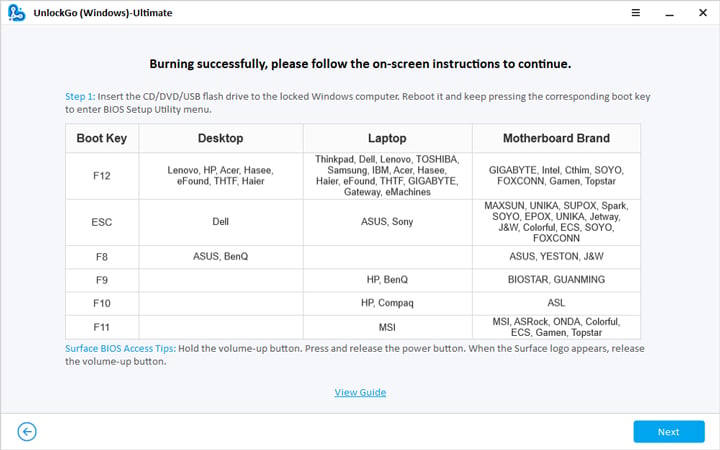
Step 2: After burning, you can insert it into your locked Windows device, and then press F12 or ESC to enter BIOS menu, check the below chart to know how to get into it, and then you should use arrow key to select boot tab and boot device priority to set bootable USB/CD/DVD, finally press F10 to save and exit.
Step 3: Then your computer will reboot and then you can choose Windows system and target account to remove password.
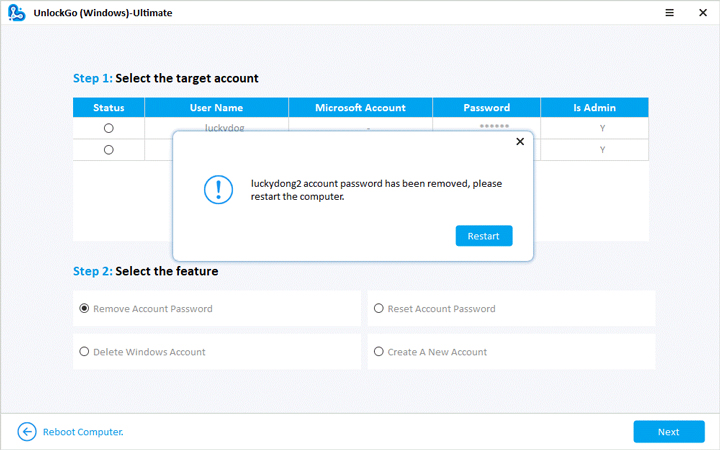
Now you’ve remove the login password, then you can’t encounter no login screen on your computer.
Final Thoughts
This guide takes you on a step-by-step journey of restoring your login screen. If you constantly keep facing the windows 10 no login screen problem, then the fixes mentioned in this guide are meant for you. However, if you face a problem with your login screen due to password problems, then you can use UnlockGo for Windows to restore your login screen ultimately.
- 1 Click to Create Windows Password Reset Disk
- Remove Windows 11/10/8/7/XP/Vista Login Password
- Remove Login Password without Losing Data or Logging In


