You may have heard of the ‘restore point windows’ feature before. It is a backup copy for some of the most crucial files and settings from the Windows OS. In case of system failure or instability, a restore point can recover a PC’s system to an earlier time. Many people use it when forgot login password, so in this blog, it offers an ultimate weapon for you to reset login password without restore point.
Check If There Are Restore Points on Windows 11/10
Restore point is available for Windows XP, Vista, 7, 8, 10, and 11. In this part of the guide, we will learn how to look for the restore points on our Windows 10 and 11 PCs. For starters, it is important to know that the restore point feature is usually not enabled on Windows 11 PCs, so they will have to find this feature and then enable it.
The steps for doing such are indicated in the steps below:
Step 1: Click Settings in the Start menu.
Step 2: Click System in the Settings and scroll down to the bottom page and select About.
Step 3: You will find the System Protection feature in the Related links section. Among the options given beside the Related links section, click System protection.
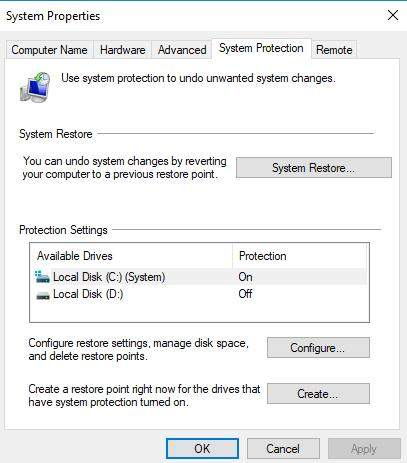
Step 4: Now, you can see a window opening. In this window, you can check for the Protection Settings. If these settings are Off, your System Restore is disabled. Also, the System Restore button on top of the window will be grayed out.

How to Create a Restore Point in Windows 11/10
You learned about finding the Restore Points in your Windows 11 PC in the previous section. In this part, we shall discuss how to enable these ‘restore point windows 10’ after finding them. Below are the steps to ‘create restore points windows 10’.
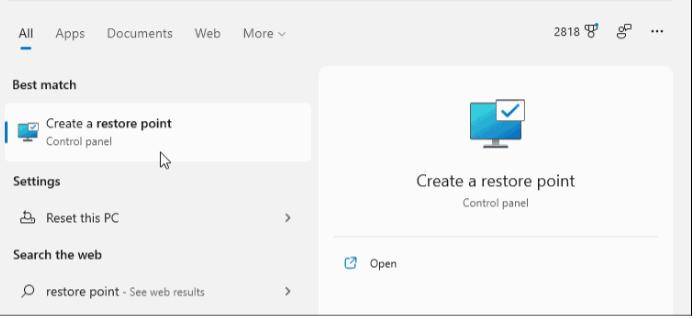
Step 1: To begin with, open your Start Menu and type Restore Point in the search bar. Then, select the option Create a Restore Point.
Step 2: This action will prompt a System Properties window to open with the System Protection tab selected. In this window, you will find a button Create at the bottom. Click that button.
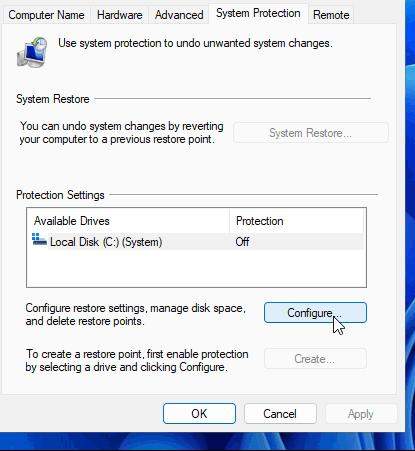
Step 3: Now, another window will appear. Here, assigns a name to your Restore Point. After naming the Restore Point, click Create.

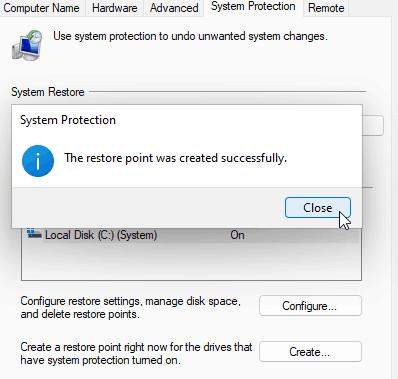
Creating a restoring point will begin, and after its successful completion, you will see a message saying, “The restore point was created successfully”. After receiving this message, click Close.
How to Use Restore Point on Windows 11/10/8/7/XP
Now since you are done with creating a restore point, you would like to know when and how to use it. Consider an example where you mistakenly downloaded a program infected with the virus. After installation, the program started messing around with your PC. In this situation, you would probably like to go back in time and restore those settings on your PC before you installed that program.
To proceed further in this situation, the steps are as follows:
Step 1: In your search bar, type System Restore. In the appearing results, click Create a Restore Point.
Step 2: The System Properties window and System Protection tab opening. There, click on System Restore. A popup window saying Restore system files and settings will open. Click Next in this window.
Step 3: A list of all the restore points you have created will appear on the screen. Choose the one to whom you want to revert.
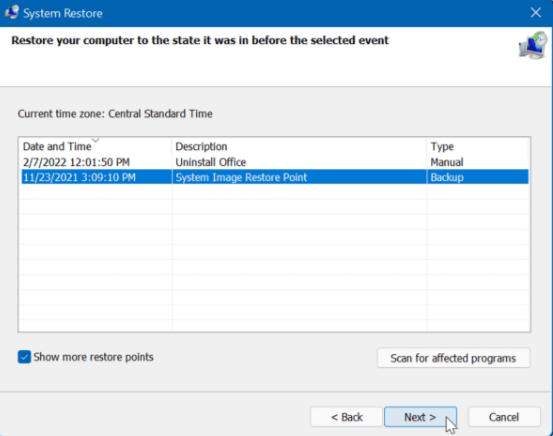
Step 4: Before finishing the whole process, you can click on a button saying Scan for affected programs to get a list of programs that will be deleted or automatically restored with your selected restore point. After the scan is done, click Next.
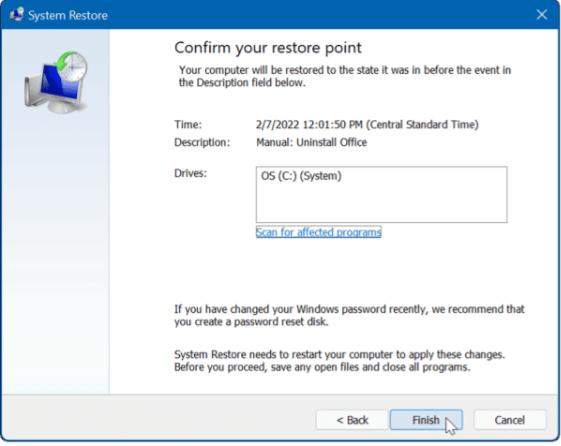
Step 5: In the following confirmation window, you can see your chosen restore point, the drive it will affect, and a warning stating that you might need to create a password reset disk with a USB drive. Click Finish to conclude the process.
FAQ: What Folder Is Used by Windows to Hold Restore Points
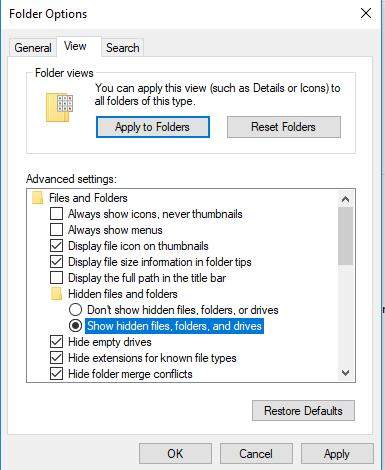
A windows 11 restore point is usually stored within the System Volume Information folder inside each drive, e.g., C: \System Volume information. If you are unable to see the folder in your Windows Explorer, change the viewing options by Folder option > View. There, uncheck Hide-protected operating system files. Instead, check Show hidden files, folders, and drives.
Extra Tip: Reset Forgotten Windows Password for Creating Restore Point
Now since you learned all about the restore points, it is important to mention that if you forget your PC’s password for any given reason, you won’t be able to take your PC back in time by using these restore points. In a situation like this, you can look forward to using UnlockGo – Windows Password Recovery.
The process of downloading and using UnlockGo – Windows Password Recovery is straightforward and requires only three steps, please see the detailed guide here.
Quick Summary
The ‘restore point windows’ is an essential feature in Windows PCs allowing their users to restore their PC settings to normal after a mishap. We took a step-by-step approach to introducing this feature to you through this guide. Moreover, we also explained how you could create and restore these restore points to revert your PC’s settings to normal. And in case you find it difficult in this process because of forgetting the password, you can try UnlockGo – Windows Password Recovery to re-access your PC.
- It only takes a single click to create a Windows password disk
- You can reset and remove passwords from all types of Windows accounts
- You can even create and delete all types of accounts
- All versions of Windows are supported
- All major PC brands are supported

