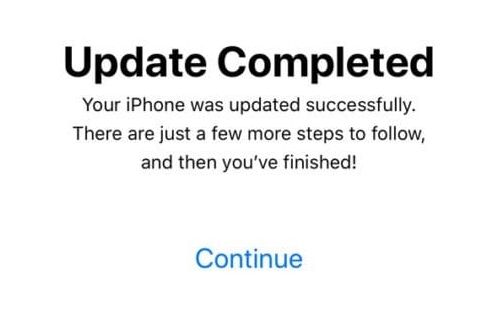
This guide offers you a number of solutions when your iPhone stuck on update completed screen. These solutions will effectively fix the device as they have for many of our users who have faced this issue before.
But, keep in mind that you may be seeing this screen because the update is just slow, which is why our first recommendation is to simply wait.
FixGo – Fix All Kinds of Stuck Issues in One Click
389,390,209 people have downloaded it
Why My iPhone Stuck on Update Completed Screen?
You might wondering the reason why the device stuck on the update completed screen. In fact, there are so many reasons. You had the better to check the following things before solve the problem.
- Poor Network: It is important to have a strong internet during iOS update process. If your internet connection is poor, you should try to restart your router.
- Insufficient Memory: Stucking on the update completed screen usually cause by the the lack of enough memory.
- Overheated: You should let your iPhone away from direct sunlight during the updating and remove your iPhone case to keep your iPhone cool. Cooling down your device can be achieved by turning off location services and Bluetooth.
- Corrupted Data: Sometimes, the certain applications or data may turn out to be corrupted when you download them. You need to check before downloading any files or applications.
Best 7 Ways to Fix iPhone Stuck on Update Completed Screen
- 1. 100% Working to Fix with iToolab FixGo without Data Loss
- 2. Restart Your Device
- 3. Let the Device Complete the Update
- 4. Reset Your iPhone in iTunes
- 5. Restore The iPhone via Recovery Mode
- 6. Restore Your iPhone via DFU Mode
- 7. Contact Apple
1. Fix The Issues with FixGo without Data Loss [First Choice]
Here is an ultimate way to fix iPhone stuck on software update complete screen, which is iToolab FixGo. This program will be effective in eliminating this problem because these are the kinds of issues it was primarily designed to fix. If you update to iOS 26/18 and it gets stuck, this software is also helpful because it supports the latest iOS version. It is designed to easily fix more than 200 of the most common iOS system issues, including a device that is stuck on the Apple Logo or the “Update Completed” screen.
One Click to Fix iPhone Frozen Issues Like a Pro
- Fixes all 200+ iOS stuck issues without losing data.
- Requires only one click to enter/exit the iOS recovery mode.
- All iPhone/iPad errors can be fixed easily.
- Support the latest iOS devices and versions includes iPhone 15 and iOS 26.
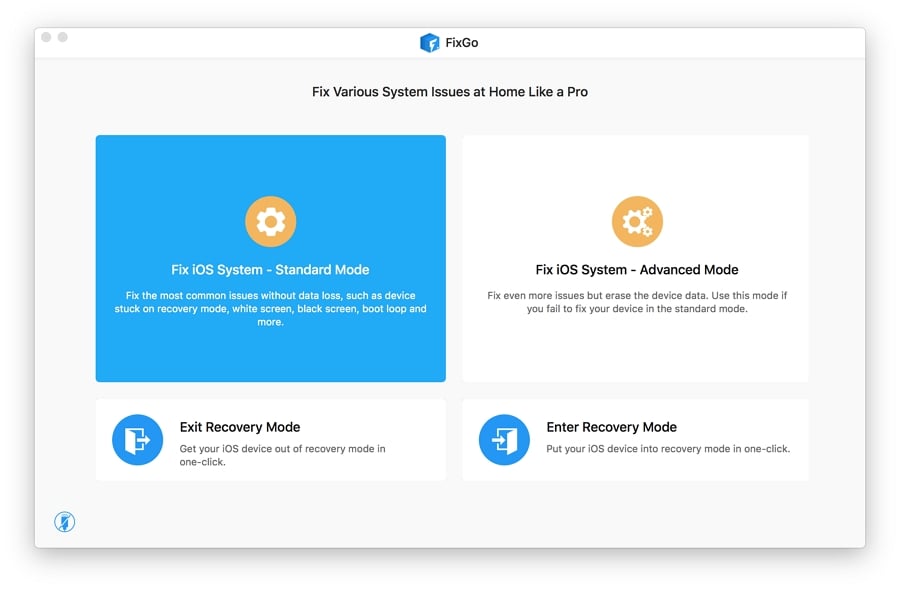
Step 1 Select “Standard Mode” in the main window and then connect the bricked iPhone to the computer using USB cables. Once the program detects the device, click on “Fix Now”.
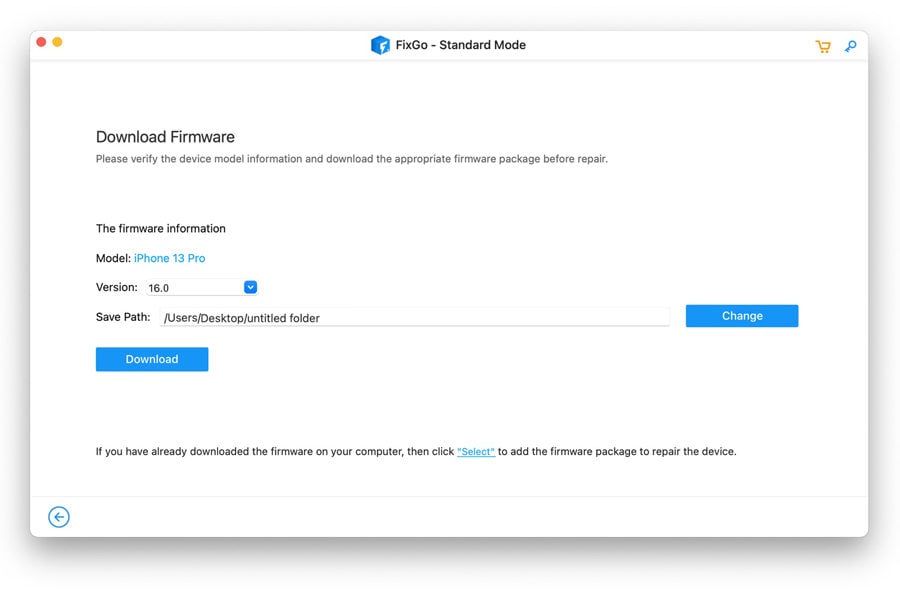
Step 2 You will need to download the latest firmware for the device in order to repair it. Just click “Download” in the next window to begin the firmware download.
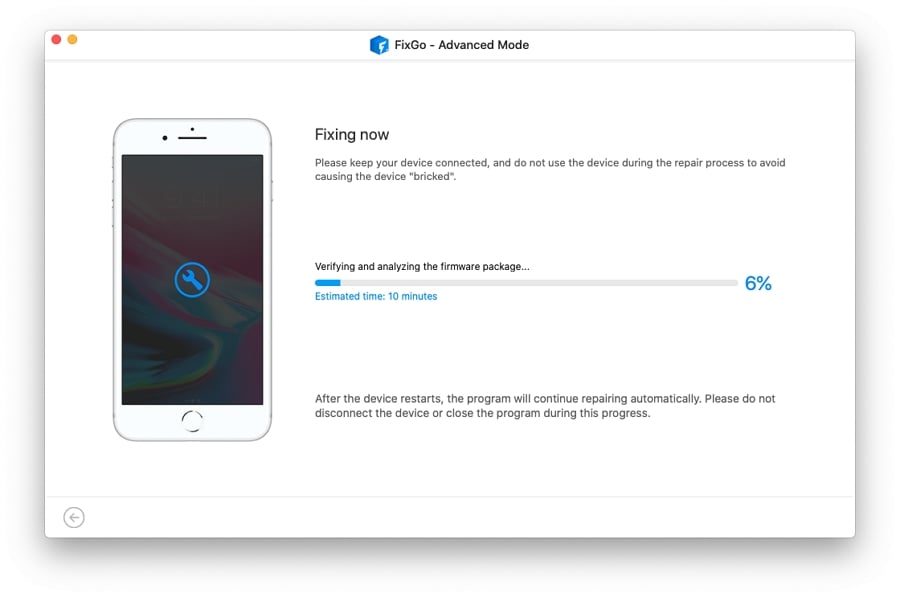
Step 3 Wait for the firmware package to be downloaded and when the download is complete, click “Repair Now” to allow the program to begin fixing the device. FixGo will notify you when the process is complete.
2. Let The Device Complete the Update
Sometimes it pays to be patient and depending on the number of files on the device and the stability of your Wi-Fi connection, the process could just be taking longer than usual. Therefore, it may be a good idea to connect the device to a power source and then just wait for the update to complete.
If, however, you think that the update may be taking longer than necessary, press one of the buttons on the device. If you see an updating message, then the update is still in progress and you just need to wait. If not, the device may be stuck and the other solutions in this article may help.
3. Restart Your Device
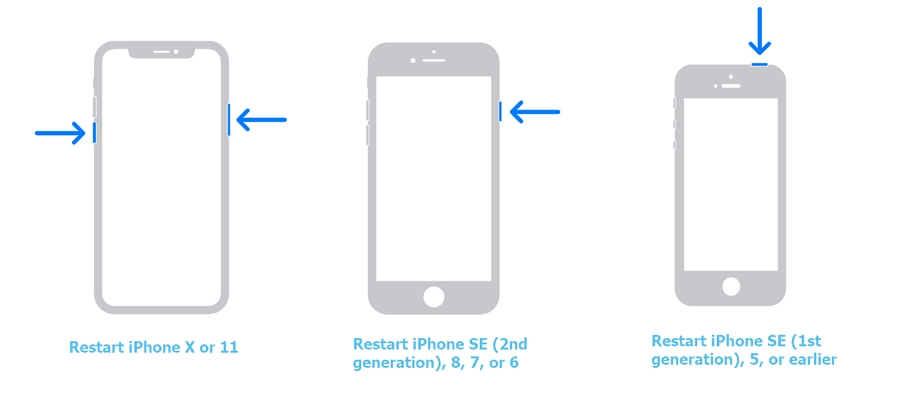
If you have determined that the update is indeed stuck, one of the things you can do is restart the device. Here’s how to do that:
Restart iPhone X or 11
Step 1: Press and hold the Power and one of the Volume buttons at the same time until the power of slider appears.
Step 2: Drag the slider to turn off the device and then wait at least 30 seconds for the device to turn off completely.
Step 3: Then, press and hold the Power (Side) button until you see the Apple Logo appear on the screen.
Restart iPhone SE (2ND Generation, 8, 7 or 6)
Step 1: Press and hold the Side (Power) button until the power off slider appears on the screen.
Step 2: Drag the slider and then give the device at least 30 seconds to turn off completely.
Step 3: Then press and hold the Power button again until the Apple Logo appears.
Restart Your iPhone SE (1st Generation), 5 or earlier
Step 1: Press and hold the Top (Power) button until the power off slider appears.
Step 2: Drag the slider and wait at least 30 seconds for the device to turn off completely.
Step 3: Press and hold the Top button again until the device until the device restarts and you see the Apple Logo appear on the screen.
4. Reset Your iPhone in iTunes
You can also fix this problem by resetting the device in iTunes. This is a great solution since it will reset the device to factory settings and can therefore eliminate some of the faulty settings preventing you from updating the device.
Ensure that you have installed the latest version of iTunes on your computer and then follow these simple steps:
Step 1: Open iTunes on your computer and then connect the iPhone to the computer using the device’s lightning cable.
Step 2: When prompted to enter the device’s passcode or to “Trust this Computer”, tap “OK” to confirm and then follow the onscreen instructions.
Step 3: Click on the device when it appears in iTunes and then go to the “Summary” section.
Step 4: Click on “Restore iPhone” and then tap “Restore”.

Keep the device connected while iTunes installs the latest version of iTunes and restores the device to factory settings.
5. Restore The iPhone via Recovery Mode
If a restore in iTunes fails to work and the iPhone is still stuck, then you may need to put the device in recovery mode before restoring it in iTunes. Here’s how to do that:
Step 1: Connect the iPhone to the computer using the device’s lightning cable and then open iTunes.
Step 2: Now on the device, press and quickly release the Volume Up button and then press and quickly release the Volume Down button. Then press the Power/Side button until you see the “Connect to iTunes” screen appear on the screen.
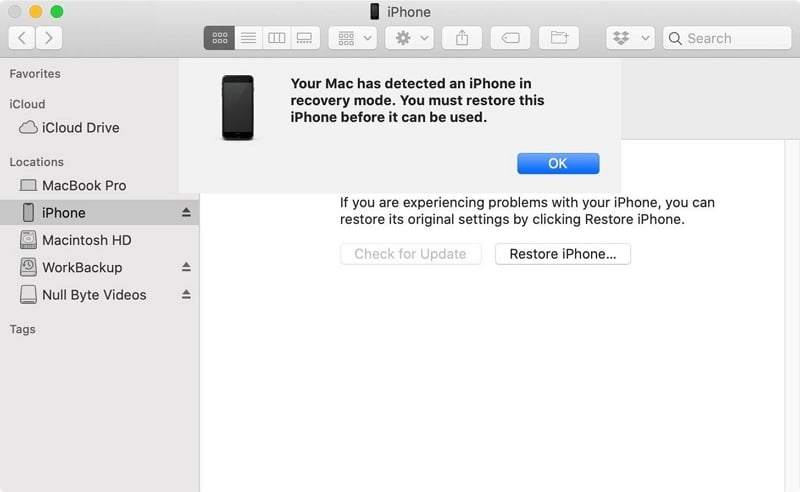
Step 3: In iTunes, you should see the message, “There is a problem with the iPhone”.
Step 4: Select “Restore” and then follow the on-screen prompts to restore the device in recovery mode.

6. Restore Your iPhone via DFU Mode
If you are not able to get the device working normally again even after restoring the device in recovery mode. Then it may be time to consider restoring the device in DFU mode. DFU mode is an ideal solution in this case since it allows iTunes to interact with the device without having to load iOS. Therefore, it offers the deepest and most comprehensive way to repair any system errors.
Here’s how to restore the iPhone in DFU mode:
Step 1: Begin by closing all open programs on the computer and removing any connected USB devices.
Step 2: Open iTunes and make sure that the iPhone is turned off before connecting it to the computer.
Step 3: Now press and hold the Side/Power button for at least 3 seconds.
Step 4: Then press the Volume down button in addition to the Power button and continue to hold both buttons for at least 10 seconds. If you see the Apple logo appear the screen, you’ve held the buttons for too long and you should start all over again.
Step 5: Otherwise, release the Power button and continue to hold the Volume Down button for an additional 5 seconds. If the screen goes black, you have successfully entered DFU mode. If you see the “Connect to iTunes” screen appear, you will have entered recovery mode instead and you will need to start again.
Step 6: Once the device is successfully in DFU mode, you should see a message in iTunes saying that the device has been detected. Click “Restore” and then follow the on-screen prompts to restore the device.
7. Contact Apple
If all the solutions above are not sufficient to fix the device, then it is likely that the device has suffered hardware damage. In this case, there isn’t a software-based solution that can help you and you may need to contact Apple Support for further assistance You may even need to bring the device to the nearby Genius Bar to have it checked out.

Summary
You can try the above ways to fix iPhone stuck on update completed screen, however, not all the ways working for you. But with iToolab FixGo, you can 100% fix this annoying issue in a short while. To be honest, for the user who want to upgrade to the latest iOS version or beta version should pay attention to this problem. But, you can also downgrade to the previous version with FixGo too!


