The following article addresses the problem of an iPhone that won’t turn on after an update, such as the latest iOS 26. This is a pretty common problem that a lot of iPhone users have met. The 6 solutions listed here have proven to be highly useful in this situation.
Let’s get started.
1. Use FixGo to Fix iPhone Turning On Issue without Data Loss
If a hard reset doesn’t work and the device is charging but won’t turn on, then we recommend using iToolab FixGo to repair it. This tool is designed to easily fix common iOS 26 problems like the iPhone won’t turn on, the iPhone stuck on the Apple logo without causing data loss. It is highly effective and very easy to use, just follow these simple steps:
Fix iPhone/iPad Volume Button Stuck Issues in One Click
- Fixes all 200+ iOS system issues without losing data.
- Entering or exiting the iOS recovery mode is free.
- All iPhone/iPad errors can be fixed easily.
- Support the latest iOS devices and versions including iOS 26.
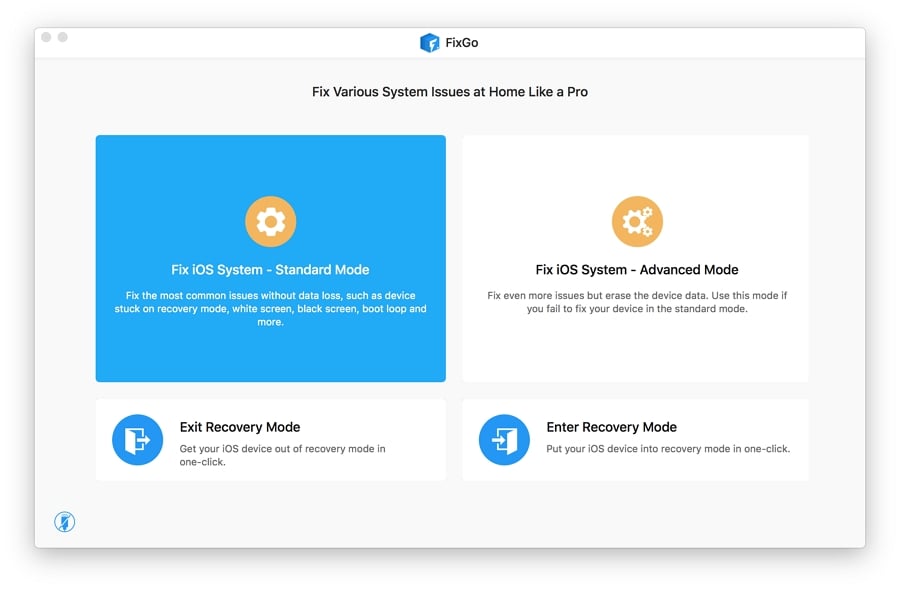
Step 1: Download and install the program on to your computer and run it. Select the Standard mode in the program’s main window and then connect the iPhone to the computer. Click “Fix Now” to begin.
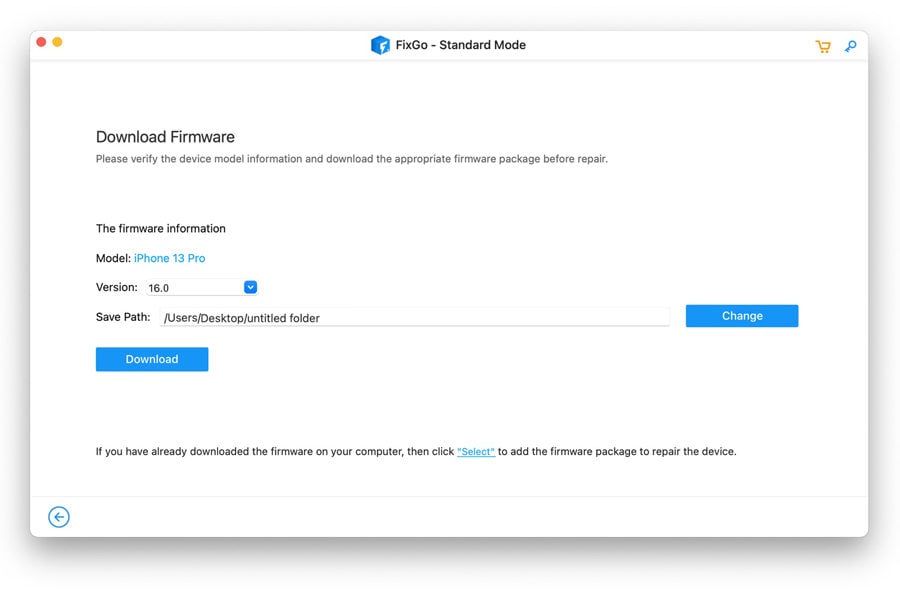
Step 2: Once the program recognizes the device, you will need to install the latest firmware the fix the device. Click “Download” to start downloading the device’s firmware package.
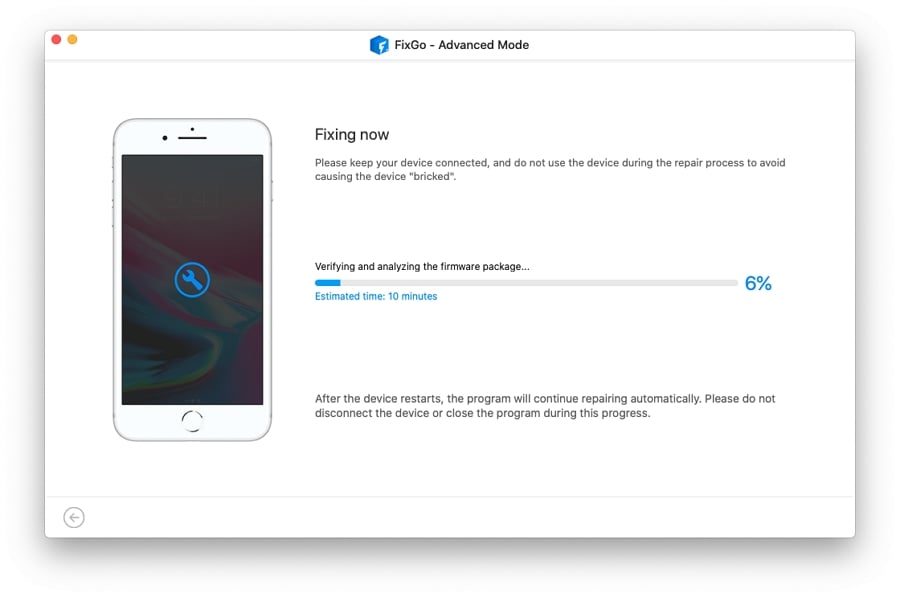
Step 3: When the firmware package has been downloaded, click “Repair Now” and the program will immediately begin fixing the device. When the repair process is complete, the device will restart in normal mode and shouldn’t display any more problems.
2. Hard Reset The iPhone
The first thing you should do when your iPhone is frozen and will not respond to touch is to hard reset it. This is the first line of defense and you should only try the other solutions on this list if a hard reset fails. Here’s how to perform reset depending on your iPhone model:
iPhone 8 or Later: press and quickly release the Volume up button and then press and quickly press and release the Volume down button. Then press and hold the Power (Side) button until you see the Apple logo appear on the screen.
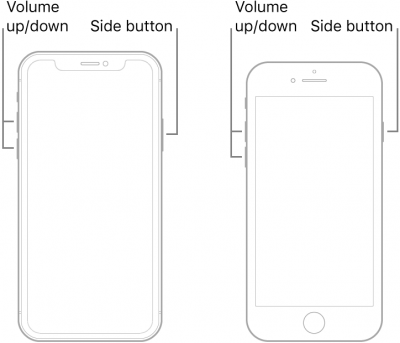
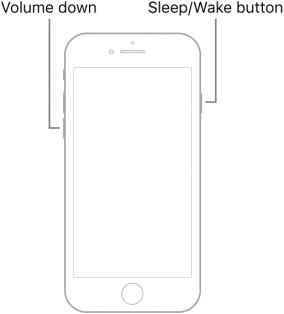
iPhone 7 and 7 Plus: Press and hold the Top (Side) button and the Volume Down button at the same time. Keep holding the buttons until you see the Apple logo appear on the screen.
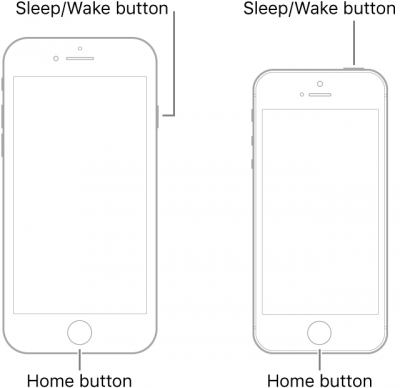
iPhone 6s and earlier: Press and hold the Home and the Power buttons until you see the Apple Logo on the screen.
3. Plugin Your iPhone
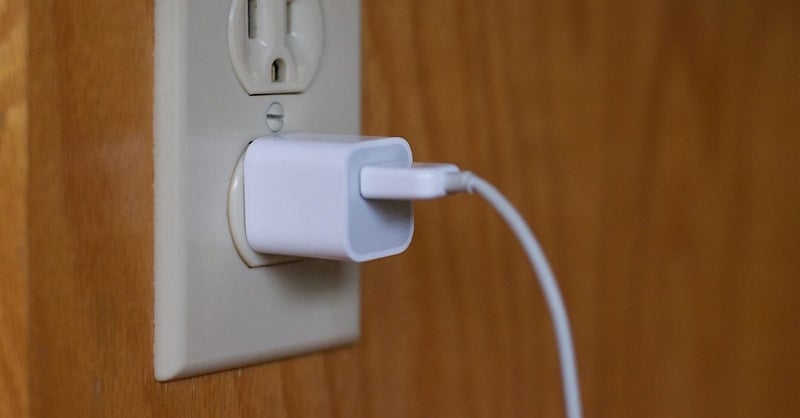
Since it is also possible that your device could be out of power, plug it in and let it charge undisturbed for about an hour. You should see the charging screen in a few minutes.
If you don’t see it even after plugging in the device for more than an hour, check the USB cable, power adapter, and jack you’re using.
Connect everything firmly and check that there is no damage to the cable or adapter. You should also consider using a different USB cable or adapter.
4. Restore iPhone in Recovery Mode
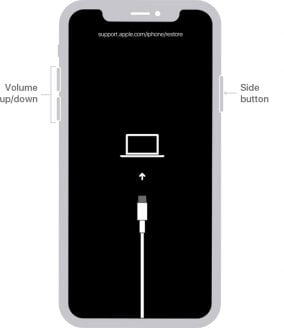
You can also fix an iPhone that won’t turn on after an update by restoring the device in recovery mode. This process will erase all the data and settings on the device, but you can restore the latest backup to the iPhone to get the data back.
Follow these simple steps to restore your iPhone in recovery mode:
Step 1: Open iTunes or Finder on your PC or Mac.
Step 2: Connect the device to the computer and wait for it to show up in iTunes or Finder. When it shows up, click on the device’s name to go to the Device summary page.
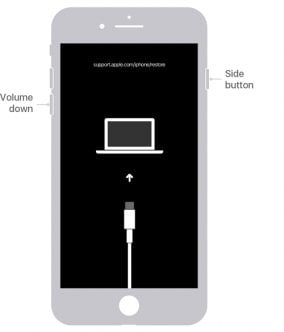
Step 3: Put the device in recovery mode. Here’s how to do that depending on the model:
iPhone 8 and Later
Quickly press and release the Volume up button. Quickly press and release the Volume down button. Now press and hold the Power (Side) button and keep holding it until a message pops up in iTunes or Finder saying the device is in recovery mode.
iPhone 7 and 7 Plus
Press and hold the Side and the Volume Down button at the same time until there is a message in iTunes or Finder saying the device is in recovery mode.
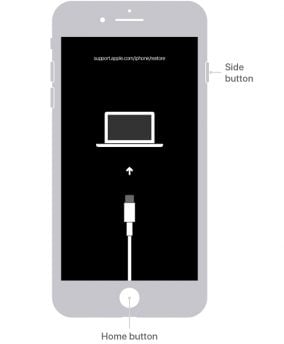
iPhone 6s and Earlier
Press and hold the Sleep/Wake and the Home button until Finder or iTunes says that your iPhone is in Recovery Mode.
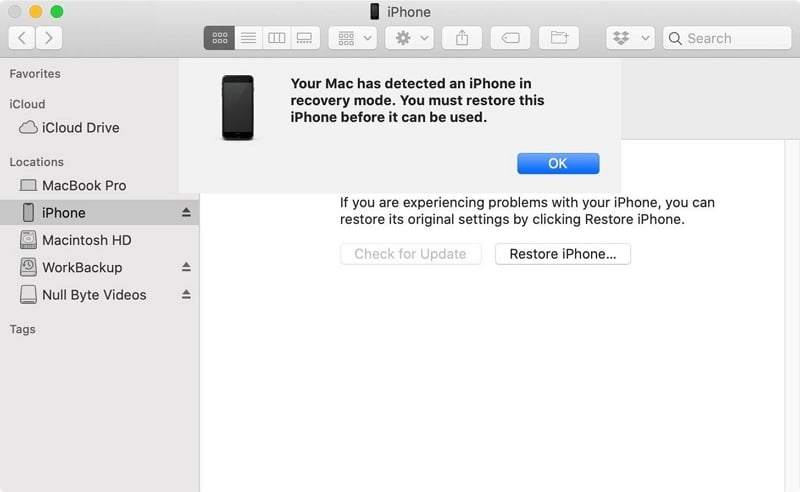
Step 4: In the message that pops up on iTunes or Finder, click on “Restore” and wait while the Mac/PC downloads and installs the latest version of OS on the device.

Once the process is complete, select the most recent backup to restore your data back on to your device.
5. Restore iPhone in DFU Mode
If recovery mode doesn’t fix the problem, we recommend restoring the device in DFU Mode. Follow these simple steps to do it:
Step 1: Open iTunes or Finder on your PC/Mac and then connect the iPhone to the computer using the device’s lightning cable.
Step 2: When the iPhone shows up in iTunes or Finder, put it in DFU mode using the following procedure depending on the model:
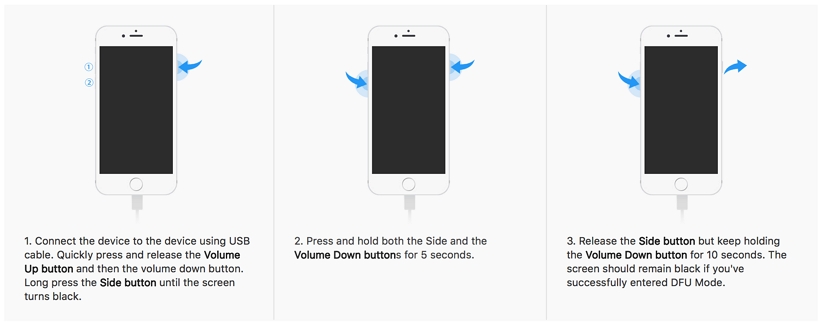
iPhone 8 or Later:
Turn off the device if it is not already turned off. Then press and hold the power button for about 30 seconds. While holding the Power button, press and hold the Volume down button. Hold both buttons for about 10 seconds. Let go of the power button, but keep holding the Volume down button for another 5 seconds. If the screen remains black your device is in DFU mode.
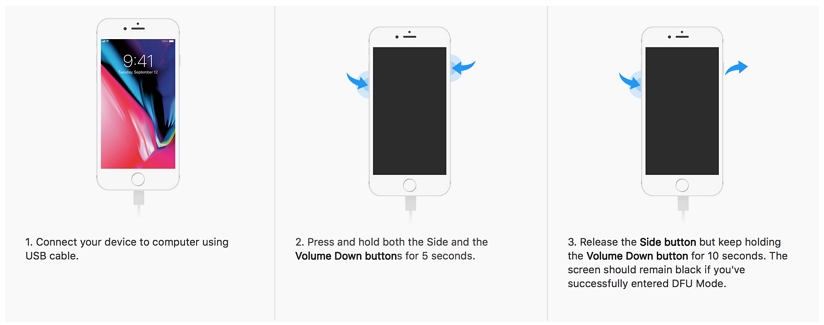
iPhone 7 and iPhone 7 Plus:
Turn of the device. Then press and hold the Side button for about 3 seconds. While holding the Side button, press and hold the Home button and hold both buttons for at least 10 seconds. If the screen remains black, the device is in DFU mode.
iPhone 6s and Earlier:
Turn off the device and then hold the Power button for at least 3 seconds. While holding the Power button, press and hold the Home button and hold both buttons for at least 10 seconds. Release the Power button, but keep holding the Home button for an additional 5 seconds. If the screen remains black, the device is in DFU mode.
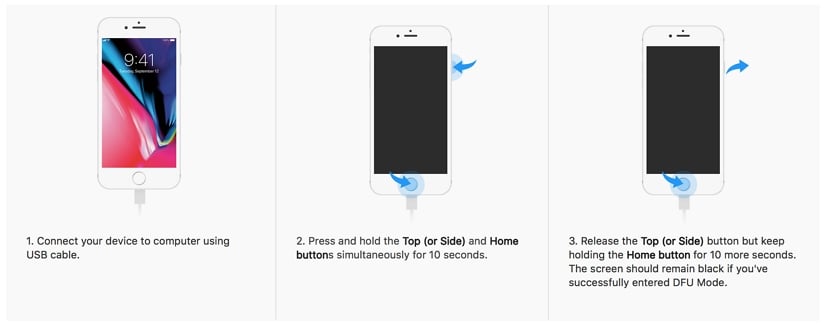
Step 3: in iTunes or Finder, click on “Restore” and wait until the process is complete.
6. Contact Apple Support
If the device will not turn on even after restoring it in DFU mode, then it may be time to pay the Apple Store a Visit. If the device is covered by the AppleCare+ protection plan, you should set up an appointment at your local Apple Store to get the device repaired.

Final Words
With these useful ways, hope you can easily fix your iPhone won’t turn on after update problem. But if you are unlucky, and still stuck on this problem, you have to consider the possibility that there is something wrong with your iPhone hardware. However, you can select iToolab FixGo as the first choice instead of contacting Apple Support.

