
This article will address 4 of the best ways to fake location on your iPhone. All the solutions on this list will help you very easily fake the GPS location on your iPhone.
These solutions vary in complexity, so choose the one that best suits your needs. But before we get to the solutions, let’s take a look at some of the reasons why you would want to fake your GPS location.
Why You Need to Fake the GPS Location?
The following are the main reasons why you would want to fake the GPS location:
- You may want to access geo-restricted content such as a movie on Netflix that may not be available in your region or a new video on YouTube that may not be available in your area.
- You can also choose to fake the GPS on your iPhone to get more matches on location-based dating apps like Tinder. Changing your location in this case can help you get access to matches in a different region.
- Location-based games can be played more easily when you spoof the location on your iPhone. For example, when playing Pokémon Go, you can gain access to nests and regional exclusive Pokémon that may not be in your area.
What You Should Know When Fake Location on iPhone
There are a few things to keep in mind when it comes to faking the GPS location on your iPhone, one of the most important things to remember is that:
Your GPS keeps track of your location for a number of reasons.
When you change the location on your iPhone, some apps will not be able to provide you with accurate information. Apps like Weather and Maps rely on your GPS location to be accurate. While you’re here, we should let you know that location-based games like Pokémon Go can detect some forms of location spoofing. It is therefore a good idea to avoid using them too much as you risk getting your account banned or suspended.
How to Fake Location on iPhone?
The following are 4 top ways to fake the location on your iPhone.
- Option 1. Use AnyGo to Fake Location on iPhone
- Option 2. Edit the PLIST File
- Option 3. Use iBackupBot
- Option 4. Use VPN Service
Option 1. Use AnyGo to Fake Location on iPhone
The best way to fake the location on your iPhone is to use iToolab AnyGo for iOS. This is a very useful solution that allows you to change the GPS location very easily. You just need to connect the iPhone to the computer, open AnyGo, and then choose the new location that you would like to use.

168,282 people have downloaded it.
- Change GPS location on iPhone/iPad in clicks (No Jailbreak).
- Simulate GPS movement along any custom path with joystick.
- Collect and import popular GPX route files for next use.
- Mock GPS location on up to 15 devices simultaneously.
- Works well with location-based social apps and AR games.
- Fully support the latest iOS 26/Android 16.
Download and install the all to your iPhone. Here’s how you can use AnyGo for iOS to fake the location on your iPhone:
Step 1 After installation you should see a map indicating the current location of the device.
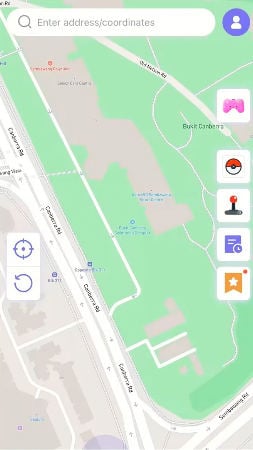
Step 2 To teleport the device to a new location, nter the exact location want to use on the search box. Hit enter to select the location from the list.
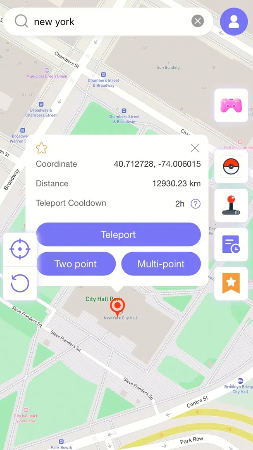
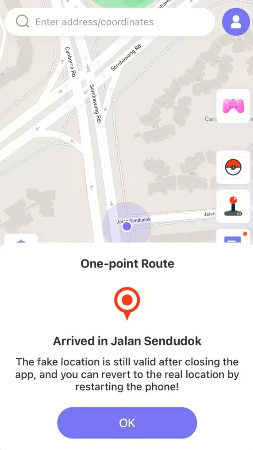
Step 3 A popup will appear indicating the coordinates of the location you have selected. Click “Teleport” to change the device’s location to these coordinates.
Video Guide:
Option 2. Edit the PLIST File
You can also change the location on your iPhone by editing the PLIST file on your iTunes backup and then restoring the same backup back to the device. To do that, you will need a program known as 3uTools. This tool is only available for Windows and will only work on iOS 10 and lower:
- Install the free 3uTools program on to your computer. Just go to http://www.3u.com/ to find the download link.
- Make sure that iTunes is not open and then connect the iPhone to the computer. Wait for 3uTools to detect the device.
- Click on the “iDevice” menu at the top and then select “Backup/Restore” at the bottom of the screen. Click on the “Back up iDevice” option.
- In the next window, choose a location to save the backup and then click “Back up Now” to begin the backup process.
- When you see the “Backup Succeeded” message, click “OK” and then exit this window to go back to the “Backup/Restore” screen.
- Now, click on the “Backups Management” option and select the backup that you just created. It should be the one at the very top of the list.
- Click on “View” to open the backup using the tool’s Backup Viewer.
- Select the “App Document” tab on the left and then open the “AppDomain-com.apple.Maps” folder.
- Go to “Library > Preferences” folder and double click on the “com. apple.Maps.plist” file.
- Scroll down to the bottom of the text file so you can enter some information. Copy and paste the following text directly above the final tag:
- Click on the “Save” button at the top of the editor window to save the changes you have made. Select “Save” again and then click “OK.”
- Exit all the open screens and on the Backup/Restore screen, select “Restore Data.”
- Choose the latest backup at the top and then click “Restore Now.” When the restore process is complete, disconnect the iPhone from the computer.
- Now, open the Maps app and search for the new fake location that you would like to use. Please note that this method will only work with Apple’s Maps app and not any other navigation app.
- As soon as the pin drops on the map, scroll through the menu to choose “Simulate Location.”
__internal__PlaceCardLocationSimulation
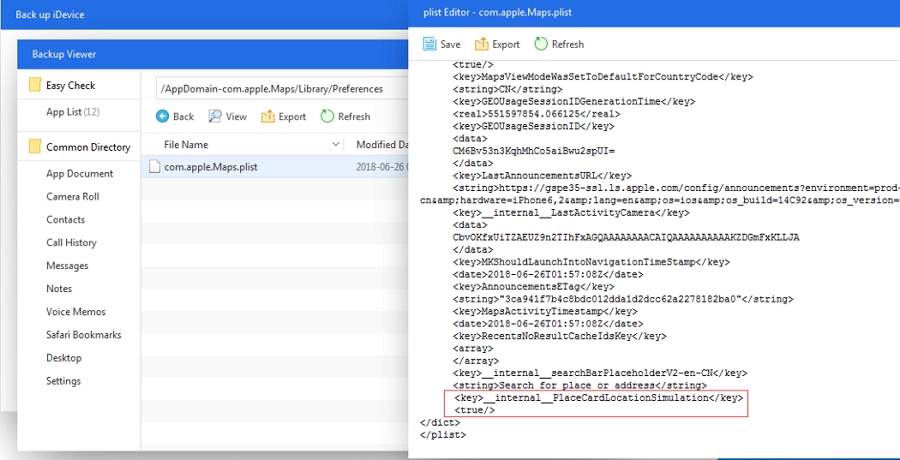
If you want to go back to the default location, just restart your iPhone.
Option 3. Use iBackupBot
iBackupBot can also help you alter the backup file to change the location on your iPhone. This one, works with iPhones running iOS 11 and later and Mac only. Here’s how to use it:
- Go to https://www.icopybot.com/download.htm to install iBackupBot on to your Mac.
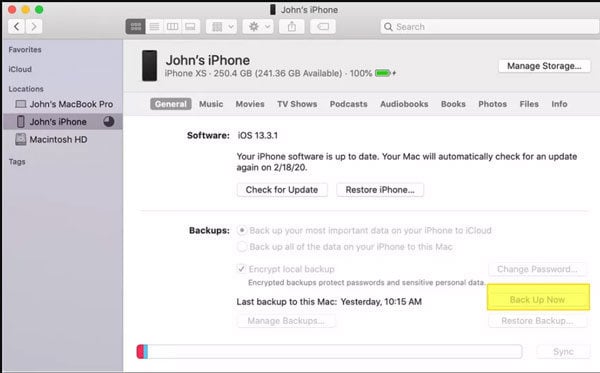
- Connect the iPhone to the Mac and open Finder.
- Click on the device icon and then click on the Manually Backup and Restore section.
- Click on “Backup Now.” Do not encrypt the backup.
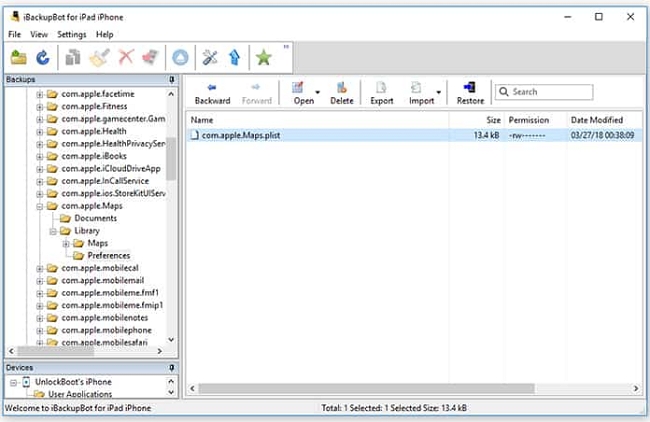
- Wait for the backup to be completed and then open iBackupBot. This tool should find your recent backup and open it.
- Go to “System Files – > HomeDomain -> Library -> Preferences” or “User App Files -> com.Apple.Maps -> Library -> Preferences” to locate and open a file named “com.Apple.Maps.Plist”.
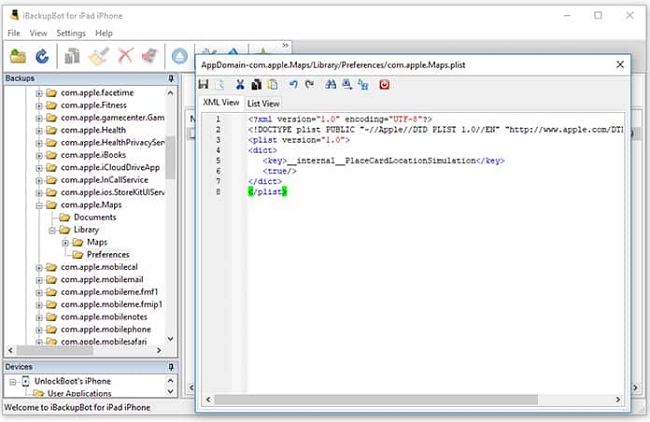
- When the file is one, locate the <dict> tag and enter the following code right below it:
- Save and close the file and then close iBackupBot. But don’t disconnect the iPhone from the computer just yet.
- On your iPhone, go to Settings > {Your Name} > iCloud > Find My iPhone and turn it off.
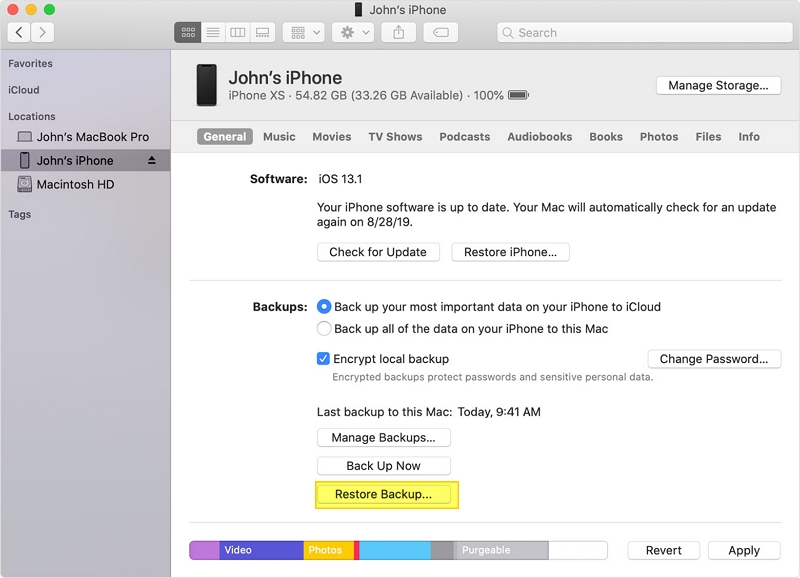
- Now open the Finder and choose “Restore Backup.” Select the backup that you just edited.
- When the restore is complete, open the Maps app on your iPhone and select the new location that you would like to use. Tap at the bottom of the screen to get more information about the new location and then select “Simulate Location” to begin using the new location.
<key>__internal__PlaceCardLocationSimulation</key>
<true/>
Option 4. Use VPN Service
The last solution on this list is one of the most common ways to fake location on any device. VPNs can do this very easily by masking your IP address, allowing your device to access content from the new location.
Follow these simple steps to effectively use VPN to fake the location on your iPhone using VPN:
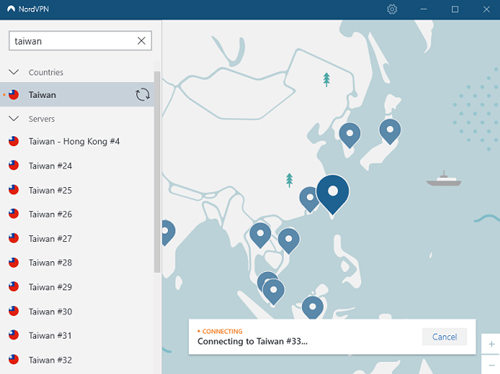
- Begin by choosing a VPN service that you would like to use. NordVPN is a great choice since it is very easy to use and highly effective.
- Then install the VPN app on your iPhone from the App Store. Open the NordVPN app and then follow the on-screen instructions to create an account if you don’t have one.
- To use the VPN app to change the location on your iPhone, you will need to jailbreak the device.
- Once the device is jailbroken, go to the Cydia app store and download the “tsProtector” app. This is an app that will help hide your device’s jailbroken status from location-based apps like Pokémon Go.
- You will also want to download the “Location Spoofer” app from Cydia. Launch both the tsProtector and the Location Spoofer app and choose your preferred location in the Spoofer app.
- Open NordVPN and then make sure that it is in the same area as the location you have chosen in the Spoofer app. You are now ready to begin enjoying the benefits of the new location.
Conclusion
In this article, we’ve introduced you 4 ways to solve the problem “how to fake your location on iPhone.” But, we have to highly recommend that iToolab AnyGo for iOS is the best way for you. No complicated steps and 100% safe. If this article helps you, don’t forget share it with your friends.

