In this guide, we take a look at how you can update your iPhone through iTunes.
It can sometimes become necessary to update your iPhone via iTunes when an OTA update is impossible, particularly when the device is experiencing software issues. Whatever the reason you are choosing to update your device via iTunes, the following guide will prove very helpful.
Let’s begin.
Why Update with iTunes or Finder
There are several reasons why you would want to update your device through iTunes rather than OTA. These include the following:
- When you update your device via iTunes, you get the full build of iOS firmware rather than the delta updates that you get when you update OTA. Delta updates are often smaller files and will change only the section of code that has changed from the previous version. While the full build that you get when you update via iTunes or Finder full replaces all the code of the previous iOS.
- You may also want to update the device via iTunes when the device has software problems. For example, when your device’s battery doesn’t hold charge like it used to, updating via iTunes may prove easier and more effective.
iTunes or Finder?
With the introduction of macOS Catalina, Apple replaced iTunes with other apps like Music, TV and Podcasts. But this doesn’t mean that you will not be able to manage your device the way that you used to with iTunes. When you connect the iPhone to the Mac and then open Finder, you should be able to find all the familiar features that you would use to manage the iPhone in Finder.
Therefore, Finder will be useful to macOS Catalina users to sync content like music, movies, tv shows, books, photos, and other files. Mac users who still run macOS Mojave and lower as well as PC users can continue to use iTunes.
How Do I Update iOS with Finder and iTunes?
Updating your device via iTunes or Finder is very easy. The following simple steps show you how to do it:
Update Your iPhone via Finder
Step 1: Turn on your Mac and then make sure that the Mac is up-to-date. To update the Mac, go to System Preferences > Software Update.
Step 2: If an update is available, wait for the Mac to fully update before connecting the iPhone to the computer.
Step 3: Unlock the device if prompted by entering your passcode.
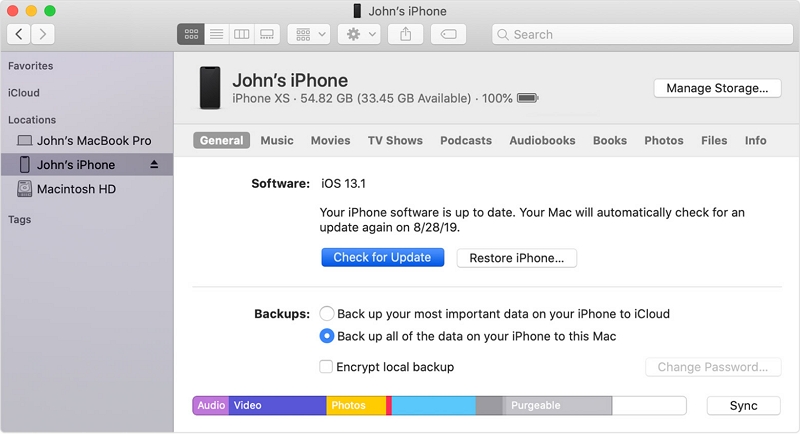
Step 4: Open the Finder app and in the left sidebar, look for the device under “Locations”.
Step 5: Select the device to see the details and then click “Back up Now”.
Step 6: When the backup is complete, click on the “Check for Update” button from the General tab.
Step 7: Click on “Download and Update” and then enter your passcode when prompted.
Update your iPhone via iTunes
Step 1: Connect the PC or Mac to a Wi-Fi network.
Step 2: Then, you want to make sure that the version of iTunes running on your device is up-to-date.
On Windows: Open iTunes and then click on Help > Check for Updates or download the latest version from the Windows Store.
On Mac: Open the App Store on your Mac and then click on “Updates” at the top. If updates are available, click “Install”.
Step 3: Now connect the iPhone to the computer using a USB cable.
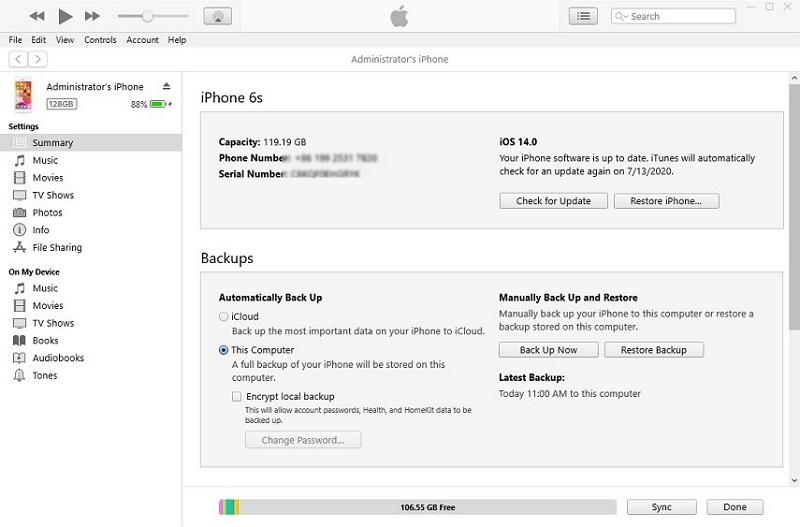
Step 4: Open iTunes and then select the iPhone that you would like to update.
Step 5: We recommend backing up the device before updating it. So, click “Back Up Now” to begin the backup process.
Step 6: When the update is complete, click on “Check for Update” under “Summary”.
Step 7: Click “Download and Update” and then enter the device’s passcode when prompted, Keep the device connected until the update process is complete.