
Android Debug Bridge (ADB) is a tool through which the command console of our PC act as a bridge between it and the phone. Thanks to it, we can send different instructions to the smartphone and upload files from one platform to another.
To start working with ADB, you need to enable USB Debugging. So, what is this USB Debugging mean? This function is initially intended for developers but to which everyone can have access. In this article, we will guide you through using USB Debugging and how to allow USB Debugging on Android device from the PC.

When Do You Need to Turn on USB Debugging?
USB Debugging is a tool that allows your Android device to communicate with the Android SDK (Software Development Kit) through the USB cable. That is, it allows an Android device to receive commands and files from a computer, as well as it allows the computer to obtain important information such as log files from the Android device.
Reasons to enable USB Debugging
- Most of the apps require USB Debugging for proper functioning and to debug Android phone
- Mode to establish the connection between the phone and the PC
How to enable USB Debugging in Phone

- Open the Settings app and tap on the About option
- Tap on the Build Number option 7 times to enable developer mode
- Go back to the Settings screen and enable the USB Debugging option in the list
Now let’s see how to set up ADB on the PC before using USB Debugging.
How to Enable USB Debugging Using ADB Command?
You can follow the below steps to enable the USB Debugging using the ADB command. This method is useful when users have an Android device with a broken or damaged screen. This method can only be used when the Android device is bootloader unlocked.
Step 1: Put the device into Recovery Mode. For Samsung users, we have a comprehensive guide on how to boot the device into recovery mode.
Step 2: Download the latest SDK platform tools and extract the zip file into the PC.

Step 3: Go inside the extracted folder and find the “platform-tools” folder. Click on the File option on the left top corner and select “Open Windows PowerShell” to launch a new command window.
Step 4: Then type “adb devices” and press Enter.
Step 5: If the device ID is visible as an alphanumeric number, then it means ADB can detect the device in the Recovery mode.

Step 6: You need to type the following commands to mount the relevant directories and press Enter after each command.
- adb shell
- $ mount data
- $ mount system
Step 7: Next, you must transfer the “persist.sys.usb.config” file from phone to the PC. This can be done using the below command. To save it in the desired PC location, users can replace it with their folder location.
- adb pull /data/property/persist.sys.usb.config C:\Users\Technastic\Desktop\
Step 8: To edit the “persist.sys.usb.config” file, right-click on it, and select the text editor you have. Then add the “mtp,adb” options to the file and push it back to the phone using the below command.
- adb push “C:\Users\Technastic\Desktop/persist.sys.usb.config” /data/property
Step 9: Then download the “build.prop” file from phone to the PC.
- adb pull /system/build.prop C:\Users\Technastic\Desktop\
Step 10: You can open the “build.prop” file using the same text editor used before. Then add the below lines into the file.
- persist.service.adb.enable=1
- persist.service.debuggable=1
- persist.sys.usb.config=mtp,adb
Step 11: Save the file and push it back to the phone using the below command. After typing the below command, press Enter.
- adb push “C:\Users\Technastic\Desktop/build.prop” /system/
Step 12: After following the above steps, you should be good with enabling USB Debugging. Then execute the below command to reboot the device.
- adb reboot
After the reboot, users can execute ADB commands again if needed since the USB Debugging is still enabled. Every time you execute the command, it will prompt a command window to allow USB Debugging or verify the RSA key fingerprint on your phone.
How to Enable USB Debugging from PC Software?
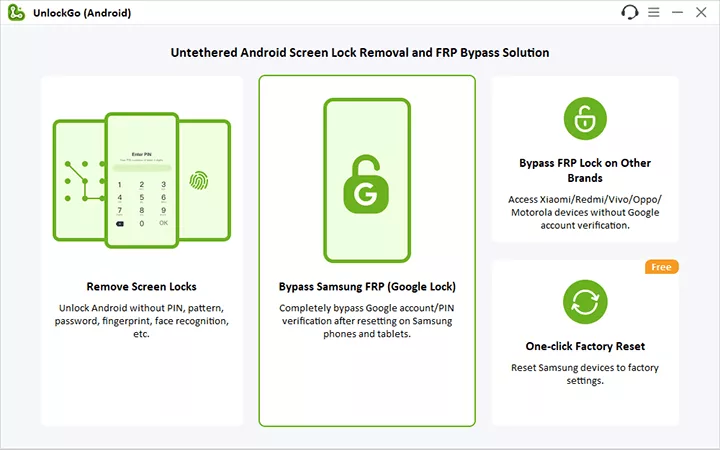
Sometimes it isn’t easy to follow the ADB commands to enable the USB Debugging when you don’t have any previous experience in coding. As a solution, iToolab has introduced UnlockGo (Android) software that can enable USB Debugging with a few steps. During the FRP lock removal process, the software will guide you through setting up a USB Debugging app and turning on USB Debugging.
iToolab UnlockGo (Android) is a great tool that can remove any type of screen lock, including PIN, Pattern, Password, and Fingerprints. Apart from that, users can bypass the Google FRP lock on Samsung phones and tablets with Android 13/12. With the extended support of 15 brands, including Samsung, Huawei, Honor, LG, etc., and 2000+ Android phone and tablet models, UnlockGo (Android) has become one of the favorites among users. More importantly, it is easy to use, and no technical knowledge is required.

UnlockGo (Android)
Android Unlocker
- Zero technical and coding hassle
- Allow USB Debugging on Android from Windows and Mac
- Bypass FRP lock on Android 14/13/12/11/10/9/8/7/6/5
- Remove all Android compatible screen locks
- Unlock Samsung device without data loss
How to allow USB debugging without Settings menu
Step 1: Connect the phone to the PC
After installing the UnlockGo (Android) on the PC, connect the phone using the USB cable. After that, open the installed software and click on the Remove Google Lock (FRP).
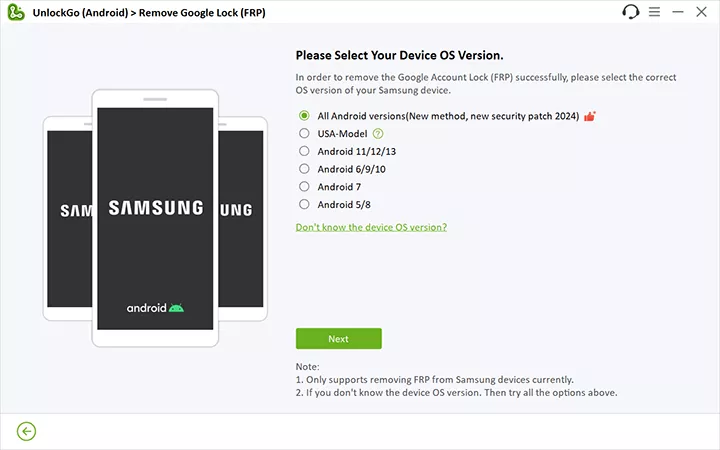
Step 2: Select the first option
On the next screen, click on the Start button. Then select the top option which help you enable USB debugging with internal codes.
Step 3: Enter the secret code
Now follow the on-screen instruction, dial the codes from emergency call. After that, a pop-up with “Allow USB debugging” texting should appear. Do not disconnect the phone during the whole process.

Step 4: Reboot the device
When you give a permission to “this computer”, your Samsung will be restarted automaticall.
Tips: How to Turn Off USB Debugging?
To turn off the USB Debugging on your Samsung device, follow the below steps.
Step 1: Open the Settings app and tap on the System option. On Android 7 and below, you may not find the System option.
Step 2: Under the System option, tap on the Developer options.

Step 3: Select the USB Debugging and turn the toggle to Off. This will disable USB Debugging. If you can’t find the USB Debugging option in the list, use the search option on the top to get it.
Conclusion
We have brought you the easiest way to enable USB Debugging when the device is broken or hard to enable it manually. Now users can enable USB Debugging Android from PC using the iToolab UnlockGo (Android). We hope this guide help all Android users, and we highly recommend trying UnlockGo (Android) to solve many Android-related issues.
Do we have something similar for iOS?
Hi Eiti, can you please describe your problem in detail? If you need a similar program for iOS, you can check UnlockGo iPhone Unlocker: https://itoolab.com/unlock-iphone/
Hi I’m new to using Android Studio and I don’t know how to operate it. I am struggling getting my phone to enable the developer option, the state of the phone has already been factory reset so I can’t get to the menu with build number. I dont know what exactly I still need to do or download to execute this. If you can tell me what to do after I try to update with add? Thank you
Hi Lolly, can you access the home screen of the phone?