
“Hey, I have entered the wrong passcode several times, due to which my iPad got disabled, and I am unable to unlock it. I don’t remember my passcode and don’t know how to undisabled it. Does anyone know how to fix it?”

Disabled iPad can be annoying as you can’t use the device until you enter the right password. If your iPad is disabled and you don’t know how to fix it, we have got you covered! In this blog, we will guide you on how to fix disabled iPad using two different methods. Let’s discuss all these ways and fix your disabled iPad.
Part 1. Is iPad Disabled? We Tell You Why Would This Happen
There can be many reasons for disabled iPad. This problem often comes when users cannot remember their passcode and have entered the wrong passcode several times. This resulted in the iPad being disabled, which can cause issues for you. Apart from that, it can also happen due to malware in the device. The other reason for disabled iPad is running an outdated iOS version or turning the device during the updates. However, you can fix it in no time. Below we have mentioned all the possible ways to fix disabled iPad.
Part 2. iPad is Disabled Connect to iTunes Fix without Computer?
How to unlock disabled iPad? If you don’t want to use a PC to fix the problem, then you can open iCloud on another device and solve this issue. The great news is that you don’t need any PC to fix this issue. However, it can be complicated for some users. But if you still want to try it, follow the steps below.
- On your phone and search for iCloud Website. Sign in using the passcode and Apple ID.
- Click on “Find iPhone.”
- Under the “Add Devices” option, choose your iPad.
- Click on the option that will show your iPad location and hit the “Erase iPad” option.
- This will erase all your data, and you can now set your new password. So, make sure to keep a backup so you can restore it.
Part 3. How to Fix Disabled iPad One-Click with iToolab UnlockGo?
What to do when my iPad is disabled? The second method you can try to fix disabled iPad is using the iToolab UnlockGo application. This application unlocks the screen passcode within minutes. You don’t have to follow complicated steps to use it. Below is the guide that you can use to fix disabled iPad with iToolab.
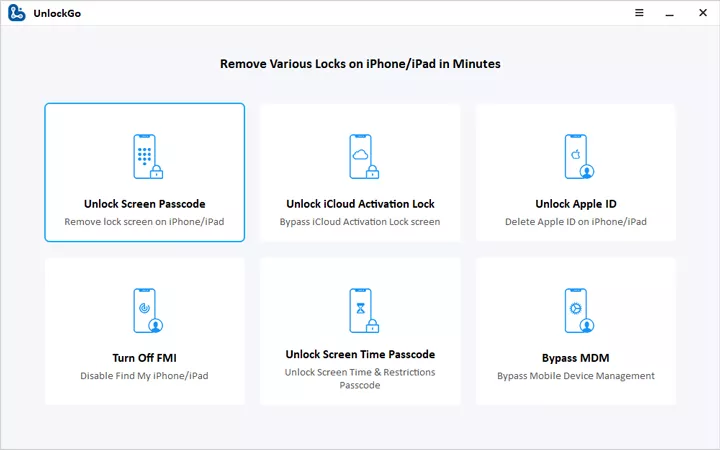
Step 1: Launch the tool and choose “Unlock Screen Passcode” from the main interface to start the process. Make sure your device is connected to the PC.
Step 2: Choose a path and download the latest firmware package by clicking the “Download” option. If you have already downloaded the firmware package, just choose it by clicking the “Select” option so you can easily import the firmware.

Step 3: Once the firmware package is installed, click the “Start Unlock” option to unlock your device. Please ensure your iPad is connected; otherwise, you have to repeat the process again.

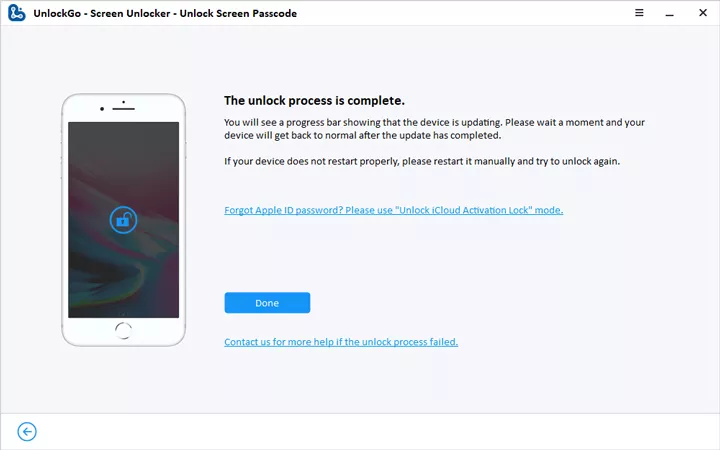
Step 4: After your device password has been successfully removed, you can easily set the new password and also get the backup file from iCloud or iTunes.
So, this is how you can unlock an iPad if it is disabled due to known reasons. This software also helps to remove Apple ID, turn off Find My iPhone, and more. In case you don’t like to use third-party apps and want to fix this issue using iTunes, check out the steps below.
Part 4. iPad is Disabled Connect to iTunes, What Should I Do?
You must be wondering how to undisable an iPad? In this section, we will guide you on how to undisable an iPad using iTunes. For this method, you don’t need any third-party application as using iTunes; you can quickly undisable your iPad. Let’s see how this process works.
- Open the iTunes app on your computer and use a USB cable to connect the iPad to the PC.
- Next, force the iPad to get into the recovery mode.
iPad with Face ID: If your iPad is secured with FaceID, press the volume down and volume up buttons at the same time. Release the buttons and after that, press the Power button. Keep going until you see the recovery mode on the screen.
iPad with Home Button: If you have the Home Button on the iPad, press the power and home button at the same time and hold the buttons until you get the recovery mode on the screen.
The computer will detect the issue with the iPad, so click the “Restore iPad” option to fix the issue. The restoration of the iPad will start soon, and your issue will be solved in no time. In case the problem is still there, then you have to factory reset the device and click the “Restore” option.
Conclusion
Getting locked out of your iPad is normal and can happen to anyone. However, many people don’t know how to fix it. This article shows different ways that you can quickly apply if your iPad gets disabled and you are locked out of the device. However, remember that some of the methods require Apple ID and password. But the good thing is that you can fix this issue without a PC as well. Furthermore, if you want to unlock your passcode on your iPad, then you can use iToolab UnlockGo, which helps unlock your password in no time. Also, using it, you can set a new password and use your iPad.