
iPads use cutting-edge technology, but that doesn’t mean they always work perfectly. Screens freeze, devices get stuck trying to upgrade, and batteries malfunction.
We’ve developed a series of simple troubleshooting solutions for common iPad problems without deleting your data or requiring technical assistance.
Keep reading to find out what these magic tips can do for your iPad.
#1 Back up your data
Before you try any of these troubleshooting tips, back up your iPad using iTunes, iCloud, or third-party backup software.
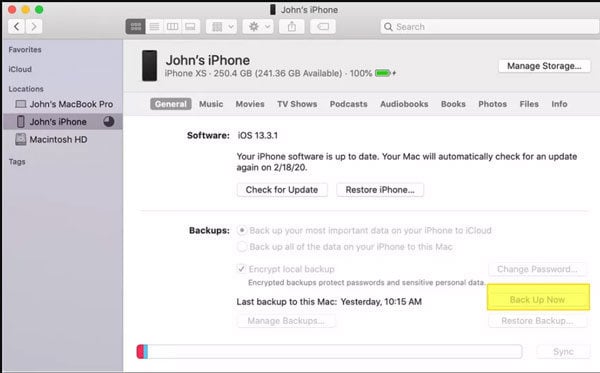
To back up using iTunes:
- Using a USB cable, connect your iPad to a computer;
- Open iTunes on your computer;
- Go to the backups section;
- Select This Computer;
- Click on Encrypt local back up;
- Select Back up Now.
To back up using iCloud:
- Tap on the Settings icon on your iPad;
- In the left-hand panel, click on your name;
- Select iCloud from the right-hand panel;
- Scroll down and select iCloud Backup;
- Drag the toggle switch into the on position;
- Click on Backup Now.

#2 Close all apps
Even when you’re not using an app, iPad will keep it open in the background. With some resource-heavy apps, this can cause your iPad to slow down or be slow to respond. You can close your apps by:
- Holding down the app’s window and swiping up to the top of the screen;
- In App-Switcher, press the Home button twice;
- Open App Switcher and drag four fingers up to the top of the screen.

#3 Delete malfunctioning apps
If one app keeps giving you problems, causing your iPad to malfunction, try deleting it and then, if necessary, reinstalling. To delete an app, navigate to the home screen and then hold down the app’s logo until all your apps start to vibrate. Tapping on the X that appeared the top lefthand corner of the icon will delete the troublesome app and hopefully resolve your problems.

#4 Restart your iPad
This solution may sound too simple to be of any real use but restarting your device can resolve all kinds of issues, including those affecting your operating system and battery.
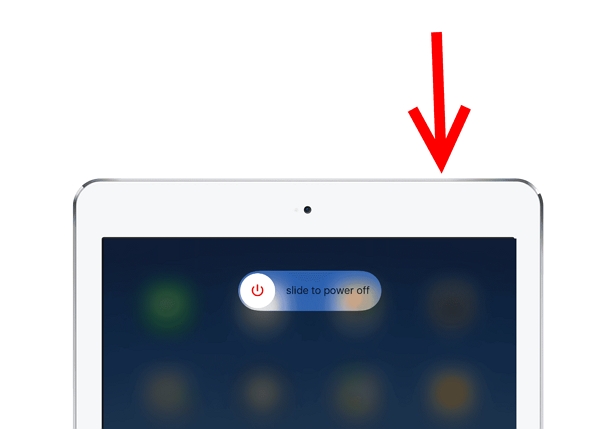
To restart an iPad with a Home button:
- Press and hold the Power button on the top of your device;
- When the Power slider appears, drag it to the off position;
- Wait 30 seconds for your device to completely shut down;
- Turn your iPad back on.
To restart an iPad without a Home button:
Press and hold both the Power button and either the volume up or down button. Follow steps 2 to 5 listed above.
#5 Force restart your device
This technique effectively pulls the plug on your device, allowing it to reset at a deeper level. This process can resolve many issues and usually has positive results.
To restart an iPad with a Home button:
- Press the Home button and hold it down;
- Press and hold the Sleep/Wake button at the same time;
- Continue to hold both buttons until you the Apple logo appears on-screen;
- Release both keys
- Wait while the reboot process completes.
On iPads with Face ID, you can force restart by:
- Quickly pressing and releasing the volume up button;
- Press and then release the volume down button;
- Press and hold the Power button;
- Wait for the Apple logo to appear;
- Release the Power button;
- Wait for the reboot to complete.

#6 Check your network
If your iPad problems only occur when it’s connected to the internet, it could be your wireless connection that’s causing the issue, rather than your iPad.
To check if this is the case, start by performing a speed test to see if your internet connection is both stable and consistent. If not, either move closer to your router or try rebooting both your modem and your router. If this doesn’t resolve your problem, try resetting your iPad’s network settings. To do this:
- Open the Settings app;
- Select General;
- Scroll to the bottom of the menu;
- Click on Reset.
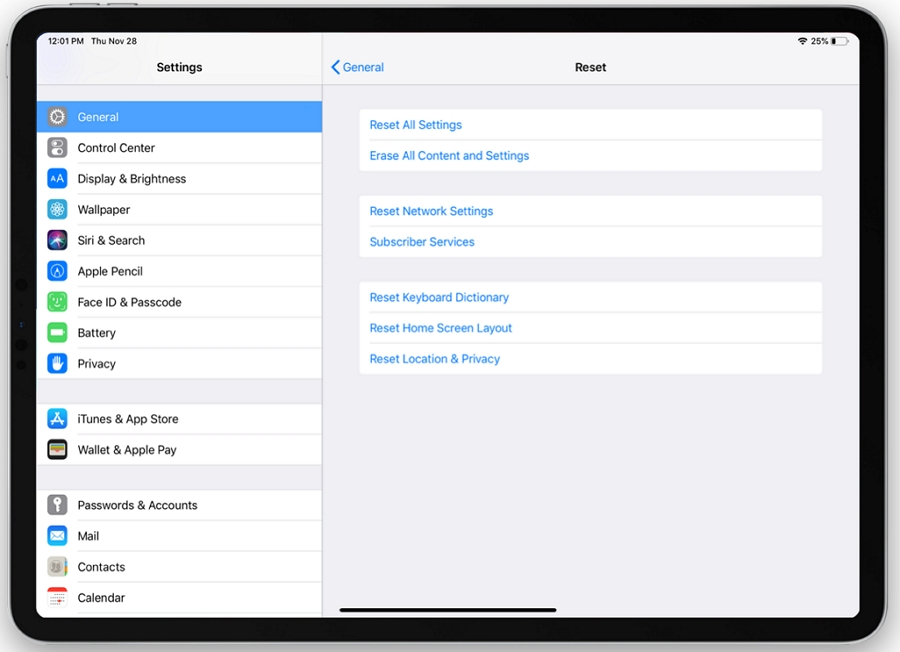
#7 Erase all content and settings
Much like a factory reset, this clears everything in your device’s memory, including all your data, so make sure you’ve backed up before attempting this fix:
- Navigate to Settings;
- Select General;
- Go to Reset;
- Click on Erase All Content and Settings;
- Confirm your choice;
- Restart your device.
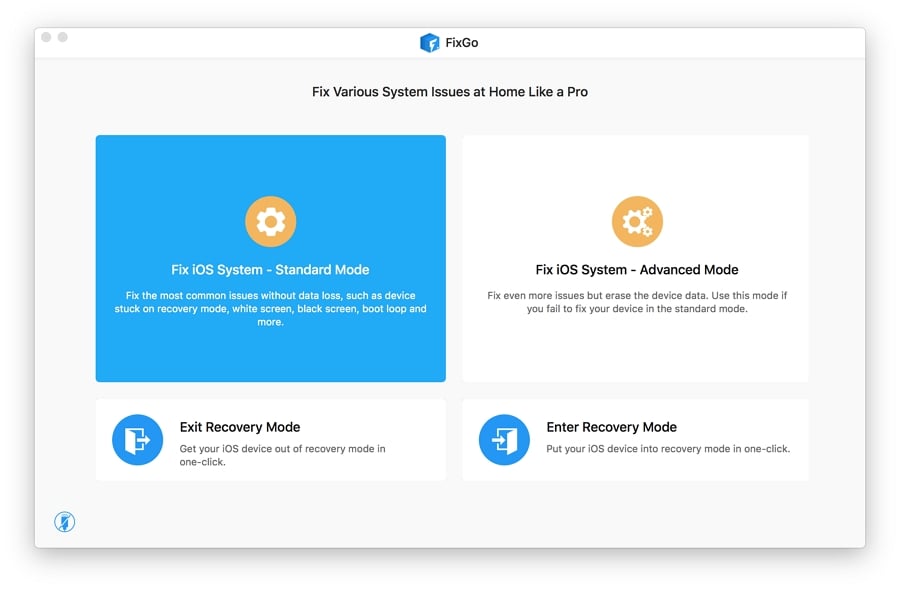
#8 Use FixGo
FixGo system repair tool can fix hundreds of issues, including those affecting your iPad operating system. It has two repair modes – standard and advanced – so, if the first fix doesn’t work, you have another, more technical solution at your fingertips. Better still, FixGo won’t delete any of your data during the process.
- Download and instal FixGo;
- Open the app to access the main user interface;
- Click on Standard Mode;
- Connect your iPad to a computer;
- Wait for the computer to detect your device;
- Click on the “Fix Now” button;
- Select “Download” if firmware packages are required to complete the fix;
- Select “Repair Now” and wait for FixGo to perform its magic commence!
FixGo will notify you once the repairs are finished, at which point, you can restart your iPad.
#9 Restore your iPad in recovery mode
This handy solution can fix a myriad of issues by allowing your device to communicate with iTunes without activating the bootloader. To perform this fix, follow these simple steps:
- Use an Apple-approved able to connect your iPad to a computer;
- On an iPad with a Home button, press and hold both the Home and Sleep/Wake buttons;
- One an iPad with Face ID, press and release the volume down button, followed by the side button;
- Now hold down either the Sleep/Wake or side button until the Recovery mode screen appears;
- Wait for a prompt from iTunes;
- Select Restore;
- If the download takes longer than 15 minutes, your iPad will exit the Recovery Mode in which case you’ll need to repeat the process;
- Follow the on-screen instructions to set up your device.

#10 Restore iPad in DFU mode
A Device Firmware Update (DFU) is the iPad user’s last resort – it can restore serious issues and system errors and is the most thorough restoration process available.
- Connect your iPad to a computer;
- Open iTunes on your computer;
- Press and hold the Sleep/Wake and Home buttons;
- Wait eight seconds and then release the Sleep/Wake button while continuing to hold down the Home key;
- Your iPad should now be visible in iTunes;
- Follow the on-screen instructions.
For iPads with Face ID, once you have connected your iPad to a computer and iTunes is open, instead of pressing the Sleep/Wake and Home buttons, use the Power/Side button along with the volume down button. After five seconds, release the volume button and wait for your iPad to appear in iTunes.

To get out of DFU mode, perform a force restart.
#11 Ask for help
If your iPad is still not operating correctly, it’s time to call the experts. Before you take that potentially pricey step, it’s worth checking to see if your iPad is still under warranty.
The standard Apple terms and conditions give you 90 days of free technical support and a year’s worth of limited hardware protection. You can extend this by signing up for the AppleCare+ program or simply bite the bullet and pay upfront for whatever repairs you need.

Conclusion
iPads are durable and versatile, using cutting-edge technology to deliver a smooth user experience. Things do, inevitably, go wrong from time to time, however, which is why having a few troubleshooting tricks up your sleeve is such a bonus.