
This article explores how to bring an iPad with the black screen of death back to life.
A black screen may mean nothing more than a dead battery or a device that’s turned off. On the other hand, it could suggest a software crash or something even more critical.
Let’s look at some of the ways you can fix an iPad that refuses to display anything more than a black screen.
#1 Restart the iPad
A simple restart can fix multiple problems and is easy enough to execute, assuming you get the key combinations correct.
For iPads with a Home button:
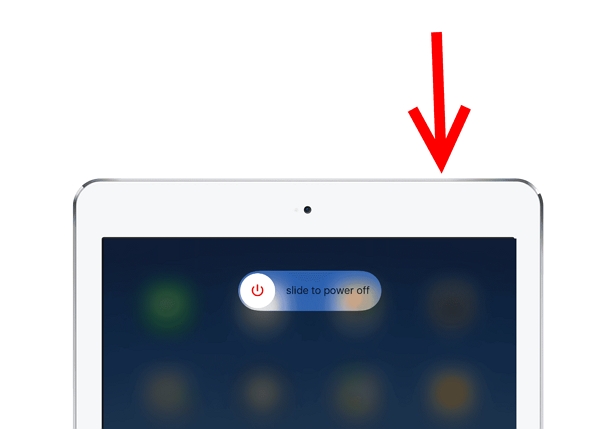
- Press the Power button on the top of your device and hold it down;
- Wait for the slider to appear;
- Drag the slider to switch your iPad off;
- Wait around 30 seconds while your device shuts down;
- Restart your iPad.
For iPads with Face ID:
- Press and hold the Power button;
- Simultaneously, press and hold either the volume up or volume down button;
- When the Power slider appears, drag it to the off position;
- Wait a few seconds while your device shuts down;
- Restart your iPad.
#2 Charge the Battery
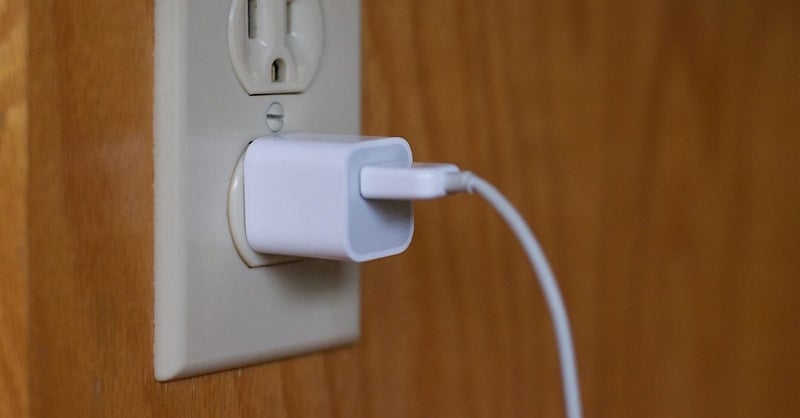
If you’re staring at your iPad and seeing nothing more than a black screen, you should first try just turning the device on by holding down the power button until the Apple logo appears onscreen. If the Apple logo doesn’t appear and the black screen continues, or you see a battery icon, you can try charging up your device and see if that solves the problem.
The best way of charging an iPad is by using an Apple-certified cable and connecting it to a wall socket. While a full charge will take up to five hours, an hour of charging should be enough to resolve your black screen problems if a flat battery was responsible for those issues. If nothing’s changed, move onto the next solution.
#3 Check the Charging Port
If your iPad is showing a black screen of death, it could be because it’s not charging correctly. The charging point often gets dirty and could have deposited some dirt or dust inside your iPad’s charging port.
To fix this, take a wooden toothpick or a similar non-metal tool, and gently dislodge any grime that’s stuck in the port. Now try charging your device. Still nothing? Move on to the next step.

#4 Adjust Brightness
Maybe your black screen is simply the result of a glitch in your screen settings. Perhaps you accidentally changed the settings to the darkest option which is making it appear black. To adjust this:
- Open your iPad’s Control Center by swiping down across the screen from the top right-hand corner;
- Navigate to the brightness icon;
- Tap on the icon to adjust your brightness.

#5 Use FixGo
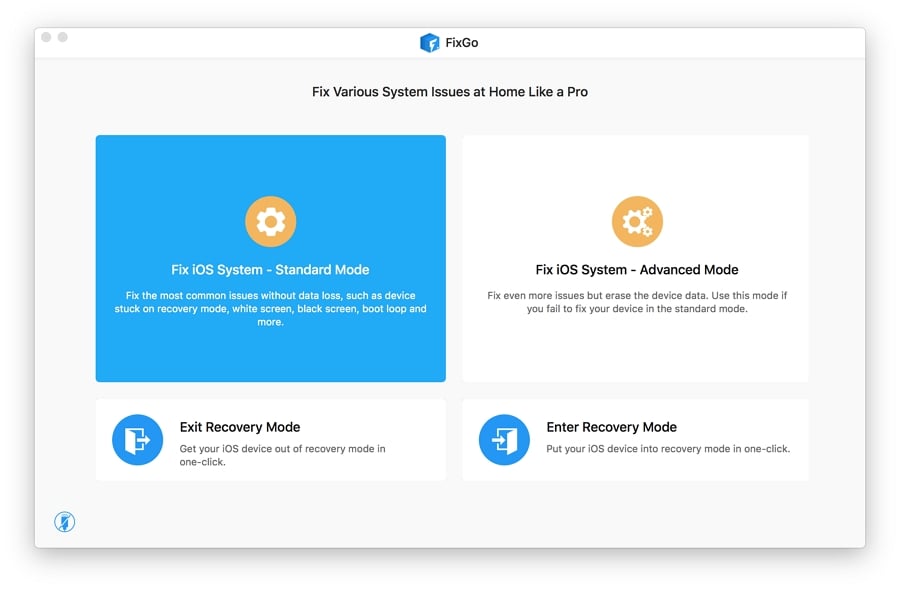
FixGo iOS repair tool can repair the black screen of death easily and without deleting any of your data, apps, or contacts. It’s a versatile yet lightweight app that can resolve over 200 different issues, including those affecting the latest iOS 27 and iPadOS.
FixGo has two modes available. The standard option is designed for more common problems, like an iPad that keeps switching itself off or one that’s stuck on a black screen. The more advanced mode is intended for more complex issues, like hardware glitches and software errors.
Simple to use, FixGo can revive your iPad if you just follow these instructions:
- Download and install the app from the iToolab website;
- Once installed, open the FixGo app;
- Navigate to the main interface
- Select Standard Mode;
- Connect your iPad to a computer;
- Wait while your computer detects your device:
- Click on the “Fix Now” button;
- Select “Download” to install any necessary firmware;
- Click on “Repair Now”.
FixGo will take a few moments to complete the process, after which it will notify you, letting you know that you can now safely restart your iPad.
#6 Update Your iPad in Recovery Mode
Apple rolls out updates to improve its products, correct errors, and improve security. If you’ve tried all the solution above and your iPad is still showing the black screen of death, then this could be the fix you need.
- To perform a system update on an iPad with a Home button:
- Connect your device to a computer using a USB cable;
- Open iTunes on your computer;
- On an iPad with a Home button, press and hold down the Home and Sleep/Wake buttons simultaneously;
- On an iPad with Face ID, press and quickly release the volume down button, followed by the side button;
- Keep holding both buttons down even after you see the Apple logo appear on the screen;
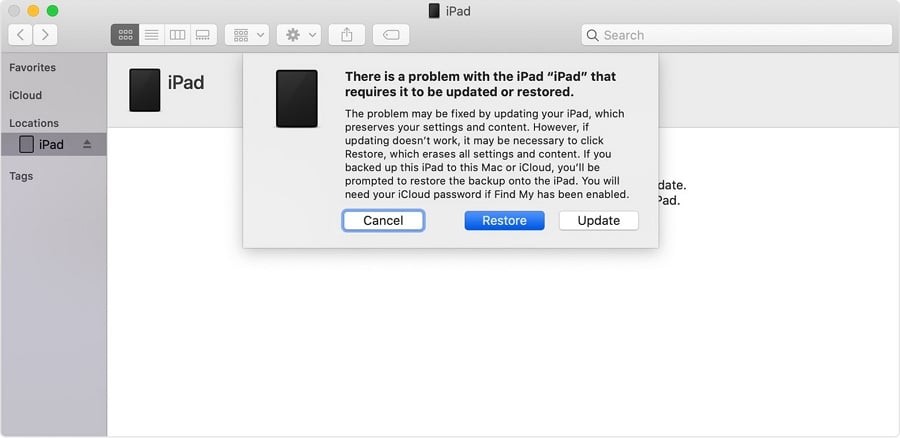
- When the option to Restore or Update appears, release both buttons;
- Click on Update;
- iTunes will reinstall the latest version of iPadOS.
If this process fails to complete within 15 minutes, your device will exit recovery mode, and you’ll have to start again from the beginning.
#7 Restore Your iPad in Recovery Mode
This fix is your last resort for fixing an iPad that’s exhibiting a black screen of death, but it’s a simple procedure that won’t take long to complete.
To perform a system restore, follow the same steps as you did in the previous section on performing a system update. When you get to step 8, click on Restore instead of Update and wait for the process to complete.
Conclusion
If, after performing these seven fixes, your iPad is still showing a black screen, your only available option is to seek technical advice from Apple. I hope it didn’t come to that and that, like me, you managed to resurrect your iPad from the grip of the black screen of death. If it did, then all I can do is wish you luck.
Hi! I like how you offered solutions that can be done directly on my phone, and solutions that involve the use of third-party tools. Personally, I hate troubleshooting since it is so complicated for me and I am afraid to mess something up, so I prefer using tools instead and letting them do the work for me. I am amazed by the features of FixGo – iOS Repair Tool, I like how it is able to recover backups from almost everything and even Safari History! I only tried using AceThinker Fone Keeper before, which also works as an iOS recovery tool, but I guess I’ll give FixGo a try too!