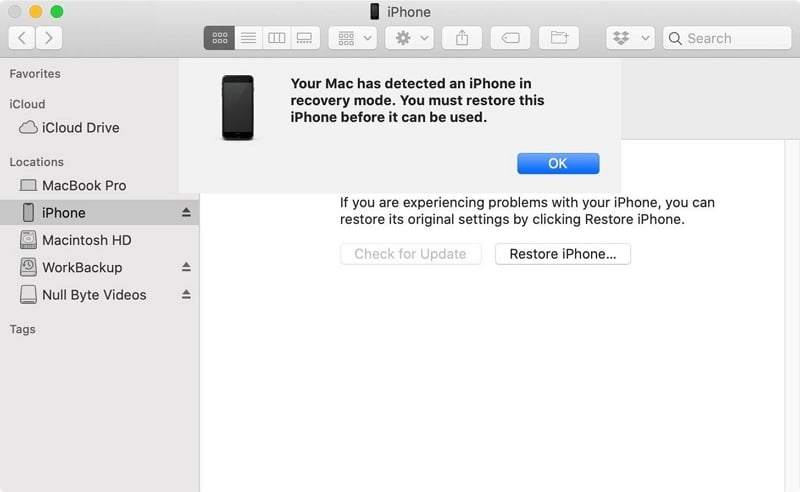
The iPhone white screen is a very common iOS issue that can occur for a lot of different reasons.
In this article, we are primarily going to focus on some of the proven solutions to fix this issue and get your device working normally again.
Let’s get started.
1. The Best Way to Fix this Issue without Data Loss
The best way to repair system issues like the iPhone White screen is to use an iOS system repair tool like iToolab FixGo. This is because these issues are often caused by a system bug that can affect the iOS system, preventing it from working normally. FixGo has numerous features that make it the most ideal solution. They include the following:
- It can be used to easily and quickly fix this and more than 200 other iOS issues such as iPhone stuck on Apple logo, iPhone not turning on, iPhone black screen, and more.
- The standard mode will fix the device without causing data loss.
- It is also one of the best ways to enter and exit recovery mode when the device’s buttons will not work.
- It is fully compatible with iPhone Models.
Download and install FixGo on to your computer and then follow these simple steps to use it to fix the iPhone:
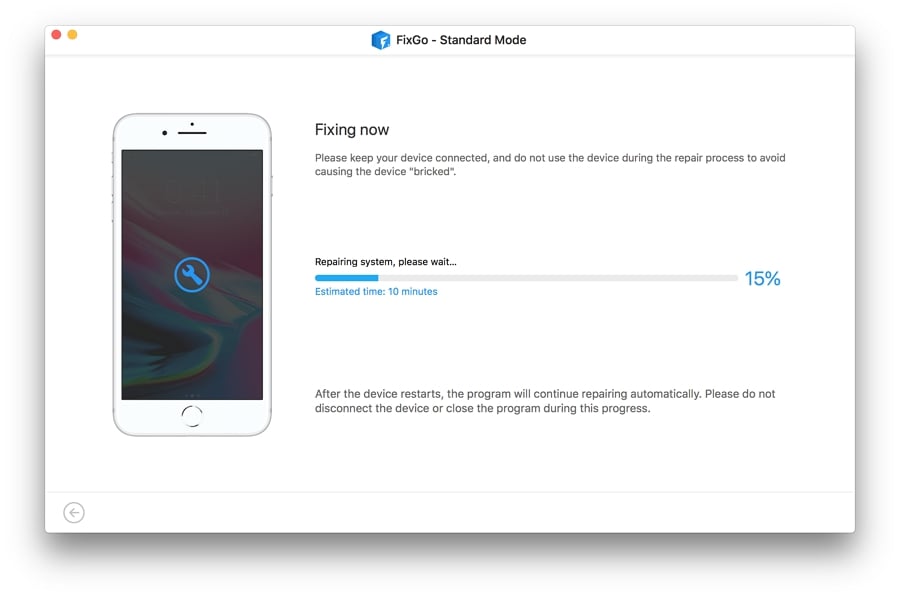
Step 1: Open the program and in the main interface, select “Standard Mode.”
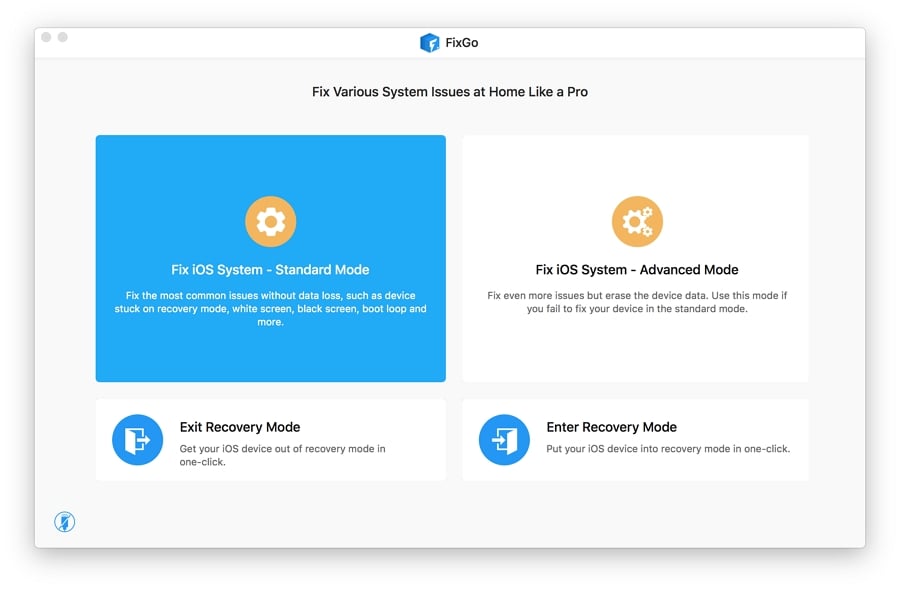
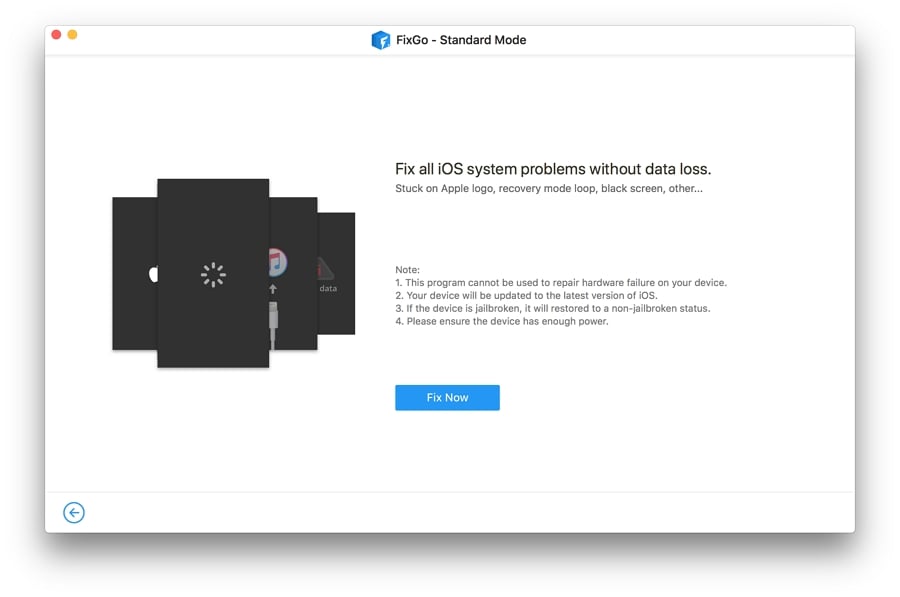
Step 2: Connect the device to the computer using USB cables and wait for the program to detect the device. Click “Fix Now” to begin the process.
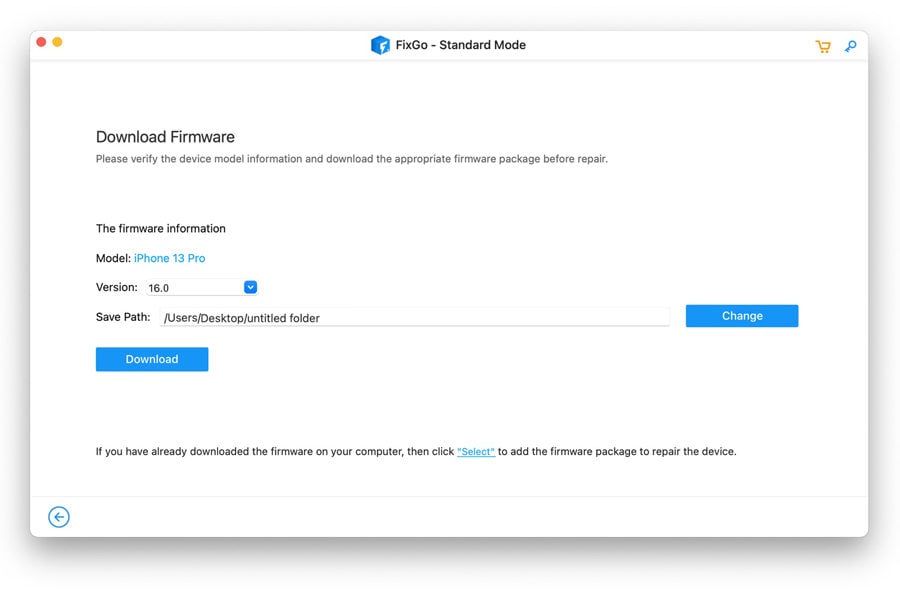
Step 3: In the next window, click on “Download” to start downloading the firmware package that is needed to fix the device.
Step 4: As soon as the download is complete, click “Repair Now” and FixGo will immediately begin repairing the device. When the process is complete, FixGo will notify you and your device will restart in normal mode.
2. Force Reboot the iPhone
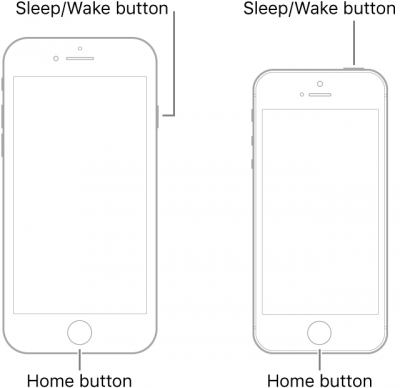
A force reboot can also successfully eliminate some of the system bugs that can cause the iPhone white screen. This is because it refreshes the device’s memory. To perform a hard reset, follow these simple steps:
For iPhone 6s and below:
Step 1: Hold the Power and the Home Buttons at the same time.
Step 2: Continue to hold both buttons until the screen goes black and you see the Apple Logo.
Step 3: Wait about 30 seconds after the device power off to turn it back on.
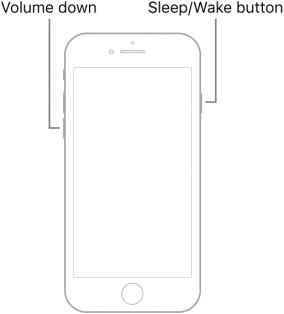
For iPhone 7 and 7 Plus:
Step 1: Hold down the Power and the Volume Down buttons at the same time.
Step 2: Continue to hold down both buttons until the screen goes black and the Apple Logo appears on the screen.
Step 3: Wait at least 30 seconds before turning the device back on.
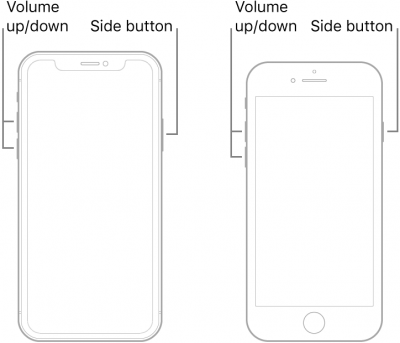
iPhone 8 and earlier:
Step 1: Press the Volume Up button and then release it.
Step 2: Press the Volume Down button and then release it.
Step 3: Then press the Power button until the Apple Logo appears on the screen.
3. Hold Down the Home + Volume Up + Power
There is also another combination of buttons that you can hold down to try and fix this problem. Here’s what to do:
Step 1: Press and hold the Home, Volume Up and Power button at the same time.
Step 2: Keep holding the buttons until the screen turns off.
Step 3: Continue to hold the buttons until the Apple Logo appears on the screen. You can let go of the buttons now and the device should power on normally.
This method will obviously only work for devices that have a Home button and may therefore not be applicable for iPhone 7, iPhone 8, iPhone X, iPhone XS, iPhone XR.
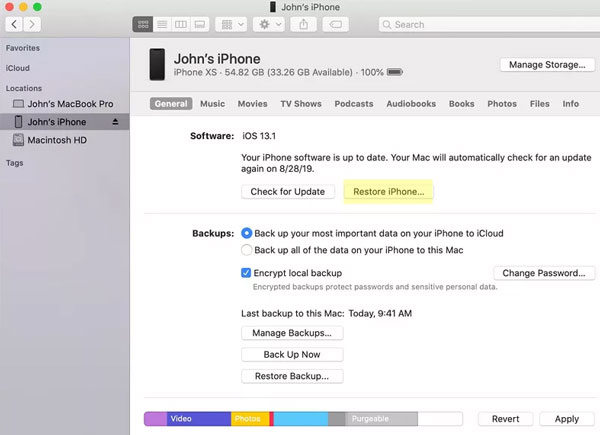
4. Restore your iPhone using iTunes
Restoring the device in iTunes is another way you can fix the iPhone white screen issue. Follow these simple steps to restore the iPhone in iTunes:
Step 1: Open iTunes on your computer and then connect the iPhone to the computer using the device’s lightning cable.
Step 2: When prompted to enter the device’s passcode or to “Trust this Computer”, tap “OK” to confirm and then follow the onscreen instructions.
Step 3: Click on the device when it appears in iTunes and then go to the “Summary” section.
Step 4: Click on “Restore iPhone” and then tap “Restore”.
5. Try Recovery Mode
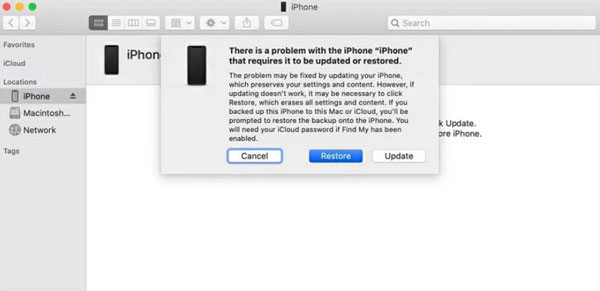
You can also try to fix the iPhone white screen by restoring the device in recovery mode. This method can be successful since it will attempt to reinstall the iOS on the device without affecting the data on it. Here’s how to do it:
Step 1: Turn off the device.
Step 2: Connect the USB cable to the device, but don’t connect it to the computer just yet.
Step 3: Hold down the Home (iPhone 6 and below), Volume Down (iPhone 8), or Power button (iPhone 8 and earlier) while connecting the other end of the cable to the PC.
Step 4: Keep holding the button until the recovery mode screen appears on the device.
Step 5: In the message that pops up in iTunes, select “Update”.
6. Try DFU Mode
Device Firmware Update (DFU) mode should be a last resort when recovery mode doesn’t work. It prevents the iOS firmware from loading so you can make changes to the operating system. Follow these simple steps to restore the device in DFU mode:
Step 1: Connect the device to the computer and make sure that it is turned off completed.
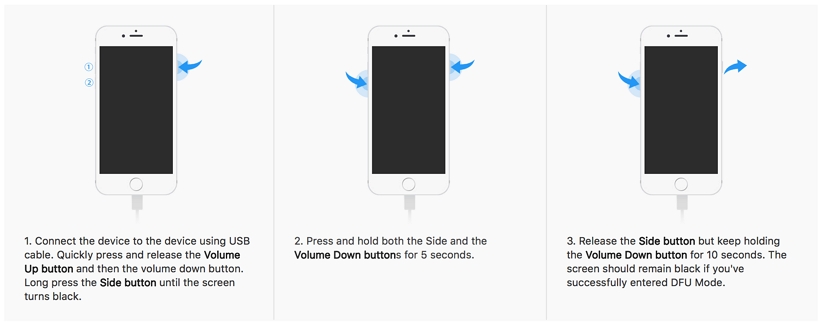
Step 2: Put the device in DFU mode depending on the iPhone Model:
iPhone 8 and later:
Step 1: Press the Power button for about 3 seconds.
Step 2: While still pressing the Power button, hold down the Volume Down button and continue to hold both buttons for at least 10 seconds.
Step 3: Let go of the Power button, but continue to hold the volume down button for another 5 seconds. The screen should go black.
iPhone 7 and 7 Plus:
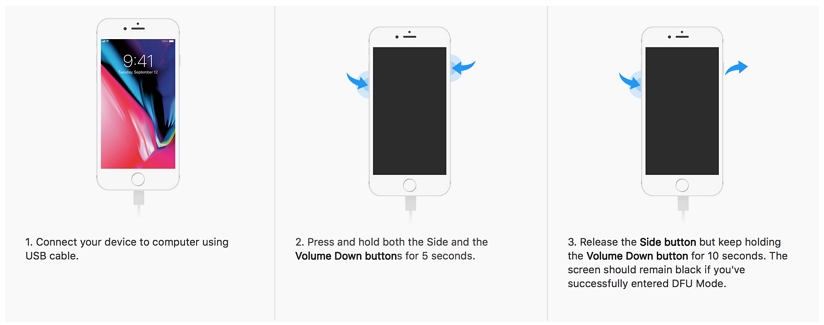
Step 1: Press and hold the “Side” button for about 3 seconds.
Step 2: While still holding the Power button, press and hold the Home button and keep holding both buttons for about 10 seconds.
Step 3: Keep holding both buttons until the screen goes black.
iPhone 6s and earlier:
Step 1: Press and hold the “Power” button for about 3 seconds.
Step 2: Without releasing the power button, press, and hold the Home button and keep holding both buttons for 10 seconds.
Step 3: Release the Power button, but continue to hold the Home button for another 5 seconds.
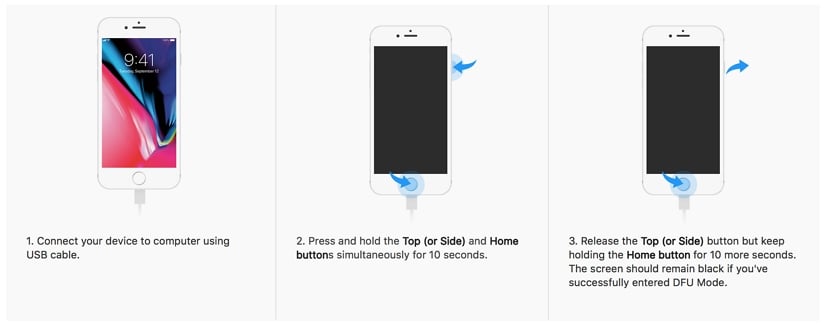
Once the device is in DFU Mode, follow the on-screen instructions in iTunes to restore it.
