iTunes error 39 commonly occurs when you try to sync your iPhone using iTunes during an iOS update, although it can also occur when you try to delete photos and videos from your iOS device.
The solutions below can help you overcome it and continue updating your device. Let’s get started.
1. Check the Version of Your iTunes
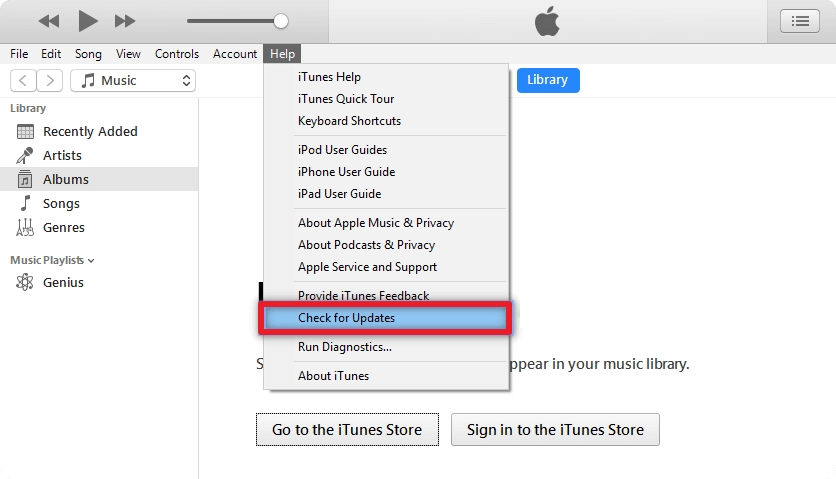
You are more likely to see the iTunes error 39 when the version of iTunes you are using is not up to date. Therefore, go to https://apple.com/itunes/download/ to download the latest version of iTunes and install it on your computer.
If you already have the latest version of iTunes, then try disabling or deleting the web accelerator software you may have on your computer.
2. Disable the Antivirus Software
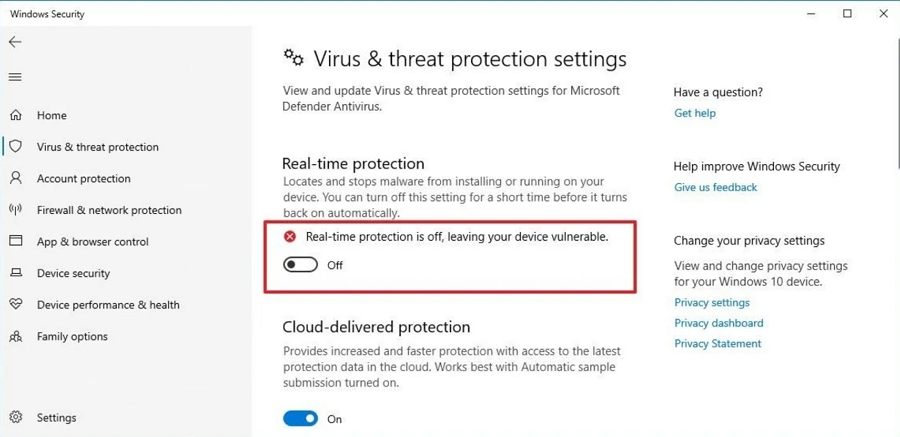
If you are on a PC and there is a third-party antivirus program installed on your system, disabling it may help you overcome the iTunes error 39. The same applies to Windows Defender. Here’s how to temporarily disable anti-virus protection on your PC:
Step 1: Press the Windows key + I on your keyboard to open the settings.
Step 2: Click on the “Update and Security” option and then select “Windows Security” on the left.
Step 3: Click on “Virus & Threat Protection” and then select “Manage Settings.”
Step 4: Turn off the toggle under “Real-time Protection” and then click “Yes” in the popup that appears to confirm that you would like to turn off anti-virus protection.
Once this is done, connect the iPhone again and try to sync it with iTunes.
3. Delete the Photo Cache
Your device will create the photo cache during a backup to optimize the picture gallery when you restore the backup.
But sometimes this photo cache can become corrupt, due to an error in the process and it has been known to cause this and many other iTunes errors. Deleting it may therefore help fix error 39.
Here’s how to do it on both Mac and Windows:
On Mac:
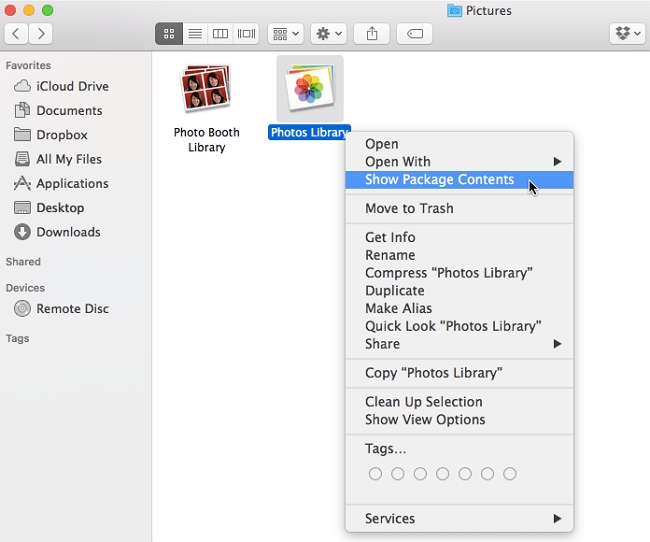
Step 1: Click on the Finder menu and then select “Go > Home”
Step 2: Click on “Photos” and select the “Photo Library”, “iPhoto Library” or “Aperture Library.”
Step 3: Right-click on the selected files and choose “Show Package Contents” from the popup options
Step 4: Find “iPod/iPhone Photo Cache” or “Apple TV photo Cache” and drag them to the trash to delete them.
Step 5: Close the Window and then try backing up your data via iTunes again.
On Windows:
Step 1: Type in “iPod/iPhone Photo Cache” or “Apple TV Photo Cache” in the search bar.
Step 2: When they appear in the search results, right-click on the folder and select “Open Folder Location”.
Step 3: Select the folder and then use the “Shift + Delete” keys on your keyboard to delete it permanently.
Step 4: Now reconnect the iPhone to your PC and try to back up the device again.
4. Update Windows and macOS
You are also more likely to see this error if you are running an outdated version of Windows or macOS. Here’s how to update your operating system:
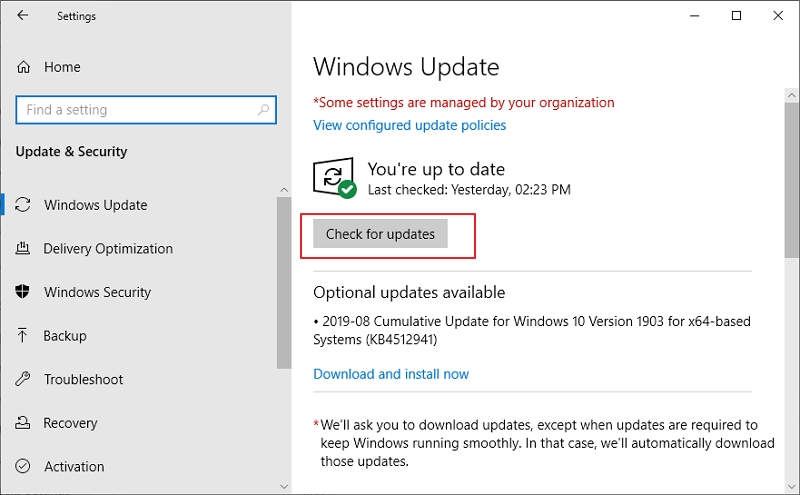
Updating Windows
Step 1: Open the Settings on your PC. You can do that by pressing the Windows Key + I on your keyboard.
Step 2: Click on “Update & Security” and then select “Windows Update”
Step 3: In the Updates window, click on the “Check for Updates” button and then wait while Windows finds an update.
Step 4: If an update is available, click on “Download and Install” and wait while Windows installs the updates.
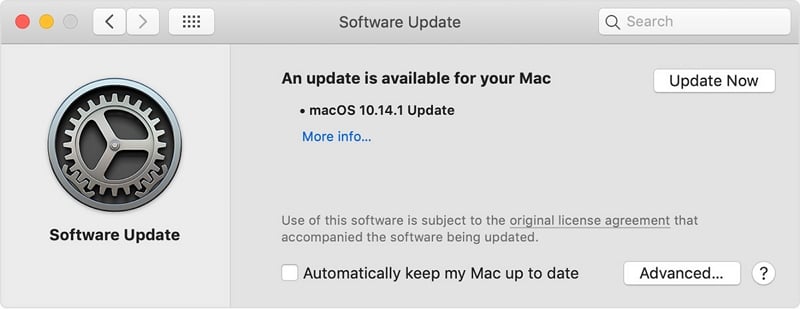
Updating macOS
Step 1: Click on the “Apple Menu” and then choose “System Preferences”.
Step 2: Click on “Software Update” and wait while your system checks for any available updates.
Step 3: if an update is available, click on “Update Now” to begin updating your Mac.
Once the operating system is up to date, reconnect the iPhone to the computer and try to backup or update the device again.
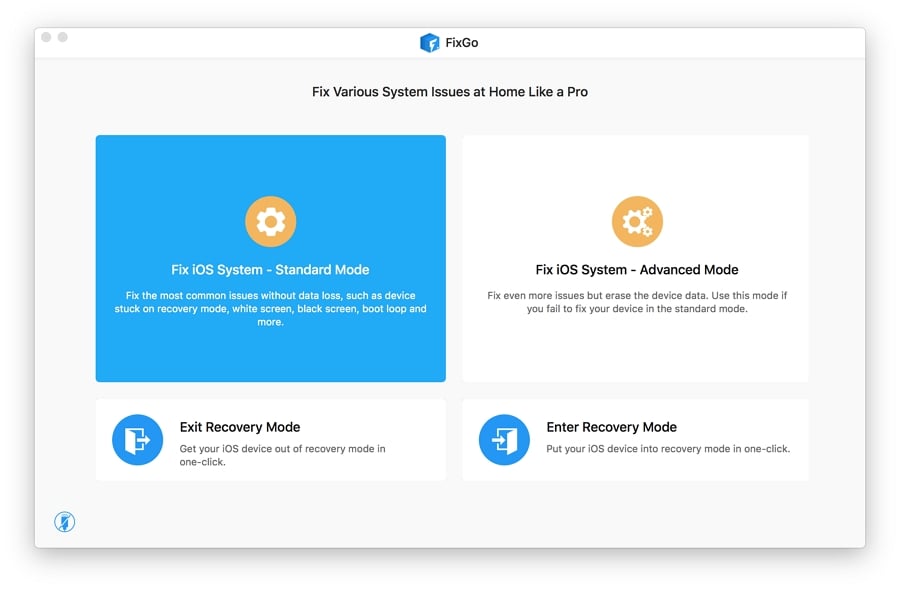
5. Use FixGo to Restore Your Device
If the error keeps popping up even after trying all the options above, you can try to restore the iPhone using FixGo. FixGo is an iTunes alternative that doesn’t suffer the same errors and safeguards all the data on your device during the update.
Before we take a look at how you can use FixGo to restore the iPhone, let’s begin by looking at its main features:
- FixGo is one of the best iOS system repair tools, allowing you to fix more than 200 iOS stuck issues including a device stuck on the Apple logo, recovery mode, or a boot loop.
- It is also the most ideal solution to restore or update your iPhone without losing data.
- Its easy-to-use and highly navigable user interface make it very easy to use even for beginners with no technical expertise.
- FixGo is fully compatible with all iPhone and iPad models and all version of iOS and iPadOS.
To use FixGo to restore your iPhone, download and install the program on to your computer and then follow these simple steps:
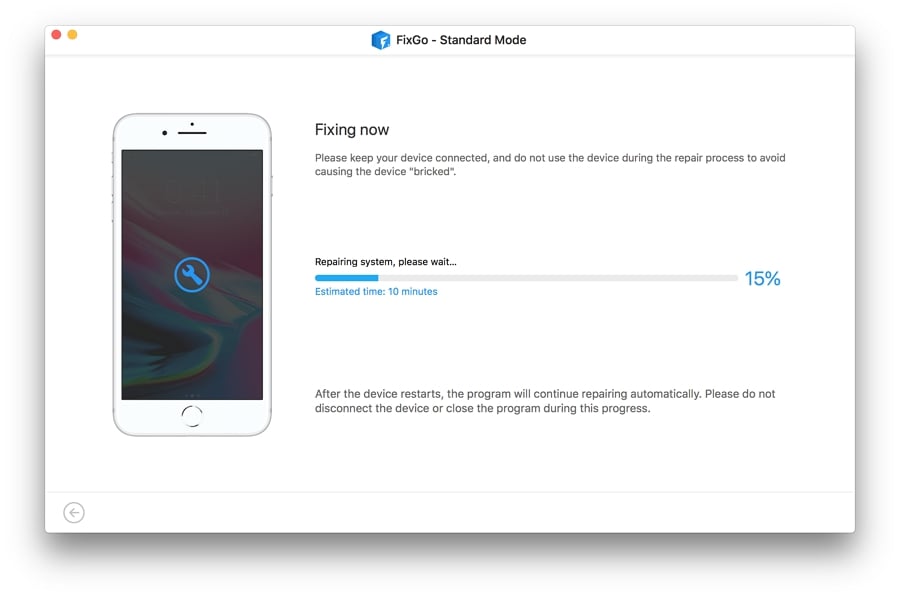
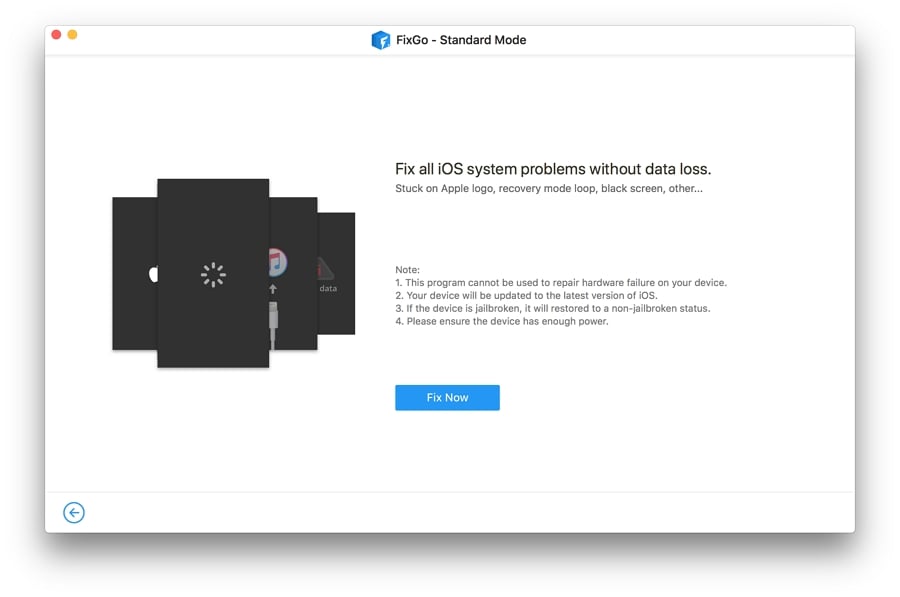
Step 1: Run FixGo and in the main window, click on “Standard Mode”.
Step 2: Connect the iPhone to the computer using its original lightning cable and then click “Fix Now” to begin the process.
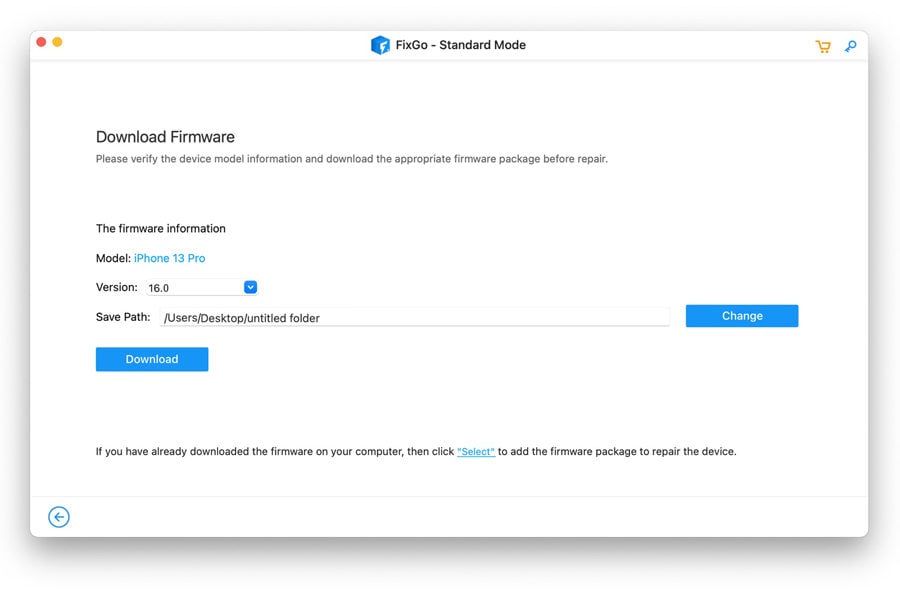
Step 3: You will then need to download the necessary firmware to update the device’s system. Simply click “Download” to start downloading the firmware.
Step 4: Once the firmware package has been downloaded, click on “Repair Now” to start updating the device’s system. Keep the device connected to the computer until the process is complete.