We all love to upgrade to the newest version of Android as soon as it’s released. Google has recently rolled out the Android 13 developer preview, and many users have upgraded their devices. But the upgrades are not for all the users. Some users have come across stability issues and bugs after the upgrade. Also, some have complained that their device is not working as seamlessly as before. Hence there is no choice other than downgrading your device to Android 12. This article will discuss how to downgrade from Android 13 to 12.
Method 1. Quick Tips to Unenroll from Android 13 Beta
For users who have enrolled in the beta version, this method would be the easiest and ideal way to downgrade from Android 13 to Android 12. Before proceeding with the below method, we recommend you to backup all your data since, at the end of the process, wipe all data on the phone.
Step 1: Open the browser and go to the Android Open Beta page to unenroll from the Android 13 beta.
Step 2: The above link will take you to the eligible devices. If your device is not seen, scroll down until you see it. All the devices signed with the primary Google account are shown here.
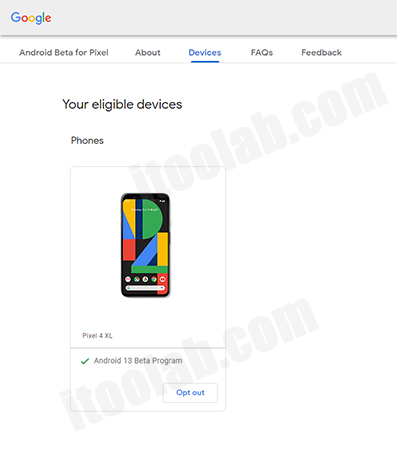
Note: To find the list of accounts on the device, go to the Settings app and tap Accounts. Under Accounts, you can find Google. Tap on it to find all the Google accounts.
Step 3: You can see which device has enrolled in the beta version from the list of devices. Click on the “opt-out” button. If you only see the opt-in button, the selected device is not using the Android 13 beta version.
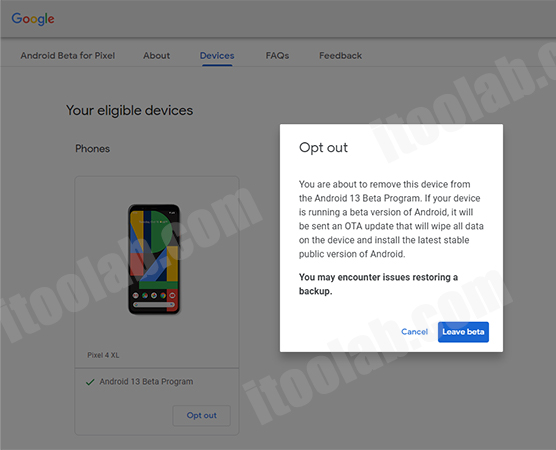
Step 4: Now, you will receive a warning message about opting out. By confirming the opting out by clicking the Leave beta button, it will send an OTA update to the device to roll back from Android 13 to Android 12, wipe all data on the device and bring the device back to the stable version of Android 12.
Method 2. Roll Back from Android 13 to Android 12 via Android Flash Tool
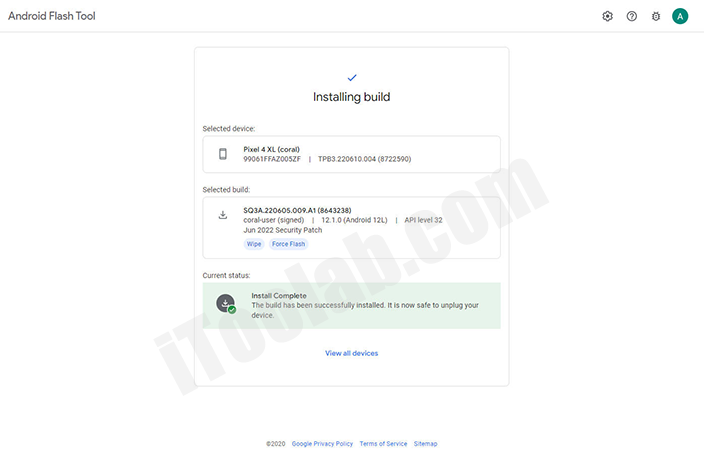
One of the easiest methods to downgrade from Android 13 to 12 on Google Pixel is to use Google’s Android Flash tool. This tool follows the same procedure as the command line but in a user-friendly way. Make sure to connect the device to the PC for the entire duration of the process. Disconnecting the Google Pixel during the process could corrupt the software.
Step 1: Connect the Google Pixel to the PC using a USB-C cable.
Step 2: You need to download the flash tool required for the flashing. Go to the Android Factory Images website and scroll down to find the compatible version.
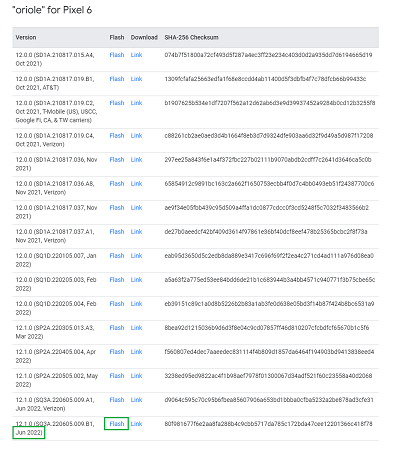
Step 3: Click the Flash button to download the required version.
Step 4: Click the Allow ADB access button to grant access to ADB keys.
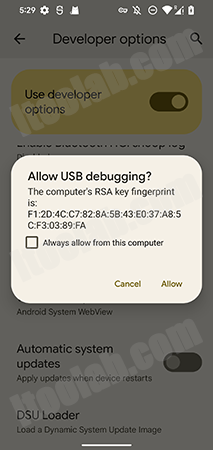
Step 5: Now, you will see a debugging prompt on the device. Tap on Allow to grant the debugging access.
Step 6: Before proceeding, ensure the device is connected by referring to the Selected Device section. Also, make sure to confirm the selected build version before proceeding.
Step 7: Click on the edit icon next to the Selected build to change the build settings. Make sure to checkmark the Wipe Device option. Also, expand the Advanced Options and checkmark the Force Flash all Partitions option if it is not selected by default.
Note: Using the bootloader option depends on your reference. If you wish to unlock it after the flashing, keep the Lock Bootloader option unchecked.
Step 8: After setting all the configurations, click on the Install build button.
Step 9: Now, you will get a confirmation dialog box. Before confirming it, please go through all the selected options. Once you click on the Confirm button, there is no way to undo the process. After confirming, click on the Confirm button.
Step 10: The flashing tool now starts to flash the phone. During the process, the device automatically boots to Fastboot and FastbootD modes.
Step 11: Once the process completes, the device notifies you to reboot the device. You can unplug the phone from the PC and give it a reboot. Now your phone is downgraded to a stable lower version.
Method 3. Downgrade From Android 13 Beta to 12 via SDK Platform
This method requires some understanding of commands and how to use them to revert back to Android 12. If you are a beginner, you can still follow the process given below to downgrade your device. We need to install the Android SDK platform-tools for this process on our PC. Google recommends this method, but there are some concerns, which we discuss later in the article.
Step 1: Download and install the Android SDK Platform-Tools package
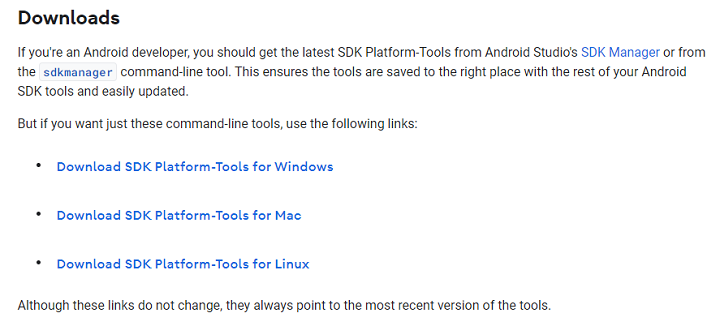
To downgrade the Android version, we need to use Android Debug Bridge(ADB) which comes with the Android SDK platform tools. It is a component of the Android SDK and includes both ADB and fastboot tools. To download the latest platform-tools, click here. After downloading, extract the files into a one folder.
As an alternative method, you can use the Nexus Tools from Corbin Davenport, which offers the latest platform tools for all the OS, including Windows, macOS, Linux, etc. Since the tool is developed with Dart, it works with all the OS without any issue. Once you have the Nexus tools, you can execute ADB and fastboot commands without any issue.
Step 2: Enable OEM unlocking and USB debugging
Go to the Settings app in the Google Pixel to enable the USB debugging. Then tap on the About phone option. Find the Build number and tap until you receive a message confirming that Developer options have been enabled.
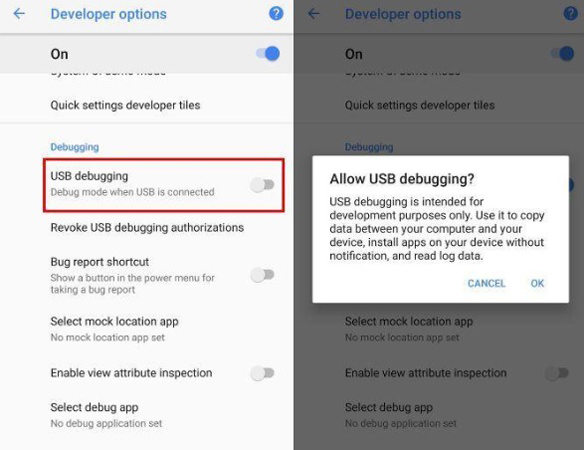
After enabling Developer options, go back and tap on the System options. Then select Advanced, and tap on the Developer options. Before proceeding, scroll down and find the OEM unlocking. On the Debugging section, tap on the Allow USB debugging. Once you enable both the USB debugging and OEM, then you are good to follow the below steps to roll back android update.
Step 3: Download the Factory Image for your device
Downloading the correct factory image for the device is a necessary step to downgrade from Android 13 to 12 on Samsung. It acts as a blank slate for the device at runtime. You can find all the Pixel-compatible snapshots from Google’s Factory Image OTA hosting site.
- “oriole” for Pixel 6
- “raven” for Pixel 6 Pro
- “barbet” for Pixel 5a
- “redfin” for Pixel 5
- “bramble” for Pixel 4a (5G)
- “sunfish” for Pixel 4a
- “coral” for Pixel 4 XL
- “flame” for Pixel 4
After downloading, unzip the file and add the contents to the platform-tools folder. Don’t create any sub-folders inside the platform-tools folder. Extract all the files to the main folder.
Step 4: Boot into device bootloader
Booting the device into the bootloader can be done in 2 ways. The easiest way is to use the command line on the PC. For the connect your phone with the PC. Then open the platform-tools folder and open a cmd.
Then in the command line, type “adb reboot bootloader.”
Another method is to press and hold the Power button and the Volume Down keys until you see the Android logo. Now release the Volume Up key, keeping hold of the Power button. Select “enter fastboot” from the menu using the Volume Up/Down keys and confirm with the Power key.
Step 5: Unlock the bootloader
For the flashing process, unlocking the bootloader is necessary. But by using the ADB sideloading method, it is impossible to flash a factory image and downgrade the Android version. To unlock the bootloader by using fastboot, we can use the command line. Open the command line and type “fastboot flashing unlock.” Once you hit Enter key, you will receive a warning about device instability.
Use the Volume keys to select the “Unlock the bootloader” option and confirm it with the Power button. Reboot the Pixel to apply the changes. To set up the device for the next step and re-enable USB debugging, we must skip the device startup process. Once done with that, connect the Pixel back to the PC and enter the command “adb reboot bootloader” again.
Step 6: Flash your device with command
When all Factory Image files have been extracted, now type the “flash-all” command in the Command Prompt/PowerShell windows. You will see a completion hint when rolled back Android update.
Step 7: Relock the bootloader (optional)
This is an optional step for users wishing to get future OTA updates. When you have an older version of OTA, it always gives a warning pop-up every time device reboots. There is an option in the Flash tool to take care of them. To enable that, you have to go through the device setup again. For that, go back and re-enable the USB debugging. Plug the Pixel back into the PC, then open a command prompt inside the platform-tools folder.
Then enter the command “adb reboot bootloader” and press Enter. After that, re-lock the bootloader using the “fastboot flashing lock” command. Use the Volume keys to select the “lock the bootloader” option in the Pixel. Use the Power button to confirm the choice. After confirming, a lock appears on the screen within the bootloader menu. Please mind that this method will wipe all the data on the device.
Step 8: Reboot your phone
After the downgrading process, reboot the device. Now it should load with a stable version of Android 12. This method works for device models like Pixel 6, 6 Pro, 5, 5 Pro, 4, and 4 Pro. But according to the experts, this method is not recommended since it can bring various security threats and other issues related to the software. That said, only downgrade Android version in your device when there is a major necessity. Downgrading from one version to another should be done at your own risk.
Conclusion
We have discussed 3 main methods you can use to downgrade from Android 13 to Android 12 on Google Pixel. You can choose any method from above depending on your requirement and expertise level. Before using the methods, make sure to backup device data since some steps wipe out all the data. We hope this guide provides answers to all your questions on how to downgrade Google Pixel. If you have any questions or comments, we are happy to answer.
UnlockGo (Android)
Android Unlocker
- Bypass Samsung FRP lock on Android 5~12
- Remove all Android screen locks, PIN, password, pattern, fingerprints, face lock
- Unlock Samsung screen lock without data loss
- Covers over 15 mainstream brands, 2000+ Android models


