Wi-fi has become an indispensable part of daily life. Whosoever is coming to your home would like to have Wi-Fi password first instead of a glass of water. That sound’s funny but true! Sharing Wi-Fi password with everyone, again and again, meant annoying sometimes. But here is the solution – you can share Wi-Fi password from iPhone to iPhone without dictating a uttering a single word. If you don’t know how to share Wi-Fi password on iPhone then don’t bother.
In this article, you will know about the whole process in easy steps. Before you start, you can check this article to learn about how to solve iphone wifi not working issues.
Before You Share Wi-Fi Password on iPhone
To share Wi-Fi password on iPhone is an easy and quick process. You don’t need any technical skills to execute it. However, there are some key points that need to follow before you begin to process.
Below are the points to be followed before proceeding:
- Ensure that both devices have an updated version of iOS.
- Turn on Wi-Fi and Bluetooth functions on both devices and make sure that the personal hot spot is off on both devices.
- Sign in to iCloud using your Apple ID. Then, save another person’s email id registered with his Apple ID in your contacts and ensure that your email id registered with your Apple ID is saved in his contacts.
- Make sure another person’s device is nearby to your device.
How to Share Wi-Fi Password from iPhone to iPhone/iPad
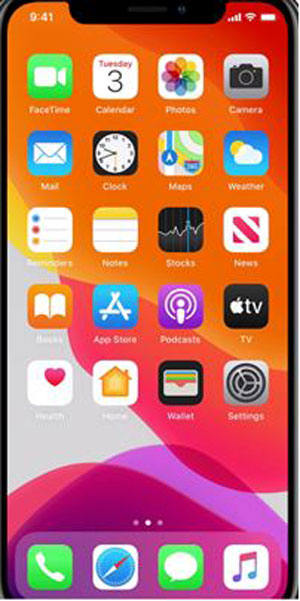
How to share Wi-Fi password from iPhone to iPhone has become a common question amid digital era. If you are the one, you are at the right place. In this section, you come to know how to share Wi-Fi password from iPhone to iPhone/ipad. Below are the steps for the same:
- Ensure that your device is connected to your Wi-Fi network.
- Ask another person to open “Settings” and click on the “Wi-Fi” option. Then, ask him to select the same network you connected with.
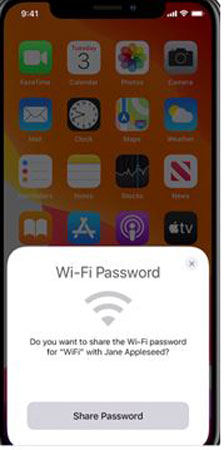
- Afterwards, you will receive a notification asking for allowing access to another device.
- Click on the “Share Password” tab.
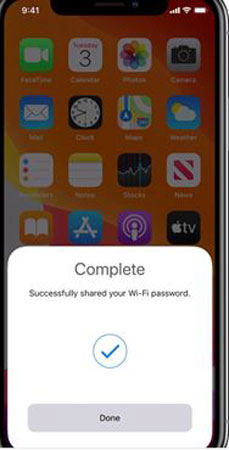
- Hurray! You have shared your Wi-Fi password successfully.
How to Share Wi-Fi Password from iPhone to Mac
If you are the one looking for how to share Wi-Fi password from iPhone to mac then you are at the right place. Here, you will learn about it in the easiest way:
- Connect your iPhone to Wi-Fi network.
- Select the same Wi-Fi network on Mac and request for Wi-Fi password from the Mac.
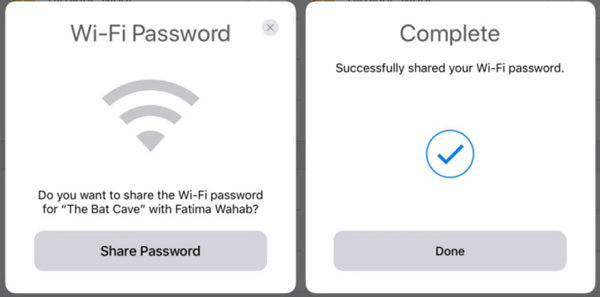
- In your iPhone device, you will get a pop-up. Tap on “Share Password” to continue the process.
- Tap on “Done”. On the other side, Mac will be connected automatically to your Wi-Fi network.
How to Share Wi-Fi Password from iPhone to Android
When we talk about how to share Wi-Fi password from iPhone to Android, our eyebrows shrink a little bit, and a question emerges from inside- Is it even possible? Well! iPhone and android devices run on quite different operating systems. This is the reason that there is no official way to share Wi-Fi password from iPhone to Android.
However, there is an alternate way to perform the same. The alternative method is a little bit complex. Proceed step by step to get the desired outcome. Before, proceeding, install a QR code generator like Visual Codes. Now, follow the below steps:
- Install a QR code generator (for e.g. Visual Codes) on your iPhone.
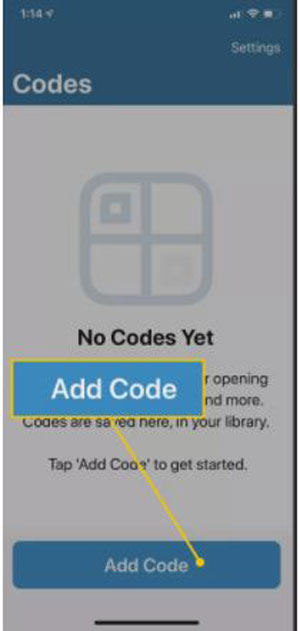
- Open the app.
- Click on “Add Code”.
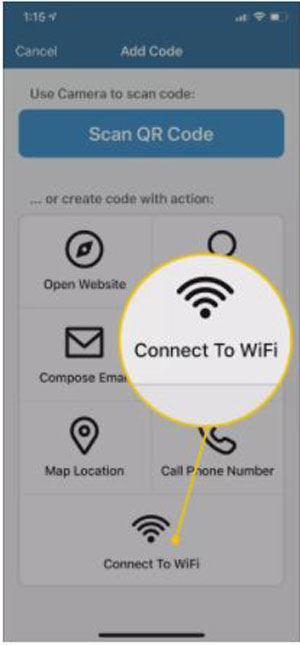
- Then, tap on “Connect to Wi-Fi”.
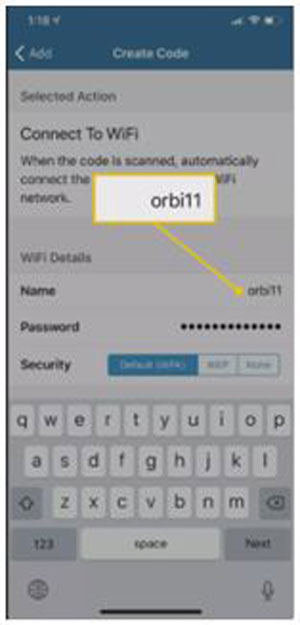
- Insert Wi-Fi details like name and password. Also, choose your Wi-Fi security type. You will find the following details in your Wi-Fi router application.
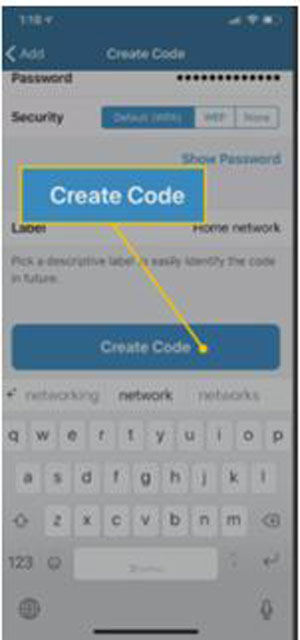
- Type a familiar name in the “Label” column. Then, tap on “Create Code”.
- A new screen will appear. Select the type of network. Following QR code will appear on your screen.
- Open the QR scanner on the Android phone. Scan the QR scanner from iPhone. The device will connect to Wi-Fi automatically.

How to Share Wi-Fi Password from iPhone to PC
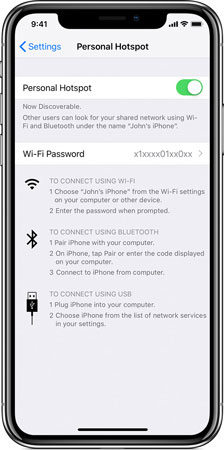
It is a bit tricky. Since PC and iPhone works differently and hence there is no such direct way of sharing Wi-Fi password to PC. Instead, you can try out the following steps.
- Head to “Settings” in your iPhone and turn on “Mobile Data”.
- Go to “Mobile Data Network” now and look for “Personal Hotspot” section. Hit on “APN” and enter the internet in APN.
- Enable Hostpot now and choose “Personal Hotspot” in “Settings”.
- When you turn the hotspot on, tap on either Wi-Fi or Bluetooth option to connect to your laptop. Apart from it, you can take help of USB tethering as well.
Tips: Share Wi-Fi Password iPhone Not Working How to Do?
Technical issues are common in any electronic device. You may face that the share Wi-Fi password iPhone function is not working sometimes. So, you must know how to fix this bug. If you are facing this bug, then you would know the pain. Now, don’t worry. With the help of iToolab FixGo, you can fix it at your home like a pro in no time. The USP of this app is that using Standard mode, you can repair 200+ issues without losing data. Let see how to fix your problem with the help of this mode.
Step by step tutorial:
Step 1: Open the software on your computer. Choose “Standard Mode” showing on the home page of the software.

Step 2: Connect your device to the computer. Now, click on “Fix Now”.

Step 3: You need to download the latest firmware to fix iPhone issues. Click on the “Download” option to download the package.

Step 4: Post downloading and installing the firmware package, click on “Repair Now”. The process will begin and takes few seconds to complete.

iPhone wifi not working like connected but not working, keeping saying incorrect password but correct, keeping disconnecting, this batch of problems, I believe everyone has encountered more or less, you have FixGo, you got no worries.
Conclusion
That’s all. Till now, you have got the solution of most irritating problem. In fact, you have become a pro in sharing Wi-Fi password on iPhone without uttering a word to the receiver. In case, you face any problem to do so, you can always take help of iToolab FixGo. Also, we believe that after reading this article, you can easily teach others how to share Wi-Fi password from iPhone to iPhone.

