People are curious about Android security while it’s much secure with built-in features like Google Play protection and Factory Reset Protection. FRP is your device’s first-tier security that blocks illegal phone access to anyone through factory reset or by flashing a new firmware.
Wondering why you need to disable factory reset protection if it mounts your device with an extra security layer? That is what this content brings to you so clear your doubts and get started.
Why Should You Disable Factory Reset Protection?
Your phone requires to disable factory reset Android in many cases, like if you want to sell your phone and choose to manually delete data instead of using “Backup and Reset Settings”. Handing the phone to the buyer in this condition makes it crucial for him to format your phone. As he performs a factory reset, it will erase all data but activates FRP. The device will then ask for the previously synced Google account linked to that device.
Likewise, if you want to reset your device using other routes like recovery mode, remove your Google account first, to deactivate FRP, and then go through a hard reset.
Steps to disable FRP Lock
FRP is associated with your Google account. As you set up an account on your device, it enables automatically. Start with these outlines to disable FRP lock on Android.
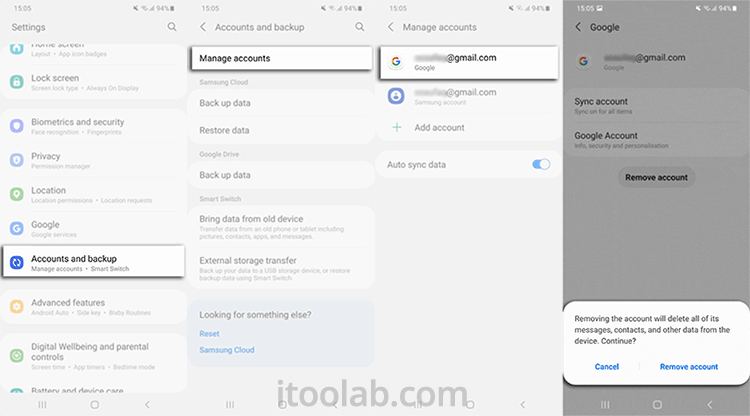
- Go to the Settings app of your Android device.
- Here, find the “Account” or “Account Backup” option and tap it.
- As you enter your Account Backup page, mark your Google account and select the “Remove Google Account” option. This action will remove your Google account and FRP as well.
- Repeat the same process to remove other existing accounts that you might use in the past.
Note: It will be slightly different depends on the Android OS.
How to Turn off FRP Lock When You Bought a Used Phone?
To turn off the FRP lock online, you must remove the device’s activation lock before performing a factory reset. In fact, when you factory reset your phone it is impossible to remove the FRP lock with your Google account.
Further, if you bought a used phone and want to turn off FRP, contact the last owner and ask to disable the FRP lock remotely. Preferably, share this guide with him to perform the process precisely with the following steps.
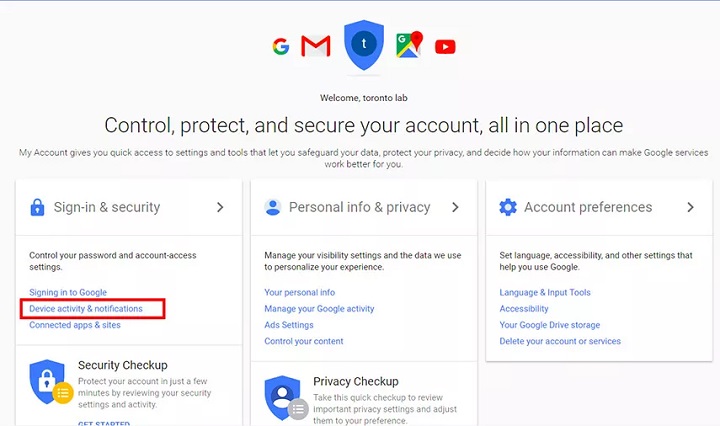
Step 1: Firstly, sign in to your Google account and move to “Device Activity and Notifications”. Select “Review Devices” and choose an Android device that you need to eliminate from your Google account.
Step 2: Remove your device access from the Google account and proceed further.
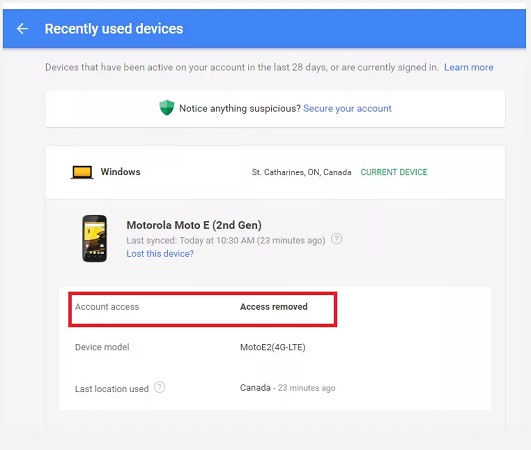
Step 3: As you finished this process, a window will appear confirming to remove account access. Choose “Remove” and Google FRP lock from your Android has been removed.
Step 4: As you finish this process, you can perform a hard reset on your device.
How to Remove Factory Reset Protection without Google Account?
Factory Reset Protection (FRP) is essential for your Android device’s security. However, when you tend to remove FRP it asks for your Google account, if you don’t have a Google account then luckily you have a better option to remove Factory reset protection by using a third-party FRP removal tool.
Here is a bonus tip for Samsung users that disable FRP lock on Samsung without any technical effort. The advanced unlocking tool iToolab UnlockGo (Android) is facilitating Android users globally by removing FRP lock remotely just in minutes.
No matter you bought a used phone or just forgot your Google account, UnlockGo (Android) removes FRP lock like professionals.
UnlockGo (Android) – Easy FRP Lock Removal Tool
- One-click Google lock removal
- Bypass Samsung FRP lock on Android 5~13
- Unlock Android without any tech skill
- Remove all Android screen locks
- Allows for customized plans
If you are a non-technical user, I highly recommend taking professional help through this tool as performing wrong processes may result in device damage or malfunctioning.
So, just follow these steps and let the UnlockGo (Android) unlock your phone steadily.
Step 1: Connect Android phone with your Computer
To begin this process, download and install iToolab UnlockGo (Android) first. After that connect the Samsung device with your PC by using a USB cable. Launch the software and a nice startup screen appears showing the option “Remove Google Lock (FRP)”, click on it.

Step 2: Choose the latest FRP bypass solution
Click the green Start button to confirm that you want to bypass FRP. There is an all-in-one method works for Android OS 5-13.
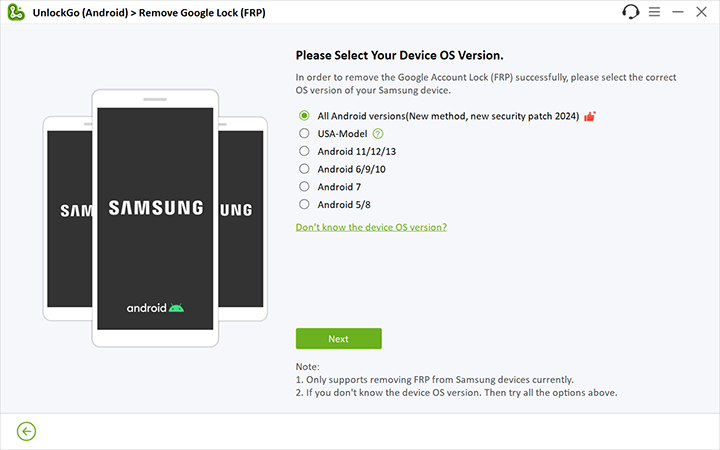
Step 3: Activate USB debugging on locked Samsung
Follow the on-screen instruction to enable USB debugging from computer. No worry, the secrect codes will help you a lot.
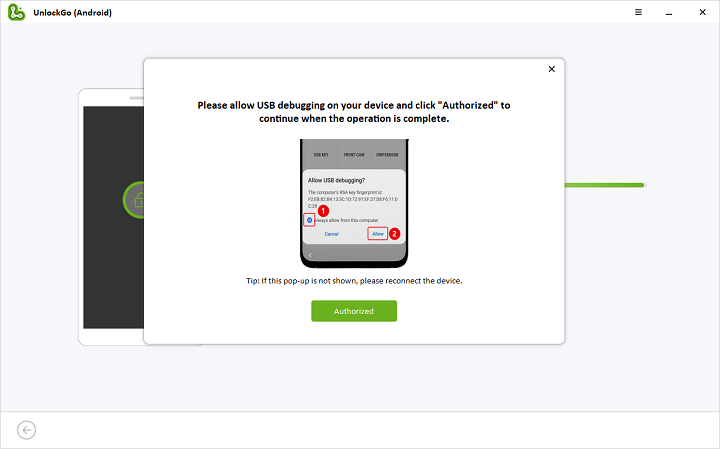
Step 4: Disable Factory Reset Protection on locked Android
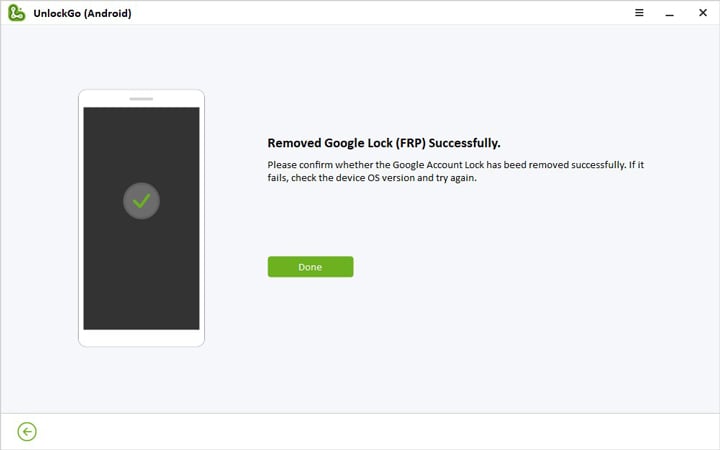
After that, your device should be restarted by the software. Now, you can use it as new. Enjoy the full features of your phone.
The Bottom Line
As Google launched FRP lock for Android security, people started to trap in crucial FRP lock cases. Most of them can’t figure out how to disable Factory Reset Protection. To fix those issues, iToolab UnlockGo (Android) provides a malware-free service to unlock Android phones and removes FRP lock without harming the device. Now, it’s your turn to choose the best for your phone and treat it professionally with UnlockGo for Android.
19,390,209 people trusted and downloaded


