
Installing ADB on Windows and Mac can be tricky sometimes when the user has no technical background. If you are new to this subject, you might wonder what is ADB Debugging means. It is a great utility tool that many Android users use to enable hidden features by default. So, if you are confused about how to install Android Debug Bridge, we have provided answers to all the issues in this article.
What is Android Debug Bridge (ADB)?
If you are wondering what does ADB stand for, it stands for Android Debug Bridge. It is based on the client-server architecture, which ensures the connection between the PC and the mobile. Once the connection is established through the ADB platform tools, the user has access to device data, log files, etc., and debug Android phone or apply update from ADB by sending instructions from PC.
It establishes the connection; ADB architecture comprises 3 components. The client, server, and the daemon.
The client here refers to the PC that is used to send commands.
The daemon is the process that handles all the background jobs necessary for connection while the server manages the connection between the client and the daemon.
How to Install ADB on Windows 10?
Step 1: To set up ADB in Windows, download the Android SDK Platforms Tools zip file into the PC.

Step 3: Open the extracted folder and open a command prompt using right-click and shift keys. Then select the Open command window here. To install ADB on Windows 10, you may use PowerShell.
Step 4: Now connect the smartphone or tablet to the PC using the USB cable. It is required to change the USB mode to file transfer (MTP) mode. Changing the mode is not mandatory for some OEMs. But we recommend using this mode to avoid any compatibility issues.
Step 5: Use the command “adb devices” to launch the ADB daemon. This command shows all the ADB download supported devices connected to the system at that moment.
Step 6: On the phone, you will see a prompt to accept or deny access to USB Debugging. If you want to remember the choice, tick the “Always allow from this computer option”. Then tap on the OK button.


How to Install ADB on Mac?
Step 1: To set up ADB on Mac, download the Android Debug Bridge zip file into the PC.
Step 2: Extract the downloaded zip file into a different location.
Step 3: Unlike the steps we followed in setting up ADB on Windows, we follow a different set of steps on Mac. For that, open the Terminal.
Step 4: To navigate to the downloaded folder, use the following command.
- cd /path/to/extracted/folder/
For example, if the folder locates at the Desktop, commands look like the following.
- cd /Users/Doug/Desktop/platform-tools/
Step 5: Use the USB cable to connect the device to the Mac machine. Now change the USB connection mode to file transfer (MTP) mode. This step is not required for all the devices, but it is advised.
Step 6: Execute the following command to launch the ADB daemon.
- ./adb devices
The ADB terminal should be in the same folder as the ADB tools folder.
Step 7: Unlock your phone screen, and you will see a prompt to “Allow USB debugging”. Tap on the tick to “Always allow from this computer”. Then tap on the OK button.
Note: If your device is connecting on a public computer, for your data safety, we don’t suggest enable “Always allow” option.
Step 8: Re-enter the command in step 6 and press Enter. If you see the device’s serial number, then everything has gone successfully, and ADB install properly.
Troubleshooting: Allow USB Debugging Not Showing Up
To use ADB on an Android phone, you need to turn on USB debugging on Developer mode. There are 2 solutions we introduced here to enable USB Debugging. For users who have a broken screen or locked Android phone, we recommend the following solution 2.
Solution 1. Check if you enable USB Debugging
Step 1: Open the Settings app on your phone and tap on the About phone option.
Step 2: Select the Software information and tap on the Build number seven times to enable the developer option.

Step 4: Tap on the OK button on the Allow USB debugging pop-up prompt.
Solution 2. Turn on USB Debugging on a Locked Android phone
Turning on the USB Debugging on an Android phone is straightforward. But many Android users struggle to turn on USB Debugging Android 13/12/11/10 when it is locked. Sometimes manually turning it on is hard when users have no technical knowledge. iToolab has introduced software that can bypass the Google FRP lock, acting as a USB debugging app. This guides users to turn on USB Debugging during the process.
UnlockGo for Android is not a typical utility software that helps to resolve one issue. It is the go-to software for Android users to resolve many issues such as removing PIN, Passwords, Fingerprints, Face lock and Pattern screen locks, bypassing Google FRP lock on Samsung devices with Android 13/12 and below. Also, if your phone is managed by MDM, it also guides you through hard reset and bypasses following Google verification.
Another reason for its popularity is the wide range of adaptability. It supports 15 Android brands, including Samsung, Huawei, Xiaomi, Motorola, etc., and 2000+ Android phone and tablet models.
- Enable USB debugging on FRP-locked Samsung
- Bypass Samsung Google FRP lock (Android 13-5)
- Remove screen lock with no data loss on Samsung
- Easy to use and user-friendly interfaces
- Unlock Android without passowrd or pattern
How to active USB debugging request on a locked Android?
Step 1: Connect Samsung device to PC
Download and install the UnlockGo (Android) on the PC. After that, connect the Samsung phone to the PC using the USB cable. Open the software and select the Remove Google Lock (FRP) option.
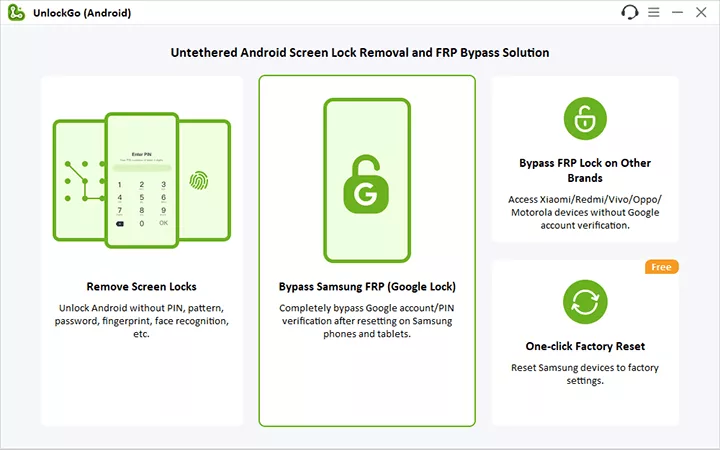
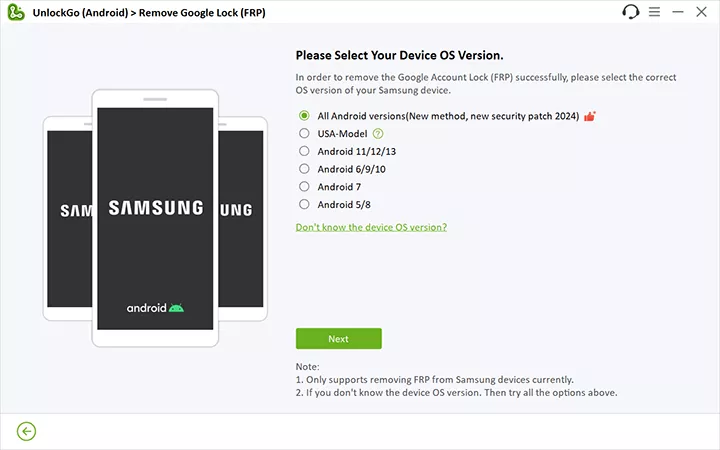
Step 2: Select the innovative solution
Now click on the Start button and select the first option from the list. Then click on the Next button.
Step 3: Activate USB debugging with PC
In this step, UnlockGo (Android) will guide you enter secret codes to enable USB debugging without Developer options or Settings menu. Do not disconnect the connection between the PC and the mobile during the whole process.

After your device restarts, you are easy to set up ADB and start ADB debugging on Android 13, 12 or 11.
Conclusion
We believe all the information we discussed here will help you to enable ADB and start using the USB Debugging functionality. If you are worried about ADB install in a locked phone, iToolab UnlockGo (Android) is the only solution. As mentioned previously, the FRP lock removal process will guide the user to fix “Allow USB Debugging” not showing up.
i dont have a pc can i do it ith a tablet or my phgone
Hi mike, what can we do for you?
byepass
Hi Anstruda, what can we do for you?