
Adding a location on Facebook sounds easy until you actually try it. The steps aren’t the same across the platform: One method works for business pages, another works for posts, and photos and stories follow entirely different rules. So it’s no surprise that many users feel confused when trying to figure out how to add a location on Facebook for the first time.
This guide clears up the confusion with simple steps and practical tips. It explains how to add a location in different parts of Facebook and shows how to handle cases where you want to check in somewhere else.

Part 1. How to Add a Location in a Facebook Page
If you run a business page, adding a location helps local customers find you faster and builds instant credibility.
Here’s how to add a location on Facebook for your business page:
- Open your Facebook Page and navigate to Page Settings or the About section.
- Enter your full business address carefully, including street, city, and other needed details.
- Save the changes and check how the location appears on your page. If something looks off, edit it again before leaving it live, because even a small mistake can confuse customers.

A page location is different from a normal post tag. Think of it as your permanent business address on Facebook rather than a one-time place label for a single update. Once set, this location on your Facebook Page will consistently appear across your profile and search results.
Part 2. How to Add Location in Facebook Check-In and Post
Sometimes you want to tell people where you are right now. Other times, you just want your post to carry a place tag. Facebook allows both, but the steps can feel slightly different.
1. Adding a location to a new post (Check-in)
To check in on Facebook, start from the post creation box at the top of your feed. Facebook’s check-in option is built into the posting flow, which makes it easy to share your place before you publish.
- Tap or click “What’s on your mind?” to open a new post. Then choose Check-in from the available post options.
- Search for the place name or choose one from Facebook’s suggestions. If location services are on, nearby places may appear first, which saves time.
- Add your text, photos, or friends if needed, choose the audience, and hit Post. Your update will now carry a visible Facebook check-in location tag.

2. Adding a location to an already-published regular post
Now for a regular post that’s already live, the flow is similar but requires editing the existing post. That’s useful when you forgot to add a place the first time.
- Open your published post, click the three-dot menu in the top-right corner, and select Edit Post.
- Tap the Check-in option, search for the place you want to attach, and select it.
- Click Save to update your post. The location tag on Facebook will instantly appear below your content without affecting your existing likes or comments.

This feature helps more than social sharing. For local stores, cafes, and event posts, a place tag can also make the update feel more relevant and easier to understand at a glance.
Part 3. How to Add Location in Facebook Photo
Photos often tell the story better when the place is attached. Whether it’s a beach picture, a dinner at a new restaurant, or a team-building event, attaching a place helps your audience understand the context without relying solely on your caption.
Here’s how to add a location on Facebook when uploading an image:
- Start uploading the photo to Facebook as you normally would. During the upload or editing stage, look for the option that lets you add extra details to the image.
- Choose the location option and search for the place name. Facebook may also suggest places based on your device location or recent activity.
- Confirm the location and publish the photo. The image will then appear with the place tag linked to it.

This Facebook photo location tag is especially useful for travel albums, business event coverage, and food photos. It adds instant context and saves you from having to type out “where this was” in every caption.
Part 4. How to Add Location in Facebook Story
Stories move fast, so Facebook keeps the location tool simple here. You usually add it through a location sticker or tag while building the Story.
Here’s how to add a location on Facebook when creating a Story:
- Open the Facebook Story and upload a photo or video, or create one using the camera. Once the Story editor opens, look for location stickers or extra add-on tools.
- Tap the location sticker or location tag option. Then search for the place you want to show in the Story.
- Select the correct place and position the sticker where it looks clean on the screen. After that, publish the Story as usual.

A well-placed Facebook Story location tag works well for quick updates, shop visits, short event coverage, or travel moments. It gives viewers instant context without making the Story feel crowded.
Part 5. How to Check in Somewhere on Facebook without Being There💡
Facebook usually shows nearby locations based on your device’s GPS signal when you try to check in, tag a post, upload a photo or share a Story. So if you’re not physically near that place, Facebook won’t surface it as an option.
That is where a GPS location changer like iToolab AnyGo can help. It lets you check in on Facebook without being there by virtually teleporting your device GPS to any place in the world.

- Fake a Facebook check-in and make the platform detect a different area.
- Support check-ins, posts, photos, and Stories on Facebook from any location.
- Compatible with location-based apps, including Facebook, Instagram, Twitter, Life360, Tinder, Hinge, and more.
- No jailbreak or root required for a simpler, safer setup.
- Run seamlessly on Windows, Mac, iOS, and Android devices.
- Fully support the latest iOS 27/Android 16.
How to Add a Fake Location on Facebook
The process only takes a few clicks. Here’s how to add a location on Facebook using AnyGo:
Step 1 Download and install the iToolab AnyGo app on your iPhone or Android.
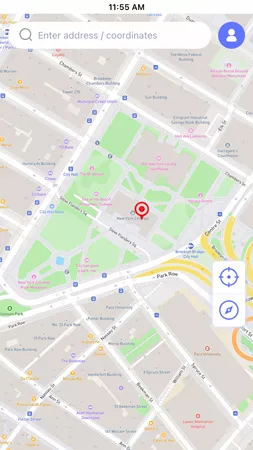
Step 2 Select the Teleport mode on the map interface. Search for your desired destination by typing in a city name, street address, or even specific GPS coordinates.
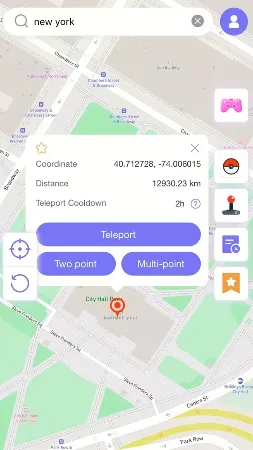
Step 3 In seconds, the GPS of your device will be updated. Open the Facebook app and proceed with any location-based action, whether it’s a check-in, a tagged post, a photo with a place tag, or a Story sticker. Facebook will now show your chosen destination as your current location.

Conclusion
Facebook gives you several ways to add a location, and each one serves a different purpose. A Page address helps local businesses get found. Check-ins and location tags add context to posts, photos and Stories.
However, when the place you want to tag is far away or doesn’t appear as expected, the process can become frustrating. That is where AnyGo Location Changer comes in. It lets you check in on Facebook without being there, and gives you the freedom to add a fake location on Facebook from anywhere in the world.
Want to try it? Download AnyGo today. Start with a free trial and experience how much more flexible your social posting can be. Your next great post might come from anywhere.