When you take a trip to another country, your iPhone automatically adopts a mobile phone network from your visiting place. Some travelers have so much experience that they already know which service has the fastest network or the best features. Hence, you might not be travelling, but you want to use the best carrier available in your region. Is there a way to change to that carrier? The answer is yes; read on to find out how to do it.
How to Change Carrier on iPhone?
On some occasions, you might have to change your carrier to another one due to some common reasons like network failures, and also if you are a frequent traveler, changing carrier is important. Changing the carrier can be done with few simple steps given below.
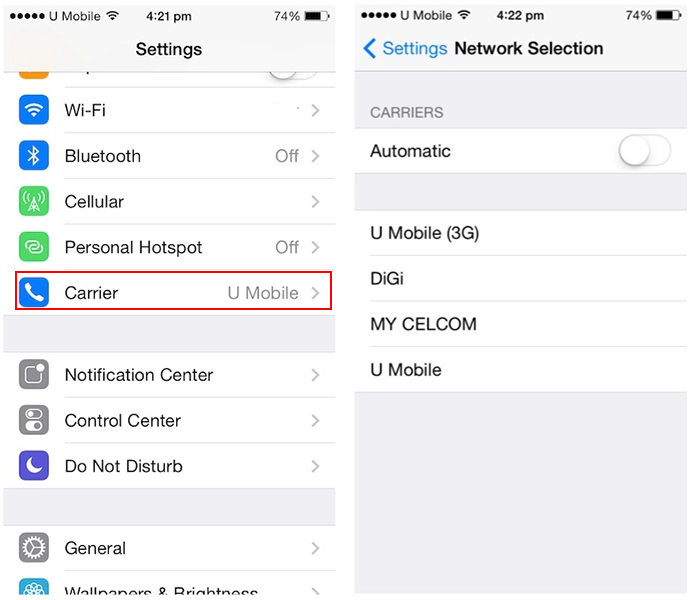
- Step 1: Go to Settings and tap on the Carrier.
- Step 2: By default, Automatic is selected. You can turn off the Automatic option.
- Step 3: After few seconds, you can find the list of available carriers below the screen. Select one carrier from the list and test the network speed. You can then select the carrier with the highest network speed for your area.
How to Change Carrier When iPhone is Locked?
In many places you might have seen, there are different ways to unlock your iPhone carrier. From the article on How to unlock iPhone to any carrier, we have introduced 4 different ways of unlocking your carrier for any iPhone model. Out of the 4 methods we discussed in that article, unlocking through a third party site is common and frequently used. One of the recommended sites for this is iToolab SIMUnlocker.
SIMUnlocker is software designed specifically to remove SIM lock with one click. It is compatible with all models, from iPhone 5 to iPhone X. To get full access to the iOS file system, you need a jailbreak to unlock iPhone carrier. This is usually done with patches of the iOS kernel.
💡 Features
- iPhone SIM unlocker
- Simple to use
- Future updates to the tool will be free
- Easy download and cheaper
📖 How to steps
Step 1: Download and install
First, you need to download and install the SIMUnlocker in your PC.
Step 2: Connect iPhone to computer
Now connect your iPhone to the PC, and software will verify whether your iPhone is eligible for unlock.
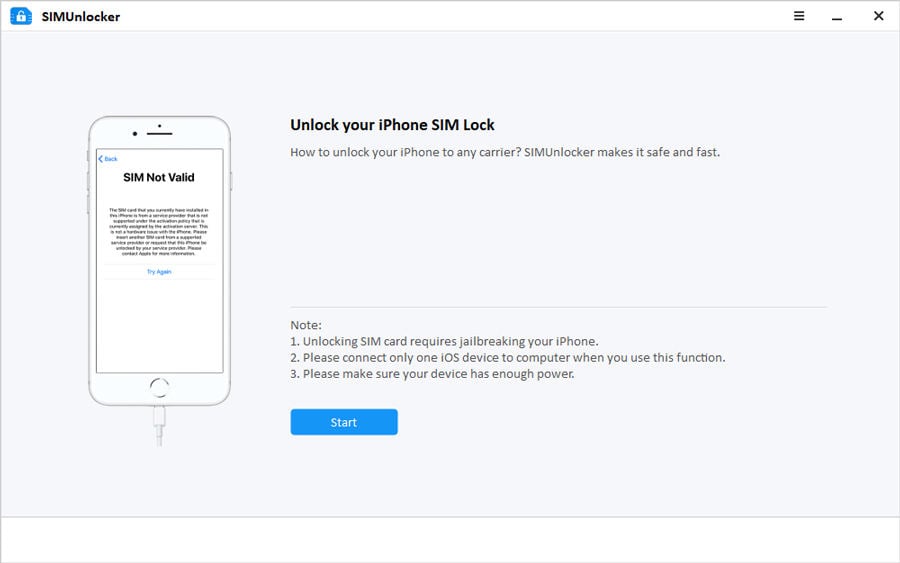
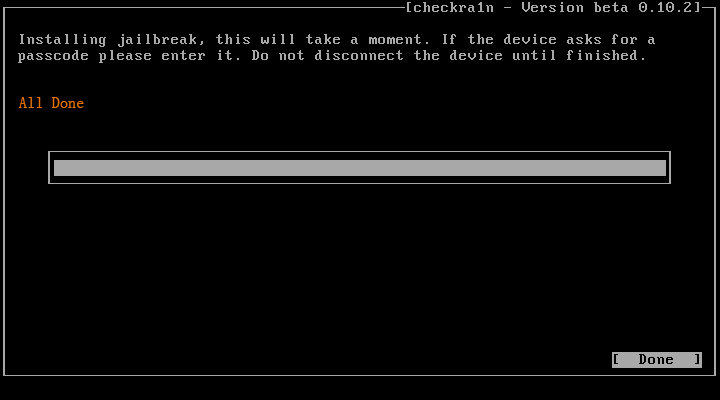
Step 3: Jailbreak iPhone
The software will automatically download Checkra1n, enter the jailbreak environment, and then use Checkra1n to complete it.
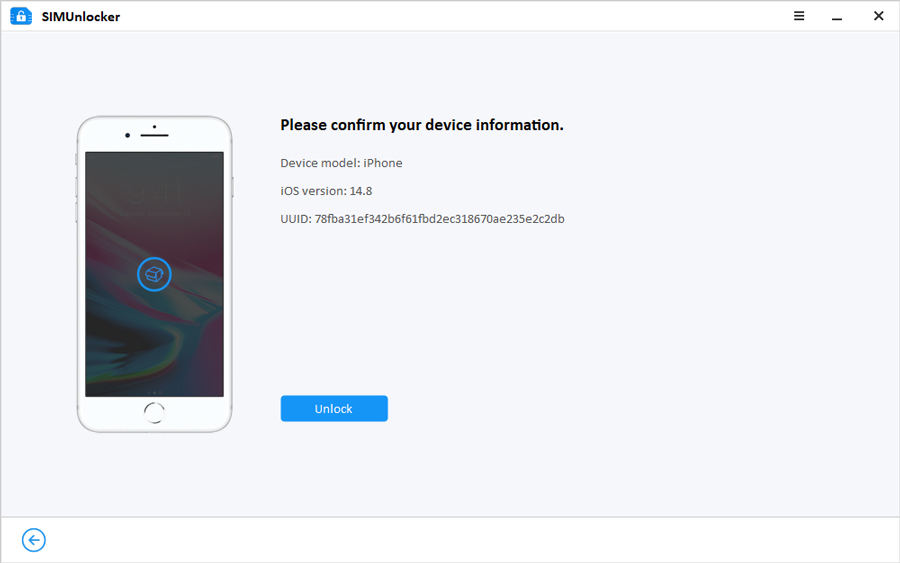
Step 4: Remove SIM lock in minutes
To start the bypass process, click on the Unlock button. This process will run for few minutes, and once it’s complete, iPhone will be automatically restarted. Now your phone is unlocked, and you can change any carrier you want.
How to Change Carrier 4G to 5G on iPhone 12/13?
Apple brand smartphones are compatible with the 5G network on iPhone 12 and up. To find out if you are connected to a 5G network, your iPhone will show you an icon in the iPhone status bar. It’s at the top of the screen, and it’s the same screen where you see the coverage level, the battery percentage, or the time. Before testing the wireless carrier, please turn off your Wi-Fi connection since we need to test your 5G, not your home network.
- Step 1: Open the Settings app on the iPhone.
- Step 2: Tap on Cellular and choose Cellular Data Options.
- Step 3: Then tap on Voice & Data. Next, change from LTE to 5G auto.
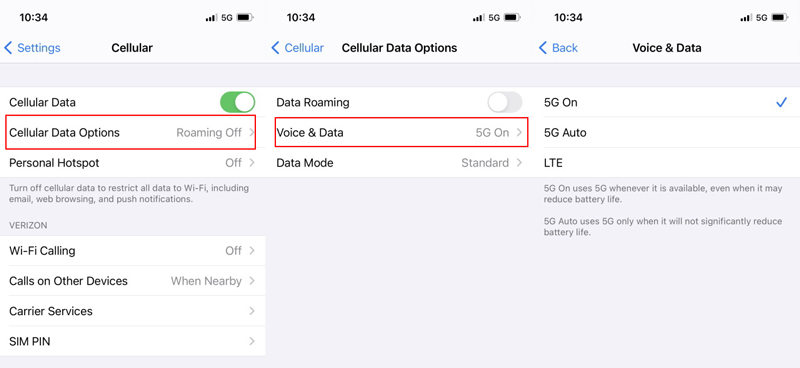
Now you have changed your wireless carrier to use a 5G network instead of 4G LTE.
How to Change Carrier Name on iPhone?
- Step 1: The first step is to download the Carrier Editor program.
- Step 2: Then start the execution of it where we can press Let’s Get Started.
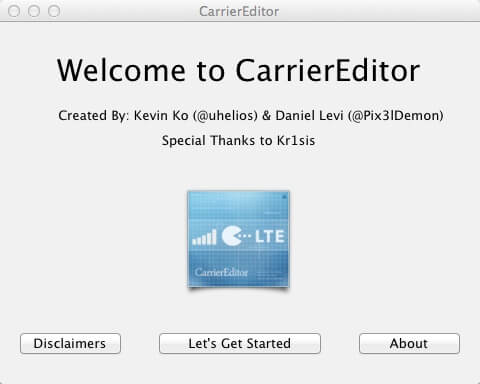
- Step 3: In this way, we will be allowed to go to the option of ‘Settings’ then turn to the option ‘General’; finally, we press About. Under until the option Carrier and note down the version number.
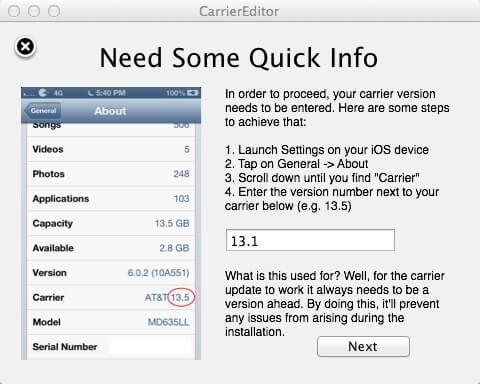
- Step 4: Next, type the noted number in the input box and tap Next.
- Step 5: By locating ourselves on the information page of the program operator, we will have two tabs available, which way they can be displayed. As a next step in the program customization page, it offers us two options with the logo on a white or black background.
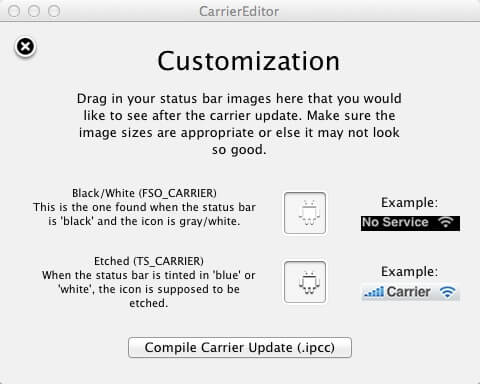
- Step 6: When you have selected the logo, you will have to click on Compile Carrier Update (.ipcc). In this way, the application alone will save the original logo on your desktop and the modified one.
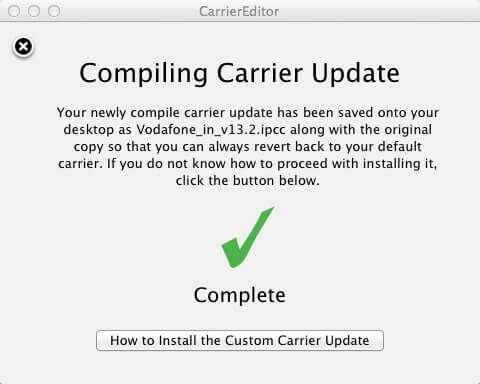
- Step 7: Once done, your desktop will have two new files. You are going to use one of these to change the carrier name.
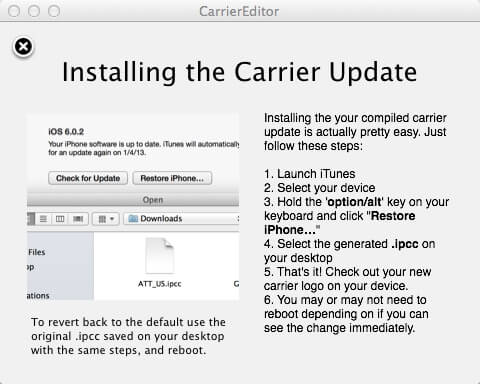
- Step 8: Finally, open iTunes and click your device’s name > “Restore iPhone…”, choose the .ipcc file to change carrier. Next restart your device, you will find the new carrier name on your iPhone.
Summary
For those who doubt changing carriers on iPhones, we believe we have provided a comprehensive explanation. Now you no longer need to stick with one carrier always but can select the carrier you want at any time manually. With these tips, you are ready to use any carrier without ceasing to be connected or running out of access to your mobile data.

