

Running low on Poké Balls is annoying enough without the nearest stop being a long walk away. Before you give up on your local map, look around. That mosaic beside the library or the trail marker in the park might be worth submitting.
If you’ve been looking up how to make a PokéStop in Pokémon GO, you’ll need more than a place you’d like to spin. Reviewers need to understand what it is, where it stands, and whether people can reach it safely. This guide explains who can nominate, how to prepare the submission, and what happens once you’ve sent it in for review.

Part 1. What Are the Requirements to Make a PokéStop in Pokémon GO?
What is a PokéStop in Pokémon GO? It is a location on the game’s map tied to a real place, such as a mural, church, or park sign. When you’re close enough, you can spin its Photo Disc to collect items, including Poké Balls.

Before you pick a spot to nominate, check these requirements:
- Trainer Level 35 or Above: You need to reach level 35 in Pokémon GO before you can submit nominations. You’ll also need to complete Wayfarer’s onboarding, which introduces the criteria used to review places.
- An Eligible Account and Wayfarer Access: Nominations aren’t available through child accounts. You’ll need to sign in to Wayfarer to finish your submission, even if you start from the New PokéStop button inside Pokémon GO.
- A Place That Qualifies: Look for somewhere people explore, exercise, or spend time together. The spot needs to be permanent, identifiable, and safe to reach on foot. A place being convenient for you isn’t enough on its own.
- Your Own Photos and Accurate Details: Take a clear photo of the spot and supporting pictures that show its surroundings. Use your own images, write an accurate description, and place the map pin where the object actually stands.
- Space Under the S2 Cell Density Rule: Approval and appearing in Pokémon GO are separate things. Under the community-observed rule, the game generally uses one PokéStop or Gym per Level 17 S2 cell, a small map area. If that cell already contains one, another accepted nomination may not appear. This affects placement in the game, rather than whether the place itself qualifies.
Part 2. What Makes an Eligible PokéStop?
Creating a PokéStop in Pokémon GO starts with picking the right kind of place, not a famous one. What matters is what people do there and whether the spot meets Wayfarer’s criteria. A small mosaic outside your library could be worth nominating, while a plain sign beside a busy road might not be.
The Three Core Wayfarer Criteria
Your chosen place needs to meet at least one of these:

- Somewhere Worth Exploring: Think about places you’d point out to someone visiting your neighborhood. A mural, a historical plaque, or an unusual sculpture gives people something to discover. Your description should explain what makes it interesting.
- Somewhere to Exercise: A walking trail, sports court, or outdoor fitness area gives people a reason to get moving. For a larger area, choose an identifiable feature, such as its entrance or trail marker, so reviewers know exactly what you’re nominating.
- Somewhere to Spend Time Together: A community hall, picnic pavilion, or local gathering spot may qualify because it brings people together. Explain how the place is used; simply saying that lots of people pass through doesn’t tell reviewers much.
Meeting one of these criteria is a starting point. The place also needs to be permanent, easy to identify, and safely accessible on foot. Reviewers should be able to match your photos and description to the location you’ve marked.
Places That Don’t Qualify
Some restrictions apply even when the object itself looks interesting:

- Private Homes and Their Grounds: A sculpture in someone’s front garden doesn’t qualify, even if you can photograph it from the pavement.
- Schools and Childcare Centers: Objects on preschool, primary, or secondary school grounds are excluded. The same applies to daycare centers.
- Unsafe Locations: Skip anything people cannot safely reach on foot, or that would interfere with emergency services.
- Temporary Displays and Generic Objects: Seasonal decorations won’t stay around. An ordinary bench or mass-produced sign still needs a specific reason to qualify.
- Adult-Oriented Businesses: Locations such as liquor stores, shooting ranges, and adult entertainment venues are excluded.
Before taking your photos, ask yourself what you would tell a reviewer about the spot. If you can explain why people explore, exercise, or gather there, you have a reason to nominate it.
Part 3. How to Make a PokéStop in Pokémon GO
Once you’ve found a suitable place, you’re ready to learn how to create a PokéStop in Pokémon GO. Visit it with your phone and open the game, then go to Main Menu > Settings > Uploads > New PokéStop. The game will direct you to Wayfarer, where you’ll sign in to complete the nomination.
Five steps make up the submission:
- Set the location: Place the pin on the object itself for a mural or sign, or at the entrance for a larger place like a sports field.
- Take the main photo: Fill the frame with the object in daylight, check for blur, and keep faces and number plates out.
- Capture the supporting photo: Step back and show the surroundings, including the path that leads to the spot.
- Write the title and description: Use the name on the sign or plaque if there is one. Describe what’s there and add details you can verify, with no emojis or requests for approval.
- Add supporting information and submit: Explain why the place meets the criteria, mention anything unclear from the photos, then check everything over once before submitting.
Part 4. How Long Does It Take to Approve a PokéStop and How to Speed It Up?
A PokéStop nomination typically takes anywhere from 24 hours to a couple of weeks to get approved, though some can take several months depending on the area. The wait largely depends on whether the automated system handles your submission or whether it goes to community reviewers.
The process breaks down into three stages:
- Automated Review: Nominations that clearly meet or fail the criteria can be decided by the automated system within about a day.
- Community Review: Submissions that need human review usually take a few days to a couple of weeks. The number of active reviewers in your region can affect how quickly a decision comes through.
- Appearing in the Game: After approval, an eligible location generally appears within another 24 to 48 hours, or at the next daily map sync. It still needs to meet Pokémon GO’s placement rules.
To help move things along, review other nominations and earn an Upgrade. You receive one for every 100 Agreements, reviews that match the community’s final decision. Applying it lets more reviewers see your nomination, which can shorten the wait. Clear photos and an accurate location pin also help you avoid mistakes that could lead to rejection and another submission.
Part 5. How to Reach Faraway PokéStops Without Walking
You’ve submitted your nomination, but the nearest PokéStop is still the same long walk away. This is the gap a location changer fills: iToolab AnyGo changes your phone’s GPS location so you can explore an area where stops already exist.
For Trainers using a supported setup, that means choosing a destination and moving around it from home. The appeal is simple; you don’t have to wait for reviewers before exploring somewhere else. Think of it as a shortcut to existing PokéStops, rather than a tool that adds infinite new ones to the map.

- Teleport to target PokéStops via location search or coordinates.
- Control movement with virtual joystick and custom multi-spot routes.
- Auto catch Pokémon and spin PokéStops with GO Catcher.
- Support Monster Hunter Now, Pikmin Bloom and other location-based apps.
- Scan the area for nearby Pokémon and raids quickly.
- Run seamlessly on Windows, Mac, iOS, and Android devices.
- Fully support the latest iOS 27/Android 17.
Step-by-Step: How to Use AnyGo to Teleport
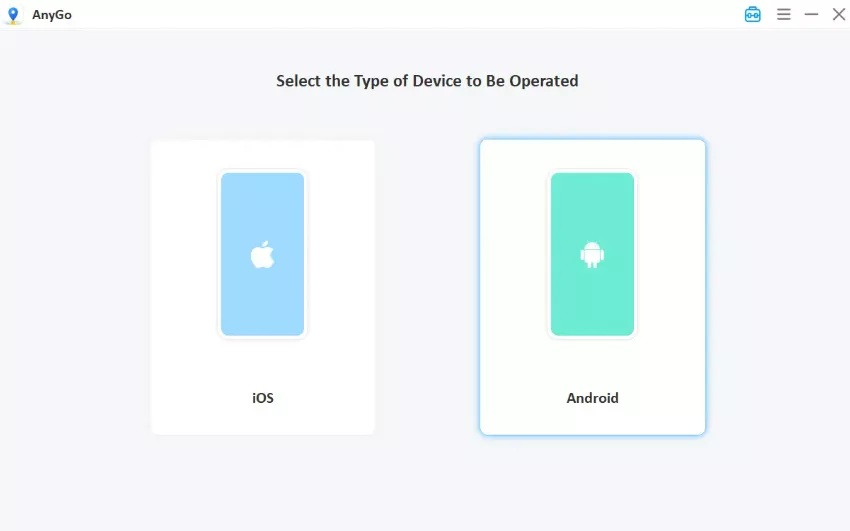
The steps below use the Windows version as an example. You can also use AnyGo App directly on Android or iOS devices.
- Download iToolab AnyGo on your Windows PC or Mac. Follow the installation instructions to get started.
- Connect your iPhone or Android phone to your computer with a USB cable.
- Hit the Teleport icon in the top-right corner. Type a PokéStop hotspot into the search bar (coordinates are fine too), and click Go.
- Your location updates instantly. Open Pokémon GO. You’re now standing in the new spot, surrounded by stops waiting to be spun.


Part 6. Top Reasons Pokémon Nominations Get Rejected (and How to Appeal)
A rejection doesn’t always mean you need to find another spot. Sometimes, a clearer photo or a missing detail can help. Other times, the location itself doesn’t qualify, such as a mural on school grounds. Check the reason first, then decide whether to correct the submission, appeal the decision, or choose somewhere else.
Common Rejection Causes
Check your nomination for the following issues:
- Poor Photo Quality: The photo does most of the talking. Shoot it at night or through a car window and reviewers will struggle to tell what they’re even looking at. Watermarks, filters, and a stranger’s elbow in the frame only add to the problem.
- Inaccurate Pin Placement or Duplicate Nomination: Pins love to wander a few meters off. Ten meters doesn’t sound like much, but if it puts your spot on the wrong side of the road, the photos and the map stop agreeing. And if someone already nominated the same mural, yours goes down as a duplicate.
- Ineligible Location: Some spots simply can’t win. Private homes, school grounds, and places you can’t safely walk to get turned down however good the photo is.
- Weak Title or Description: “Park” or “Old Statue” tells reviewers very little. Use the place’s actual name where possible, spell it right, and keep emojis and any mention of Pokémon GO out of it.
- Asking for Votes: You might think a friendly “please make this a PokéStop!” helps. It doesn’t. Wayfarer treats it as an attempt to sway reviewers, and it’s enough to get a decent nomination thrown out.

How to Appeal a Rejection
If the rejection seems wrong, you can ask for another review:
- Read the Rejection Email: What was the objection? Read the reason in the email, then look back at what you sent. It helps to know exactly what you’re disputing before opening an appeal.
- Open Your Contributions Page: Log in to Wayfarer and pull up the rejected nomination. An Appeal button shows up at the top whenever an appeal is allowed.
- Make Your Case: Explain the disputed point. If the rejection concerns pedestrian access, for example, describe the footpath beside the spot. Keep the explanation about the place, rather than how much you want a new stop.
- Use Appeals Wisely: There’s one appeal per nomination, and only a couple available at a time. Save them for nominations you’d happily defend.
- Resubmit If It Fails: Wondering how to add a PokéStop in Pokémon GO after a rejection? Send in a fresh nomination for an eligible spot. Take another photo if the old one was blurry, or add the detail you left out. A second submission should address what went wrong with the first.
Final Thoughts
Learning how to make a PokéStop in Pokémon GO starts with choosing a place worth visiting. A clear photo, an accurate pin, and a useful description give reviewers something they can properly assess. The wait may be longer than you expect, and approval doesn’t always mean the spot will appear in the game. If a rejection comes back, read the reason before deciding whether to correct it or appeal.
For a new stop near home, put your effort into showing what makes that local place worth sharing. While your nomination is being reviewed, try AnyGo Location Changer to explore existing PokéStops in a different area.